by Micah Caldwell | Jul 31, 2025 | Preparedness
Choosing the Right Location
Scout Out Potential Areas
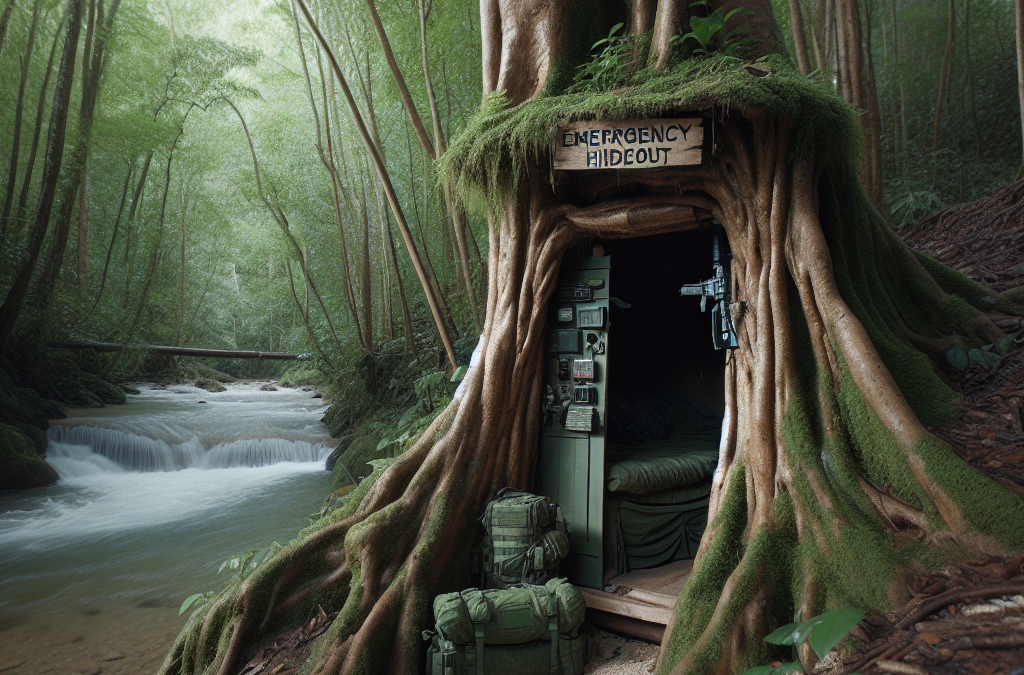
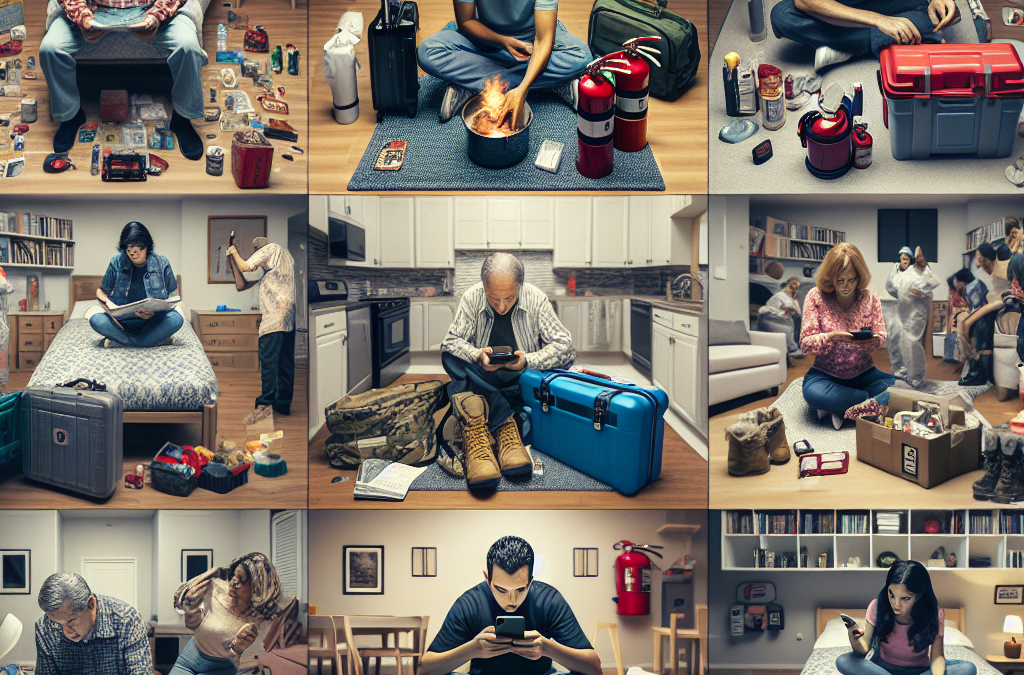
Finding the perfect spot for a hideout is super important. I always start by scouting out various locations around me. Parks, wooded areas, and even abandoned buildings can all be great options, depending on your situation. I recommend making a list of spots that seem discreet but accessible enough for a quick getaway.
Once you find a few potential areas, visit them at different times of day, and take note of foot traffic. Are there busy times when someone might wander by? If so, you might want to steer clear of those times or go for a spot that’s tougher to spot during rush hours.
Lastly, think about how easy it is to blend in or remain unnoticed in these spots. Remember, the key is to remain hidden, so your chosen location should offer some natural cover or be well out of sight.
Evaluate Accessibility
Making sure you can easily access your hideout is crucial. After all, what good is a hideout if you can’t get to it in a hurry? I usually identify multiple routes to my chosen place. Being able to approach from different angles can really help evade anyone looking for you, whether it’s a prank gone awry or something more serious.
Consider the weather conditions as well. You don’t want to choose an area that becomes a muddy mess in the rain or one that’s a sweltering oven in the summer heat. A good hideout is not just a place to stay; it’s a place that allows you to stay comfortable while waiting it out.
Lastly, think about your gear. If you plan on bringing supplies, you’ll want to ensure these routes can support your load—think about how you can get your essentials, whether it be a backpack or more complex gear.
Consider the Surrounding Environment
When evaluating your location, considering the environment is super important. How does the local wildlife impact your stealth? I’ve found that some areas are teeming with critters that can draw attention to your hideout. Keep your eyes peeled for animal trails or nests. Even in a stealthy location, the little things can betray you.
There’s also the aspect of human activity in the area. Are there nearby homes? It’s beneficial to stay out of earshot of prying ears. I’ve been in places where I thought I was safe, but then I heard kids playing or dogs barking, and it really stressed me out.
Finally, know how to use terrain to your advantage. Hills, trees, and backs of buildings can help conceal your hideout. I love a good natural windbreak that can obscure sound as well as sight. The goal is to learn how to leverage your environment effectively.
Gathering Essential Supplies
Compile a Survival Kit
Whenever I think of a hideout, I can’t stress enough how important a well-equipped survival kit is. The basics usually include a first aid kit, non-perishable food, water, and a flashlight. I like to make sure I have items that can sustain me for several days on my own. After all, I might not have the luxury of an immediate escape.
Another thing to consider for your kit is how discreetly you can store everything. Lightweight options that fit in a small backpack work best. I like using packing cubes to keep everything organized. You never want to be fumbling around if you need to grab something in a pinch!
Also, consider including personal items, such as a notebook, pen, or even a favorite book for downtime. It’s amazing how comforting familiar things can be when you’re in a tense situation.
Incorporate Self-Defense Tools
You never know what might happen when you’re hiding out, so having some self-defense tools is a must. I always carry something like pepper spray or a personal alarm. They’re lightweight and can literally make the difference between a safe escape or facing an unwanted situation.
Of course, it’s crucial to check local laws on self-defense items. I remember a time when I didn’t realize a tool I thought was harmless might raise eyebrows. Better safe than sorry, am I right?
Most importantly, just having these tools adds a layer of psychological safety. Knowing that I’m prepared helps me feel calmer, even in stressful situations!
Plan for Communication
In this age of technology, never underestimate the need for communication. I like to have a basic burner phone or walkie-talkies stashed in my hideout. It’s a fail-safe for contacting friends or family in case of an emergency. Imagine trying to explain your situation without a way to reach out!
Consider putting together a communication plan with trusted individuals. Establish set times when routine check-ins happen. That way, if something feels off, they know to alert the appropriate people.
Finally, think about signal techniques. If you’re not able to verbally communicate, a simple sign can alert someone to your situation without drawing unwanted attention. Chalk marks on a nearby tree or even a series of stones can help convey important messages discreetly.
Creating Concealment
Utilizing Natural Cover
I’ve had a bunch of experience with camouflaging my hideout using natural materials. Branches, leaves, and other debris can be your best friends when it comes to creating a concealment structure. I often collect what’s readily available nearby to blend my hideout seamlessly into the environment.
Take some time to assess how visible your spot is from various angles. From this perspective, I can learn how to better conceal my area while waiting out the storm. Knowing how to utilize natural camouflage not only protects you but can also add a personal touch to your hideout.
Don’t forget to use low-growing shrubs or thick brush to your advantage. These not only obscure sightlines but can help muffle sound as well. The quieter, the better!
Building a Stealthy Shelter
If you’re planning on staying a while, you might need a bit more structure. Constructing a temporary shelter is not only practical but can also be fun. I love using tarps, branches, and even some old fabric to create a makeshift cover. It’s like playing outdoors again but with a serious twist!
Always remember the balance between sturdy and stealthy. Make sure your shelter is eco-friendly and blends into the surrounding environment. I’ve found that simple lean-tos work great, but it’s crucial to maintain a low profile.
Also, keep in mind how to dismantle or hide the shelter afterwards. You don’t want your hideout to be detected just because of signs of previous activity.
Layering Invisible Barriers
Add an extra level of stealth by layering invisible barriers. You can use things like tripwires or low-cost traps that can alert you to unwanted visitors. I’ve had experiences where a small signal system gave me peace of mind while I was holed up.
Additionally, ensure the sounds created by these barriers remain unnoticed. I’ve been working on sound-dampening techniques using natural materials; it’s effective and doesn’t draw the eyes of passersby.
Always test your barriers beforehand to ensure they work as intended, but remain discreet. It’s all about making your hideout as elusive as possible while you’re hunkering down.
Maintaining Situational Awareness
Stay Updated on Surroundings
When I’m in a hideout, I make it a priority to keep an active awareness of what’s happening around me. I enjoy spending some time just listening, observing, and taking mental notes. I look for changes in the environment—whether it’s wildlife behavior or the presence of people.
I also recommend minimizing distractions like screens. Being in your hideout shouldn’t be about scrolling through social media, it should be about tuning into your senses!
Writing down what you observe helps, especially if you realize patterns exist in how people interact with the area. It can totally inform your next steps or decisions on when to leave your hideout.
Develop a Routine
Staying too idle can lead to impatience or poor decisions. Having a daily routine gives structure even in the most unexpected of situations. Include practical tasks, such as collecting water or gathering more natural cover.
I also find personal time valuable, like practicing mindfulness or even basic workouts. It helps to keep my mind and body sharp, making sure I’m ready to act if needed.
Of course, don’t forget to mix in periods of complete stillness. Being quiet and observant for an extended period can yield surprising insights about your surroundings.
Building a Contingency Plan
You must always have an exit strategy when creating a hidden space. The last thing you want is to be caught off guard. I typically visualize several scenarios: one that goes smoothly, and others that don’t.
This preparation includes routes to escape, alternative hideouts, and having an emergency contact plan in place. The flexibility to adapt your plan based on situational awareness is key.
I recommend practicing your escape routes beforehand, ideally during routine outings in the area. Being prepared can make all the difference when you need to act quickly.
FAQ
1. What materials do I need to make my hideout?
You’ll want basic survival supplies like food, water, first aid items, and tools for setting up the shelter. Don’t forget to include self-defense tools and a means of communication!
2. How often should I check my surroundings?
Staying aware is a continuous task. I recommend checking your surroundings at least every half hour and being quiet to listen for changes.
3. How do I ensure my hideout remains hidden?
Using natural materials to camouflage your space is key. Keep it low to the ground and avoid bright colors or unnatural shapes.
4. Can I have company in my hideout?
While it’s possible, be cautious! The more people, the more noise and potential to draw attention. If you must have someone over, make sure they’re trustworthy and share the same goals.
5. What if I need to leave my hideout quickly?
Always have escape routes mapped out, and keep your gear organized for a quick departure. I recommend practicing your exit strategy regularly to be fully prepared!
by Micah Caldwell | Jul 31, 2025 | Preparedness
Choosing Essential Supplies
Assessing Your Needs
When preparing a first aid kit for hiking, it really helps to think about the specific conditions and challenges you might face in the great outdoors. Personally, I always consider the type of terrain, the length of the hike, and the level of risk involved. If I’m hiking a challenging route, I’ll make sure to pack some extra supplies compared to an easy day hike.
You also want to think about your individual health needs. Do you have any allergies or medical conditions that could arise during a hike? It’s smart to pack medications or any necessary equipment that you may need. I always take my allergy meds—better safe than sorry!
Remember, it’s all about striking a balance. You don’t want to overpack and weigh yourself down, but you definitely don’t want to be without something crucial when you need it. Taking the time to assess your needs will really help when choosing supplies for your kit.
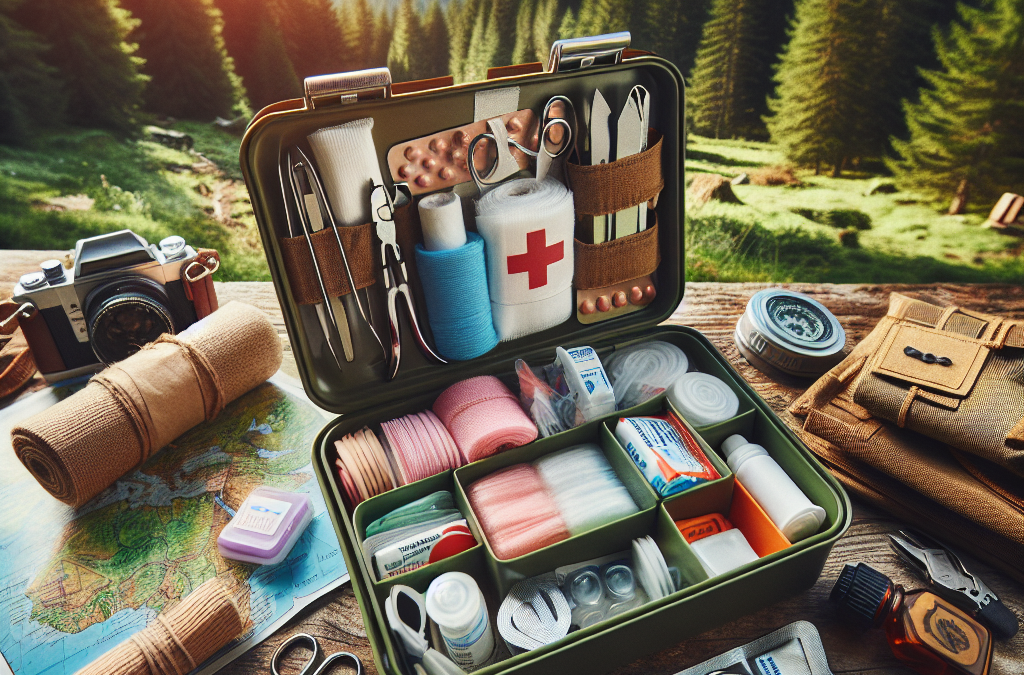
Basic First Aid Items
Once I know what I need, I start gathering basic first aid items. This includes items like adhesive bandages, gauze pads, antiseptic wipes, and sports tape. These items are small and lightweight, yet they can make a huge difference if someone gets a cut or scrape.
I can’t stress enough how handy a good pair of scissors can be; they’re useful for cutting tape or gauze. In my own kit, I also keep a pair of tweezers for splinters or ticks, which are unfortunately a common nuisance during hikes.
Lastly, don’t forget about pain relief! I usually pack some ibuprofen or acetaminophen because you never know when a headache or muscle ache might hit while enjoying nature.
Upgrades and Extras
Once the basics are sorted, I like to consider upgrades that could be beneficial for more serious situations. A compact emergency blanket can be a lifesaver if someone experiences hypothermia. These blankets are lightweight and fold up neatly, making them easy to include in a compact kit.
I also like to pack a small tube of burn cream. Trust me, you might not think you’ll need it during your hike, but if you’re near a campfire or get sunburned, you’ll be glad you packed it!
Another upgrade I found valuable is a CPR face shield. Accidents happen, and being prepared is crucial. Having the tools needed to perform CPR can really help if the unexpected occurs.
Size and Weight Considerations
Choosing the Right Container
The next thing I consider is the container for my kit. I want something durable yet manageable. A small, waterproof bag is my go-to because it protects my supplies from the elements and ensures everything stays organized. You can find various sizes, so I always opt for one that holds all the essentials without being bulky.
Keep in mind that if you’re hiking for an extended period, a more substantial container might limit what you can carry. Finding that perfect size means you can easily shove it in your backpack without worrying about it taking up too much space.
After all, the last thing you want is a rigid box that weighs you down. Flexibility and durability should be your top priorities when selecting a container for your first aid kit!
Minimizing Weight
Speaking of weight, the next step is minimizing it. One tip I’ve found helpful is to decant larger medicine bottles into smaller, labeled containers. You don’t need a whole bottle of painkillers for a day hike—just a few tablets will do!
Also, rather than packing a full-sized roll of gauze, I cut it down into smaller strips. This not only saves space but also lightens the load on my back. I keep a small zip-top bag to hold these smaller pieces as it’s compact and easy to access.
Remember, as hikers, we need to be prepared but also need to lighten our packs. Each ounce counts when you’re on the go!
Organizing Your Kit
Finally, organization is key for a compact first aid kit. I like to use small pouches within my container to separate items – for example, one for bandages, another for medications, and so on. This way, I’m not digging around looking for what I need when time is of the essence.
You could even go a step further and label each pouch. I just use a simple label maker, but you can use tape and a marker if that’s what you have on hand.
Being organized not only saves time but also reduces stress; you’ll be so grateful when you know exactly where everything is located in a pinch!
Regular Maintenance
Checking Expiry Dates
It’s easy to pack a first aid kit and forget about it, but I make it a habit to check expiry dates regularly. Medications can lose their effectiveness over time, and the last thing you want is to use expired supplies in an emergency!
I usually schedule a check every few months; it’s a simple step that can save lives. During this check, I also take the opportunity to reassess my needs. Are there new risks with the seasons changing, like more bug bites in summer or increased chances of getting sick in the colder months?
Keeping my supplies fresh and relevant ensures I’m always prepared for whatever nature throws at me. Trust me, it’s worth taking the time for these quick assessments!
Restocking Supplies
After checking expiry dates, I take stock of what needs restocking and replace any used items. Sometimes, I find that I’ve been using more of a certain item—like antiseptic wipes during bug bites—so I’ll increase the quantity I pack for next time.
I have a list I keep that outlines everything I want in my first aid kit. Each time I go on a hike, I tick it off after I’ve checked it. This simple practice makes sure I’m always prepared for the next adventure!
Plus, restocking isn’t just about keeping it full; it’s also about keeping it relevant. As I gain more experience, I sometimes add new items that I find helpful and remove what I don’t need.
Practicing with Your Kit
Finally, regular maintenance isn’t just about the physical supplies; it’s also vital to practice using your first aid kit. I’ve found that knowing how to use what you have is just as important as having it. I often take a First Aid/CPR course not just to stay certified, but also to refresh myself on how to respond in emergencies.
It’s a good idea to run through a mock scenario with friends or family. Practice makes perfect! Having everyone familiar with the contents of the kit and how to use them adds an extra layer of preparedness on group hikes.
So, grab your kit and have a little fun while making sure everyone knows the ropes. It’s all about staying safe while enjoying nature!
Frequently Asked Questions
What items should be included in a compact first aid kit for hiking?
A compact first aid kit should include adhesive bandages, antiseptic wipes, gauze pads, pain relievers, scissors, tweezers, and any necessary personal medications. Always assess your individual needs based on the length of the hike and potential risks involved.
How can I keep my first aid kit lightweight?
To keep your first aid kit lightweight, consider decanting full-sized supplies into smaller containers, removing unnecessary items, and organizing your kit efficiently. Also, aim to only pack the essentials for the length of your hike.
How often should I check and restock my first aid kit?
It’s a good practice to check your first aid kit every 3-6 months. Check for expired items, restock used supplies, and adjust the contents based on your hiking experiences or changes in environment.
What should I do if I use supplies during a hike?
If you use supplies during a hike, take note of what was used. After your hike, restock those items immediately so your kit is always ready for future adventures. This ensures that you won’t be caught short next time!
Is it necessary to take a first aid course before hiking?
While it’s not mandatory, taking a first aid or CPR course is highly recommended. It equips you with the skills needed to use your first aid kit effectively during an emergency. It’s a valuable investment in your safety and the safety of your hiking companions.
by Micah Caldwell | Jul 31, 2025 | Preparedness
Hey there! As someone who’s been through a few challenges during past pandemics, I’ve come to realize just how crucial it is to be prepared. I remember the initial shock and panic that gripped everyone when the news first broke. It felt overwhelming, but with a little planning and the right supplies, it became a whole lot easier to handle. So, I’ve compiled a quick guide for you on what essential supplies to have at home to weather any future storms. Let’s dive into it!
1. Medical Supplies
First Aid Kit Essentials
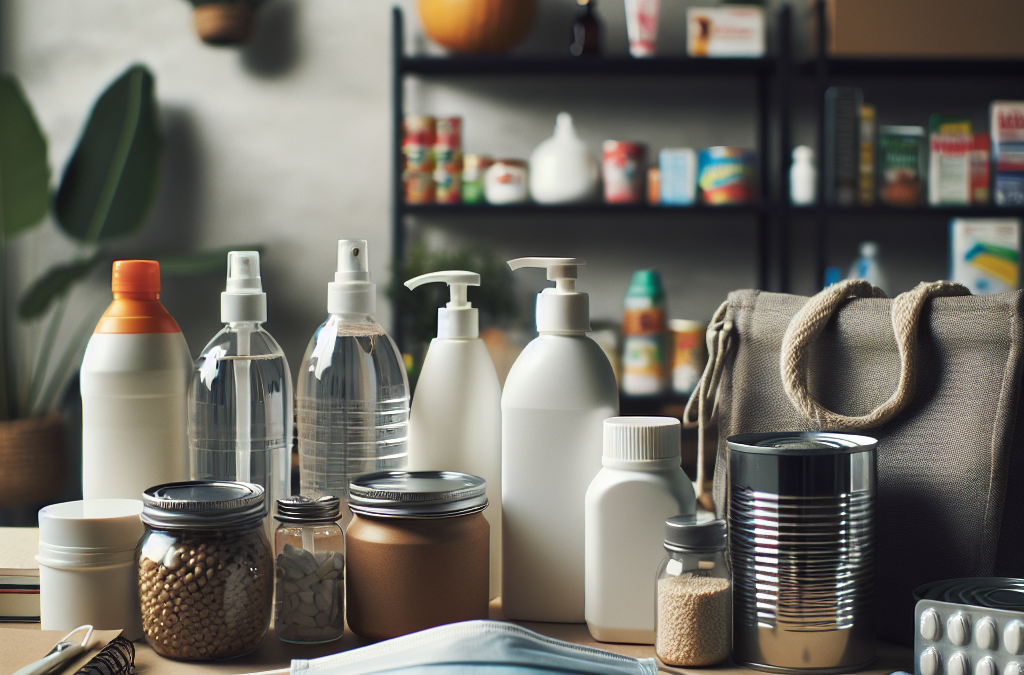
First off, you can’t go wrong with a well-stocked first aid kit. It’s sort of like having your own little emergency room right at home. I recommend including items like band-aids, antiseptic wipes, and gauze—these basics can make a huge difference. There’s nothing worse than a scraped knee with no way to treat it!
Don’t forget to personalize it based on your family’s needs. If you or someone in your household takes prescription meds, ensure you have a good stockpile just in case. Trust me, when things get hectic, it’s a huge relief to have everything you need on hand.
Also, it’s wise to include over-the-counter medications. Pain relievers, allergy medications, and antacids can save you a lot of hassle later. Remember, it’s better to be safe than sorry!
Regular Health Monitoring Tools
During any pandemic, health awareness is key. Having a thermometer, a pulse oximeter, or even a blood pressure monitor can help you keep tabs on your loved ones’ health. These tools can be lifesavers if anyone feels unwell.
It’s surprisingly easy to overlook the simple stuff, but trust me, monitoring health can prevent a lot of stress down the line. I remember when I had a fever and having a thermometer handy gave me peace of mind because I could track my symptoms easily.
If your family always has these tools in reach, it’s just one less thing to worry about when you’re feeling under the weather. Plus, it shows you’re taking your health seriously!
Face Masks and Sanitizers
Ah, the infamous face mask! Whether you love them or think they’re a nuisance, having a good supply at home is essential. I like to keep a stash of both cloth and disposable masks. They vary in comfort, and sometimes you just need that extra layer of protection.
And while we’re talking germs, hand sanitizers are a must-have too! I can’t stress how handy they were when I couldn’t wash my hands right away. Just a drop of sanitizer does the trick to keep those pesky viruses away.
So remember, a well-prepared medical supply kit isn’t just about basic first aid—it’s about your overall health and safety readiness!
2. Food and Water Supplies
Non-Perishable Foods
Next on my list is food. Non-perishable foods are a lifesaver during any crisis. Think canned goods, pasta, rice, and dried beans—items with long shelf lives that can be stored easily. I learned the hard way about the importance of stockpiling when my local grocery store was stripped bare.
Having a variety of foods can also help make sure your meals don’t get stale. Mix it up with some spices, sauces, and other flavor enhancers. Trust me, your taste buds will thank you when you’re in lockdown!
Also, don’t forget pet food if you’ve got furry friends at home. They depend on us too, and running out in the middle of a pandemic is definitely not a fun time!
Water Storage
Let’s talk about water. Staying hydrated is absolutely key, especially in stressful times. I suggest keeping at least a week’s worth of water stored. I like to have a mix of bottled water and larger containers that can be filled from the tap.
You might not think it’s necessary until you find yourself without easily accessible water. This past summer, we faced a minor drought, and it reminded me that having extra water on hand is never a bad idea!
Plus, if you ever need to boil water for safety concerns, having some bottled water can help ensure you have something to drink while you wait. Always plan ahead!
Meal Prep and Planning
Meal planning might sound boring, but when you have a well-thought-out grocery list, it makes things so much easier. I love sitting down once a week to plan out my meals and make a shopping list. This helps avoid those annoying last-minute runs to the store.
Try to get creative with what you have stocked and mix up your meals. I follow various recipes that incorporate pantry staples, so I’m never at a loss for meal ideas. Plus, it’s a fun way to keep cooking entertaining!
And with meal prep, you’ll always have something on hand. It can really save time when you’re juggling work or kids at home. Always good to have a strategy!
3. Cleaning Supplies
Disinfectants and Sprays
Keeping a clean environment is crucial, especially during a pandemic! I always stock up on disinfectants and sprays. You can never have too many wipes or cleaning sprays, am I right? It reassures me that my home is a germ-free zone when I’m constantly cleaning high-touch surfaces.
Make a checklist of all the surfaces you need to regularly disinfect—kitchen counters, doorknobs, light switches, and cell phones are top of my list. It’s amazing how quickly germs can spread if we aren’t careful!
And don’t be afraid to get creative! You can make your own disinfectant using household items like vinegar and baking soda. It’s a natural way to keep things clean and fresh.
Basic Cleaning Tools
Once you have your cleaning supplies, don’t forget basic tools! Mops, brooms, and sponges are vital for maintaining cleanliness. I keep an extra set of cleaning rags on hand too—nothing’s worse than realizing you’ve run out in the middle of a deep clean.
It can be super helpful to set up a regular cleaning schedule. I like to designate specific days for different tasks, making it much less overwhelming. Trust me, it makes a huge difference in how I feel about my living space!
So take it from me, get yourself set up with the right tools, and cleaning will feel like a breeze instead of a burden!
Personal Hygiene Supplies
Personal hygiene is super important during uncertain times. You’ll want to make sure you have plenty of toiletries, like soap, shampoo, toothpaste, and toilet paper. I still laugh when I think of all the toilet paper panic from the last pandemic!
Having an abundance of personal care items can ease the stress of running out in the middle of a crisis. Stocking up ahead of time helps you feel prepared and comfortable.
Lastly, consider including some self-care items in your stockpile. Facemasks, bath products, or even scented candles can help lift spirits during trying times. Don’t underestimate the power of a pampering session!
4. Communication Tools
Chargers and Backup Power
In our digital age, staying connected is essential. Make sure to have chargers handy for all your devices! I’ve learned my lesson the hard way about losing power during a storm—let’s just say I had to take a break from my phone and reconnect with the offline world!
Investing in a portable charger can help too. If the power goes out, having that backup can keep you connected to news, friends, and family. I love using mine when I’m on the go too—such a lifesaver!
It’s also good to have a small stash of batteries for any other devices you might need. Radios, flashlights, or even those battery-operated speakers can come in handy when you least expect it!
Social Media and Communication Apps
In times of crisis, staying in touch with people is key. I’ve found that group chats and social media become my lifeline when the world feels a bit too chaotic. It helps to know you’re not alone, and others might share your experiences.
Set up communication channels with your close friends and family—it’ll help you all feel more connected. Plus, sharing tips and updates during a pandemic can help everyone stay informed and safe.
Make sure to also turn off notifications occasionally. Sometimes, a little digital detox can be good for your mental health, especially when your feeds are flooded with pandemic news.
Emergency Contact Lists
Don’t forget to create an emergency contact list. Write down important phone numbers for family, friends, neighbors, and healthcare providers. Keep this list handy in case technology fails.
It’s kind of like your own mini directory, so don’t overlook it. Having these contacts made it so much easier for me when I had to reach out in a hurry.
And remember to update this list regularly as contact information changes. Keeping everything organized helps when you really need to reach someone!
5. Entertainment and Wellness
Books, Movies, and Games
Staying home during a pandemic can lead to some boredom. But it can be a chance to pick up that hobby you’ve been meaning to explore! Stocking up on your favorite books, movies, and games can really help keep morale high.
I remember going through my bookshelf and finding books I’d forgotten about. It was like a treasure hunt! Having a mix of entertainment options can take the edge off long days stuck at home.
Think about doing fun family activities too! Board games, puzzles, or even home movie nights can bring everyone together and create a welcoming atmosphere.
DIY and Hobbies
You might find that this is the perfect time to pick up a new hobby or dive into a DIY project! Whether it’s knitting, gardening, or even learning to cook, creative outlets can be a great escape.
Use supplies you already have around the house to get started! I found some old paint in my garage and turned my patio into a little art area. It became a cool new space to enjoy and reflect, and it keeps the creativity flowing!
Also, don’t forget about online tutorials! There’s a world of knowledge out there, and being able to learn something new from home can really help keep spirits high!
Mental Health and Mindfulness
Finally, don’t forget about your mental health! It’s super important during stressful times. I rely on mindfulness practices such as meditation, journaling, or even simple breathing exercises to stay grounded.
Having supplies like journals or calming essential oils can help create a soothing atmosphere at home. Establish a daily routine that includes time for self-care.
It’s essential to check in with yourself regularly. Make sure you’re processing everything, whether through talking with someone, engaging in creative outlets, or simply taking a break.
FAQ
1. What are the most essential medical supplies to have at home?
It’s crucial to have a stocked first aid kit, regular health monitoring tools like a thermometer, and plenty of face masks and hand sanitizers.
2. How much food and water should I store?
Aim to have at least a week’s supply of non-perishable food items and water. This ensures you’ll stay nourished and hydrated during tough times.
3. Why are cleaning supplies important?
Keeping your living space clean helps prevent the spread of germs and illness. Stock up on disinfectants, basic cleaning tools, and personal hygiene supplies.
4. What communication tools should I prepare?
Ensure you have chargers, backup power sources, and an updated emergency contact list so you can stay connected in any situation!
5. How can I maintain mental wellness during a pandemic?
Engage in hobbies, practice mindfulness, and set up a routine that focuses on self-care to help manage stress and anxiety.
So there you have it! Being prepared doesn’t have to feel daunting. A little planning can go a long way in ensuring you feel comfortable and secure at home. Stay safe, folks!
by Micah Caldwell | Jul 31, 2025 | Preparedness
Assessing Your Risks
Understanding Common Hazards
You know, living in an apartment can be pretty cozy, but it also comes with its own set of challenges when it comes to emergencies. For me, the first step in any preparedness plan is to recognize what hazards might actually pop up. Whether it’s a natural disaster like a fire, flood, or even a severe snowstorm, being aware of the potential risks you face in your area can go a long way in staying safe.
Take a moment to think about what could happen, based on your location. For instance, if you live in a flood-prone area, make sure to keep tabs on the weather. I’ve learned through my own experiences and chatting with neighbors that knowing these details can help you react quickly when trouble strikes.
Understanding your building’s emergency protocol is also crucial. Each place might have different rules when it comes to evacuations or sheltering in place. Ask your landlord or management to provide you with this information; it could be a lifesaver!
Creating a Personal Risk Plan
Once you’ve got a grip on the risks, it’s time to make a plan tailored just for you and your apartment. Think about how you’ll respond to different scenarios. Ask yourself questions like: “What will I do if there’s a fire?” or “How can I safely exit during an earthquake?” This kind of mindset sets you up for success.
Having a designated escape route is essential. In my experience, walking through these routes a few times, preferably during calm moments, really helps me remember my paths under pressure. And don’t forget to share this plan with anyone you live with so everyone knows what to do!
Additionally, consider specific accommodations for any family members who may need extra help, like kids or elderly folks. You never know what type of situation you might face, so being prepared for everyone can provide peace of mind.
Regularly Review and Update Your Plan
Just because you’ve made a plan doesn’t mean you can set it and forget it. Trust me, living a busy life often leads me to forget these important details, but I’ve learned the hard way that revisiting and updating my plan is key. Seasonal changes may bring new risks, so keep that in mind!
Schedule regular reviews of your plan. You might find that new neighbors or changes in your building’s structure could impact your safety. Include a periodic check at the beginning of every season in your calendar. That way, you won’t forget!
An additional tip here – involve your neighbors! Sharing your experiences and updates can foster a sense of community, and who knows, you might spark a group initiative that benefits everyone!
Building Emergency Kits
Choosing Essential Items
Okay, so you’ve assessed your risks and made a plan. Next up? Building an emergency kit! This might sound overwhelming, but trust me, you don’t need to go overboard. Start with the basics: water, non-perishable food, first aid supplies, and personal hygiene items. I found that having a backpack as a designated emergency bag makes it easier to grab and go!
This part can be both fun and practical. I like to customize my kit according to my specific needs. For example, I throw in my favorite snacks, extra medications, or a cozy blanket — anything that can make a tough situation a bit more bearable.
Don’t forget about important documents! Having copies of identification, insurance info, and medical records can be crucial during or after an emergency. I always keep these documents in a waterproof folder in my kit!
Storing Your Kit Safely
Where you store your kit is almost as important as what goes into it. I recommend finding a cool, dry place that’s easy to access. My kit is in a closet near the front door so I can grab it quickly when I leave in a hurry. You never know when you’ll need it!
Keep track of your kit’s items and expiration dates. I like to go through mine every six months and replace anything that might be getting outdated. It’s a small, simple step but can make a world of difference in an emergency.
Encourage anyone you live with to know where the kit is and what’s inside it — it could save them precious time in a chaotic situation!
Personalizing Your Kit for Unique Situations
As I mentioned earlier, it’s important to customize your kit. Think about your hobbies or lifestyle. Do you have pets? Make sure to include pet food, medications, and carriers for them too. You’d be surprised at how easy it is to forget furry family members!
If you enjoy camping, you might already have some useful gear. Consider adding a flashlight or multi-tool, which can be super handy during emergencies. Remember, your readiness kit should reflect your personal needs.
If you have kids, including some games or comforting items may help ease their anxieties in stressful situations. I always pack little toys or books for my nieces when they visit; it gives everyone a sense of comfort when the unexpected occurs.
Communication Strategies
Creating a Contact List
Communication is so vital during emergencies. I highly recommend creating an emergency contact list that includes both local and out-of-town family and friends. It’s a great way to ensure that if one method fails, you still have backup options.
List people who can check on you and vice versa, especially if you have family in different areas. This way, you don’t have to panic about finding out if everyone is okay. A quick text or call can do wonders!
Consider using social media or messaging apps as part of your communication plan, especially if traditional phone lines are down. I’ve found this to be efficient for tagging family in posts to alert them of our situation!
Establishing Meeting Points
If an emergency occurs and you can’t reach each other by phone, you’ll need to have an established meeting point. It could be a nearby park, a neighbor’s place, or any identifiable landmark. I like to choose spots that everyone knows about, as there’s less room for confusion.
Make sure to discuss these points with your loved ones in advance. You might also want to take a few different routes to get to your chosen location — exposing them to various scenarios can really help!
Always double-check these points regularly. I re-confirm my meeting places whenever I have family over or someone new joins our group; it keeps everyone in the loop!
Staying Connected with Neighbors
We often overlook the importance of connecting with our neighbors, but it’s super essential. Building relationships can foster a sense of community and means there’s someone looking out for you. If you ever need help, they’re first responders even before any official aid can arrive!
Consider starting or joining a neighborhood watch or community group. This can help everyone share resources, advice, and even skills that are incredibly helpful during emergencies. Personally, being involved has opened my eyes to lots of safety tips I hadn’t thought of before!
Regularly check in with your neighbors and be available for them to reach out. You never know when a little friendly chat can morph into a life-saving collaboration.
Practicing Your Emergency Plans
Conducting Drills
Alright, time to put your plan into action! Conducting drills is a fantastic way to prepare yourself, and honestly, it can even be a fun activity. I try to gather my family or roommates about once a year to practice our escape routes.
These drills help me visualize the process and identify any areas that might need improvement. Plus, it’s a great opportunity to have some laughs and strengthen our camaraderie!
Document anything that seems confusing or difficult to manage during the drill so you can refine your plan further. Remember, the goal is to feel more confident when the real deal happens, not stressed out!
Incorporating Feedback
After you conduct drills, it’s super important to talk about how things went. Get feedback from everyone involved and make adjustments as needed. Perhaps someone found a new obstacle that could slow you down during a real emergency.
Think of it as an opportunity for improvement, rather than a failure. I find that being open to suggestions not only helps fine-tune our plans but also strengthens our bonds as a group.
Encouraging this sort of feedback builds trust and confidence among group members. The more everyone feels heard, the better they’ll execute the plan when the time comes!
Keeping Skills Fresh
Lastly, make sure to keep your skills fresh! Knowing how to use a fire extinguisher, perform CPR, or stop bleeding are essential skills. I try to refresh my CPR knowledge every couple of years by taking a course; it’s an excellent way to stay current.
Invite friends over for informational meet-ups where you can practice these essential skills together. You’d be amazed at how empowering it is to feel confident in your ability to help others when it counts!
Also, keep an eye on any community workshops. Local fire departments or hospitals often host safety training events, and attending these will only enhance your knowledge and keep your skills fresh!
FAQs
What should be in my emergency kit?
Your emergency kit should include essentials like water, non-perishable food, first aid supplies, medications, a flashlight, batteries, and copies of important documents. Customize it further based on your personal needs, like pet supplies or comfort items.
How often should I review my emergency plan?
It’s wise to review your emergency plan at least twice a year, but consider doing so every season. This helps to keep it fresh in your mind and ensures you’re prepared for any new risks that may arise over time.
Why is it important to involve neighbors in preparedness?
Your neighbors are often your first line of defense in an emergency. Building a community can enhance safety and ensure everyone has a support network in place. Plus, sharing resources and experiences can provide valuable insights!
How do I practice my emergency plan effectively?
Conduct regular drills with your family or roommates. Utilize your escape routes and encourage open dialogue afterwards to share feedback. This keeps your skills sharp and enhances teamwork!
What if I have special needs in my family?
It’s essential to tailor your emergency plan to cater to the unique needs of your family members. Discuss their specific requirements, ensure comprehension of their roles during emergencies, and consider their comfort items in your emergency kit.
by Micah Caldwell | Jul 31, 2025 | Preparedness
Assessing Your Food Supply
Check Expiration Dates
Alright, first things first—let’s take a good look at what you’ve got in your pantry and fridge. The first step is to check those expiration dates on everything. This may seem tedious, but trust me, it’s totally worth it when you’re staring down the barrel of a blackout.
Don’t just shove items to the back and forget about them! You’d be surprised how quickly stuff can go bad. Make a little checklist if you need to. This way, you won’t get stuck with expired food when you might really need it.
Once you’ve got everything sorted, make sure to toss out anything past its prime. There’s no sense in keeping items that could potentially make you sick. Your health is the priority!
Organizing Your Coolers
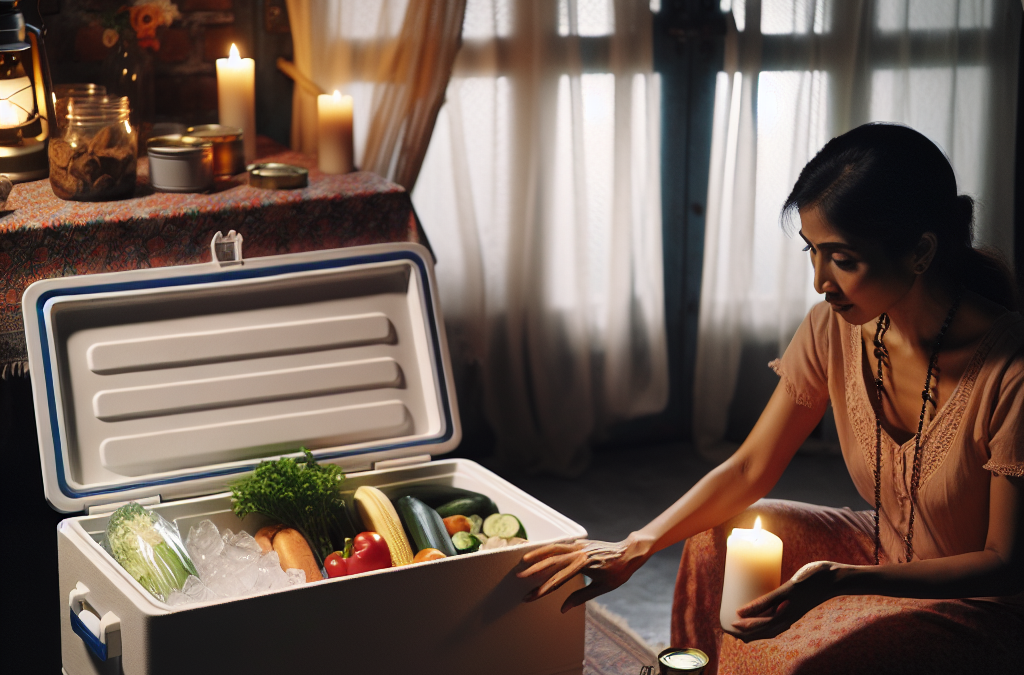
Now that you’ve checked for expiration dates, it’s time to gather your coolers. Yes, those plastic boxes that just sit in the garage most of the time! If the power goes out, these will be your best friends. I like to keep a couple handy for emergencies just like this.
Fill them up with ice or frozen gel packs before a blackout hits. If your power is out for an extended period, you can use the cooler to keep essential items cold—like milk, meat, and leftovers. Just make sure you have everything form-fitted to avoid any mess. Ain’t nobody got time for that!
Also, try to minimize how often you open the cooler. Each time you pop that lid, you let cold air escape, which can raise the temperature inside. A little patience here goes a long way!
Prioritize Food Storage
If you have a deep freezer, take advantage of it. Fill it with essential items! But here’s the trick: always remember to keep it as full as possible. A full freezer will maintain its temperature longer than a half-empty one.
In the unfortunate event that the power shuts off, don’t open the deep freezer unless it’s absolutely necessary. Most full-freezers will keep food frozen for about 48 hours if kept closed. That’s some solid insulation work!
If you suspect that the blackout is going to last longer than 48 hours, consider cooking some of the food in advance. This way, you have meals ready to go, and you won’t end up losing anything important.
Keeping Track of Food Temperatures
Using a Thermometer
Okay, let’s talk about temperatures. This is super important! Investing in a good refrigerator thermometer is one of the best things you can do. I can’t stress enough how vital it is to know exactly what’s going on inside your fridge.
You should aim to keep your fridge below 40°F (4°C). If it goes above that, you might need to toss out some items, especially perishables. So make sure to keep that thermometer handy and check it frequently.
If you don’t have a thermometer, just know that if the fridge is cool to the touch, you’re probably in the clear. But just remember, a solid thermometer takes the guesswork out of the equation!
Timing is Everything
Another great tip is to write down when the power goes out. This can help you keep track of how long your food has been out of refrigeration. The general rule? If the food has been exposed to temperatures above 40°F for more than two hours, it’s safer to throw it away.
Keep an eye on your food and check the temperature regularly. Trust me, it’s a small effort that can save you from a nasty case of food poisoning later on.
Also, having a timeline helps when connecting with your friends or neighbors. You can all team up to track your food safety—safety in numbers!
Communicating with Power Providers
Don’t forget about the importance of keeping in touch with your local power provider. If you know a blackout is on the way, call them to get updates. They can give you an idea of how long you might be in the dark.
A lot of providers these days have apps or websites where you can report outages and get real-time updates. This can be a huge help in planning how to manage your food storage strategically.
Staying connected will definitely help ease your mind and allow you to make effective decisions when it comes to your food supply during uncertain times like a blackout.
Utilizing Emergency Meal Kits
Stocking Up on Essentials
If you haven’t already thought about it, having an emergency meal kit is a game-changer. I’m all about being prepared. Canned goods, dried foods, and any non-perishables should be your go-to items.
Make it fun! Try to involve your family in picking out foods they like. When they help, they’ll be more inclined to eat them when the time comes. Plus, a little teamwork goes a long way in stressful situations like a power outage.
Don’t forget about water, either. Every person needs at least a gallon a day, so stock up accordingly. It’s amazing how fast it can disappear when you least expect it!
Creating Balanced Meals
It’s not just about having food, but also about having nutritious food! When setting aside your emergency kit, think about the balance. Include protein, grains, and some fruits or vegetables if possible.
When you’re making your emergency kit, aim for foods that can be easily cooked over a camp stove or even eaten straight from the can. I mean, who wants to cook during a blackout?
Give some thought to including comfort foods as well. In those moments when things get a bit overwhelming, a little taste of home can help lift spirits. Choose wisely, my friend!
Regularly Review Your Kit
Lastly, don’t just toss everything in a box and forget about it. You need to check your emergency meal kit regularly! I like to do this every few months. Check expiration dates and refresh your stock as needed.
Sometimes the things you thought weren’t going to expire for ages suddenly turn into little time bombs of stale food. Keeping your kit updated is crucial for spending those unexpected blackout hours worry-free.
Plus, it’s a great excuse to have a little fun with food! Try out new recipes, taste-test some items, and who knows—you might even discover a new favorite meal for future emergencies!
FAQs
1. How long can food stay safe during a blackout?
Generally, a full freezer can keep food frozen for 48 hours if the door remains closed. A refrigerator will keep food safe for up to 4 hours if it stays closed.
2. What should I do with food in the fridge during a blackout?
If the power is out for more than 4 hours, check the temperature. If it’s above 40°F for two hours or more, it’s best to toss it.
3. How can I keep food cold without power?
Use coolers packed with ice or frozen gel packs. Limit how often you open them to keep the cold air inside.
4. Are emergency meal kits necessary?
Absolutely! Having an emergency meal kit ensures you have safe, non-perishable food available during unexpected outages.
5. When should I replace food in my emergency kit?
Check your emergency kit every few months and replace items as needed before their expiration dates. Keeping it updated is key!

by Micah Caldwell | Jul 31, 2025 | Preparedness
When life throws a curveball, being prepared can make all the difference. Emergencies come in various forms—from natural disasters like hurricanes and earthquakes to unforeseen events such as fires or medical crises. Understanding these risks is your first step in crafting a solid emergency preparedness plan.
## Understanding the Risks: Identifying Potential Emergencies in Your Area
Every region has its unique set of risks. Start by researching the types of emergencies that are prevalent where you live. For instance, coastal areas may face hurricanes, while those in the Midwest might be more concerned about tornadoes. Local government websites often provide helpful resources detailing historical data on natural disasters and other emergencies that could affect your community.
Additionally, consider personal risks—do you have family members with medical conditions? Are there particular hazards in your home environment? By identifying these potential threats early on, you can tailor your emergency response efforts effectively.
## Building Your Emergency Kit: Essential Supplies for Every Household
Next up is assembling an emergency kit—a crucial component of any preparedness strategy. This kit should contain essential supplies to sustain you and your family for at least 72 hours following an emergency.
Start with the basics: plenty of water (one gallon per person per day), non-perishable food items like canned goods or energy bars, a flashlight with extra batteries, a first-aid kit, and any necessary medications. Don’t forget items that cater to specific needs; these might include baby formula if you have infants or pet supplies for furry family members.
Also, consider adding important documents (like IDs and insurance papers) stored in waterproof bags, a multi-tool for various tasks, and cash since ATMs may not be operational during emergencies.
## Creating a Family Emergency Plan: Communication and Evacuation Strategies
Once you’ve identified risks and built your kit, it’s time to create an actionable family emergency plan. This blueprint should encompass communication strategies to ensure everyone knows how to reach one another during chaos. Designate an out-of-town contact who can act as a central point for information exchange.
In addition to communication protocols, outline clear evacuation routes from your home and identify safe meeting spots outside your neighborhood or town. Regularly practice this plan through drills so each family member feels confident navigating it when the time comes.
## Staying Informed: Resources for Ongoing Preparedness and Response
Preparedness doesn’t end once your kit is packed and plans are laid out; staying informed is paramount. Subscribe to local news alerts or download apps that provide real-time updates about emergencies in your area. The Federal Emergency Management Agency (FEMA) offers preparedness resources that can keep you ahead of potential threats.
Engage with community preparedness programs or workshops—they’re often free or low-cost—and connect with neighbors so that everyone can contribute towards collective safety efforts. Sharing knowledge strengthens resilience within communities, making it easier for everyone to bounce back when disaster strikes.
Ultimately, embracing an attitude of calm preparedness allows you to navigate uncertainties with confidence. By understanding risks specific to your area, building comprehensive kits, formulating effective plans, and staying educated about ongoing developments—you not only safeguard yourself but also empower those around you during times of crisis. So take action today—because tomorrow may just depend on it!