by Micah Caldwell | Jul 31, 2025 | Preparedness
Use Visual Signals
Colorful and Bright Items
One of the simplest and most effective ways to grab attention in a remote area is to use colorful or bright items. When you’re out in nature, it can be hard to stand out from the surroundings. I once found myself in a thick forest, and the trees were all shades of green and brown. That’s when I realized how vital it was to use something that really pops—like a bright orange backpack or a red jacket. For me, these items became lifesavers.
You can also create a larger visual signal by laying out items in an open space. Think of it like making a giant SOS sign with rocks or logs. The more contrast you create against the background, the better your chances of being seen. Remember to always have a high-visibility item with you when you’re heading into remote areas, just in case.
And don’t forget about reflective materials! If you have shiny or reflective gear, such as a mirror or a space blanket, it can catch the sun’s rays and send a signal over considerable distances. I’ve seen a simple mirror reflect sunlight across a canyon, which really hammered home how powerful these simple tools can be!
Sound Signals
Using Whistles
When I was hiking in a particularly isolated area, I learned the power of sound signals. Whistles are one of the most effective tools you can carry. They require minimal effort and can carry much farther than your voice can. I always keep a whistle clipped to my backpack. It’s lightweight, and the sound carries over long distances, even amidst the wind or rustling trees.
It’s also helpful to remember how to use your voice effectively. Shouting for help can be exhausting, plus it only works if someone is reasonably close. I’ve found that intermittent shouting combined with whistle blows can capture attention better. People are naturally drawn to odd sounds, and alternating between these can really increase your chances of being heard.
Try to use rhythmic patterns, too. For instance, three short blasts on a whistle followed by a pause can stand out better than random noises. It’s like a code that people can easily recognize as a distress signal. I’ve experienced firsthand how this method can draw attention from miles away, especially in secluded terrains.
Fire Signals
Creating a Signal Fire
Ah, fire! The age-old method of signaling. When done right, a signal fire can be seen from a far distance, which is why it’s one of my favorite techniques. If you’re in a survival situation, build your signal fire in a clear area and use all available materials to create a smoke signal. I’ve often used green branches or leaves to produce thick smoke that rises high into the air.
Make sure you’re following safety protocols when it comes to fire! It’s important to know the fire regulations in the area, and always have water or an extinguisher handy. You want to signal for help, not create a wildfire! I can tell you from experience that safety should always come first in these situations.
Also, burning pieces of rubber or other materials that produce a lot of smoke can be effective, but only if it’s safe to do so. Always check your surroundings and if there’s any wind direction to consider. Trust me, it’s about being smart while definitely standing out with your fire signals!
Electronic Devices
Using a Satellite Phone or GPS Device
If you’ve got access to technology, it can make signaling a breeze. I remember one time being out on a remote camping trip when I realized how handy having a satellite phone could be. It allows you to call for help without relying on cellular service, which is often nonexistent in isolated areas.

Always keep your electronics charged before heading into the wild. I also suggest carrying a portable solar charger, just in case you need a power boost in the middle of your adventure. With these devices, sending out your location or a distress message could be as simple as pressing a button, cutting out the stress of trying to find your way back.
Plus, many modern devices also have SOS features that send your location along with a help request. I’ve found peace of mind knowing that my devices give me that safety net when I’m out exploring. It’s a game changer and can literally be your lifeline in emergencies.
Enlisting Natural Signals
Using Wildlife and Nature
Believe it or not, nature can assist you in signaling for help. Animals often act as indicators of human presence or potential dangers. For instance, if you see birds flocking in one direction, it can indicate the presence of water, people, or even food source nearby. In my early days of backpacking, I learned to keep an eye on wildlife behaviors—it’s fascinating how they can lead you to safety naturally!
Gathering natural resources to help make your signals louder or clearer is also crucial. Using a walking stick, for instance, to tap on trees or rocks can create a rhythmic signal. I often used this method when I was further away from more populated areas. It can produce a unique sound that might catch the attention of other hikers.
Moreover, learning the behavior of local wildlife can help you communicate more effectively. An approach I employed was whistling to mimic bird calls, allowing me to echo back and forth in responses. It’s amusing how much we can learn from the creatures around us, and it can definitely help increase your chances of being noticed!
FAQ
1. What’s the best way to signal for help in the wilderness?
The best way to signal for help is to combine visual signals, like brightly colored items or smoke, with sound signals, such as whistles and shouting. Each method amplifies the chances of being noticed.
2. Can I use electronic devices for signaling?
Absolutely! Satellite phones or GPS devices are excellent for signaling in remote areas. Just ensure they’re charged and functional before your trip.
3. What should I include in my emergency kit for signaling?
An emergency kit should include a whistle, reflective items, a signal mirror, possibly a satellite phone, and materials for making a fire. Always be prepared!
4. How do I create a signal fire safely?
To create a signal fire safely, find a clear area away from flammable materials. Use dry wood and add green foliage for thick smoke. Always have water or an extinguisher on hand and follow local regulations on fire safety.
5. How do natural signals help in emergencies?
Natural signals can guide you toward resources or potential help. Animals’ behavior can indicate safety, while using natural materials can amplify sound or visual signals in your surroundings.

by Micah Caldwell | Jul 31, 2025 | Preparedness
Listen to Local Authorities
Stay Updated with Alerts
One of the very first things that I emphasize when it comes to staying safe during a volcanic eruption is to keep your ears open to the local authorities. They usually have the latest news and will alert you about any immediate dangers. This can mean the difference between safety and disaster.
Local news stations, radio broadcasts, and official social media accounts are great resources to find real-time information. I remember a time when a nearby volcano showed signs of activity, and being tuned in saved a lot of my friends from unnecessary panic and confusion.
In many regions with volcanic activity, they have early warning systems in place that can notify residents about potential risks. Don’t underestimate this; being informed is your first line of defense.
Follow Evacuation Orders
Evacuation orders are not just suggestions—they’re often based on thorough assessments by experts who know way more than we do. In the moment, when all the adrenaline is rushing and fear kicks in, following those orders can feel overwhelming. But trust me, it’s crucial.
During my time living close to a volcano, I saw how quickly things can escalate. Ignoring an evacuation order can lead to dire situations, including being caught in ash falls or lava flows. If you’re told to go, pack your essentials and hit the road!
And remember, evacuate sooner rather than later. Delaying could mean getting stuck in traffic or worse. Always err on the side of safety and take orders seriously.
Participate in Community Emergency Drills
Participating in community drills can not only give you peace of mind but also equip you with the knowledge you need come crunch time. I know it might sound boring, but practicing evacuation routes and safety procedures genuinely makes a difference.
When I took part in my town’s emergency drills, it was eye-opening. I got to familiarize myself with escape routes and jot down critical locations, like where to meet friends or family after an incident.
Plus, community drills foster camaraderie. Nothing like facing potential disasters together to bring people closer. It’s all about being prepared together and knowing we have each other’s backs!
Prepare an Emergency Kit
Gather Essential Supplies
When putting together an emergency kit, it’s important to think practically. You should include food, water, first aid supplies, and any medications you or family members might need. A kit isn’t just a box; it’s your lifeline during a volcanic eruption.
In my own experience, I’ve found it’s a good idea to have at least a three-day supply of food and water ready to go. Things like energy bars and canned goods work wonders when you need something quick and nutritious.
A fun tip? Pack some comforting items as well, like a favorite book or a game. You’ll be surprised how much these little things can lift your spirits during a chaotic time.
Include Important Documents
When you’re evacuating, time is crucial, and you don’t want to waste it rummaging through piles of paperwork. Keep copies of important documents in your emergency kit—things like ID, insurance papers, and medical records.
I learned this the hard way when, in a rush, I left behind my important paperwork. It ended up being a headache I didn’t need on top of everything else. So make copies, file them away neatly, and don’t overlook their importance!
Having your documents ready can help you re-establish your identity fast, which is super essential, especially if your house or belongings get affected.
Prepare for Ash Fall
A volcanic eruption often comes with the byproduct of ash, and trust me, dealing with that stuff isn’t fun. It can cause respiratory issues, so having masks and goggles easily accessible in your kit is a must.
The last time ash fell in my area, I saw folks trying to cover their faces with whatever they could find. It was chaotic. If you have proper masks stored away, it’ll save you a headache later and help keep you safe.
Additionally, know how to clean ash off your home and car without causing damage. It’s a little prep work that goes a long way. Look it up before you need it!
Stay Indoors During an Eruption
Seal Your Home
When the eruption starts, the last thing you want is for ash and debris to get indoors, so sealing your home is key. I remember watching the news and seeing how important this step was during a neighboring eruption.
Close all windows and doors tightly. If you have air conditioning, switch it to recirculate to avoid pulling in outside air. Those little steps can protect you from having your indoor space turn into a dust bowl.
If you discover gaps or drafts in your home, take the time to seal them. You’ll be much better off in a snug space than one constantly bombarded by volcanic ash.
Limit Outdoor Exposure
As tempting as it might be to peek outside during an eruption, limiting your outdoor time is crucial. You don’t want to be caught in ash storms or airborne debris. It can wreak havoc on your lungs!
I once made the mistake of stepping outside for “just a minute” during an ash fall; it turned into a good old-fashioned choking hazard. Trust me, it’s safer to stay inside until authorities say it’s clear.
While you’re cooped up, find ways to keep entertained—read a book, watch a movie, or tackle a project you’ve been putting off.
Stay Informed While Indoors
Even when you’re safe at home, continuing to stay informed is key. Make sure you have multiple channels available for alerts, including a battery-powered radio. It might sound old school, but these babies can really save the day!
My experience has shown that social media can also be a powerful tool for receiving updates. Follow credible pages that provide alerts regarding the volcano activity, local government announcements or emergency services updates.
Keep an eye on the news and follow updates—knowledge is power, especially when it comes to the uncertainty of volcanic eruptions.
Have a Plan for After the Eruption
Assess Your Situation
Once it’s safe to emerge after the eruption, assess your surroundings before going anywhere. This is a biggie I can’t stress enough. Look for hazards like downed power lines or unstable debris that could cause injuries.
It’s also a good idea to connect with friends or family to ensure everyone’s okay. I found it comforting to check in with my neighbors after a huge eruption in my area a few years back. It’s great to have a support network!
Caution is key, so take your time to evaluate the landscape. Your safety is worth spending a little extra time ensuring it.
Know Your Evacuation Routes Back
When returning home, re-familiarize yourself with evacuation routes. What worked before might not be viable anymore, given that the landscape could be altered. I often refer back to my community emergency plan to remind myself of alternative routes.
Trust your instincts and have a backup plan. Sometimes, roads might be blocked or two-way streets could be one-way. Being prepared can help you avoid unnecessary stress.
Also, watch for potential hazards in the roadways—like ash buildup, landslides, or fallen trees—once again putting that assessment skill to the test!
Check for Damage Before Re-Entering Your Home
Before you walk back into your home, inspect it for signs of damage. I remember advising friends to check their roofs for ash accumulation or potential leaks from the volcanic lining that could collapse.
Always carry a flashlight and a first aid kit, just in case there’s an area that’s hard to navigate. Walking into a damaged home can be risky, and I’d hate to see anyone get injured because they weren’t careful!
Once you’ve checked and feel it’s safe, take your time to clean up thoughtfully and responsibly. It’ll be a journey, but you can do it!
FAQs
1. What should I take in my emergency kit for a volcanic eruption?
Your emergency kit should include essential supplies such as food, water, a first aid kit, masks, goggles, flashlights, batteries, and important documents. Don’t forget comfort items to help ease stress!
2. How can I find out about evacuation orders?
Stay tuned to local news, radio broadcasts, and official social media accounts of your local authorities. They provide the most reliable updates on evacuation orders.
3. Is it safe to go outside during a volcanic eruption?
It’s generally advised to stay indoors during an eruption. If you must go outside, wear protective gear like masks and goggles, and limit your exposure as much as possible.
4. What are the risks of ash fall?
Ash fall can cause respiratory issues, visibility problems, and more—for both people and property. Make sure to seal your home and use masks to protect your lungs during ash fall.
5. How do I clean ash from my property safely?
When cleaning ash, wear masks and use damp cloths or mops to minimize dust. Don’t use vacuums unless they are specifically designed for ash to avoid damage to the appliance.
by Micah Caldwell | Jul 31, 2025 | Preparedness
Assess Your Communication Needs
Understanding Your Audience
One of the key aspects of creating an effective emergency communication plan is to really understand who you’re communicating with. Whether it’s your family, staff at work, or even your community, knowing your audience will guide how you convey your message. For instance, different age groups or backgrounds might require tailored communication methods to ensure everyone gets the message.
Think about the different modes of communication people might respond to. For instance, younger folks may prefer texts or social media, while older adults might appreciate a quick call or even a face-to-face meetup. Identifying these preferences early on can help in crafting a plan that resonates with all parties involved.
Another critical part is knowing where to reach your audience. Sometimes it’s about being in the right place at the right time to get that message across. So, take some time to gather this information on your audience; it’s going to save you headaches down the line.
Identifying Key Messages
Next, you’ll want to think about what key messages you need to get across. In an emergency, it’s vital to have clear, concise, and actionable messages. Avoid jargon and make sure that anyone hearing your message knows exactly what’s happening and what they need to do. Write down a few key messages that can be readily shared across various platforms.
You might also want to run these messages by a few people to see if they understand them as intended. It’s super helpful to have fresh eyes on your material. Out in the field, you may encounter unexpected questions, so it’s a good idea to anticipate these and have answers at the ready.
Keep your language simple, direct, and to the point. During emergencies, people tend to be stressed, and clear communication can make a world of difference in ensuring everyone stays safe and informed.
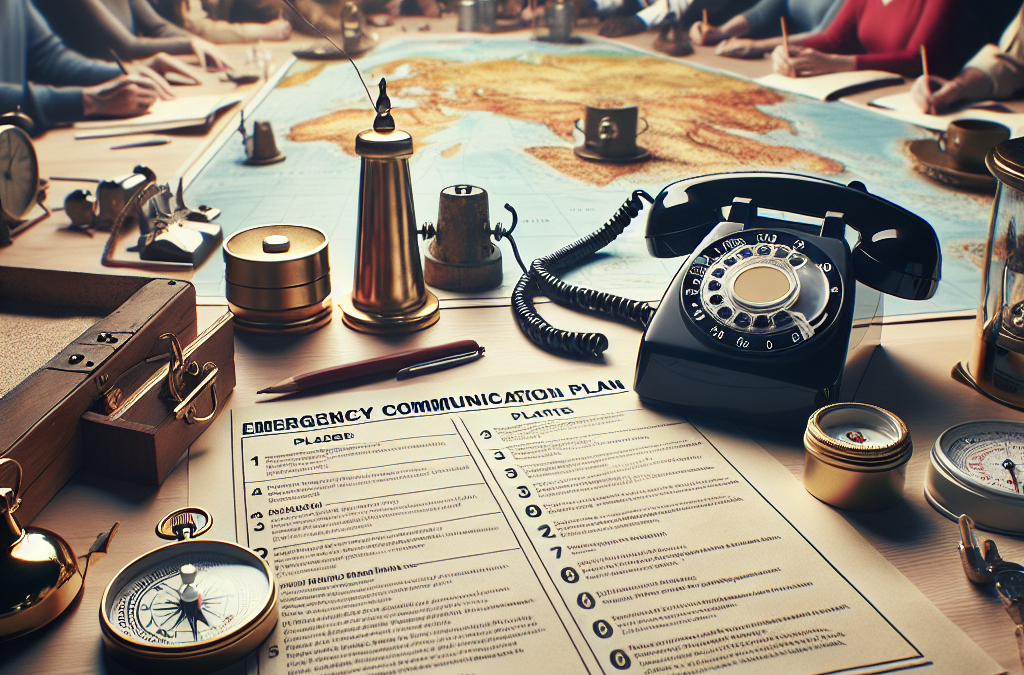
Choosing Communication Tools
Now, let’s dive into the nitty-gritty of what tools you’ll use to communicate. Depending on your audience, you could use anything from social media platforms like Twitter or Facebook to SMS text alerts, emails, or even printed flyers. Every tool offers different advantages, so think about what will work best in your situation.
Don’t forget to consider the diversity of your audience. Some might not have access to tech, or they may be in areas with poor reception. In those cases, having face-to-face methods or emergency radio communications might be best. It’s all about ensuring that your message reaches everyone.
Also, test your chosen tools ahead of time. Send practice messages, monitor responses, and refine your methods. The last thing you want is to find out in a crisis that a tool you planned to use is not reliable or effective.
Establish Roles and Responsibilities
Define Who Does What
One of the best things I learned while creating my emergency communication plan was to define roles early on. Everyone involved should be crystal clear about what they’re responsible for during a crisis. This not only ensures smooth communication but also eliminates any confusion when the heat is on.
Assigning roles can range from spokespersons to logistical support. For instance, who will communicate with the media? Who will handle internal communication within the organization? Make a list of roles and make sure everyone understands their responsibilities. Seriously, having this laid out makes life so much easier during emergencies!
Prioritize and delegate tasks based on people’s strengths. For instance, someone with clear communication skills may be better suited as a spokesperson, while those with organizational skills could manage logistics. Trust me, efficiency is key during critical times.
Training and Drills
Training is a huge part of ensuring everyone is prepared. Schedule regular drills so that everyone knows exactly what to do when an emergency occurs. Just like fire drills in school, these moments help familiarize everyone with the plan and reduce panic during real situations.
Training should also involve reviewing the communication tools you’ve chosen. Make sure everyone knows how to operate them properly. Hold mock scenarios where you test out messaging and roles, and see what works and what doesn’t.
After each drill, gather feedback and refine your plan accordingly. It’s a learning experience, and each step forward gets you closer to achieving your communication goals during a crisis.
Encourage Feedback and Adaptation
Once your plan is in place, creating a culture of open communication and feedback is essential. After drill sessions or actual incidents, take the time to gather everyone’s thoughts on how things went. Was something unclear? Did certain tools not work as expected?
Being adaptable is crucial. Don’t be set in your ways; tweak your plan based on actual feedback. The world is always changing, and having an adaptable plan may very well be the difference between chaos and effective communication down the line.
It’s a tough pill to swallow sometimes, but realize that your initial plan is not the be-all and end-all. It’s a work in progress, and improvement should be continuous.
Test and Review Your Plan Regularly
Schedule Regular Reviews
Get into the habit of regularly reviewing your communication plan. I like to set reminders every six months or so. This is a great opportunity to assess your tools and messages, ensuring they’re still effective and relevant. Something that worked a year ago might not cut it now!
During your reviews, consider asking the team if any new technology or platforms could improve communication. Stay up to date with the latest trends so that your plan remains fresh and effective.
Don’t underestimate the value of these reviews. They can prevent someone from being left out in case something changes last minute. Plus, it keeps everyone on their toes and engaged in the process!
Run Simulations
Once or twice a year, I recommend running a full simulation of your communication plan in action. This is a great way to see if everything operates smoothly under pressure. Will everyone know their roles? Are the established messages still clear and actionable?
It’s kind of like a sports team practicing before the big game. The more you practice, the better you perform. During these simulations, address any issues that arise and make a note for future trainings.
Trust me; running simulations will boost everyone’s confidence, being prepared for real emergencies. Plus, it’s a bit of a team-building activity!
Incorporate New Communication Channels
As new communication tools come onto the scene, it’s essential to incorporate them into your plan. Social media and messaging apps are always evolving, and being aware of these changes can make a significant difference. Maybe a new app would work better for the whole group or allow for quicker updates!
Keep an ear to the ground so you can swiftly adapt. The faster you can integrate these tools into your existing plan, the more effective your overall communication will be.
Being proactive rather than reactive will save you a ton of stress when an actual emergency occurs. Just remember: embrace change!
FAQs
What is an emergency communication plan?
An emergency communication plan outlines how to communicate effectively during a crisis. This includes assessing needs, defining messages, choosing tools, assigning roles, and reviewing regularly.
Why is it important to assess communication needs?
Assessing communication needs helps tailor your messages and methods to ensure everyone affected understands the situation and knows what actions to take.
How often should I review my emergency communication plan?
I recommend reviewing your plan at least twice a year. It helps ensure it’s relevant and effective in case of an emergency.
What if my audience doesn’t have access to the latest technology?
That’s a great concern! Always consider a mix of communication methods, including traditional approaches like face-to-face interactions or printed materials, to reach everyone.
How can I involve my team in building the plan?
Involving your team is key! Encourage open discussions about roles, conduct drills together, and gather feedback. Their insights can help create a more robust communication plan.
by Micah Caldwell | Jul 31, 2025 | Preparedness
Preparation Before a Flood
Creating an Emergency Plan
When I think about facing a flood, the first thing that jumps to mind is preparation. Having an emergency plan is like your blueprint for survival. You’ve got to map out where you’ll go, how to get there, and what you’ll do if things get tricky. Make sure everyone in your household knows the plan. A little coordination goes a long way!
Everyone should have a role in the plan; it makes the whole situation less chaotic. If you’ve got kids, involve them! Let them help put together a “go-bag” with essentials. Kids often feel more empowered when they actively participate in the planning process.
Lastly, review and rehearse the plan. This isn’t something you just write down and forget about! Go through the steps together, and if possible, do a mock evacuation. It can be a great bonding experience and ensures everyone is on the same page.
Stocking Up on Supplies
You never know when a flood will hit, so having an emergency supply kit is a must. In my experience, I like to keep enough non-perishable food and water for at least three days for everyone in the household. It’s not just about food; think about medications, personal hygiene items, and other essentials too. You want to be completely stocked!
Don’t forget about your furry friends! If you have pets, make sure to include food, water, and any medications they might need in your emergency supplies. I can’t imagine being in a situation where I had to choose between my pet’s needs and mine. It’s all about planning for the whole family, right?
Also, keep important documents in waterproof containers. I learned the hard way that losing irreplaceable papers can complicate things when you’re trying to get assistance post-flood. So, having everything safely stored away saves a ton of headaches later!
Understanding Flood Alerts
It’s crucial to stay tuned into weather reports and alerts. These days, there are plenty of apps and services that provide real-time updates. When I’m alert for possible flooding, I ensure that I check reports multiple times a day. It’s better to be safe than sorry, after all!
Familiarize yourself with the different types of flood alerts: watches, warnings, and emergencies. They signal how serious the situation is. For example, if a flash flood watch is issued, it means conditions are favorable for flooding. Actively monitoring these alerts can save your life.
Additionally, local emergency management offices often share invaluable information about your specific area. It’s worth following them on social media or signing up for their newsletters. You’d be surprised how much peace of mind it brings knowing you’re being kept in the loop!
During the Flood
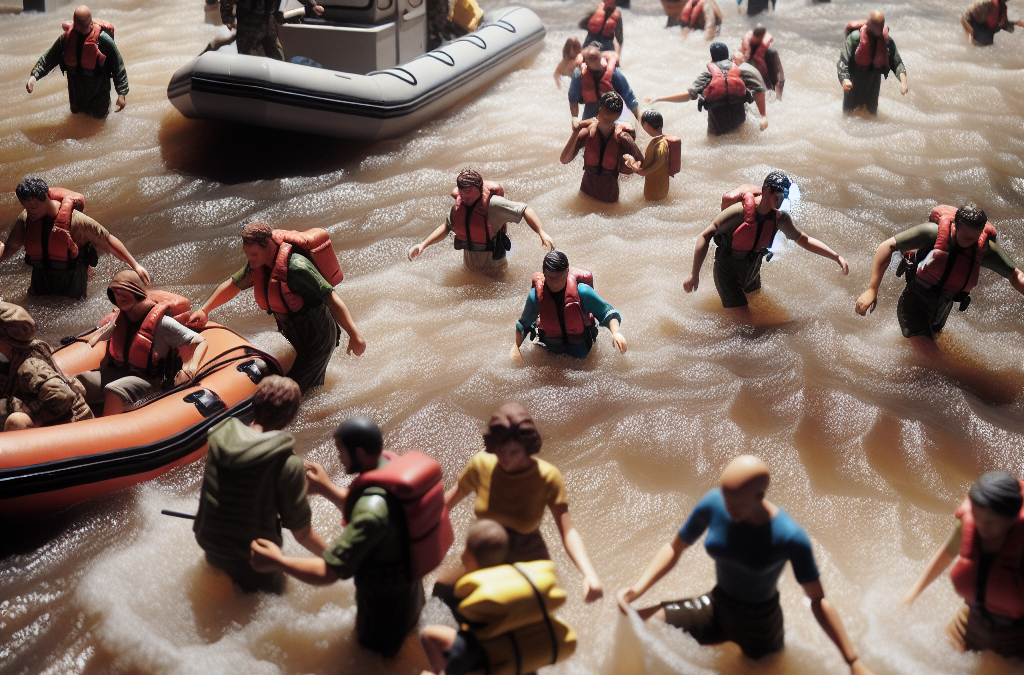
Evacuate If Necessary
If things take a turn and you need to evacuate, don’t hesitate! I’ve learned that staying put just because you think you’re safe is a risky move. Follow the planned routes in your emergency plan and avoid walking or driving through floodwaters. You never know how deep or fast the water is moving!
Don’t forget to take your emergency kit. Trust me, I’ve been in situations where I thought I’d be fine without it, and it’s a bad feeling! Pack some of your most important belongings if time allows—documents, medication, and loved items that can’t be replaced.
While evacuating, keep your family together. The chaos can make it easy to lose sight of one another. I always stress the importance of sticking together. It’s not just for safety; it’s comforting to know you’re all facing this challenge as a team!
Staying Informed
During a flood, it’s super important to stay updated. This is where battery-powered radios or phone alerts come into play. I always keep a radio handy for emergencies. Sometimes, power lines can go down, and cell service may get iffy, so having a backup is key.
Follow local authorities and emergency services on social media and listen to their reports. They often share critical updates about evacuation routes and safety notices. The more informed you are, the better decisions you can make for everyone’s safety.
If you’re at home and water starts to rise, don’t ignore it. It can escalate quickly. I’ve learned to have that mental switch ready to go just in case. Don’t wait for someone else to tell you to leave; trust your instinct!
Keeping Your Family Safe
In a flooding situation, ensuring everyone’s safety has to be your top priority. Avoid flooded areas, stay away from downed power lines, and steer clear of electrical appliances and outlets. Staying safe means keeping a level head and thinking about what’s truly essential.
Communicate with each family member about what to do in an emergency. It helps everyone know what’s happening, and it can reduce anxiety. If you have kids, it’s comforting for them to see that there’s a plan in place, even when things seem scary.
Lastly, don’t forget to have a buddy system. If you’ve got neighbors who are also trying to navigate the flood, check in on each other. Sometimes those connections can make all the difference when you’re feeling isolated or overwhelmed.
After the Flood
Returning Home Safely
When the floodwaters recede, and it’s time to go home, you need to approach it with caution. It’s easy to want to rush back, but checking for any hazards should be your first step. Look out for structural damages, downed electrical lines, and any signs that the area is still unsafe.
Always listen to local authorities regarding when it’s safe to return. They often provide the best information on whether areas have been cleared or are still in danger, which can protect you from accidental harm.
Once you’re back, take photos of any damage for insurance purposes before starting to clean up. This will save you a lot of hassle later when you’re dealing with claims. I’ve learned that it’s always better to have documentation just in case!
Cleaning Up
Cleansing your home after a flood can seem overwhelming, but tackling it step by step makes it manageable. Wear protective gear, including gloves, masks, and sturdy boots. You never know what could be lurking in the floodwaters, and being cautious is always wise.
Focus on removing water-damaged items first—carpets, appliances, and furniture. I’ve found that documenting each item is super helpful for later discussions with your insurance company. Make a list, take photos, and keep track of what needs to go!
After the bulk is removed, thoroughly clean and disinfect all surfaces. You don’t want mold lurking around, trust me! Mold can be hazardous, so a bit of elbow grease during the cleanup phase does wonders for your home’s longevity.
Seeking Support
After a flood, it’s not just about physical repairs; the emotional impact can be just as significant. Don’t hesitate to reach out. Whether it’s family, friends, or a support group, talking things through can be incredibly helpful during the recovery phase.
You can also check for local resources and organizations offering assistance. Many communities rally together in times of need, and you’d be surprised at the kindness of strangers. It’s something that has always amazed me in tough situations.
Lastly, give yourself time to heal, both mentally and physically. Engaging in community programs that focus on recovery can offer camaraderie and support as you navigate the aftermath of flooding. Lean on your community; there’s strength in numbers!
FAQs
1. What should I do before a flood hits?
Preparation is key! Create an emergency plan, stock up on supplies including food and water, and stay informed about potential flooding in your area.
2. How can I ensure my family stays safe during a flood?
Stay together, stick to your emergency plan, and ensure everyone knows the safest routes to evacuate. Avoid flooded areas and listen to local authorities for updates.
3. What supplies are crucial for my emergency kit?
Your kit should include non-perishable food, water, medications, personal hygiene items, important documents, and items for your pets if you have them.
4. How can I clean up my home effectively after a flood?
Start by wearing protective gear, removing water-damaged items, cleaning and disinfecting surfaces, and documenting everything for insurance purposes.
5. Where can I find support after experiencing a flood?
Reach out to family and friends, local organizations, and community support groups to help with recovery, both emotionally and physically.
by Micah Caldwell | Jul 31, 2025 | Preparedness
Dress in Layers
Understanding Layering
When it comes to staying warm in freezing temperatures, layering is my go-to strategy. It’s not just about throwing on a ton of clothes; it’s about knowing how to create a barrier against the cold. The idea is to trap heat while wicking moisture away from my body. I usually start off with a moisture-wicking base layer that hugs my skin, keeping it warm and dry.
The second layer, which I often choose to be fleece or down, helps to insulate. This is crucial because it traps body heat effectively but remains lightweight. It’s important to avoid cotton for this layer, as it absorbs moisture and loses its insulating properties. Trust me, getting wet in the cold is no fun at all!
Finally, I always top my outfit with a waterproof and windproof outer layer. This protects against wind chill and any wet conditions, ensuring that my inner layers stay dry and effective. Adopting the right layering technique has been an absolute game changer for me during cold weather outings.
Choosing the Right Materials
Not all fabrics are created equal when you’re battling the cold. In my experience, wool, polyester, and nylon are winners, while cotton is a big no-no. Wool is fantastic for retaining warmth even when wet, and believe me, I’ve had my share of snowy adventures where that’s come in handy!
Polyester, on the other hand, is excellent for moisture-wicking, keeping me dry during high-energy activities. When I’m out there skiing or hiking, staying dry is essential. As for nylon, it’s tough and offers wind resistance, which can be a lifesaver during blustery winter days.
One tip I’ve picked up over the years is to be mindful of my socks and gloves. I always go for thermal materials that not only keep my extremities warm but also wick moisture away. Cold feet and hands? Yeah, let’s avoid that at all costs!
Monitoring Your Body Temperature
Throughout my freezing adventures, I’ve learned to listen to my body. It’s super important to monitor how I’m feeling temperature-wise. If I start to feel too warm, I know it’s time to shed a layer or two. Conversely, if I begin to feel chilled, I need to add another layer back on.
Dressing appropriately can help me avoid both overheating and hypothermia. I often keep an eye on the signs of frostbite as well, particularly on my fingers and toes. Redness, tingling, or numbness are all indicators that I need to warm up quickly.
Being proactive about my comfort and warmth has really increased my enjoyment of winter activities. If I understand how my body reacts to cold, I can adjust my layers to keep myself cozy without overdoing it.
Building a Shelter
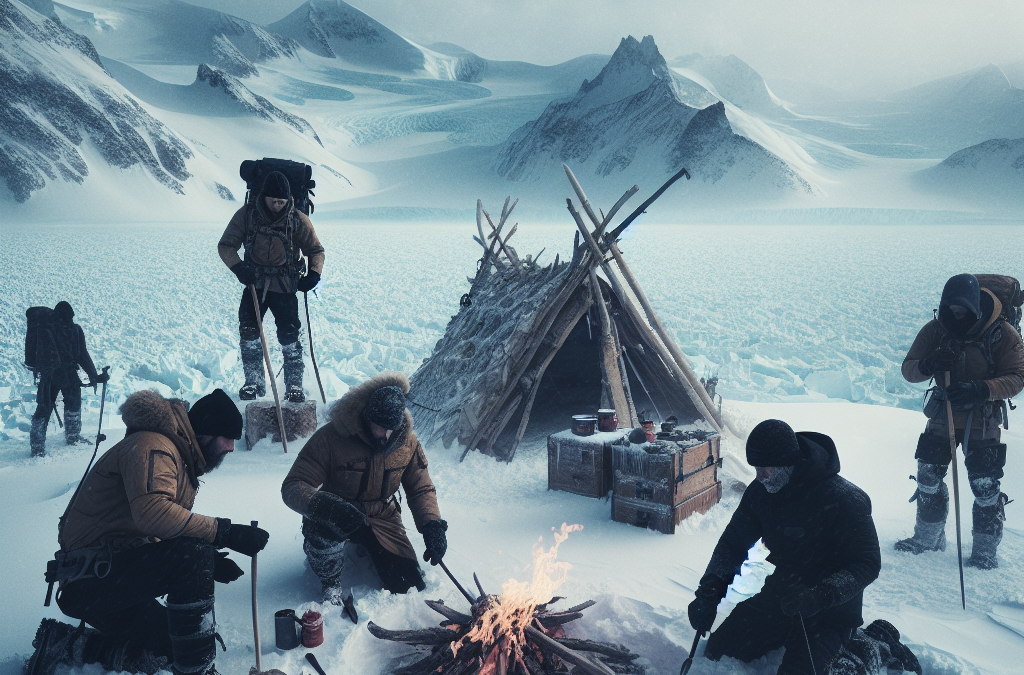
Finding the Right Location
Whether I’m stuck overnight in a snowstorm or camping out, knowing how to properly set up a shelter can be a lifesaver. I always prioritize finding a spot that’s away from the wind and provides some natural cover. Ideal locations might be near trees or boulders; those spots break the wind and reduce chill.
It’s also important to choose a spot that’s dry; the last thing I want is snow or moisture seeping into my shelter. If I can find a natural depression in the ground, even better! It naturally provides some insulation. I’ve learned that a good view might be nice, but protecting myself from the elements is way more important.
Orientation matters, too! Positioning the entrance away from the wind can make a world of difference. I’ve made the mistake before of not paying attention to this, and it left me cold and uncomfortable!
Constructing the Shelter
When I get the location figured out, it’s time to build the shelter itself. For a quick and effective structure, I often lean towards a simple snow cave or a debris hut. Both methods are pretty straightforward, and I love how easy it is to find materials in my surroundings.
A snow cave, for instance, uses the insulating properties of snow to keep the temperature regulated inside. I usually dig into the snow and design it in a way that it’s spacious enough for me to sit or even lie down comfortably.
If it’s not snowy, I tend to gather branches, leaves, and other debris to create a hut structure. Layering branches on a frame gives me a strong foundation, while more foliage offers insulation and wind protection. It’s amazing how resourceful you can be when you put your mind to it!
Insulating the Shelter
Insulation is key for ensuring my shelter remains warm. I like to gather leaves, pine needles, or even more snow (if available) to stuff in the nooks and crannies. This helps trap the heat and keeps the cold at bay. It’s surprising how much of a difference a few extra layers can make!
I also make sure to create a comfy place to sit or lie down. Finding or creating a bed of leaves or branches elevates me off the cold ground and gives added insulation. It’s so worth the time and effort for a better night’s sleep!
The whole insulating process makes my shelter not just a temporary fix but a real haven against the chilly temperatures outside. In my experience, putting in the effort to properly insulate pays off when I’m hunkered down in the cold.
Finding Food and Water
Locating Fresh Water
In cold climates, finding water can be as challenging as finding food. I always need to observe my surroundings for sources, like streams, rivers, or melting snow. Drinking snow is often a last resort, and I typically avoid it unless I’m desperate since it can lower my body temperature.
When it comes to melting snow, I generally prefer to use a stove if I’ve got one, but if not, I’ll collect it in a vessel and let it sit until the sun does the work. Every drop counts when you’re out in the cold.
I make it a habit to check for clear, running water, as it’s usually the safest choice. Staying hydrated is crucial; dehydration can sneak up on me during cold weather just as easily as in the heat!
Identifying Edible Plants
Foraging for food in the winter can seem daunting, but trust me, it’s doable. I’ve had luck by keeping an eye out for certain hardy plants; dandelions, for example, have leaves that can be eaten, and their roots are edible too. In fact, I’ve even made a tasty tea from dandelion roots when I’m in a pinch!
I also pay attention to berry bushes, as many species retain some fruit in colder months. Ripe berries are not only a source of food but can also provide a much-needed dose of energy. Just a quick word of caution, though—always double-check what you’re consuming.
Getting familiar with edible plants takes practice, but I’ve found that keeping a simple guide with me can be helpful. You never know when you might spot something edible on your chilly adventures!
Hunting and Trapping
If I’m in a situation where I need a more substantial meal, knowing how to hunt or trap small game can be perfect. Depending on the area I’m in, I look for tracks or signs of animals. I’ve often used snares or simple traps to secure food when essentials run low.
Setting up traps can be tricky, but it’s rewarding when done right. I usually look for spots where animals are likely to travel, like game trails. The more I observe their behavior, the better my chances become.
Remember, patience is key here. Waiting quietly is essential to let the animals do their thing. Eventually, I’ve managed to catch my own meals which adds a real sense of accomplishment to my winter survival skills!
Staying Warm with Fire
Gathering Firewood
Fire can be a lifesaver in freezing temps, so I always begin by collecting dry wood. I like to search for dead branches that are still off the ground; these tend to be much drier. When I’m getting wood, I also gather smaller twigs to use as kindling to help the fire get going.
It’s crucial to make sure everything is dry for an effective fire. I’ve learned the hard way that trying to burn wet wood can be a total bummer, so I do my best to find the best materials.
I also collect tinder from things like dry grass, pine needles, or birch bark. These can spark up quickly and help get the larger pieces of wood to ignite. Having these materials on hand often turns out to be a real game-changer!
Building the Fire
Building the fire itself is where the fun starts. I usually set up a small base using logs in a teepee or log cabin style, ensuring that my kindling is in the middle. The idea is to allow airflow, which helps ignite the fire more easily.
Once I’ve struck a spark onto my tinder and got it going, I gradually add larger pieces of wood to the fire. It’s all about patience; I’ve seen too many folks try to rush it, only to end up with a smoldering mess! If I take my time, I’ve found fires are much easier to maintain.
Finally, once the fire is going strong, I keep an eye on the flames and regulate the size by adding wood as needed. A well-maintained fire not only keeps me warm but also serves as a beacon in case I need to signal for help!
Using Fire Wisely
Fire is a powerful tool, but it demands respect. I’ve made it a point to never leave my fire unattended, as this can lead to dangerous situations. Safety is key, especially in remote areas. If it’s dry, I make sure to create a fire ring if I can to prevent any chance of it spreading.
Also, when the fire’s not in use, I’ll cover it up using some damp soil or leave it to go out naturally instead of dousing it with water. I’ve learned fires can leave a lasting imprint on the environment if not put out properly.
Lastly, I use my fire smartly, positioning it not just for warmth but for cooking or melting snow too. Balancing all functionalities has really enhanced my overall survival experience in freezing temps!
Using Survival Tools and First Aid
Essential Survival Gear
Having the right tools can be the difference between comfort and chaos. I always carry a well-stocked survival kit, including a knife, fire-starting tools, and a first-aid kit. A good knife is invaluable when it comes to making shelters or preparing food!
I also make sure I’ve included a multi-tool; this little gem can serve various purposes, from cutting to screwing or opening cans, you name it! It’s one of those tools that always comes in clutch.
Don’t forget a good map and compass, or a GPS if I have the battery life. Getting lost in the wilderness can be not only scary but dangerous, especially in freezing temps. I’ve learned to orient myself with the terrain around me and take the right tools along to always find my way home.
Basic First Aid Skills
Accidents can happen, and dealing with injuries in freezing weather can be tough. I find it crucial to know how to treat common ailments, such as frostbite or hypothermia. Recognizing signs early can make a big difference—like understanding when tingling starts in my extremities!
If someone is showing signs of hypothermia, I focus on warming them up with layers and getting them sheltered quickly. When it comes to frostbite, I’ve learned to never rub the affected area; instead, I should gently warm it up using body heat or warm water if possible.
Having a first-aid kit handy with bandages, antiseptics, and pain relievers keeps me prepared for any unexpected scrapes or bruises during cold adventures. I always take note of any allergies as well and plan the contents of my kit accordingly!
Emergency Signals
When all else fails, knowing how to signal for help is crucial. I usually pack a whistle—trust me, it’s way more effective than yelling! It carries farther, and I can conserve my energy this way.
I also don’t forget mirrors or bright colors that can be used to attract attention. Flashing sunlight off a mirror or wearing neon can work wonders. It’s all about being visible in the best way possible.
And finally, I always keep a flashlight handy. Not only does it help me to navigate in the dark, but it’s also a great signaling device if the need arises. Preparation is everything when I plan to face the elements!
Frequently Asked Questions
1. What’s the best way to stay warm in freezing temperatures?
The best way to stay warm is by dressing in layers. Start with a moisture-wicking base layer, add insulation, and top it off with a weather-resistant outer layer. It’s all about trapping heat and staying dry!
2. How do I make a shelter in the snow?
To build a shelter in the snow, look for a windbreak area, dig a snow cave, or construct a debris hut using branches and leaves. Be sure to insulate it well to keep warm!
3. Can I drink snow for hydration?
Drinking snow is not the best option as it can lower your body temperature. If you must, melt it first, but always try to find fresh water sources instead.
4. What materials are best for starting a fire?
When starting a fire, look for dry twigs, small branches, leaves, and other tinder materials. Using dry wood will help the fire ignite more easily.
5. What should be included in a survival kit for freezing temperatures?
A solid survival kit should include a knife, fire-starting tools, a first-aid kit, food rations, and water purification tablets. A map and compass are also vital for navigation!

by Micah Caldwell | Jul 31, 2025 | Preparedness
Prepare Your Home and Surroundings
Recognizing Vulnerabilities
One of the first things I did was check out my home for weak spots. It’s crazy how many things can become dangerous during an earthquake—think heavy shelves, mirrors, and those cute but precariously stacked decorative items. I recommend getting down on your hands and knees and looking for anything that might topple over. This little exercise will give you a fresh perspective on your space!
Also, take a peek outside. If you live near large trees or buildings that are leaning a bit, consider how they could impact your safety. It’s all about understanding your environment and making smart adjustments. Plus, it’ll ease your mind knowing you’ve minimized risks!
Lastly, don’t forget to check your emergency supplies. Make sure you have essentials like food, water, and first-aid kits handy. I like to keep mine in a designated spot so I don’t have to search at crunch time. It’s all about being proactive!
Practice the “Drop, Cover, and Hold On” Technique
The Importance of Immediate Response
When an earthquake strikes, it can be hard to think straight. That’s why practicing the “Drop, Cover, and Hold On” technique is crucial. I personally practiced this with my family a few times, and trust me, it helps embed that immediate response in your brain.
Dropping to the ground is all about protecting yourself from falling debris. Covering your head and neck with your arms is next—imagine there’s heavy furniture above you; you want to shield yourself! Finally, holding on until the shaking stops ensures you’re prepared to move if needed.
Even practicing this method in different locations can be beneficial. Whether you’re at home, in a restaurant, or at a friend’s place, try running through in your head where you’ll drop and cover. You’ll feel less panicked knowing you have a solid plan.
Communication Plans
Setting Up a Contact List
Another essential skill is having a solid communication plan. I remember chatting with my family about our go-to contacts in case we get separated during an earthquake. It sounds simple, but knowing who to reach out to can relieve a lot of stress!
Create a contact list, and consider using text messages instead of calls during emergencies since they can get jammed. I also recommend designating a meeting spot where everyone can go if the chaos unfolds. That way, you know you’ll find each other without racing through the streets!
Make sure you have your phones charged and even consider getting a portable charger. When things get tight, a working phone can be your lifeline to loved ones and emergency services. I never go anywhere without mine fully charged anymore!
Evaluate Your Emergency Kits
What to Include
This is where things get practical. I’ve spent some time ensuring that my emergency kit has everything we’d need—food, water, and first aid are just the basics. Make sure to include enough non-perishable food to last at least three days. I prefer items that don’t need cooking, like energy bars and canned goods, because you never know what might happen!
Don’t forget about personal items like medications and glasses. Those little things can make a big difference in your comfort! I keep a small checklist in my kit so I can quickly see if anything needs replenishing.
Lastly, add any important documents or valuables in a waterproof container. It’s heartbreaking to think about losing family photos or important papers. Keeping these handy makes sure you’re prepared for whatever life throws your way!
Stay Informed About Earthquake Activity
Use Technology to Your Advantage
Staying informed is easier than ever, thanks to apps and local news. I’ve downloaded an earthquake app that notifies me of any seismic activity in my area. It’s a game changer! Knowing about tremors before they happen allows me to prepare and keep calm.
Connect with local emergency management agencies, too. They provide up-to-date information and resources, and they can be a reliable source during emergencies. Following their social media accounts or subscribing to newsletters can keep you in the loop.
Lastly, engage with your community. Joining local emergency preparedness meetings can offer more insights, plus it’s a great way to connect with neighbors and develop strategies together. You’re not alone in this; it’s always better when we tackle it as a team!
Frequently Asked Questions
What should I do immediately during an earthquake?
Drop, Cover, and Hold On! Get low to the ground, cover your head and neck, and hold on until the shaking stops.
How can I prepare my home for earthquakes?
Identify and secure heavy items, and make sure you have emergency supplies readily available in a designated spot.
Why is communication planning important during earthquakes?
During an earthquake, things can get chaotic. Having a contact list and designated meeting spot ensures you can find your loved ones safely.
What should I include in my emergency kit?
Include non-perishable food, water, first-aid supplies, medications, important documents, and personal items in your kit.
How do I stay informed about earthquakes?
Utilize earthquake apps, follow local emergency management agencies, and engage with your community for updates and resources.