by Micah Caldwell | Aug 3, 2025 | Preparedness
Essential Safety Gear
Emergency Kit
When I first built my emergency vehicle kit, I focused heavily on putting together an emergency kit. This includes essentials like first-aid supplies, flares, and a multi-tool. Each item has a specific purpose that can make a huge difference in a crisis. Trust me; you don’t want to be rummaging through your glove box when something goes wrong.
I’ve found that it’s best to buy a pre-assembled emergency kit if you’re unsure what to include. They usually have everything from sterile bandages to reflective warning triangles. I’d highly recommend checking the expiration dates on any medication or supplies every few months.
Of course, you can customize your kit! Add items that cater to your personal needs or those of your family. For example, if you have pets, consider including food and water for them, too. It makes all the difference knowing you’ve covered all your bases.
Roadside Assistance Tools
In my experience, being stranded on the side of the road is a real wake-up call. That’s why I always keep roadside assistance tools like a spare tire, jumper cables, and a tire inflator in my car. I’ve had plenty of times where those jumper cables saved the day!
It’s essential to know how to use all these tools. When I first learned about changing a tire, it felt overwhelming, but practice makes perfect! Spend some time getting familiar with these tasks, and you won’t have to rely on others when you’re in a jam.
Additionally, consider investing in a roadside emergency tool that combines several functions, like a flashlight, hammer, and seatbelt cutter. When you can tackle multiple problems with one tool, you simplify the whole process, and that’s always a win in my book!
Reflective Gear
One item that often gets overlooked is reflective gear. When you’re dealing with a roadside emergency, being visible is super important. I learned the hard way that standing on the side of a busy road without something reflective can be pretty dangerous!
I keep a reflective vest and some roadside flares in my emergency vehicle. The vest is especially crucial when it’s dark or raining; it really makes a difference. Plus, having those flares can alert other drivers that you’re there, keeping everyone a bit safer.
Remember, incident visibility isn’t just about you. If friends or family often ride with you, having extra reflective gear ensures everyone is safe. It’s just a small addition that can have a massive impact.
Food and Water Supplies
Non-Perishable Snacks
You might be thinking, “Why do I need snacks in my emergency vehicle?” Let me tell you, hunger pangs can make an emergency situation feel that much worse. That’s why I make sure to keep non-perishable snacks like granola bars, nuts, and dried fruit in my glove compartment.
When times get tough, having something healthy to munch on can help keep you calm and collected. Plus, if you’re stranded for hours, those snacks can keep your energy levels up. It’s all about making a stressful situation a little more manageable!
Remember to rotate these snacks every few months. Not only do you want to keep things fresh, but checking back on your supplies allows you to monitor any other items that might need replenishing. And it’s always nice to treat yourself to a fresh snack!
Water Supply
Hydration is essential, folks! I always keep bottled water in my car – this isn’t just for emergencies; it’s great to have for long drives as well. I typically store a few bottles in the trunk. They can get super hot, but there’s nothing quite like drinking water when you really need it.
Make sure to replace your water supply periodically, as it can get stale over time. I usually refresh mine every couple of months, and I try to keep at least three bottles on hand. This way, if I get stuck somewhere, I won’t have to worry about hydration.
The beauty of having extra water on hand is that it can also serve different purposes, such as washing minor wounds or even creating extra coolant for an overheated engine. Keeping those bottles stashed can be a lifesaver!
Portable Water Filtration
Okay, this one might sound a bit extreme, but hear me out – portable water filtration systems are game-changers! In case you run out of bottled water, having the ability to filter water can truly make a difference, especially if you’re in a remote area.
I keep a compact water filter in my emergency kit. It’s lightweight and easy to use, and it ensures I can drink safely in dire situations. Plus, it can work with river or lake water, expanding your options dramatically.
Research what type of filters work for your specific needs and make sure you know how to use them correctly. Remember, this extra layer of preparedness could be what stands between you and dehydration!
Communication Essentials
Fully Charged Cell Phone
These days, we depend heavily on our phones for communication and navigation. One tip I can share from personal experience is to keep your cell phone fully charged at all times, especially before a long journey.
I also ensure to have a charging cable and a portable charger in my emergency stash. It’s an absolute must if you’re stuck somewhere. You don’t want to miss out on calling for help just because your phone is dead!
Make it a habit to check your phone’s battery percentage before hitting the road. This will make a big difference in your preparedness, and it’s a small step that can save you a whole lot of stress and hassle down the line.
Portable Talkie-Walkies
Sometimes cell signals can be spotty or completely nonexistent when you need them most. That’s why I keep a set of portable talkie-walkies in my vehicle. These handy little devices can help you communicate with family or emergency personnel when your phone fails you.
Make sure your walkie-talkies are charged, and familiarize yourself with how to use them. Check the range and set channels so everyone knows how to reach you. Having this additional means of communication can be priceless in urgent situations.
Plus, talkie-walkies can be great for family outings or camping trips. So even if you never need them in emergencies, they’re a tool that adds fun and safety to your adventures!
Emergency Contact List
Surprisingly, one of the simplest things can also be one of the most helpful: having an emergency contact list. I usually keep a printed version tucked away with my insurance papers, and I make sure to update it regularly.

This list generally includes family members, trusted friends, and insurance info – just in case you need to reach out for help. Having these contacts easily accessible can speed up response time during emergencies.
So take a few minutes to compile your list. Not only does it serve practical purposes, but it can also ease your mind knowing you have a plan in place if something happens. An ounce of prevention is worth a pound of cure, right?
Navigation Tools
GPS Device
Although smartphones are handy, having a dedicated GPS device in your emergency vehicle can save you a lot of headaches. I’ve relied on mine countless times, especially when my phone’s battery ran low or I found myself in an area with spotty service.
Make sure to keep your GPS device updated with the latest maps and software, as this ensures you have accurate directions when you need them most. There’s nothing worse than relying on outdated information while you’re lost!
If you don’t own a GPS device, consider downloading offline maps on your phone. This way, you’re covered in areas without Wi-Fi. Just make sure you’re prepared because getting lost can really elevate your heart rate when time is of the essence!
Emergency US Map
While we live in a digital age, let’s not forget about paper maps! A physical map of your region is incredibly handy, especially if technology fails. You can fold it up and fit it right into your glove box.
I always keep a current map on hand because not every road will be easily accessible via GPS, especially in less populated areas. This little addition can help you reroute when roads are blocked or under construction.
Before your next road trip, take some time to familiarize yourself with the main roads and alternatives in your area. Trust me; having a paper map can save the day when technology lets you down!
Detailed Local Road Guides
If you’re venturing into unfamiliar areas frequently, consider keeping a regional road guide with detailed descriptions of back roads and shortcuts. In the age of GPS, it’s easy to forget the good old-fashioned road guides that contain real treasure!
This guide can help you identify alternative routes that might not show up on your GPS. It also provides insights into landmarks, gas stations, and potentially safe areas to stop. Plus, it’s nice to have a backup plan!
Spend some time browsing through sections covering your go-to travel destinations. You’ll be amazed at the hidden gems you can discover. Having this knowledge not only enhances your travel experience but can also be a lifesaver in emergencies.
First Aid and Health Items
First Aid Kit
One of the most vital items I keep in my emergency vehicle is a well-stocked first-aid kit. It might seem basic, but it’s there for a reason! I’ve used it more than I’d like to admit for minor scrapes or cuts.
I recommend checking the contents regularly to ensure everything is stocked and not expired. Be familiar with how to apply a bandage or a pressure wrap; knowing how to use these items can make a significant difference in an emergency.
If you have specific medical needs like allergy medications or a prescription for emergency use, be sure to include them as well. Customizing your first aid kit goes a long way in personal preparedness!
Personal Medications
Another must-have in my vehicle is personal medications. I always keep a stash of over-the-counter meds for headaches, allergies, and even a few for digestive issues. You never know when you’ll need a little relief!
Make sure these medications are properly labeled and organized. A little pouch can keep everything neat and accessible. Again, don’t forget to review your supplies every few months to avoid expired medicine and stock up on the essentials.
Prioritize keeping an inventory of what you have and what you need. After all, life can throw curveballs that come out of nowhere, and being prepared can save your day.
Emergency Blanket
An emergency blanket is another surprise hero in my vehicle. These lightweight thermal blankets are great for keeping warm and can even double as a water-resistant tarp if needed. I never leave home without one!
In colder climates or during the chilly nighttime in remote areas, these blankets can be lifesavers. They help to trap body heat, which can make a huge difference if stranded in cold weather.
Adding a few extra emergency items, like hand warmers, can enhance your kit. Keeping cozy when things go south can truly boost morale, and you’ll be glad you had them on hand!
FAQs
1. What are the basic items I should include in my emergency vehicle kit?
Your emergency vehicle kit should ideally include an emergency kit (first-aid supplies, flares, and a multi-tool), roadside assistance tools (jumper cables, spare tire), food and water supplies, a GPS device, and a first-aid kit.
2. How often should I check and update my emergency supplies?
It’s a good habit to check your supplies every few months. Ensure that food items are fresh, medications aren’t expired, and that your first-aid supplies are fully stocked.
3. Can I rely solely on my smartphone for navigation in emergencies?
While smartphones are useful, they can fail due to low battery or poor signal. It’s also wise to keep a paper map and other navigation tools on hand to ensure you’re fully prepared.
4. What should I do if I run out of bottled water?
If you run out of bottled water, having a portable water filtration system can allow you to purify other water sources. Always prioritize knowing how to set it up properly for safe drinking.
5. Is it necessary to keep food and snacks in my emergency kit?
Yes! Keeping non-perishable snacks can help maintain your energy and morale in emergencies. Make sure they’re easy to store and that you refresh them regularly for freshness.

by Micah Caldwell | Aug 3, 2025 | Preparedness
Understanding Resilience
What is Resilience?
Resilience is that magical quality that allows us to bounce back from tough times. Think of it like a rubber band that stretches but doesn’t break under pressure. From personal experiences, I’ve found that resilience isn’t just about surviving challenges; it’s about growing through them.
When I faced setbacks in my life, it was my resilience that pulled me through. It’s like having an internal compass that helps you navigate through the stormy seas. This strength often comes from being prepared, mentally and physically, for whatever life throws at us.
In simple terms, resilience is a combination of emotional strength, adaptability, and mental fortitude. It’s important to remember that while we might not have control over what happens to us, we definitely control how we react to it.
Why is Resilience Important?
Having resilience can make a huge difference in how we deal with stress and adversity. When I think back to tough times, it wasn’t merely surviving that mattered; it was thriving afterward that really counted. Resilience empowers us to face problems head-on and transform them into opportunities for growth.
Moreover, resilient individuals often find it easier to maintain healthy relationships, manage their emotions, and engage in positive coping strategies. This can lead to not only a happier life but a more fulfilling one too. In a nutshell, resilience lays the groundwork for a vibrant life.
Building resilience also gives you the confidence to take risks, knowing that even if you don’t succeed, you have the wherewithal to pick yourself up and try again. It’s like having a safety net — it catches you when you fall.
How Can We Build Resilience?
The great news is that resilience isn’t a trait that’s just reserved for a select few; it’s something we can all cultivate. In my journey, I’ve discovered a few strategies that have really helped me strengthen my resilience muscles. These involve mindfulness, seeking support, and focusing on solutions rather than problems.
Being aware of your thoughts and feelings is crucial. Whenever I feel overwhelmed, I pause to reflect and practice mindfulness techniques. This allows me to stay grounded and aware of how I can proceed. It’s a powerful tool in building emotional resilience.
Moreover, having a support system is critical. I’ve relied on friends and family during tough times, and their encouragement has often made a world of difference in my resilience journey. So, never underestimate the power of community in tough situations!
Positive Mindset
The Power of Positivity
Sure, life can throw curveballs, but maintaining a positive outlook can seriously shift your entire experience. I’ve often found that a positive attitude acts like a lighthouse, guiding me through dark times. It builds the foundation for resilience.
Some days, positivity comes easily, while other days, it feels like an uphill battle. A trick I’ve picked up is to practice gratitude. No matter how small, finding something to be grateful for shifts my focus. It’s a simple yet effective strategy to keep negativity at bay.
Cultivating positivity also involves surrounding yourself with uplifting folks who reinforce that optimistic energy. When I hang with people who have a positive outlook, it inspires me to adopt that vibe too. We definitely thrive in supportive environments!
Self-Talk Matters
Your inner dialogue can either be a source of strength or a huge roadblock. I’ve learned that self-talk matters a lot. When facing challenges, I’ve made a habit of encouraging myself rather than criticising. Whenever I catch negative thoughts, I try to replace them with something uplifting.
For example, instead of saying “I can’t do this,” I tell myself “I will give it my best shot.” This simple shift makes a huge difference and helps me develop that resilience mindset. It’s amazing how changing your words can change your outlook!
Also, I often remind myself that it’s okay to feel overwhelmed sometimes, but choosing to uplift my spirit with positive affirmations helps convert that energy into resilience and strength. It’s all about creating that healthy mental environment!
Visualization Techniques
One of the coolest tools I’ve incorporated is visualization. It involves picturing myself overcoming challenges before they even happen. It’s like a sneak peek into a positive future. For me, visualising my goals and what success looks like sets the tone for my actions.
Whenever I face a big challenge, I close my eyes and imagine the best possible outcome. This technique has helped build my confidence and maintain a positive mindset in the face of adversity. It creates this mental blueprint that guides my actions!
The more I practice visualization, the more resilient I become, as I believe in my ability to achieve my aspirations despite any hurdles. It’s a great way for me to motivate myself and keep pushing forward.
Proactive Planning
Anticipate Challenges
Being prepared doesn’t mean you need to predict every little problem that might come up. From my experience, it’s about being aware that challenges will arise and thinking ahead on how to tackle them. This has made a big impact on my resilience.
When I take time to think through possible challenges, I feel more in control, and that sense of control boosts my resilience. For instance, when planning a big project, I identify potential obstacles and brainstorm ways I can navigate them.
This not only equips me with a plan but also reduces any anxiety about the situation. I feel more ready to face challenges, and my confidence grows each time I proactively plan for potential bumps in the road.
Setting Realistic Goals
Goals can be powerful motivators, but they need to be realistic and attainable. I’ve learned that setting achievable goals is key to boosting my resilience. When I set smaller, manageable goals, it feels less daunting, and I’m more likely to achieve them.
Celebrating those small victories is just as important! Each achievement fosters my belief in myself and strengthens my resilience muscle. I create a chain of success that builds a solid foundation for facing larger challenges ahead.
Additionally, I check in with myself and adjust my goals if needed. Sometimes life throws us curveballs, and it’s essential to remain flexible. This adaptability only enhances my resilience over time!
Preparation Strategies
Having a plan B (or even C!) is something I’ve come to really value. I believe that preparation means creating contingencies and having tools to manage unexpected situations. Just like in my personal life, when I’ve had backups in place, I felt more secure and less stressed.
Moreover, I always equip myself with information. Knowledge is power — the more I know about potential challenges, the easier it is to prepare for them. For instance, learning new skills has helped me become more adaptable in professional situations. That adaptability fuels my resilience.
In essence, preparation is not about expecting the worst but rather ensuring I have the tools and mindset to tackle whatever comes my way. It has been a game changer for me!
Building a Solid Support Network
The Importance of Relationships
Having a network of supportive friends, family, or mentors has been one of the most uplifting aspects of my resilience journey. When I think back to tough times, it was the people in my corner who helped me rise above challenges. It’s incredible how relationships can bolster our resilience.
In my experience, sharing challenges with trusted friends allows me to lighten the load. It’s like having this little support system that cheers me on, offers different perspectives, and helps me find solutions. What a difference it makes!
So, investing time in building and maintaining those connections is essential. Whether it’s a chat over coffee or a group message with friends, those interactions nourish our resilience and keep us grounded.
Active Listening
Not only is it important to have a strong support network, but I’ve also realized that being an active listener is just as crucial. When I lend an ear to others, it fosters strong bonds of trust and creates an atmosphere where we can share openly and honestly.
Listening helps strengthen those relationships, as it shows I value their thoughts and feelings. In return, I find that other people are willing to support me, creating a reciprocal support system that enhances our resilience collectively.
Sometimes, just being there for someone can be more powerful than solving their problems. It’s like knowing they’re not alone; that in itself builds resilience.
Sharing Resources and Experiences
One thing that has helped me tremendously is sharing resources, advice, and experiences with my network. Whether it’s sharing a book that inspired me or a strategy that worked for tackling stress, I find that collaborating and exchanging ideas fosters resilience.
When I open up about my experiences — the highs and lows — it not only reinforces my own learning but can also inspire others. This kind of sharing creates a ripple effect that enhances resilience within the entire community.
So, don’t underestimate the power of sharing! In my opinion, we all have unique insights that can make a difference, contributing to each other’s growth and strength.
Taking Care of Yourself
Physical Well-being
I can’t stress enough the impact physical health has on resilience. If I don’t take care of my body, I find that my mental strength falters too. Regular exercise, balanced nutrition, and sufficient sleep are like the trifecta of well-being for me.
Getting physical is a stress buster! When I engage in activities like jogging or yoga, it releases all those feel-good endorphins that brighten my mood. Plus, it’s an excellent way to channel negativity into something positive.
Eating well doesn’t just fuel my body; it fuels my mind. When I focus on nourishing my body with healthy foods, I feel better equipped to handle challenges. And let’s not forget the importance of good sleep. A rested mind is a resilient mind!
Mental Health Practices
Alongside physical health, prioritizing my mental health has been crucial. I’ve learned to adopt various mental health practices, like meditation and mindfulness, which help center me during chaotic times. They give my mind a break, allowing clarity to surface.
Journaling has also provided a fantastic outlet for my thoughts and feelings. When I write, I often uncover patterns in my emotions that I hadn’t noticed before. It’s like having a conversation with myself that leads to greater self-awareness.
Taking time for myself isn’t selfish; it’s necessary. I’ve discovered that self-care shouldn’t feel like a chore — instead, it should be a refreshing way to recharge and rejuvenate my spirit for the challenges ahead!
Healthy Boundaries
Establishing healthy boundaries has been a game changer in my resilience journey. It’s so easy to overcommit and spread myself too thin. For a long time, I struggled with saying “no,” but I’ve learned it’s okay to prioritize my well-being.
By setting clear boundaries, I find I can focus on what truly matters and devote my energy to those areas without getting exhausted. This, in turn, fortifies my ability to face challenges as they come.
Ultimately, healthy boundaries protect my mental space, making me more resilient in handling life’s curveballs. It’s about respecting myself and my time, which enhances my capacity to bounce back from setbacks.
Conclusion
Developing resilience through positive preparedness is a personal journey for everyone. By understanding resilience, fostering a positive mindset, proactively planning, building supportive relationships, and taking care of ourselves, we not only prepare for challenges — we thrive through them!
So, let’s embrace this journey together, nurturing our resilience and supporting one another as we move forward confidently. Remember, it’s about progress, not perfection!
FAQ
What is resilience?
Resilience is the ability to bounce back from challenges and adversity, using those experiences to grow and strengthen oneself.
How can I maintain a positive mindset?
Practicing gratitude, engaging in positive self-talk, and surrounding yourself with uplifting individuals can significantly enhance your positive mindset.
Why is proactive planning important for resilience?
Proactive planning helps you anticipate challenges and develop strategies to handle them, ultimately reducing anxiety and enhancing your ability to cope with adversity.
How can I build a supportive network?
Building a supportive network involves nurturing meaningful relationships, practicing active listening, and being open to sharing experiences and resources with others.
What role does self-care play in resilience?
Self-care is crucial for resilience as it helps maintain both physical and mental well-being, allowing you to face challenges with a clear and energized mind.

by Micah Caldwell | Aug 3, 2025 | Preparedness
Assessing Your Surroundings
Understanding the Environment
So, you want to build a shelter, huh? The first thing I’ve learned is that you really need to get a handle on your environment. Assessing your surroundings means tuning into what’s around you. Look for natural resources like trees, bushes, and even rocks. Each element can play a huge role in your build. Plus, they can help you decide how much shelter you actually need!
For example, if you’re in a forest, you’re likely to find a bounty of fallen branches, leaves, and even some old tarps. But if you’re in an urban area, don’t overlook those discarded pallets. They might not look like much, but they can be a goldmine for creating walls. Make sure to really look around—every little thing can be useful!
And don’t forget about the path of the sun and water sources. Positioning your shelter is key for warmth and visibility, so consider where the sun rises and sets. Plus, being near a water source is a huge advantage in survival situations. Just think of it as checking out all your options before diving in!
Gathering Scavenged Materials
What to Look For
Now that you’ve assessed your surroundings, it’s time to gather some materials. This part can be a bit like a treasure hunt! I’m always on the lookout for items that I can upcycle or repurpose. Think of things like old sheets, tarps, cardboard, and even furniture. You’d be surprised what people throw away!
When you’re out there scavenging, keep your eyes peeled for anything sturdy. Old pallets can be great for framework, while large branches can serve as the backbone of your shelter. And if you find any nails or screws? Score! You can use those to hold everything together nicely.
Remember, not all materials need to be perfect. Sometimes, a slightly damaged piece can fit perfectly into your design. It’s all about creativity and thinking outside the box. The more materials you gather, the more options you’ll have when it comes time to build your shelter.
Designing Your Shelter
Creating a Solid Plan
Before you start hammering things together, take a hot second to design your shelter. I can’t tell you how many times I’ve jumped into a project without a plan, only to regret it later. Sketching out your idea can help keep you focused and organized.
Consider the size of your shelter. How many people will be using it? If you’re camping with buddies, you’ll want something more spacious. For a solo venture? A cozy little corner is just fine. Think about how you want it to look and feel. Do you want an open-air design, or do you want to seal off your space from the outside world?
Also, don’t let the aesthetics go by the wayside. A little thought into the layout can make your shelter more functional and comfortable. Keep in mind materials and insulation as you design. This all contributes to how well your shelter will perform in different weather conditions, and trust me, comfort is key!
Constructing Your Shelter
Getting to Work
This is where the magic happens! When I’ve gathered my materials and sketched out a design, it’s time for construction. Start with a solid foundation. If you’re working with pallets, lay them down flat to create the base. You want something stable that won’t budge during storms—or the occasional surprise leg-kick!
Create the frame of your shelter by leaning branches against something sturdy, like a fallen tree. If you’re in an urban area, secure pallets vertically to form walls. Use whatever you’ve got: rope, bungee cords, or even duct tape will do the trick. Remember, it’s about improvisation and using what you have.
Finally, it’s time to make your shelter cozy! Layer the roof with leaves and branches to keep you dry, and cover the walls with whatever fabric or tarp you found. This will insulate your space and help to hold in warmth. It’s all coming together, and trust me, there’s nothing quite like the feeling of building your own little haven!
Maintaining Your Shelter
Regular Check-ups
Once your shelter is built, don’t forget about maintenance! This means regularly checking for any wear and tear. I’ve had shelters that looked great upfront, but after some wind and rain, they needed some TLC. It’s all part of the process!
Make sure to reinforce areas that may have weakened over time. If you notice leaks or sagging spots, address them right away. It’s way easier to fix small issues than to wait until they become big problems. I often find myself doing little upgrades to create a more comfortable space, too.
Also, remember to clean up debris around your shelter. Keeping the space tidy not only makes it more pleasant but also minimizes the chances of pests. After all, you don’t want to share your cozy nook with any unwanted guests, right?
Frequently Asked Questions
What types of materials are best for building a shelter?
Look for sturdy items like pallets, branches, tarps, and old furniture. Even fabric scraps and cardboard can be useful!
How do I know where to place my shelter?
Consider sunshine, water sources, and protection from wind when choosing a spot. A well-chosen location makes all the difference!
How long can I expect my scavenged shelter to last?
The lifespan really depends on your materials and maintenance. Regular checks can help it last longer, even through some rough weather!
Can I build a shelter alone?
Absolutely! While having a buddy helps, many simple designs can be created solo with good planning and the right materials.
What if I can’t find enough materials?
If you’re struggling, think creatively! Mixing and matching smaller pieces can still produce a sturdy shelter. Also, don’t be afraid to expand your search area for more options.
by Micah Caldwell | Aug 3, 2025 | Preparedness
Living in a world that’s always connected, we often forget just how dependent we are on electricity.
Whether it’s smartphones, tablets, or portable speakers, sometimes we find ourselves in situations where there’s simply no plug to be found.
Having faced such moments myself, I learned a thing or two about keeping my devices charged even when the power is out.
Let’s dive into some creative ways to recharge your devices without relying on the grid!
Utilizing Solar Power
Understanding Solar Chargers
One of the best ways I’ve found to charge my devices without electricity is through solar chargers.
These nifty gadgets convert sunlight into energy, allowing you to charge your devices on-the-go.
Purchasing a solar charger might feel like splurging, but I promise it’s a game changer, especially for outdoor enthusiasts like myself.
When choosing a solar charger, look for one that matches your device’s needs.
Some chargers are designed specifically for phones, while others can handle laptops.
The key is to ensure the output voltage is compatible to avoid any tech hiccups.
It’s also good practice to check reviews and compare brands.
Some solar chargers come with additional features like built-in batteries to store energy for when the sun isn’t shining.
Plus, they’re often portable, making them an easy travel buddy.
Positioning for Optimal Sunlight
Once you’ve got your solar charger, positioning it correctly is crucial.
Trust me, I’ve made the rookie mistake of leaving it in the shade, thinking it would still work.
The best place is to lay it directly under sunlight, preferably angled toward the sun for maximum exposure.
It’s also best to avoid using it on cloudy days, as the efficiency can significantly drop.
If you live in a sunny area, try to get a feel for which spots in your yard or on your balcony generate the most sunlight throughout the day.
While you’re waiting for it to charge, you can engage in other activities, be it hiking or simply enjoying nature.
The beauty of solar charging is that it’s great for both your devices and the planet!
Using Solar Panels for Larger Devices
For those bigger gadgets, I’ve ventured into using portable solar panels.
These are a step up from handheld solar chargers, and can power larger devices that require more juice, like laptops and drones.
Setting up these panels can take a bit more effort, but it definitely pays off in terms of versatility.
Usually, they come with a variety of connectors to accommodate multiple device types, which is super handy.
Just make sure to understand how to connect and configure the setup safely.
It’s a bit of a learning curve, but once you’ve got it down, you can literally charge amid nature—and believe me, it feels pretty rewarding.
Hand-Crank Generators
Choosing the Right Generator
If the sun isn’t cooperating, hand-crank generators can be a lifeline.
These generators allow you to generate power manually through physical effort, and while it might be a workout, it’s a reliable backup.
When I first got my hand-crank generator, it was more of an experiment than anything else.
I had to learn which devices it could effectively charge, as not all can handle the output from these generators.
Always read the specs and follow the guidelines.
Getting an incompatible device can do more harm than good, and I learned that the hard way!
How to Use a Hand-Crank Generator
The operation is pretty straightforward.
Just connect your device to the generator using the appropriate cable and begin cranking.
It sounds simple, but you’ll quickly realize that it requires some stamina!
I recommend checking the output voltage frequently while cranking.
It’s also a good idea to have a clear plan on how long you need to crank to get a desired amount of charge.
Each minute usually gives you enough energy for a few minutes of device use.
Finding a rhythm helps too.
I often listen to music or podcasts while cranking—it definitely makes the workout a bit more enjoyable!
Benefits of Hand-Crank Generators
The best part about hand-crank generators is their independence from weather conditions.
No sun, no problem!
This method can also be more sustainable over the long run, which is something I’m always on the lookout for.
Plus, it’s a great conversation starter.
Nothing sparks interest quite like telling someone you powered your phone by cranking a generator!
They can also serve as a fun family activity.
Toss in a little competition, and see who can produce the most charge in a minute.
It’s a workout and a bonding experience rolled into one!
Using Rechargeable Battery Packs
Choosing Quality Battery Packs
One of my go-to methods for emergencies is having a good quality rechargeable battery pack on hand.
These battery packs can hold a charge for months and are ready to go whenever you need them.
When selecting a battery pack, make sure it has adequate capacity for your devices.
Some batteries may not be up to snuff for larger devices, so check their specifications before buying one.
I’ve found that brands vary widely in terms of reliability.
Reading user reviews is essential, and sometimes it’s worth spending a little extra for a trusted brand that you know will get the job done.
Proper Charging Techniques
Once you’ve got your battery pack, it’s important to understand how to charge it properly.
Overcharging can be detrimental, so always follow the manufacturer’s guidelines.
Many packs come with indicators, making it easier to know when to unplug.
Additionally, store them properly when not in use.
Keeping them at room temperature and avoiding extreme heat or cold extends their lifespan significantly.
Also, make a habit of recharging them periodically.
I learned early on that leaving them untouched for too long can lead to diminished capacity, which is no bueno when you really need them!
Using Battery Packs Efficiently
To maximize the utility of your battery pack, be strategic about what devices you charge.
I often opt to charge essentials first, like my phone or GPS for hiking, then move onto non-essentials once I know I have enough power to spare.
Many packs come with multiple outputs, allowing you to charge several devices at once.
Just be cautious not to overload them, as it may slow down charging speed or diminish the lifespan of your battery pack.
Lastly, plan to use your battery pack when you really need it.
It can be tempting to charge a device just for fun, but being selective about usage will ensure you’re never caught off-guard when you need power most.
Finding Alternative Energy Sources
Exploring Alternative Energy Options
In case you’ve exhausted the mentioned methods, there are other alternative energy sources to consider.
Hand-crank generators and solar chargers are just the tip of the iceberg!
For instance, certain wind-powered systems are available that can generate power using breezes.
I’m planning to explore these myself soon, especially for my camping trips.
I imagine it’d be great to harness the wind’s energy to keep my devices alive.
Additionally, bioenergy or even mechanical energy can be options if you’re willing to do a bit of research.
These unconventional sources of energy are fascinating and can often be very effective in the right conditions.
Creating Your Own Energy Solutions
Have you ever thought about building your own energy source?
It’s like a school science project but way more useful!
From basic DIY solar panels using old coffee cans to wind turbines made from PVC pipes, the possibilities are endless.
There are countless resources and communities online ready to share previous projects and tips.
The journey of creating your own devices can be just as rewarding as using them once they’re fully operational!
I love the idea of combining creativity with energy solutions.
Not only do you save money, but you also get that sweet satisfaction of knowing you made it yourself.
Networking for Access to Shared Resources
Lastly, don’t forget about the power of community!
Networking can lead to partnerships and group investments in power solutions.
I’ve met folks who collaborate on buying large solar panels or wind turbines together to share the energy produced.
Local community centers, schools, or even online forums can be fantastic places to discover like-minded individuals who are also keen on sustainable practices.
More hands make light work, right?
So, build those connections!
You never know when you’ll need to share or barter for energy, especially during rough times.
Frequently Asked Questions
1. Can I really charge devices without electricity?
Absolutely! There are multiple methods to charge your devices, including solar power, hand-crank generators, battery packs, and alternative energy sources.
2. How long does it take to charge a device using solar power?
The time to charge depends on the solar charger’s power output and the sunlight conditions. On a bright day, smaller devices can take a few hours, while larger ones might need more time.
3. Are hand-crank generators practical for everyday use?
While they aren’t ideal for frequent use, they can be great backup options for emergencies or outdoor adventures.
4. Can I create my own renewable energy system?
Definitely! There are many DIY resources available to help you create your own solar panels or wind turbines, often using materials you already have.
5. Do I need special cables to charge my devices with battery packs?
Most battery packs come with various connectors or USB outputs, but it’s always a good idea to check compatibility with your devices to avoid any issues.
by Micah Caldwell | Aug 3, 2025 | Preparedness
Hey there! If you’re reading this, it means you’re either planning a trip into the great outdoors or just curious about how to survive if things go south. Trust me, I’ve been in quite a few sticky situations while out in nature, and I’m here to share what I’ve learned. Let’s dive into the major areas of wilderness survival and get you prepared for whatever Mother Nature throws your way.
Finding and Purifying Water
Locating Water Sources
First things first — you gotta know how to find water. In my experience, looking for streams or rivers is a great starting point. Water flows downhill, so if you’re in the mountains, follow the slope. You’d be surprised how often you’ll come across a small trickle. Also, keep an eye out for animal tracks; they usually know where the water is located.
Another trick I learned was to look for wet ground or plant life. Green plants are usually a sign that water is nearby. Even digging a bit in that muddy patch can yield results. Just make sure not to go overboard digging if you’re in a dry area — you don’t want to waste your energy!
Lastly, look for dew in the morning. It might not seem like much, but collecting dew from leaves with a cloth can give you a refreshing sip in an otherwise dry camp. Every drop counts, right?
Methods of Purifying Water
Once you’ve found some water, it’s time to make sure it’s safe to drink. I can’t stress enough how important this step is. Boiling water is the most basic and effective method. Just get it rolling for a few minutes, and it should kill any nasty microorganisms lurking in there.
If you can’t boil it, try filtering through a cloth or using natural materials like sand and charcoal to create a makeshift filter. It’s not perfect, but it can help clear out some impurities and make it more palatable.
For those with a bit more gear, water purification tablets can be a lifesaver. I always keep a few in my pack. Just remember to follow the instructions on the package, and you’ll be good to go!
Staying Hydrated
Hydration is key, folks! I learned this the hard way — dehydration is no joke in the wild. Always drink small amounts frequently instead of guzzling a ton all at once because your body absorbs it better that way.
If you’re sweating a lot, don’t forget to replenish electrolytes. You can carry sports drinks or eat some salty snacks to keep your sodium levels in check. Or, you can go the natural route — some wild plants can help too.
Keep an eye out for signs of dehydration, such as headaches or dizziness. Listen to your body; it’s amazing at sending signals when things aren’t right.
Building a Shelter
Choosing the Right Location
Finding a good spot for your shelter is super important. I once made the mistake of setting up camp too close to a stream, and guess what happened? I woke up soaked! Look for higher ground to avoid flooding — always a solid choice.
Aim for an area that provides some natural windbreak, whether it’s a cluster of trees or rocks. They not only block the wind but also offer some insulation. I like to set up my shelter in a way that it faces away from the direction of the prevailing wind as well.
Lastly, avoid areas where there’s an obvious risk of falling branches, known as widow makers. You don’t want to wake up feeling like you’re in a horror movie because a tree decided to drop a branch on you while you were sleeping!
Types of Shelters
When it comes to the type of shelter, your options really depend on your environment. In the forest, I often go for a simple lean-to made from branches and leaves. It’s quick to set up and provides great coverage from rain.
In a colder climate, I’ve built a snow cave, which is surprisingly warm. Digging into the snow may take some effort, but once you’re in there, the insulation it provides is fantastic. Just don’t forget to create an air hole; ventilation is key!
If you’re lucky enough to have a tarp or emergency blanket, using that over some branches can make for a fast and effective shelter too. Creativity goes a long way in survival situations!
Insulating Your Shelter
Insulation is all about keeping the warmth in and the cold out. When I’ve built shelters, I always gather ample foliage to line the walls and the floor. It’s surprising how much warmth it can trap.
If you’re in a pinch, your own body heat can be used for insulation, so huddle up if you’ve got friends around! I remember one cold night where we all snuggled together for warmth – it made for good bonding too!
Lastly, consider the orientation of your shelter. Keeping it small and cozy helps retain heat, so don’t go building a mansion in the woods. Go for a snug fit; it’s much more effective than sprawling out in the cold.
Finding Food
Identifying Edible Plants
Alright, let’s talk food. I’ll be honest — I was overly cautious at first about foraging. But once I got familiar with a few plants, I realized it’s a good skill to have! Start with plants you know; dandelions and clover are great beginner options.
You can also check your surroundings for nuts and berries. Just make sure you have a good guide or app to identify what’s safe; some wild berries can be tricky. I always remember the old saying: “When in doubt, don’t eat it!”
Plus, look for natural food sources like insects — yes, crickets are a thing! They are packed with protein and are very crunchy. Just don’t think too hard about it!
Setting Traps
If you’re more into hunting, traps can be a useful tool. I’ve set a few snares in my time, and it’s fulfilling to catch your own meal. But, I’d advise practicing how to set them before you find yourself in a situation where you need to.
Try using natural materials like twigs or vines to create your traps; they blend well into the environment. There are tons of resources online showing different techniques to employ — a bit of research can go a long way.
Just be mindful of local regulations, and remember to check your traps regularly if you set them. You want to avoid cruelty and wasting food!
Cooking Options
So once you’ve snagged yourself some food, you’ll want to cook it. Fire is definitely your best friend here. If you don’t have a pot, you can wrap food in large leaves and cook them over hot stones. My first attempt at this ended up with smokey flavors that were surprisingly delicious!
If you have any cooking gear, don’t hesitate to use it. A lightweight stove or a simple portable grill can make a world of difference when you need to cook something up quickly.
Always make sure you’re cooking your food thoroughly to prevent any nasty stomach aches. No one wants that when they’re trying to enjoy a wilderness adventure!
Starting a Fire
Gathering Materials
Fire might just be the most crucial skill in the wild, so let’s break down how to get it going. First, gather your materials. You’ll need tinder (think dry grass, leaves, or bark), kindling (small sticks and branches), and heavier logs for fuel.
The way I see it, the earlier you gather your materials the better. It can be a challenge to find dry kindling if it’s been rainy, so I always keep a few fire-starting materials in my pack just in case. It’s amazing how a little planning can save the day!
And remember, don’t forget to keep some of that burning material close to your site, so when it’s time to settle down, you can ignite a fire quickly, even if your hands are a bit cold.
Ignition Techniques
Now, on to actually starting the fire. There are multiple methods, but the classic matches or lighter works best for me. I always carry waterproof matches in my kit just for those damp days when I know fire is crucial.
If you want to go old school, try using flint and steel. It’s rewarding when you see that spark, but it does take practice. I remember my first fire; it took me ages and a lot of frustration before I finally got it. But once I did, I felt like a true wilderness pro!
Finally, you can even use a magnifying glass if you have one. Just focus the sunlight on your tinder, and it could catch. It’s a neat trick to have up your sleeve for sunny days!
Maintaining a Fire
Once you’ve got that fire blazing, maintaining it is key. Keep an eye on the size of your flames; you want them to burn steadily, not wild. Adding more fuel gradually helps ensure that the fire lasts longer.
Always have a backup plan for wind and rain; there are ways to create a windbreak for your fire if the weather turns. Using rocks or sticks can help create a shield. Trust me, it can save the day during a surprise downpour!
Lastly, don’t forget fire safety! Make sure to fully extinguish your fire when you’re done. Douse it with water and stir it up so that it’s completely out before you leave. We want to leave the wilderness just as we found it!
Outdoor Navigation
Using a Compass and Map
Alright, let’s talk about navigation. I can’t stress enough how important it is to have a good map and compass on hand. Even in this digital age, a physical map can be invaluable. I personally love the feeling of unrolling a real map and plotting my course — it feels adventurous!
Learning how to use a compass can be a bit tricky, but once you’ve got it down, it’s game-changing. Always make sure that you orient your map in the direction of the north indicated on your compass. Practice before you need to rely on it, so you won’t waste time fumbling in an emergency.
And remember, don’t just rely on technology, as batteries die and signals can be lost. Old-school skills keep you grounded, literally.
Natural Navigation
I’ll never forget the first time I tried to navigate using natural signs — things like the position of the sun and stars. It’s incredible how much information nature gives us. For instance, the sun rises in the east and sets in the west, which can guide you during the day.
At night, I rely on the North Star — it’s the brightest star in the Little Dipper and can point you north. It’s a skill that takes a bit of practice, but once you get it down, it’s pretty fun to show it off to friends!
Lastly, pay attention to the moss growth on trees. It’s usually lusher on the north side in the Northern Hemisphere. Use everything around you to your advantage!
Landmarks and Signs
As I wander through the wilderness, I always keep an eye out for natural landmarks. They serve as great reference points. Remembering a rock formation or a unique tree can help orient you as you hike. It’s like leaving breadcrumbs on your way out!
Keep track of your direction and distance as you travel; I often jot things down in a small notebook because it helps me remember my path. It’s easy to get turned around when you’re deep in the woods.
And don’t forget to share your navigation skills with your buddies — it makes the adventure more fun and engaging. Plus, it’s always safer when everyone knows where they’re heading!
Frequently Asked Questions
- 1. What should I pack for a wilderness survival trip?
- You should pack essentials like a good knife, water purification tablets, a first-aid kit, fire-starting tools, and non-perishable food. Don’t forget a map and compass for navigation!
- 2. Is it safe to drink water from streams or lakes?
- No, it’s not safe to drink untreated water from natural sources. Always purify your water by boiling or using purification tablets before drinking.
- 3. How can I keep warm at night in the wilderness?
- Layering is key! Use extra clothing, build a cozy shelter, and ensure you’re insulated from the cold ground. A good fire can help too!
- 4. What should I do if I get lost in the woods?
- Stay calm, and don’t panic. Try retracing your steps to a known area. If that fails, find a safe place to shelter and signal for help. Use your map and compass to navigate if you have them.
- 5. How do I start a fire without matches?
- You can use flint and steel or even create a fire using a magnifying glass on a sunny day. Both methods take practice, so try them out beforehand.
by Micah Caldwell | Aug 3, 2025 | Preparedness
Understanding the Importance of Checklists
Why Checklists Matter
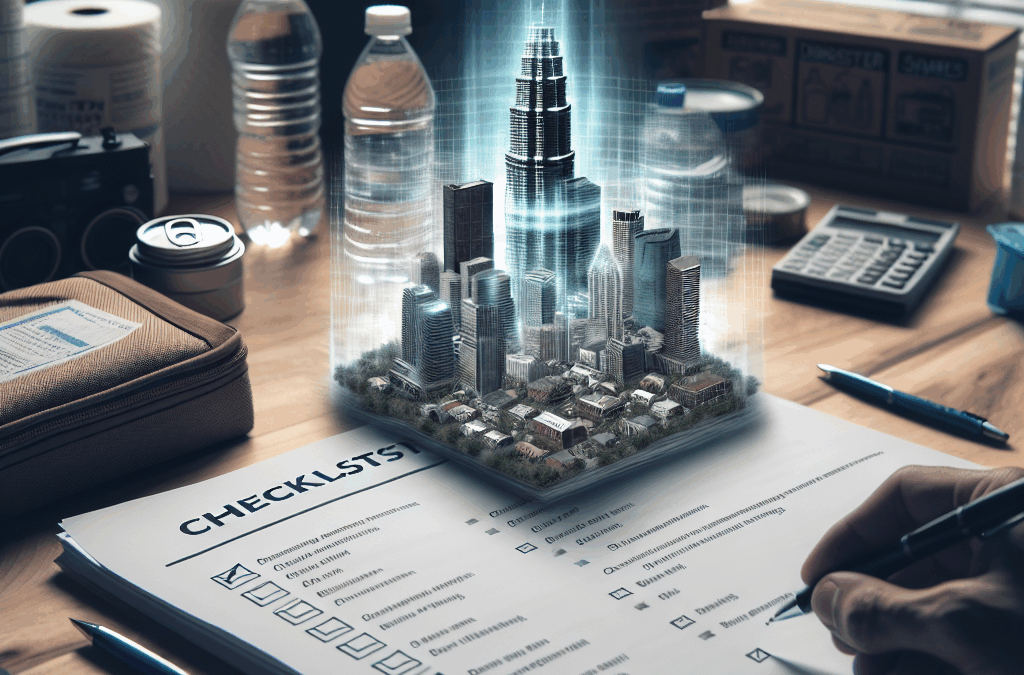
Let me start by saying, checklists are not just mundane tools; they are lifesavers. Through my own experiences, I’ve come to realize that the human brain can only hold onto so much information at once. When a disaster strikes, it’s easy for our thoughts to spiral. A well-constructed checklist serves as a grounding tool that brings clarity in moments of chaos.
Using checklists in disaster planning allows me to streamline my response. For instance, when preparing for a natural disaster, I can tick off items like ‘water supply’ or ‘first aid kit’ as I gather them. This not only keeps me organized but also gives me peace of mind knowing that I’m less likely to forget something critical in a high-stress situation.
Moreover, checklists help different members of a team stay aligned. If everyone on an emergency response team knows their checklist, it enhances coordination. I’m all about teamwork, and having a clear plan outlined in a checklist means we can respond efficiently, reducing panic and confusion.
Creating Your Checklist: Key Components
Essential Items to Include
When I sit down to create a checklist for disaster preparation, I consider what items are absolutely critical. This might include food supplies, water, medications, and important documents. Each of these items might seem obvious during calm times but can easily slip my mind when the stress kicks in. That’s why I always make sure they’re on my checklist.
Next, I always include communication tools on my checklist. Whether it’s a charged phone or a designated meeting place, having a reliable way to connect with loved ones or team members during a crisis is vital. It’s easy to overlook, but trust me, it can make all the difference.
Lastly, I think about non-tangible items like mindset and preparedness. I often write reminders on my checklist to stay calm and think clearly. This is just as important as gathering physical items. In a panic, the storm of emotions can cloud judgment, so it helps to have that reminder visually in front of me.
Implementing Your Checklist Effectively
Practice Drills
Now, creating the checklist is only half the battle. The real power of checklists comes from actively using them. A technique that works wonderfully for me is conducting practice drills. This might sound like a daunting task, but practice makes perfect! It’s great to simulate different scenarios so I can get comfortable using my checklist in real-time.
During these drills, I can see firsthand which items I always forget and adjust my checklist accordingly. Repetition helps to solidify the information, and before I know it, I’m more confident and prepared. Every drill feels like a mini workout for my disaster planning skills!
Involving my family or team in these drills not only helps everyone feel more prepared but also fosters teamwork. Engaging with everyone on the checklist helps me identify strengths and weaknesses and gives us a chance to brainstorm on improvements collaboratively.
Reviewing and Revising Your Checklists
The Importance of Regular Updates
Just like everything else in life, checklists need a little TLC. Regularly reviewing and revising my checklist has been a game changer. After each drill or real-life situation, I take some time to reflect on what worked and what didn’t. This helps to keep the checklist relevant and useful over time.
New information always emerges about disaster response strategies. By keeping myself informed and updating my checklist accordingly, I can ensure that I’m using the most effective practices available. Nobody wants to be outdated in their disaster prep, and a few tweaks here and there can elevate my game tremendously.
Additionally, I make sure to revisit the checklist after major life changes. Moving to a new location, welcoming a new family member, or even changes in my work can all necessitate updates. Keeping my checklist current reflects my current reality and needs.
Spreading the Word About the Benefits of Checklists
Educating Others
One of the most fulfilling aspects of learning about checklists is sharing that knowledge with others. I often host workshops or casual meets with friends or community groups to discuss disaster preparedness and checklist strategies. Educating others not only spreads awareness but also reinforces my own learning. Talking about checklists is like music to my ears!
During these sessions, I show how personalized checklists can cater to different lifestyles and needs. It’s amazing to see people coming together around the shared goal of preparedness. We bounce ideas off each other while creating customized strategies based on our unique environments.
Lastly, I emphasize the emotional component. Advocacy around checklists shouldn’t just be about ticking boxes; it’s about empowering individuals to create a sense of safety in their lives. It’s such a rewarding experience to see others gain confidence in their disaster preparedness through tools I’ve shared.
Frequently Asked Questions
1. What should I include in my disaster preparedness checklist?
Your checklist should include essential items like water, food, medication, and important documents. Additionally, consider including communication tools and reminders about mental preparedness.
2. How often should I update my checklist?
It’s a good practice to review your checklist after every drill and any significant life changes. Keeping your checklist up-to-date is crucial for effective disaster planning.
3. What are some effective ways to conduct practice drills?
You can simulate different scenarios where your checklist comes into play. Have family members or team members act out roles, use timers, and create urgency to better replicate real-life situations.
4. How can I educate others about the importance of checklists?
Host workshops, join community associations, or simply have conversations with friends and family. Sharing your knowledge not only helps others but reinforces your own understanding as well.
5. Are checklists only useful for physical items?
No, checklists are useful for non-tangible items too! Reminders about mindset, communication, and preparedness strategies are just as important and should definitely be included.