When it comes to storing emergency fuel, the first thing you gotta do is understand the different types of fuel you’ll be dealing with. Gasoline, diesel, and propane all have their quirks. Trust me; I’ve had my fair share of experiences that taught me this. For instance, gasoline has a short shelf life and can go stale. That’s something you definitely want to keep in mind.
So, when you’re choosing your emergency fuel, ask yourself whether you want a fuel that’s easy to find but needs special care, or if you’d prefer something like propane, which can store for ages. What I’ve learned is that knowing the ins and outs of your fuel type can save you a heap of headaches down the road.
By the way, don’t forget about safety. Different fuels have different risks, and knowing what you’re dealing with will help you store it safely. Always read up about the specific needs of your chosen fuel to avoid any accidents.
Choose the Right Storage Containers
Container Materials and Designs
Choosing the right storage container can make a huge difference, my friend. I still remember the time I got a cheap plastic can for my gasoline. Big mistake! Gasoline can eat through most plastics and can expose you to some nasty chemical reactions. Instead, I recommend using metal containers specifically designed for fuel storage.
Look for containers that meet safety standards, like the Underwriters Laboratories (UL) or American Society for Testing and Materials (ASTM) certifications. They might cost a bit more upfront, but they could save you a ton of trouble later on. Trust me, you don’t want a leaky container!
Also, consider the size of your container. If you’re stockpiling for emergencies, think about how much fuel you realistically need. I’ve been guilty of going overboard and ended up with containers that were too big to handle. Stick to what you can manage, and ensure that it’s easy to access when you need it most.
Location, Location, Location
Where to Store Your Fuel
Finding the right spot to store your fuel is crucial. Over the years, I’ve experimented with various locations, and lemme tell you, not all of them worked out. Ideally, you want a cool, dry place away from direct sunlight. Too much heat can cause vapors and expand the fuel, leading to pressure build-up – yikes!
Another thing I’ve learned the hard way is to keep it away from living areas and anything flammable. A shed in the backyard or a well-ventilated garage is a great choice. Just make sure the area is secure, so no critters or curious kids can get into it.
Don’t forget about local regulations. Some places have rules about fuel storage that you’ll need to follow, so do your research. You don’t want to be toting around an emergency supply of fuel only to find out it’s against the law!
Regular Checks and Maintenance
Keep an Eye on Your Supply
Now that you’ve got your fuel stored, the last thing you wanna do is just forget about it. I’ve made that mistake, and it was a major hassle when I really needed it. Regularly check your fuel levels and the condition of your containers, and make sure everything is still sealed tight.
Also, keep track of expiration dates. If you’ve got gasoline, remember that it does have a shelf life. When I realized my supply was stale, it was a major bummer, and I had to dispose of it properly, which is a whole other headache!
Take the time every few months to inspect and rotate your supplies. This simple step can save you from unexpected surprises when you’re in a pinch. You’ll thank yourself later for keeping everything fresh and in tip-top shape!
Emergency Preparedness and Safety Protocols
Be Prepared for the Worst
While I’m all about being prepared, I also believe in doing it safely. Having a plan in place for what you’ll do if something goes wrong with your fuel storage is super important. For instance, do you have a fire extinguisher handy? I keep one close to my fuel storage area just in case, because better safe than sorry!
I also recommend having a buddy system—get a friend involved in your emergency preparedness plan. We started a fuel storage check-in system where we help each other keep our supplies in check. It’s not just about the fuel; it’s also about having someone who can support you when the going gets tough.
Lastly, educate yourself and anyone else involved in your plans about proper fuel handling techniques. The last thing you want during a crisis is chaos. A little training and communication can go a long way toward ensuring safety.
Frequently Asked Questions
What types of fuel are best for emergency storage?
It really depends on your needs! For most people, gasoline is common for generators, while propane is excellent for long-term storage. Diesel is also a great choice if you have the right equipment, as it lasts longer than gasoline.
How can I safely store fuel at home?
Store fuel in approved containers, place them in a cool, dry area away from flammable materials, and check on them regularly for leaks or expiration. Make sure the storage area is well-ventilated!
How often should I check my fuel supply?
I recommend checking your supply every few months. This way, you can address any issues before they become bigger problems and ensure you have fresh fuel when you need it.
Are there any regulations for fuel storage?
Yes, many places have regulations regarding fuel storage. It’s best to check local laws and ordinances to ensure you’re compliant and safe. You don’t wanna run afoul of the authorities!
What should I do if my fuel goes bad?
If your fuel has gone bad, do not use it! You can dispose of it at a hazardous waste facility. Always follow proper disposal guidelines to keep you and the environment safe.
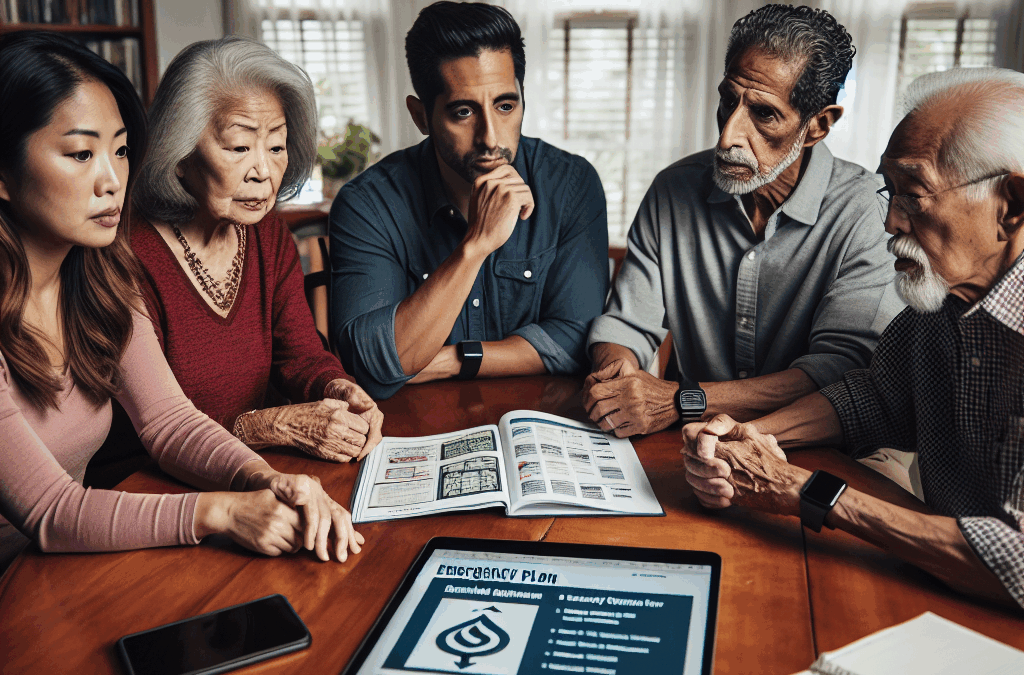
Dealing with the realities of making emergency plans for our elderly relatives can feel daunting, but trust me, it’s absolutely necessary. I’ve gone through this process with my own family, and I want to share some lessons I’ve learned along the way. I’ve broken it down into manageable sections that will make this task less intimidating. So let’s dive right into it!
Assessing Individual Needs
The first step in creating a solid emergency plan for an elderly relative is to truly assess their individual needs. Everyone is different, and what works for one person may be a complete flop for another.
Health Considerations
Your loved one’s health condition is the starting point. Take a look at their medical history—do they have chronic conditions that require daily medication? It’s essential to know exactly what medications they take, when they take them, and how they handle prescriptions. I recommend listing this stuff down; you’ll need it in emergencies.
Don’t forget about their mobility issues. If your relative struggles to move around, consider how that impacts their escape plan. Will they need assistance or special equipment? It’s vital to think this through in advance.
You might also consider their mental health. Is your elderly relative experiencing dementia or another cognitive decline? If they can’t remember who to call for help, make sure they have an easy-to-read list or even a contact app installed on their devices.
Living Environment
The next thing to look at is the living environment. Is their home safe? Are there any hazards like loose rugs or poor lighting? I’ve walked through my grandparents’ place, and I was surprised at the small things that could lead to big accidents. Making modifications can be a lifesaver!
Also, think about the neighborhood—are there resources nearby? Knowing where local hospitals, emergency services, or even neighbors are can add a layer of comfort both for you and your relative.
If it’s a multi-story house, is there a plan for getting them out in case of an emergency? Assess any changes that could help them navigate their space more easily.
Communication Preferences
The way your elderly relative communicates is also crucial. Some folks are more tech-savvy than others, and it’s essential to know this. Does your relative prefer a phone call or a text? Maybe they still have a landline and are not comfortable with modern gadgets. Find out their comfort level!
Try setting up regular check-in calls or messages. The routine helps keep the lines of communication open. I found that simply texting a simple “how’s your day” can go a long way in keeping them connected and reassured.
Also, gather all important contact information—family members, doctors, neighbors. Becoming the human directory is healthy for both of you!
Emergency Contacts and Plans
Once you’ve assessed their needs, the next logical step is to set up a solid contact plan that includes both emergency contacts and a straightforward emergency procedure.
Creating an Emergency Contact List
This list should include family members, close friends, and of course, medical professionals. Have these contacts easily accessible, maybe in the fridge, so even if the electricity is out, they can grab it!
Make sure your relative knows who everyone is. Names can easily slip from memory, especially in cluttered situations. A little photo next to the name can help jog their memory.
Don’t stop at just creating the list. Regularly update it. I usually try to do this every few months – life changes quickly, and so do our relationships.
Developing a Response Plan
Next, let’s create a structured plan for what to do during an emergency. It could be as straightforward as “if the smoke alarm goes off, get out immediately,” or more complex depending on the situation.
Practice these emergency drills together. It may feel silly, but acting it out can relieve anxiety in stressful situations. Get your relative comfortable moving and knowing what steps to take.
Lastly, have a plan for not just catastrophic emergencies but also smaller crises—like power outages. Having a stash of battery-operated lights and simple snack foods can make all the difference.
Incorporating Neighbors and Community Resources
Don’t forget about your relative’s immediate community. It’s key to include trustworthy neighbors on the emergency contact list. You never know who might be around to help!
Explore community resources. Many local organizations offer assistance for seniors during emergencies, whether it’s transportation or even well-check programs. It’s good to know who to reach out to for help.
Connecting with local clubs or volunteer groups can also foster friendships that might lead to greater support in times of need. This creates a broader safety net for your loved one.
Supplies and Resources
Besides creating plans and lists, it’s super important to ensure that your elderly relative has access to the right supplies in an emergency situation.
Emergency Kits
Start by assembling an emergency kit. This kit should contain not only first-aid supplies but also any special medical items your loved one might need. Think about medications, personal hygiene products, and water. A little foresight goes a long way here!
Include a flashlight, batteries, and a portable charger. In our tech-driven world, losing power can leave people cut off. My family always keeps our devices charged and ready!
Regularly check the kits. It’s easy to forget about items approaching their expiration dates, like medications or food. Making this a routine will keep everything fresh.
Medications and Health Supplies
As I mentioned earlier, keeping track of medication is crucial. Coordinate with their doctor to ensure they not only have enough medication but also easy access to prescriptions. If your relative finds it hard to remember to take pills, consider investing in a weekly pill organizer.
Consider other health supplies, like backup glasses, hearing aids, and any other essentials. It’s easy to overlook but incredibly important. I always recommend having spare essentials stashed just in case.
Also, discuss any health concerns with their healthcare provider. They may have great recommendations for what should be included in the emergency plan or kit.
Communication Tools
Another key piece of the puzzle is having reliable means of communication. Make sure your relative has a mobile phone that they are comfortable using. You could even set up preset emergency contacts so they don’t have to fumble through numbers.
If they’re not tech-savvy, consider a device with simplified features designed for seniors. I’ve seen these phones with larger buttons and simplified functions—they make a world of difference!
Even a basic landline can be a valuable tool if your loved one prefers the simpler approach. Just ensure it’s in a place where it’s easily reachable!
Testing and Updating Plans
Finally, a plan is only as good as it is tested and updated. Regularly revisiting your emergency plans will help it stay relevant and effective. I can’t stress enough how crucial this is!
Regular Reviews
Every few months, sit down with your elderly relative and review the emergency plans. Ask questions, see if they understand the processes, and make necessary adjustments based on changes in their health or living situation. It’s like a little family audit!
During these reviews, encourage open discussions. If your relative has suggestions or expresses concerns, take them seriously! They are the ones who will be using this plan after all.
Document any changes made so that you don’t have to guess what was updated last time. Keeping a simple log can make a huge difference.
Practice Drills
Practicing drills boosts confidence! Whether it’s a fire drill or simply making sure they know how to grab their emergency kit, acting it out can make all the difference.
Consider involving other family members or neighbors for added reinforcement. The more familiar they are with the plan, the better they’ll respond during a real emergency.
Make it fun! Turn drills into a family game. The more comfortable everyone is with the procedures, the less stress will be involved in real-life situations.
Feedback Loop
After practicing the drills or reviewing the plans, get feedback. What did they think? What could be improved? I’ve learned that sometimes the best ideas come from the very people we’re trying to help.
Keep the lines of communication open. These discussions don’t have to be formal; they can happen in a relaxed environment—maybe over coffee or during a family dinner.
Updating the plan based on feedback makes everyone feel valued. It creates a partnership that can enhance both your elderly relative’s wellbeing and your peace of mind!
Frequently Asked Questions (FAQs)
1. Why is it important to create an emergency plan for elderly relatives?
An emergency plan provides your elderly relative with a structured response to disasters or crises. It helps ensure their safety, health, and well-being, which can bring peace of mind to both you and your loved one.
2. What should be included in an emergency contact list?
Your emergency contact list should include family members, close friends, medical professionals, neighbors, and any community services they might need. Make sure it’s easy for your relative to find and understand!
3. How often should you review and update the emergency plans?
It’s best to review the plans every few months or whenever there are significant changes in your elderly relative’s health, living situation, or needs. Regular updates help keep the plan relevant and effective.
4. What are some important items to include in an emergency kit?
An emergency kit should include first-aid supplies, medications, food and water, a flashlight, batteries, and communication tools. Explore ensuring they have everything necessary for their specific health conditions, too!
5. How can I help my elderly relative practice emergency drills?
You can organize simple practice drills at home, like fire escape routes or what to do when they hear a smoke detector. Make it a fun family activity to reinforce the importance of these plans while keeping the mood light!
Surviving in tough situations often requires creativity and a bit of resourcefulness. I’ve found myself in some predicaments where household tools have come to the rescue in surprising ways. Here, I’m going to share five essential areas where you can leverage common household tools to enhance your survival skills. Grab your toolbox and let’s jump right in!
Creating Shelter
Using Tarps and Ropes
When it comes to building a quick shelter, nothing beats a sturdy tarp. I’ve found tarps to be incredibly versatile; they can be used to create a makeshift tent. Just find some sturdy trees, drape the tarp over, and secure it with ropes. It’s an efficient way to keep dry, especially if rain isn’t in your favor.
Ropes, or even strong cords, are your best friends here. I usually keep an extra roll of paracord handy for various outdoor tasks. Tying knots can turn a simple tarp into a robust structure; learn a few basic knots like the bowline or taut-line hitch, and you’ll be well-prepared.
Don’t underestimate the importance of windbreaks. Even if you can’t create a full-fledged shelter, arranging tarps to block wind can significantly improve your comfort level. A little creativity goes a long way when you’re crafting your survival setup.
Improvising Walls
If you find yourself in an urban area, I recommend looking around for materials you can use to shore up your shelter. Old pallets, cardboard boxes, or even large pieces of furniture can work wonders as additional walls. I once used furniture from a friend’s yard to create a barrier against wind and cold—desperate times call for imaginative measures!
Secure these materials with whatever fasteners you have on hand; screws, nails, or even heavy-duty tape can do the trick. Make sure everything is secure once you put it together. Trust me, there’s nothing more unsettling than feeling your shelter collapse during a storm.
Ventilation is key. If you’re sealing off a space for warmth, ensure there’s some airflow to avoid suffocation. A simple opening between barriers can help keep things breathable while offering some protection from the elements.
Insulating for Warmth
Once you’ve set up your shelter, keep it warm. Blankets, sleeping bags, or even old clothes can be used for insulation. I often use my old comforters to line the ground inside the shelter; it makes a world of difference for heat retention.
You might even consider gathering leaves or pine needles to further insulate your shelter. They’re plentiful in the wild and surprisingly effective. Layer them against the walls of your shelter for added warmth; just be cautious of critters who might want to take up residence too!
Lighting a small fire nearby, while ensuring it’s safe, can also help. I always have a small portable stove or camping kettle handy to heat up some food or drink, it not only nourishes but helps in heating the surrounding areas. Just remember, fire needs to be managed and always watch it closely!
Finding Food
Using Knives and Cutting Tools
A good knife is a vital tool in any survival situation. Whether I’m foraging for edible plants or preparing gathered berries, having a sharp blade at my side makes things a million times easier. I actually got my first bushcraft knife years back and have adjusted to relying on it for countless culinary gaps in the wild.
When you’re on the hunt for food, make sure many knives can do more than one job. Your kitchen knives can slice fruits and gut fish. I’ve often skinned small game using a sturdy knife, and trust me, it’s a lot easier than using your bare hands!
Also, having cutting tools helps in creating traps for small game. A simple mechanism made with branches and your knives can catch some pretty decent meals. It takes patience, but it can pay off when hunger strikes.
Foraging for Local Plants
It’s essential to familiarize yourself with local flora. I can’t stress enough how learning what’s edible can save your butt. From dandelions to wild berries, the woods are teeming with food. I remember the first time I discovered an abundant patch of wild raspberries; it felt like striking gold!
Books or apps on foraging can help in identification. I always carry a small guide with me if I’m venturing into new areas. You never know what may catch you off guard, and knowing what to eat is key. Just remember to be cautious of poisonous lookalikes!
And for those who can’t identify, it’s generally safer to stick to widely known edible plants. Ensure you research or ask someone knowledgeable beforehand; nobody wants a wild mushroom turning into a bad trip!
Fishing and Gathering
A good fishing rod isn’t always available, but that should not stop you. Household items like a coat hanger can make a decent fishing hook. Line it with string or use some thread and a sturdy stick. I’ve successfully caught fish with makeshift rods more times than I can count!
Don’t overlook gathering either. Things like snails, clams, or other seafood can also become part of the meal if you find yourself by a water body. Just make sure you check local guidelines for collecting, taking too many can affect the ecosystem.
Learn some basic fishing techniques: casting, baiting, and reeling in your catch are vital skills. It’s like riding a bike—it takes a bit to get the hang of it, but the dividends of freshly caught fish make it worthwhile!
First Aid and Safety
Improvised Bandages
When injuries occur in survival situations, having a means to provide first aid can be life-saving. Old t-shirts or bandanas can be transformed into bandages for cuts and scrapes. I often rip an old shirt into strips to make sure I always have something handy.
For deeper wounds, I recommend packing the cloth into the wound and applying pressure. Your goal is to control bleeding, and sometimes a bit of creativity can save a trip to the hospital if you take a bad fall!
Don’t forget to keep your tools clean. If you can get your hands on some disinfectant—be it rubbing alcohol or even soap and water—it’s essential to take that extra measure to prevent infection. It’s always worth it to have a clean environment when tending to injuries.
Using Tape for Splints
When you’re in a pinch, tape can work wonders. Duct tape is incredibly rigid, and I’ve used it to create splints for sprained or broken fingers. Simply align the injured limb alongside a sturdy stick, pad the area, and wrap it securely with tape. It might look a little goofy, but hey, we’re here to survive, right?
Some creative use of tape can help with other minor injuries too. Tape can also be used to pull together small cuts or secure bandages in place. It may seem simple, but it’s a real game changer in the field.
It’s important to assess how serious the injury is. If someone’s in critical condition, it’s best to look for professional help instead of solely relying on makeshift solutions.
Establishing Communication
In survival scenarios, communication can often save lives. Simple items like whistles can be useful to signal for help if you find yourself lost. It’s easier to blow a whistle than scream until your throat is raw!
If you have a mobile phone with a charge, even better! I’ve found myself in remote areas but with some semblance of service. Always check in with your loved ones before going on adventures, as it’ll make life easier if something goes awry.
Map reading is also a handy skill. If you’re venturing out, downloading offline maps or jotting down key details from brochures can guide you when technology fails. I’ve gotten turned around on trails before and a quick glance to a map can save you from wandering too far.
Purifying Water
Using Filters
Water purification is crucial for survival. Simple filters can be crafted using charcoal, sand, and small rocks. Brush up on your DIY filtration skills; I never go hiking without learning a few tricks to make this! Simply layer these materials in a container and pour dirty water through. It might not be perfect, but it’ll help get rid of larger impurities!
Always remember that boiling water is an effective method too. If you have access to a heat source, boil the water for about 5 minutes. It’s a tried and true way to make sure most pathogens are eradicated.
It’s also wise to carry a few purification tablets if you can. They don’t take up much space and can be a lifesaver if you find yourself without clean drinking water.
Collecting Rainwater
If you’re stuck in a place long enough, rainwater can be collected for drinking. I usually set up a makeshift collection system using a tarp to funnel water into a container. It’s a simple and effective way of gathering fresh water.
However, always ensure you’re collecting in a safe area away from contaminants such as roadside debris or animal waste. Nature sounds beautiful, but it has its dirt too!
Once collected, always strive to purify this water before drinking. Even though it may seem clean, there could be impurities that we can’t see.
Using Household Items to Store Water
Having containers is a must for water storage. Old soda bottles or jars can be repurposed beautifully for this need. Make sure they’re cleaned properly before use to avoid mixing odors or tastes from their previous contents.
When storing water long-term, designate containers solely for this purpose. They can be conveniently stashed in your emergency kit and delivered away in case of any necessity.
My best tip? Make sure to label your containers. You’re less likely to drink from something you accidentally thought was a potion during a midnight snack!
Frequently Asked Questions
1. What tools are essential for household survival?
Some essential tools include knives, paracords, tarps, and basic first aid supplies. These can help you create shelter, gather food, and take care of injuries.
2. How do I purify water in a survival situation?
You can purify water by boiling it for at least five minutes, using DIY filters made of sand and charcoal, or using purification tablets.
3. What’s the best way to create a makeshift shelter?
The easiest way is to use a tarp and ropes to create a cover between trees, ensuring it’s secured well and insulated for warmth.
4. How can I find food in the wild?
You can find food by foraging for edible plants, making makeshift traps, or using simple fishing techniques with household tools.
5. What if I get injured while out in the wild?
Use improvised bandages made from clothing, tape for splints, and try to keep the area clean. Seek help as soon as possible if seriously injured.
In my experience, it’s crucial to first grasp why road closures are happening. Sometimes they’re due to construction, accidents, or special events. Knowing the cause can help in planning alternatives. If you anticipate road blockages, it might affect your commute or travel plans significantly.
For instance, if the closure is due to construction, it often lasts longer. Local authorities usually provide information, but their updates can sometimes be vague. They may not always communicate how it’ll affect traffic flow, making it essential to stay informed.
Also, special events like parades or festivals can lead to unexpected closures even if you regularly travel the route. Being aware of the calendar in your area can save you a lot of headaches!
Gathering Real-Time Information
As someone who hates being stuck in traffic, I always recommend checking various sources for real-time updates. Apps like Waze are lifesavers! They pull data from other users who may be stuck in similar situations and can guide you around closures efficiently.
Social media is another goldmine. Local news stations often provide updates on their platforms, while community groups may share the latest finds on road conditions. Following local hashtags can keep you ahead of the game.
Lastly, don’t underestimate word of mouth. Chatting with friends or coworkers can sometimes yield the best tips and insights into what routes to avoid.
Mapping Alternative Routes
Once you know the reasons for the closures and have gathered information, it’s time to get geographical! I like to pull up a map and chart a couple of alternative routes ahead of time. It’s like mapping out an escape plan, haha!
Consider using apps that allow for multiple stops. This way, you can plan not just around the closures but also incorporate necessary stops along the way. For example, if I know a main road is closed, I might plan my route to include my favorite coffee shop to make the best of the detour.
Moreover, familiarize yourself with side streets or less popular roads you might not typically take. When times get tough on the main road, these alternatives can keep your journey moving smoothly.
Gathering Necessary Supplies
Emergency Kits for Vehicles
No one likes to think about breakdowns or being stuck, but trust me, being prepared makes all the difference! I always keep an emergency kit in my trunk. This includes basics like water, snacks, and a first aid kit.
Having road flares and an air pump can also really come in handy. You never know when you might need them! There have been times when I’ve helped strangers on the road, and having a small toolkit in my car made me a hero!
Remember to check your emergency kit regularly. It’s easy to forget about snacks that may expire or batteries that lose juice over time. Keeping these supplies fresh ensures you’re ready for anything.
Keeping Your Phone Charged
I can’t stress enough how important it is to keep your phone charged. It’s our main lifeline for updates and communication. I usually carry a portable charger in my bag just in case, especially when I know I’ll be traveling around an area prone to closures.
If you’re stuck in traffic or at a blockade, you may need to contact someone for help or to inform them about potential delays. Having a dead phone isn’t just inconvenient; it can be a safety hazard!
Consider setting up your GPS beforehand and using hands-free devices if you need to make calls while driving, too. Safety first!
Essentials for Long Waits
Sometimes you may find yourself sitting in traffic longer than expected, so being mentally and physically prepared makes a world of difference. Always keep a few items like a book, some playlists, or podcasts handy. You can make the wait a bit more enjoyable!
Snacks are also a must-have. Healthy options like nuts or granola bars can keep your energy up and your mood positive. Plus, packing a water bottle can prevent those annoying thirst pangs.
And, hey, don’t forget to pack a blanket if you’re anticipating a long wait—especially during colder seasons. Staying comfortable can make sitting in traffic a tad bit better.
Communicating with Others
Informing Your Inner Circle
When road closures disrupt your plans, don’t forget to keep your friends and family in the loop. I always give a heads-up to anyone I’m meeting up with if I anticipate being late. It’s just good manners and can save some awkward waiting around!
Texting a quick update is usually all it takes. It’s surprising how understanding people can be when you communicate openly about delays. They’re likely to appreciate the thoughtfulness.
Also, if you’re traveling with family or friends, communicate with them about your plan, routes, and potential stops. This way, everyone’s on the same page, and it makes the journey smoother and more enjoyable.
Utilizing Social Media
In this digital age, social media is a powerful tool! I often tweet or post updates about my own travel situations, and I encourage others to do the same. This way, we can create a community vibe where everyone shares information on traffic conditions.
Using local event pages or community groups can yield real-time insights that might not be available through official channels. It’s amazing what people will share! Others have often provided alternate routes or updates about when roadblocks are clearing.
Do remember, though, to stick to trustworthy sources. Miscommunication can happen easily, but a cohesive group can often help find the clearest path forward.
Driving Responsibly
Amidst blockades and closures, staying calm is key. I totally get that those situations can be super frustrating, but maintaining patience benefits everyone. I’ve learned that stressing out and honking recklessly only makes matters worse.
Follow traffic rules and respect road signage, especially when detours are set. It’s common sense, but sometimes people forget when tempers flare. Remember, we’re all in this together!
Lastly, safety should always be a priority. If you’re stuck in a dangerous spot, don’t hesitate to call for help, and always keep your seatbelt on. Your safety matters above all else!
Embracing Flexibility
Having a Positive Attitude
Traveling isn’t always about the destination; sometimes, it’s about the journey. I’ve tried my best to embrace a positive attitude when faced with unexpected road closures. After all, it’s an opportunity to explore new paths!
Putting on some good tunes and enjoying the ride can make a huge difference. I’ve discovered new spots and hidden gems because of detours! So rather than panicking, I encourage you to roll with it.
A good mindset turns frustrations into fun adventures, whether it’s singing along to my favorite songs or trying a new route. Sometimes I even challenge myself to discover if I can find a better way through traffic!
Making the Most of the Delay
Speaking of exploring, I often take road closures as a chance to stop and check out places I might not normally visit. Got a cool view? Pull over! Spot a fun diner? Go for it! Embracing these little moments can turn a frustrating experience into a delightful adventure.
Taking some extra time for yourself during these delays can also be beneficial. Whether it’s a scenic photo op or choosing to enjoy your own thoughts for a bit, take a moment to reflect or relax. It’s all about perspective!
Plus, you never know who you might meet! Striking up a conversation with another stuck driver can turn into a funny story later on. Life is also about those unexpected connections.
Improvising Your Plans
Sometimes we get so set on our travel routines that we forget how to improvise. If a road closure reroutes my plans, I’ve learned to be flexible and adapt. Instead of sulking, I switch things up and discover different routes or times.
If my favorite coffee shop is out of reach due to a blockade, I explore a new one. Why not? You may find an even better spot! Each closure can transform an ordinary trip into an extraordinary journey. I’m always down to try something new!
So remember, when plans change, take the opportunity to turn that unexpected twist into something positive. Your roadblocks might lead you to fantastic surprises!
Frequently Asked Questions
1. What should I check first if I anticipate a road closure?
Start by identifying the potential reasons behind the closure, whether it’s for construction, an event, or an accident. Gathering information from local authorities and news outlets can help you stay informed.
2. How can I stay updated on road conditions?
Use apps that provide real-time traffic updates like Waze. Social media is also a great resource to communicate road conditions with others in your community.
3. What essentials should I keep in my vehicle for emergencies?
Prepare an emergency kit with water, snacks, a first aid kit, road flares, and a portable phone charger to help in case of unexpected situations.
4. How can I communicate delays to others?
Don’t hesitate to send texts or make calls to inform people about your anticipated delays. Keeping communication clear shows consideration for their time.
5. Is it really okay to take detours if I’m stuck in traffic?
Absolutely! Embracing detours can lead to new experiences and discoveries. See them as opportunities to break your routine and discover something new.
When I think about emergencies, the first thing that comes to mind is having the right supplies ready to go. A pet emergency kit can make all the difference in a crisis—trust me on this one. I’ve learned to pack essentials like food, water, and medications, along with a first-aid kit specifically designed for pets.
Don’t forget to include a leash, a muzzle if your pet’s nervous, and even comfort items like their favorite toy or blanket. Just like humans, our furry friends find solace in familiar smells and textures during stress.
Lastly, make sure that everything is in an accessible, waterproof container. Emergencies can strike at any moment, so having a grab-and-go kit is crucial!
Include Important Documents
This is a step many folks overlook, and I get it—who wants to deal with paperwork when the world’s going haywire? But trust me, keeping a copy of your pet’s medical records, vaccination history, and any microchip information can save you a lot of headaches.
I recommend storing these documents in a waterproof pouch and placing them right in your pet emergency kit. You may also want to keep a list of pet-friendly shelters or hotels if you need to evacuate.
It’s kind of a peace-of-mind thing, ya know? If all else fails, having that paperwork handy helps you focus on your pet rather than running around trying to find it.
Prepare for Specific Needs
Each pet has their unique quirks and needs, and it’s super important to take these into account. For instance, if you have a senior dog or a pet with special medical requirements, think about how you can address those in an emergency. Maybe they need specific medications or more frequent potty breaks.
Don’t forget about keeping your pet’s information up to date. If you move or change your contact info, make sure that’s reflected on any tags or microchips.
Also, familiarize your pets with being crated or carrier trained well ahead of any emergency. It’ll make a world of difference if you need to hightail it out of your home.
2. Create a Disaster Plan
Involve Your Family
Creating a disaster plan is best done as a team effort! Gather your family and discuss how everyone can contribute to the safety of your pets during emergencies. It’s a bonding experience, plus it helps everyone feel empowered.
Assign roles based on who’s most responsible for what. Maybe one person is in charge of gathering the emergency kit, while another checks on your pets. When everyone knows their part, it reduces chaos, which is exactly what you don’t want in a crisis.
Once you’ve got a plan down, practice it! Just like fire drills at school, run through your plan every now and then to ensure everyone remembers what to do.
Know Your Route
Another vital part of your disaster plan is knowing the best routes to safety. Trust me, there’s nothing worse than piling your pets in the car during an emergency only to find traffic stacked up or roads blocked!
Check for alternate routes to pet-friendly shelters or homes. Consider downloading a navigation app that works offline, just in case the Internet is down—you never know!
Also, familiarize your pet with travel. If they’re not used to car rides, this could add a layer of stress when you’re already feeling the pressure. Short drives ahead of time can help ease them into the idea.
Practice Evacuating
Evacuating isn’t just about packing up and leaving—it’s about doing it quickly and efficiently. Run through a practice evacuation a few times a year so that everyone knows just how it’s supposed to go down.
While practicing, take notes on where your pets typically get anxious or where things slow down. This will help identify any improvements you can make to your plan.
Plus, it’s a great way to get your pets used to their carriers or leashes. The smoother the process, the better it’ll be for everyone involved.
3. Ensure Identification is Up to Date
Microchip Your Pets
If you haven’t microchipped your pets yet, what are you waiting for? I can’t stress enough how invaluable this can be in an emergency. A microchip acts like an ID card that stays with them no matter where they wander off to.
Plus, it’s a pretty simple process at most vet offices. Just make sure to register the microchip and keep your contact info current! Having that safety net makes me feel so much more secure.
Remember that collars can get lost, but microchips are basically forever, giving you that extra peace of mind when the unexpected happens.
Update Tags Regularly
Even with a microchip, I always keep my pets in collars with ID tags. Life happens, and tags can wear down or get lost just like that. So, I keep an eye on their tags and replace them if they start looking worn.
On the tags, I make sure to include my phone number and maybe even an alternative contact if I’m out of reach. Having this information handy increases the chances of a quick reunion if your pet gets lost.
It’s a small step that goes a long way—trust me, a few seconds of checking tags can save you days of heartache searching for a lost furry family member.
Consider an Escape Plan for Socialization
Let’s talk about the unexpected: what if your pet bolts in a panic during an emergency? An escape plan can save precious minutes. Have a buddy or neighbor who’s trained to handle pets? Share your plans with them so they can help if you’re caught up in the whirlwind of an emergency.
I always make sure I have a few trusted pet-sitters and friends in mind who understand my pets’ personalities and are willing to step in should anything happen.
A little creativity goes a long way. Think outside the box! The more options you have for your pet’s socialization and care during emergencies, the better you all will fare.
4. Know What to Do Post-Emergency
Check Your Pet for Injuries
Once the crisis has passed, the real work begins. The first thing I do is check my pets for any injuries. They may be shaken up, but keeping them calm is key. Gently feel for any signs of pain or distress—sometimes, they’ll hide it until you give them a good once-over.
Partnering with someone can help, too. One person can keep an eye on the pet while the other checks for any wounds or issues that may need immediate attention.
If you do find anything concerning, reach out to your vet ASAP. Don’t wait—addressing injuries quickly is so important!
Monitor Their Behavior
Pets can be affected by trauma just like we are. After the hustle and bustle of an emergency, take note of any behavioral changes—maybe they’re clingier than usual, or showing signs of fear or aggression.
Giving them a safe space can work wonders, so set up a comfy area in your home with their favorite toys and blankets to recoup. A little tip from me: engaging in their favorite activities can also help ease them back into their routine.
Consider consulting a vet or animal behaviorist if things don’t seem to improve within a few days. Better to be safe than sorry.
Re-establish Routines
In my experience, pets thrive on routine, especially after traumatic events. So as soon as things settle down, I try to re-establish some sense of normalcy. Feed times, walks, and play should return as close to normal as possible.
Routine is a familiar friend to pets—it helps them feel anchored during uncertain times. Make these activities something to look forward to.
Plus, it reinforces positive interactions, helping them bounce back and rebuild the trust they may have lost amidst the chaos.
5. Take Care of Yourself
Stay Calm
I can’t stress enough how critical it is to stay calm. Animals are incredibly perceptive; they can sense our feelings and stress levels. When I’m calm, my pets tend to be calm, too. It can even be a game-changer in how they react during crises.
Take deep breaths, count to ten, and remind yourself that you’ve got a plan—you’ve prepared, and you’ll get through it together.
Sometimes it helps to lean on friends or family for support. Having a village can make all the difference, so don’t hesitate to reach out!
Seek Support
Post-emergency, I learned that it’s crucial to seek emotional support, whether from friends, family, or professional counseling. I can’t be the only one who gets overwhelmed during trying times! If I need to talk about what happened, I do.
Talking everything out can ease the pressure and help normalize the trauma experienced by both you and your pets. There’s no shame in needing help—it’s just part of being human.
Plus, there are loads of pet-owner support groups online. Sharing experiences can provide tips while letting you know you’re not alone!
Practice Self-Care
When things get tough, don’t forget to take care of yourself. I make it a point to maintain healthy habits like eating well and getting enough sleep. If I’m not at my best, how can I be there for my pets?
Make time for self-care routines, even if it’s just a few moments of quiet. A healthy mind and body better equips you to face challenges head-on!
Just remember, you’re in this together, and taking care of yourself means you’ll be in a better position to care for your pets when it counts.
FAQs
1. What should I include in a pet emergency kit?
Key items to include in your kit are non-perishable food, water, any medications, a first-aid kit, leash, carrier, and comfort items like toys or blankets. Don’t forget important documents related to your pet!
2. How can I prepare for an emergency evacuation with my pets?
Involve your family in creating a disaster plan, know your evacuation routes, and practice evacuating with your pets to get them used to the process.
3. Why is pet identification important during emergencies?
Identification ensures that if your pet gets lost, you can be quickly reunited. Microchips are permanent, while ID tags are equally crucial to have handy.
4. How do I help my pet cope after an emergency?
Check for injuries, monitor behavior for any signs of distress, and re-establish routines to help them feel secure. A calm environment can also work wonders!
5. How can I take care of myself while managing my pet’s needs during a crisis?
Staying calm is key. Seek support from friends or professionals, and prioritize self-care, as your well-being is just as important for helping your pets.
In an unpredictable world, being prepared for emergencies is not just a smart choice; it’s a crucial responsibility. Whether natural disasters like hurricanes and earthquakes are frequent in your area or man-made crises loom, understanding the risks and preparing accordingly can make all the difference when the unexpected strikes.
*Understanding the Risks: Assessing Potential Emergencies in Your Area**
The first step towards emergency preparedness is recognizing what threats you might face. Each region has its unique set of challenges—coastal areas may contend with floods or hurricanes, while urban settings could be more susceptible to industrial accidents or civil unrest. Start by researching local historical data about disasters that have occurred. Engage with community resources and local government websites to glean information on potential hazards. This knowledge isn’t merely academic; it empowers you to take proactive measures tailored to your specific circumstances.
*Essential Supplies: Building Your Comprehensive Emergency Kit**
An emergency kit is invaluable during crises. But what should it contain? Begin with the essentials: non-perishable food items, bottled water (at least one gallon per person per day), first aid supplies, flashlights, batteries, and a multi-tool can form the backbone of your kit. Don’t forget medications you or any family member may need, as well as important documents stored in waterproof bags.
Consider adding comfort items too—a favorite book, games for children, or extra blankets. You never know how long you might be without power or access to normalcy during an emergency. Regularly check and update your kit every six months; replace expired food and medications and adjust according to changing family needs.
*Creating a Family Emergency Plan: Communication, Evacuation, and Safety**
A well-thought-out family emergency plan can save lives. Begin by establishing clear communication lines among family members—who will call whom? Designate an out-of-town contact who can serve as a central point of communication if local lines go down.
Next, outline evacuation routes from your home and identify safe meeting points where everyone knows they should go if separated. Familiarize yourself with local shelters too—they might be necessary if staying at home isn’t feasible due to safety concerns.
Incorporating drills into this plan can be beneficial as well; practice fire drills or evacuation exercises so that everyone feels confident in their roles during real emergencies.
*Staying Informed: Utilizing Technology and Resources for Real-Time Updates**
In today’s digital age, staying informed is easier than ever but requires intentionality. Sign up for alerts from local weather services or disaster management agencies via text message or app notifications—these tools provide real-time updates on emergencies unfolding in your vicinity.
Social media platforms can also serve as valuable resources for community-driven updates; follow local news outlets for immediate information about unfolding situations. Moreover, consider downloading emergency preparedness apps that offer checklists, tips on coping strategies during crises, and even maps that guide you toward safety locations.
Preparedness isn’t just about stuffing supplies into a bag; it’s creating a culture of readiness within yourself and your loved ones through awareness and action. By assessing risks specific to your area, curating essential supplies carefully tailored for your needs, establishing effective communication plans within your household, and leveraging technology for timely information—you’re not only safeguarding yourself but also reinforcing resilience within your community.