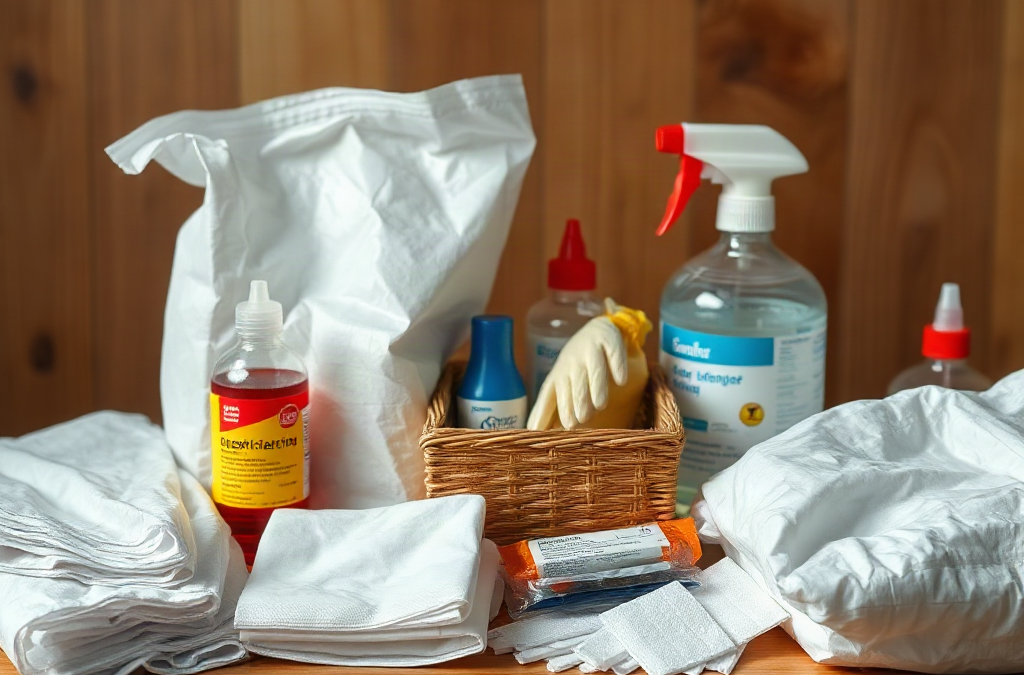
A prophylactic kit for contamination prevention should combine disposable gloves, protective clothing, eye protection, hand-cleaning supplies, sealable waste bags, and clearly labeled cleaning materials, organized for quick and safe use. Its value comes from interrupting transfer at the points where contaminants move between hands, surfaces, clothing, tools, and waste. Choose supplies that match the suspected material, exposure route, workspace, and disposal requirements rather than treating every incident the same. Keep clean and used items physically separated, replace damaged or expired components, and avoid reusing disposable protection. A kit reduces avoidable contact during minor contamination events, but it is not a substitute for professional guidance when hazardous, infectious, or unknown substances are involved.
What the Kit Is Designed to Prevent
A prophylactic kit for contamination prevention is a prepared collection of barriers, cleaning aids, containment materials, and instructions intended to reduce accidental transfer before, during, and after a contamination event. The emphasis is prevention: keeping a substance from reaching skin, eyes, clothing, clean equipment, food-contact areas, or other people. A kit is most useful when it is assembled before an incident, because searching for gloves or waste bags after exposure has already begun increases hurried handling and cross-contamination.
Contamination commonly spreads through a chain rather than a single dramatic failure. A person touches a questionable surface, handles a phone or door handle, removes gloves incorrectly, and then touches their face or clean supplies. Clothing can carry residue beyond the original work area, while damp cloths and shared brushes can move material across a wider surface. The kit should therefore support the entire sequence: approach, isolation, protection, removal, cleaning, disposal, and hand hygiene.
For example, a small spill of an unknown household chemical requires a different response from a known, low-risk dirt transfer or a suspected biological exposure. The first situation may require distance and professional advice rather than hands-on cleanup. The second may be manageable with gloves and cleaning materials suited to the surface. Treating both events as identical is a common mistake because protective equipment only works when its material and use match the hazard.
Use the kit to control a defined, limited task, not to justify entering an unsafe area. If there is strong odor, visible vapor, fire, a large spill, a needle or sharp object, suspected infectious material, or an unknown substance, stop and seek guidance from emergency services, poison-control resources, workplace safety personnel, or the relevant authority. A well-stocked kit supports cautious action; it does not turn an untrained person into a hazardous-materials responder.

Essential Components and How They Work Together
The most useful kit contains compatible layers rather than a random assortment of products. Disposable nitrile gloves are often practical for routine surface contact, but glove choice depends on the substance and the manufacturer’s resistance information. Add eye protection that covers the sides, a disposable apron or coverall when clothing may be splashed, and a face covering only when it is appropriate for the identified hazard. A face covering should not be treated as protection against every vapor, gas, or airborne risk.
Hand hygiene supplies are equally important. Include soap access where possible, alcohol-based hand sanitizer for situations in which hands are not visibly soiled, and disposable towels. Cleaning and disinfection are separate functions: cleaning removes soil and residue, while disinfection uses a product and contact time appropriate to the target organism or surface. A disinfectant cannot reliably work through heavy dirt, and mixing cleaning chemicals can create dangerous reactions.
Containment supplies prevent a used item from becoming a second contamination source. Useful additions include sealable bags, absorbent material selected for the substance, disposable cloths, sturdy labels, and a marker. Add a small flashlight and a simple instruction card if the kit may be used in poor lighting or by more than one person. The instruction card should identify what not to touch, where clean items are stored, how used items are isolated, and who to contact for escalation.
- Barriers: gloves, eye protection, and protective clothing suited to the task.
- Control materials: absorbent pads, disposable wipes, bags, labels, and ties.
- Hygiene supplies: soap, sanitizer, towels, and a clean-water option when feasible.
- Information: product labels, hazard instructions, contact numbers, and replacement dates.
A compact kit is easier to inspect and carry, while a larger kit provides more sizes and replacement stock. The tradeoff is not simply quantity. Excess supplies can become disorganized, expired, or difficult to identify under pressure. Arrange unused protective items in one clean section and containment or waste materials in another. That separation makes it less likely that a clean glove will be handled with contaminated hands.
Readers building a broader supply inventory can connect this kit with A prophylactic kit for contamination prevention as part of a clearly labeled preparation-supplies area. The useful test is whether a person can identify the first three actions without opening every container.
Choosing Supplies for Different Contamination Risks
Supply selection should begin with the exposure route and the material involved. Contact contamination calls for barriers, controlled handling, and hand hygiene. Splash risk raises the priority of eye and face protection. Dust or airborne particles may require a properly selected respirator and a fit-related process that ordinary disposable masks do not provide. Chemical exposure requires checking the product’s safety information and glove compatibility rather than relying on the label “heavy duty.”
Consider a kitchen surface, a bathroom cleanup, and a workshop spill. A kitchen task may prioritize food-safe cleaning procedures and separation of clean utensils. A bathroom task may involve body fluids, requiring careful containment and disinfection according to product instructions. A workshop spill may involve solvents, fuels, or corrosives for which household gloves and paper towels are unsuitable. The same plastic bag and disposable glove may appear useful in all three settings, but their limitations differ sharply.
Known information improves decisions. Keep original product labels, safety data sheets where available, and manufacturer directions with the kit. Record whether a cleaner is intended for hard, nonporous surfaces, whether it must remain wet for a stated contact period, and whether ventilation is required. Never assume that a stronger concentration is safer; excessive concentration can damage surfaces, increase fumes, or create skin hazards without improving the result.
Budget constraints favor a small, replaceable core: several glove sizes, eye protection, bags, labels, towels, soap, and a suitable general-purpose cleaning product. Higher-risk workplaces may need task-specific chemical gloves, face shields, spill-control materials, or professionally selected respiratory protection. The advanced option is worthwhile when the setting routinely handles a known hazard; it is not worthwhile to collect specialized equipment that no one has been trained to use.
Use this decision sequence before opening the kit:
- Identify the substance if it can be done without approaching or touching it.
- Estimate whether contact, splash, dust, vapor, or sharps create the main exposure route.
- Isolate people, pets, food, and clean equipment from the area.
- Choose protection and cleaning materials supported by the product instructions.
- Escalate when the substance is unknown, the area is large, or symptoms occur.
One weak assumption is that “more protective” always means better. Bulky clothing can impair vision and dexterity, leading to poor glove removal or accidental contact. Protection should be sufficient for the credible risk and usable for the task. If the risk cannot be characterized, distance and expert advice are safer than improvisation.
Safe Use, Packing, and Replacement
A kit works best when its sequence is visible before use. Store it in a dry, accessible location away from heat, sunlight, food, and ordinary household chemicals. Keep clean supplies sealed, label the outside by function, and place the instruction card where it can be read without opening the contaminated section. A monthly visual check is useful for damaged packaging, depleted gloves, dried wipes, leaking bottles, and missing labels.
During use, establish a clean zone and a contaminated zone. Put on protection before approaching the material, limit movement, and take only the supplies required for the task. Avoid touching phones, light switches, cabinet handles, or personal items while wearing used gloves. If a glove tears, stop, move to a safe position, remove it carefully, wash hands, and replace it; continuing because the task is nearly finished is a frequent failure mode.
Removal of protection deserves as much attention as putting it on. Treat the outer surfaces of gloves, aprons, and eye protection as contaminated. Remove them slowly without snapping or shaking, place disposables directly into the designated bag, and wash hands afterward. Reusable goggles or tools should be cleaned according to their material and the suspected contaminant before returning to the clean section. Do not place used items on a kitchen counter or back into the original kit.
Replacement timing should follow condition and manufacturer information rather than an arbitrary promise of indefinite shelf life. Replace gloves or bags when packaging is damaged, products are brittle, wet, contaminated, or past their stated use period. Review the kit after every deployment and record what was used. A kit that looks full but lacks the correct glove size, working cleaner, or intact bags is not operationally ready.
For a home or small workplace, a short written checklist may outperform a larger collection of supplies. Link the checklist with the contamination-prevention kit inventory and identify the person responsible for inspection. That simple ownership step prevents the common problem in which everyone assumes someone else replaced the missing items.
Common Mistakes and Practical Boundaries
The most damaging mistakes involve cross-contamination, chemical improvisation, and overconfidence. Wiping a surface with a dry cloth may spread residue; spraying an unknown substance may create droplets or fumes; wearing gloves may encourage a person to touch more objects. Gloves protect hands only while they remain intact and are used correctly. They do not make face touching, food handling, or careless disposal safe.
Another mistake is using bleach, ammonia, solvents, or other cleaners together or outside their labeled purpose. Keep products in their original containers, follow label directions, and provide ventilation only when the instructions and hazard allow it. If eyes, skin, or breathing are affected, move away from the exposure and seek appropriate medical or emergency advice rather than continuing cleanup.
Disposal is also context-dependent. Ordinary household waste rules may not apply to contaminated sharps, chemical residues, large amounts of biological material, or items from a regulated workplace. Seal and label waste temporarily when appropriate, but do not assume a sealed bag makes hazardous material suitable for regular trash. Local authorities, workplace procedures, product manufacturers, or emergency services can clarify the correct route.
The practical priority is a usable barrier-and-containment system supported by clear limits. Test the kit by asking someone unfamiliar with its contents to locate gloves, eye protection, bags, hand-cleaning supplies, and contact instructions. If that person cannot do so quickly, reorganize the kit. Readers seeking related planning material may also review contamination prevention supplies and handling procedures before adding specialized equipment.
Frequently Asked Questions
What is the most important item in a contamination-prevention kit?
No single item is sufficient. Intact gloves, eye protection, hand-cleaning supplies, sealable waste bags, and clear instructions work together to interrupt transfer.
Can one kit handle every type of contamination?
No. Chemical, biological, particulate, and sharps hazards may require different materials, procedures, disposal methods, or professional response.
How should used disposable items be handled?
Place them directly into a suitable labeled bag or container without touching clean surfaces, then follow local or workplace disposal requirements.
How often should the kit be checked?
Inspect it regularly and after every use. Replace damaged, depleted, leaking, or expired supplies and confirm that instructions and contact details remain current.
When should a person avoid using the kit?
Avoid hands-on cleanup when the substance is unknown, the area is extensive, fumes or fire are present, sharps are involved, or symptoms develop. Seek qualified assistance instead.
Conclusion
A useful contamination-prevention kit is not defined by how many items it contains. Its value comes from matching barriers, cleaning materials, containment supplies, and instructions to the exposure that could realistically occur. Keep clean and used materials separate, make hand hygiene part of the sequence, and inspect the kit often enough to catch damaged packaging or missing components. Treat unknown substances, strong fumes, sharps, and significant exposures as escalation situations rather than ordinary cleanup tasks. Assemble a compact core for routine, limited incidents, then add specialized equipment only when the hazard is known and users understand its limitations. The next practical step is to inventory the kit, label its zones, and rehearse safe removal and disposal without an active contamination event.
Related Content
- Emergency Evacuation Tips: Essential Steps for Safe and Efficient Exits
- The Ultimate Emergency Preparedness Guide (2025) with 10 Powerful Tips to Stay Safe
- How to Identify the Best First Aid Supplies for Emergencies: A Practical Checklist and Essential Items
- How to Involve Children in Emergency Training: Practical Steps and Engaging Activities
- Storm Prep for Families: Essential Steps and Supplies for Safety