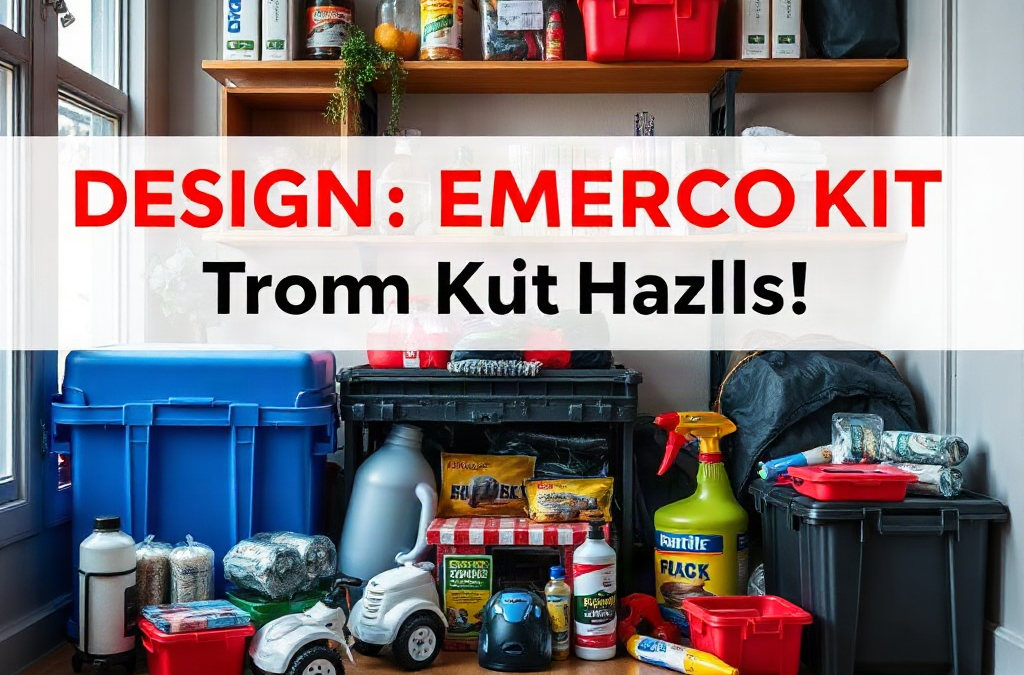
Design an emergency kit around actual household hazards by matching supplies to the risks, rooms, and vulnerabilities in your home rather than buying a generic container of gear. Check for hazards such as smoke, gas leaks, power loss, flooding, extreme temperatures, medication interruptions, and blocked exits, then assign practical supplies to each scenario. Include water, shelf-stable food, flashlights, batteries, first-aid materials, chargers, sanitation items, and essential medications, but also add shutoff tools, fire extinguishers, protective gloves, and pet or mobility equipment where needed. Store duplicate essentials near bedrooms, utility areas, and likely exit routes, and inspect expiration dates, battery condition, and access twice a year.
Map Household Hazards Before Buying Supplies
A useful kit begins with a hazard map, not a prepacked bucket. Walk through the home and identify what could injure someone, interrupt basic needs, trap occupants, or make communication difficult. The relevant risks differ sharply between a basement apartment, a rural house with a private well, and a high-rise unit where elevators may stop working.
Look at both the event and its consequence. A severe storm may cause a power outage, spoiled refrigerated food, loss of heating or cooling, and a closed garage door. A plumbing failure may create contaminated water and slip hazards but require very different supplies from a wildfire smoke event. A gas leak calls for rapid evacuation and utility knowledge, not an attempt to repair the line with household tools.
Record hazards by likelihood, severity, and response time. Smoke from a kitchen fire demands immediate action; a multi-day outage allows more time to ration supplies. Flooding may make lower-level storage inaccessible, while an earthquake can scatter items and block cabinets. This comparison prevents a common failure: spending heavily on rare, specialized equipment while lacking medication, lighting, or a reliable way to open stored food.
Use a short inspection of each room to capture details that generic lists miss:

- Kitchen: cooking fires, broken glass, spoiled food, gas or electrical hazards, and the need for a manual can opener.
- Bedrooms and hallways: darkness, smoke, blocked exits, footwear, eyeglasses, and mobility concerns during nighttime evacuation.
- Utility areas: water shutoff access, electrical panels, heating equipment, sump pumps, and protective gloves.
- Bathrooms: sanitation, stored medicines, hygiene supplies, and water that may become unavailable.
- Garage or exterior storage: flood exposure, extreme heat, fuel hazards, and supplies that could become inaccessible if the main door fails.
Do not treat a hazard map as a prediction. Its purpose is to reveal dependencies. If every flashlight is in one cabinet, every charger needs wall power, or the only drinking water is stored below a flood-prone window, the kit has a design weakness even when the inventory looks impressive. For broader household readiness decisions, the hazard-based kit assessment should be updated whenever someone moves in, develops a new medical need, or changes heating, cooking, or transportation arrangements.
Match Supplies to Rooms, People, and Failure Points
Supplies work best when they are placed where a person can reach them during the first minutes of a disruption. A single large tote may be efficient for inventory, but it is a poor design if a fallen shelf, smoke, or a locked garage separates the household from it. Divide the kit into a central reserve and small location-specific modules.
Bedrooms need a different setup from the kitchen. Keep sturdy shoes, a flashlight, spare glasses, and a whistle near sleeping areas because broken glass and darkness are immediate problems after an earthquake or severe storm. Near the kitchen, store a fire extinguisher appropriate for the likely fire class, heat-resistant gloves, and a flashlight; do not place supplies so close to a stove that they become inaccessible during a fire. In a utility area, label the main water shutoff and keep gloves, absorbent materials, and a headlamp available for inspection.
Household members also change the design. Infants may need formula, bottles, diapers, and a way to prepare food without safe tap water. Older adults may need backup hearing-aid batteries, assistive devices, and a written medication list. A person who uses a wheelchair may need an evacuation plan that accounts for stairs rather than simply adding more supplies. Pets require food, water, carriers or leads, waste bags, and copies of veterinary information.
The practical distinction is between survival supplies and access supplies. Water and food sustain people over time, while shoes, lighting, keys, gloves, and medication access determine whether those supplies can be reached. A household that prepares only the first group may still fail during a short, chaotic event.
Consider a two-story home with a finished basement. Storing all bottled water downstairs may look tidy, but a burst pipe or flood could remove the reserve first. A better arrangement keeps a modest amount on each occupied floor and a larger reserve in the safest accessible location. The tradeoff is less compact storage and more rotation work, but redundancy matters when the preferred route is blocked. Avoid storing emergency supplies in a locked cabinet, under heavy items, or in a container that one person cannot move.
Include copies of identification, insurance information, emergency contacts, medication details, and household instructions in a waterproof pouch. Digital copies can supplement paper records, but they should not be the only option when phones lose power or cellular service is interrupted. The room-by-room supply checklist should make access as visible as the inventory itself.
Build the Core Kit Around Loss of Utilities
Utility loss is often the bridge between a hazard and a household crisis. When electricity, water, heating, cooling, or communications stop, ordinary routines become difficult even if the building remains intact. Build the core reserve around those failures, then add hazard-specific equipment rather than treating every disaster as identical.
Water deserves first attention because it supports drinking, food preparation, and basic hygiene. Store commercially packaged water or containers intended for water storage, and keep a separate amount for pets if applicable. Food should require little or no cooking when power is unavailable. Shelf-stable options such as canned beans, fish, fruit, vegetables, nut butter, crackers, and ready-to-eat meals are more useful than foods that depend on a refrigerator, oven, or complicated preparation. Add a manual opener and utensils where cans are stored.
Lighting should not depend on one device. A flashlight for each sleeping area, a headlamp for hands-free work, and spare batteries provide more flexibility than a single bright lantern. Rechargeable units can reduce battery waste, but they need a charging method and a maintenance check. A battery bank is helpful only if it is charged before the outage and paired with the cables used by the household’s actual phones.
Heating and cooling create different constraints. Blankets, warm layers, and hats may help during a cold-weather outage, while breathable clothing, shade, battery-operated fans, and extra drinking water may be more relevant in heat. Never improvise indoor heating with a grill, camp stove, or fuel-burning device. Carbon monoxide can accumulate without obvious warning, so fuel-burning equipment must be used only as directed and in appropriate outdoor locations.
A compact priority order keeps spending rational:
- Immediate safety: smoke alarms, fire extinguishers, escape lighting, shoes, gloves, and a whistle.
- Medical continuity: prescriptions, first-aid supplies, a medication list, and needed health devices or batteries.
- Water and food: safe drinking water, ready-to-eat meals, opener, utensils, and pet supplies.
- Sanitation and communication: soap, wipes, toilet supplies, waste bags, radio, chargers, and contact information.
- Hazard-specific tools: dust masks suited to the task, tarps, duct tape, shutoff labels, or flood barriers where justified.
Do not confuse a dust mask with protection from every airborne hazard, and do not assume a first-aid kit replaces professional care. Supplies can reduce exposure and manage minor problems while people seek appropriate help; they cannot make an unsafe building safe. Check guidance from local authorities for evacuation, water advisories, and fire response rather than relying on the kit to answer decisions outside its purpose.
Store, Test, and Rotate the Kit
Storage determines whether preparation survives contact with a real emergency. Keep the main reserve in a dry, temperature-moderate area that remains reachable without power. Avoid attics and unconditioned garages when heat or freezing temperatures could damage food, batteries, medicines, or plastic containers. Use clear labels showing contents, expiration dates, and the date of the last inspection.
Test the kit under realistic conditions. Turn on each flashlight, connect each charging cable, inspect first-aid packaging, and confirm that adults can open containers without special tools. Practice locating the water shutoff and electrical panel with the lights off. If an item works only when someone remembers an undocumented procedure, it is not fully ready.
Rotation is more than replacing expired food. Batteries corrode, adhesive dries out, medications have storage requirements, clothing becomes the wrong size, and contact information changes. Tie inspections to a recurring household event, such as the beginning and end of daylight-saving time, and use normal consumption to rotate shelf-stable foods. Keep medication decisions with the prescribing clinician or pharmacist; do not stockpile or alter prescriptions casually.
Accessibility creates an important tradeoff. A heavy waterproof tote may protect supplies from a leak, but it is unsuitable if no household member can lift it. Several smaller containers are easier to move and audit, though they require clearer labeling. A child may be able to carry a small comfort or communication pouch, but should not be assigned responsibility for critical medication or evacuation equipment.
Watch for signs that the design is failing: supplies are repeatedly returned to the wrong place, nobody knows who carries documents, chargers do not fit current phones, or the household cannot explain what happens if the main exit is blocked. Correct those failures during a calm review. The household hazard plan should reflect actual behavior, not an idealized storage system that works only on paper.
Use a Scenario Check Instead of a Shopping List
A scenario check tests whether the kit supports decisions, not merely whether it contains popular products. Choose several hazards that fit the property and ask what the household must do during the first hour, the first night, and a longer interruption. The answers expose missing supplies and unsafe assumptions quickly.
For a nighttime power outage, the first-hour needs may be lighting, shoes, communication, and a check on medical equipment. By the first night, food preparation, temperature control, sanitation, and charging become more relevant. For a kitchen fire, the correct response may be alarm, evacuation, and calling emergency services; the kit should support escape rather than encourage someone to retrieve belongings or fight a growing fire.
For flooding, move people and essential documents away from the affected area, avoid contact with contaminated water, and expect lower-level storage to become unavailable. For an extended heat outage, identify the coolest safe location, monitor vulnerable residents, and arrange an alternative location if indoor conditions become dangerous. These scenarios demonstrate why the same item can have different value: a battery radio is useful during broad communication disruptions, while a headlamp is more useful when both hands are needed to inspect a dark utility space.
After each exercise, remove products that do not solve a credible problem and fund the gaps that do. A compact review can ask:
- Can everyone reach lighting, shoes, water, and essential information without entering a dangerous area?
- What happens if the refrigerator, elevator, garage door, phone network, or basement is unavailable?
- Which person, pet, or medical need requires a separate supply or transport arrangement?
- Which item depends on electricity, internet access, batteries, or a skill nobody has practiced?
Keep the result proportional to the home. Preparedness does not require purchasing every specialized product, and more gear can create clutter that obscures the essentials. A well-designed kit makes the most likely household hazards easier to manage, leaves clear boundaries for when to evacuate or seek help, and can be revised after every drill, repair, move, or change in household needs.
Frequently Asked Questions
Should every household have the same emergency kit?
No. A kit should reflect local hazards, building layout, utilities, medical needs, pets, and the people who must carry or use the supplies.
Where should emergency supplies be stored?
Keep a main reserve in a dry, accessible location and place small modules near bedrooms, exits, utility areas, or other points where immediate access matters.
What should be checked twice a year?
Test lights and chargers, inspect batteries, rotate food and water, review medications and documents, replace damaged first-aid items, and confirm that clothing and pet supplies still fit current needs.
Do emergency kits need specialized tools for every disaster?
No. Add specialized items only when a credible household hazard justifies them. Basic safety, medical continuity, water, food, sanitation, lighting, and communication usually come first.
Can a generator be used indoors during a power outage?
No. Fuel-burning generators and similar equipment can produce carbon monoxide and must be used only as directed in a safe outdoor location away from openings.
Conclusion
A strong emergency kit reflects the hazards that can actually affect the home and the obstacles those hazards create. Map risks by room, place immediate-use supplies near sleeping areas and exits, and build the central reserve around water, ready-to-eat food, lighting, medication continuity, sanitation, and communication. Then add equipment for specific conditions such as flooding, smoke, utility shutoffs, extreme temperatures, or pet care.
Test access rather than trusting labels: use the flashlight, connect the charger, open the food, and rehearse what happens when a usual route is blocked. Review the arrangement twice a year and after any household change. The goal is not the largest collection of gear; it is a reachable, maintained system that supports safe decisions and makes clear when the correct response is evacuation or professional assistance.
Related Content
- How do I ensure my self-reliant practices are sustainable?
- Surviving the First 72 Hours of a Crisis: What You Need to Know
- Planning for the Unexpected: Top Tips for Effective Emergency Preparedness
- How to Prepare for Communication Breakdowns During Disasters: Essential Strategies and Tools
- Prepare Now Tips: Essential Steps for Effective Disaster Readiness