Hey there, fellow adventurers! If you’re anything like me, the great outdoors calls to you like a siren song. But before you set off on your next epic journey, there’s one crucial set of skills you have to have under your belt—navigation. I can’t tell you how many times I’ve been out there trying to find my way back home, and let me tell you, those moments can be a little scary. That’s why I want to share some essential navigation skills that will help keep you safe and oriented. Buckle up, let’s dive in!
Understanding Your Map
The Different Types of Maps
First off, we need to talk about maps. There are plenty out there, but not all of them are created equal. You have topographic maps, which are like the superheroes of the navigation world. They give you a detailed view of the terrain, like elevation and landforms, which is super handy for hiking. Then there are road maps, which are great for driving but won’t help you much when you’re scaling a mountain.
Next, you’ve got digital maps, found on your phone or GPS devices. They’re convenient, but you know what? They can be a bit finicky—like when you’re deep in the woods, and your signal drops. That’s why I always have a paper map as backup. No battery needed, just good old-fashioned paper!
Lastly, let’s not forget about special interest maps, like birding maps or ski trail maps. These can be useful for niche activities, and if you’re really into one particular sport, having the right map can make all the difference. So, choose wisely!
Using a Compass
Getting to Know Your Compass
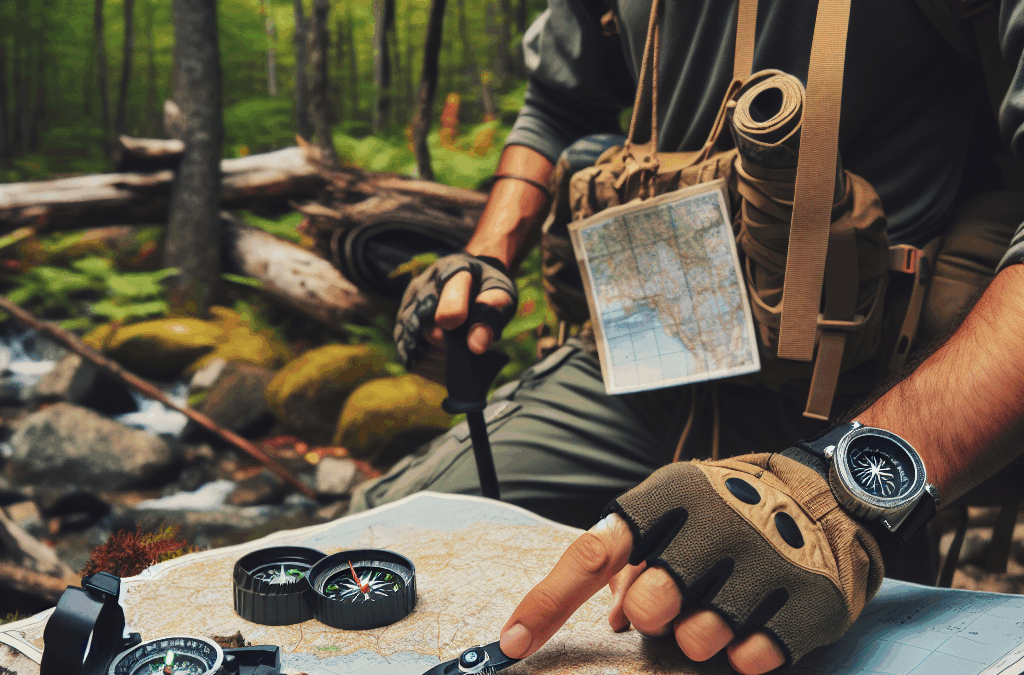
Alright, so now that we’ve got the map down, let’s talk about compasses. This little gadget is a game-changer. First things first, you’ve gotta understand how to read one. Most compasses have a housing, needle, and a baseplate, and they work together to point you towards magnetic north.
But wait, what’s magnetic north? It’s not the same as true north—there’s often a little discrepancy you’ve got to be aware of. This means you’ll want to familiarize yourself with your area’s magnetic declination. You can usually find this info on your map.
And hey, practice makes perfect. I always take my compass out with me, even on short hikes. It’s like a dance; you need to get used to the movement and flow. Trust me, once you get the hang of it, you won’t want to leave home without it!
Reading Terrain
Identifying Land Features
Next up is understanding the land around you. Learning to read the terrain can seriously up your navigation game. Look around! Observing landmarks—like rivers, mountains, or unique rock formations—can help keep you oriented. I often use these as reference points; they’re like the nature version of street signs.
Don’t forget about elevation changes! Climbing up a hill can give you a whole new perspective. I can’t tell you how many times I’ve reached a summit and been able to spot my destination from up there. It’s like seeing a video game map unfold before your eyes.
Lastly, pay attention to the slope of the land. Steep terrain can be tricky and may require different navigation tactics. If you’re planning a tough hike, consult the elevation profile on your map—it’s like a sneak peek at what’s to come. Trust me, it makes a huge difference!
Tracking Your Position
Using Land Navigation Techniques
Now let’s get into tracking your position as you go along. One of my favorite methods is dead reckoning. This means you’re estimating your current position based on your previous position and the direction you’ve traveled. It sounds complex, but it’s really just a simple mental calculation.
Another method I love is terrain association. This is about matching the features around you to your map. If I’m passing by a creek or a specific rock formation, I check if it matches up on my map. This technique can really help keep your bearings straight.
Finally, I can’t stress enough the importance of regularly checking your location. You don’t want to end up too far off-course, especially in unfamiliar territory. A quick glance at your map and compass every now and then can make all the difference in your adventure.
Emergency Navigation Skills
Creating Backup Plans
Alright, let’s get real. Emergencies happen, and it’s always smart to have backup plans. First, I always carry a whistle. If I get lost, a whistle can carry much farther than my voice. Plus, it keeps my hands free for other tasks.
Next, always have a designated meeting point. If you’re hiking with friends and you get separated, knowing where to regroup can save the day. I like to choose a landmark that’s easy to spot and won’t be missed.
Last but not least, practice makes you prepared. Make it a routine to navigate in different conditions—day, night, different weather. The more you expose yourself to various situations, the more confident you’ll become. And trust me, that confidence will serve you well!
Frequently Asked Questions
1. What should I always carry for navigation?
Great question! Always have a map, a compass, and a backup navigation tool—like a GPS or a smartphone app. These three together can cover you in most situations!
2. How do I choose the right map for my trip?
Consider the area you’ll be exploring. Topographic maps are great for hiking, while road maps are better for driving. If you’re heading to a national park, often they provide free maps at the visitor center.
3. What if my compass doesn’t seem to work?
First, check for any metal objects nearby that could distort the needle. If that isn’t the issue, it could be time for a new compass or to recalibrate your current one. Always trust your instincts combined with other navigation tools!
4. How often should I check my surroundings while navigating?
I recommend checking regularly! Every 15 minutes or so is a good rule of thumb. It will help you stay on track and adjust as necessary. Plus, you’ll catch those beautiful views along the way!
5. Can I learn these skills without going into the wilderness?
Absolutely! You can practice in your local park, or even just your backyard. Try using a map and compass to find your way around. The more comfortable you are, the more prepared you’ll be for your next big adventure!
Hey there! You know, navigating the world after dark can be a bit daunting, especially when streetlights are few and far between. I’ve had my fair share of nighttime adventures, and over the years, I picked up some cool strategies that can help anyone feel a bit safer. Here are five major tips to keep in mind, based on my own experiences.
Plan Your Route Ahead of Time
Know Your Surroundings
Before stepping out, I like to take a good look at the area I’ll be traversing. Familiarizing myself with the streets, alleys, and shortcuts can make all the difference. If there are areas I consider dodgy or poorly lit, I’ll avoid them like the plague. It’s all about knowing, right?
It might sound excessive, but sometimes I even scout these routes during the day. By doing this, I can spot landmarks or safe havens, like shops or the odd house with lights on. It really helps build my confidence when I’m moving about at night.
If you’re heading out somewhere new, I recommend using apps or maps to help plan your route, highlighting any spots to steer clear from. It’s no fun getting lost in the dark!
Check for Safe Zones
Safe zones can be anywhere that feels welcoming and secure—think well-lit areas like gas stations, convenience stores, or the front steps of busy houses. Knowing where these spots are can provide a quick escape route if you need to change course.
I’ve found that it really helps to mentally note these spots as I walk. It gives me a sense of control and makes those dark moments feel, well, a little less scary. Trust me, having a plan in your back pocket is a game changer!
Also, if the area is new to you, don’t hesitate to ask locals about safe zones. They often have good insights and can steer you towards the best routes. Community is often more important than we realize, especially at night.
Use Technology Wisely
Now, I’m a huge fan of tech, so I can’t stress enough how helpful my phone’s navigation can be when it’s dark. Having a reliable app that gives turn-by-turn directions can keep you from making wrong turns in poorly lit spots.
Another smart move is using your phone’s flashlight. It’s like carrying a miniature streetlight! I keep my phone charged and ready; a small light can help illuminate uneven pavements or even deter a potential threat.
Lastly, sharing your location with a trusted friend can be a tremendous safety net. Let them know when you’re on the move, and they’ll feel more at ease, too. Nothing builds trust like keeping those in your circle informed!
Walk With Purpose
Stay Aware of Your Surroundings
When walking in the dark, I can’t stress enough the importance of being aware of my surroundings. This means not getting glued to my phone or wearing headphones. Sure, I love my tunes, but staying alert is far more important at night.
Each time I’m out, I try to notice small details, like if there are any unusual sounds or people lingering about. It may sound overly cautious, but even a slight change can signal a need to reassess my surroundings.
When I feel the tension in the air or see something odd, I instinctively adjust my body language to appear more confident. It’s funny how often that alone can shift things in my favor. Sometimes, it’s all about projecting strength!
Keep Your Body Language Confident
One of the tricks I’ve learned is the importance of confident body language. Standing tall and walking with purpose can actually deter unwanted attention. I try to keep my chin up and shoulders back, which not only portrays confidence but also makes me feel more secure.
When I encounter others while walking, I’ll make eye contact. Not in a confrontational way, but in a way that shows I’m aware of them. People often pick up on this and tend to be less likely to mess with you when they know you’re alert.
Body language can communicate a lot! I even practice my “power poses” when I’m at home, just to instill that sense of confidence in myself. It’s all about mindset, my friends.
Travel with a Friend
Whenever possible, going out with someone else is one of my favorite tips! There’s something about having an ally that eases the nerves and enhances safety. Plus, it can be a lot more fun to share experiences with someone else.
If my friend and I are heading out, we always chat about our plans and keep each other aware of our surroundings. It’s less about just feeling safe and more about having each other’s backs, you know?
Honestly, there’s a sense of comfort in numbers. We often find ourselves looking out for potential hazards, which makes the journey way more enjoyable and less stressful! Never underestimate the power of companionship.
Dress to Be Prepared
Wear Reflective or Bright Clothing
I can’t tell you how pivotal it is to wear bright or reflective clothing when heading out at night. I’ve made it a habit to sport something noticeable, especially if I’m walking near car traffic. It’s one of those little choices that can make a huge difference!
Last winter, I bought a reflective vest for my evening walks. I felt like a safety superstar turning heads, but honestly, I felt safer knowing drivers could actually see me. It’s worth every penny if it means being visible!
Remember, it’s not about being fashionable; it’s about being smart. Choose clothes that stand out, especially if the area you’re walking through is dimly lit.
Choose Comfortable, Sturdy Shoes
Comfortable shoes are a must! I’ve been in too many situations where I regretted my choices. Whether you’re sprinting away from a situation or just walking a few miles, make sure your footwear won’t let you down.
I’ve opted for shoes with good grips and sturdy soles since they’d not only keep me comfortable but help navigate tricky terrains. I’ve tripped on uneven sidewalks all too often to know that is vital!
It might sound trivial, but taking those extra minutes to choose wisely can save a lot of hassle when you’re feeling the pace after sunset.
Carry Essential Gear
Last but not least, I always carry a small bag with essential gear when I head out at night. A mini first-aid kit, a portable phone charger, and a small flashlight are my go-tos. You never know when you might need them!
I’ve been in situations where a tiny flashlight saved me from tripping or worse. I even consider my pepper spray a part of my nighttime essentials—just a small deterrent that provides peace of mind while walking alone.
Make it easy on yourself by choosing a compact bag that’s light but functional. This will make you feel prepared and safer during those dark ventures.
Trust Your Instincts
Listen to Your Gut
This is a big one! I’ve learned time and again that my gut feelings are usually spot on. If something doesn’t feel right—a person, a sound, or even a street—I trust that inner voice more than anything!
There have been times when I’ve felt uncomfortable and chose to change my course. It’s better to be safe than sorry, right? Listening to your instincts is a fundamental part of staying safe.
Sometimes, this might mean avoiding certain paths altogether or seeking immediate company. Never hesitate to act on those feelings; they’re there for a reason!
De-escalate When Necessary
If I find myself in a tense situation, I’ve learned a few tricks to de-escalate. I focus on staying calm and keeping my voice steady. Often, my calm demeanor can influence the mood around me—people respond to energy!
Also, avoiding direct confrontation is usually a smart approach. Sometimes, simply changing the subject or walking away can diffuse tension. I’m not about proving something; I just want to get home safe.
Having strategies like these has really set my mind at ease. Practicing calm communication helps not just in the moment but builds my confidence for future encounters too.
Know When to Seek Help
There’s absolutely no shame in seeking help if you feel threatened or in danger. If I notice someone is lingering a bit too long near me, I don’t hesitate to approach a nearby shop or even flag down someone for assistance.
I’ve often found that just being loud and drawing attention can sometimes deter unwanted attention as well. People are programmed to notice when someone’s in distress. I’ve had moments when a simple shout has helped to solve potential issues.
Don’t forget: you’re not alone in this! There are so many people around who can lend a hand. Never hesitate to reach out, even if it’s to simply share your fears with someone who looks supportive.
Frequently Asked Questions
1. What should I do if I feel unsafe while walking?
If you feel unsafe, trust your instincts. Change your route, head to a well-lit public area, or seek help from others around you. Always prioritize your safety and don’t hesitate to call for assistance.
2. How can I prepare for walking at night?
Plan your route ahead of time, wear bright or reflective clothing, and ensure you have a charged phone and essential gear like a flashlight. Staying aware and confident is key.
3. Is walking alone at night dangerous?
It can be, particularly in poorly-lit or unfamiliar areas. It’s important to stay aware, trust your gut, and follow the strategies outlined in this article to enhance your safety.
4. What if I notice someone acting suspiciously?
Trust your instincts and avoid engaging. If you feel particularly threatened, seek help immediately and consider contacting authorities if necessary. Always put your safety first.
5. How important is body language when walking at night?
Very important! Confident body language can deter potential threats. Walk with purpose, make eye contact with others, and be aware of your posture to avoid appearing vulnerable.
In a world teeming with uncertainties, the ability to respond effectively during emergencies can be the difference between chaos and calm. Understanding the importance of emergency preparedness is essential—not merely as a precaution but as a proactive strategy that empowers individuals and families to navigate crises with confidence. Whether facing natural disasters like hurricanes, wildfires, or man-made events, being prepared can save lives and protect property.
*Assessing Risks: Identify Potential Emergencies in Your Area**
The first step in your journey toward preparedness is assessing the risks specific to your geographical area. Are you in a flood zone? Is your region prone to earthquakes or severe storms? Conduct thorough research into local hazards. Engage with community resources or consult governmental agencies that provide insights about historical emergencies. Once you have identified potential threats, you can tailor your preparedness efforts to address those unique challenges effectively.
*Building Your Emergency Kit: What to Include**
An essential component of emergency preparedness is assembling an emergency kit. This kit should be comprehensive yet portable, ensuring you can take it if evacuation becomes necessary. Begin by including items such as non-perishable food and water—aim for at least one gallon per person per day for three days. Don’t forget important documents (like identification), first aid supplies, medications, flashlights with extra batteries, and multi-tools or Swiss army knives. Personalize your kit further by adding comfort items like blankets or games for children; these little touches can make a significant difference during stressful times.
*Creating a Family Emergency Plan: Communication and Evacuation**
Once you’ve built your kit, focus on crafting a family emergency plan that outlines how everyone will respond during various scenarios. Effective communication is crucial—designate meeting places both near home and outside of the immediate area where family members can regroup if separated. Discuss how you’ll communicate if phone lines are down; consider using text messages or social media updates as alternatives when traditional methods fail. Planning escape routes from home ensures everyone knows where to go should evacuation become necessary; practicing these routes together helps solidify understanding and builds confidence.
*Staying Informed: Utilizing Alerts and Resources**
In our digitally connected age, staying informed is easier than ever—but it’s crucial not to overlook this aspect of preparedness. Sign up for local alert systems that notify residents about impending dangers such as severe weather warnings or public safety announcements. Monitor trusted news sources for real-time information on emergencies affecting your community. Additionally, familiarize yourself with local resources such as shelters or community centers that may open during crises; knowing where help is available can alleviate stress when every second counts.
*Regularly Reviewing and Updating Your Preparedness Plan**
Finally, remember that preparedness isn’t a one-time task but an ongoing commitment that evolves over time. Regularly review your emergency plan and update it based on changes in family dynamics—new members joining the household or kids growing older may necessitate adaptations in communication plans and escape routes. Revisit your emergency kit at least twice a year; check expiration dates on food items, replace batteries annually, and ensure everything remains functional.
By taking these steps towards comprehensive emergency preparedness today, you’re not just preparing for tomorrow’s unknowns—you’re instilling peace of mind within yourself and loved ones amidst uncertainty. After all, readiness truly leads to resilience!
In an unpredictable world, the best defense is a good offense. Emergency preparedness isn’t just a trendy buzzword; it’s a vital practice that can save lives. Whether natural disasters like hurricanes and earthquakes or man-made crises such as power outages or civil unrest, understanding how to prepare can make all the difference. So, let’s dive into essential strategies for getting ready for anything!
### Understanding the Risks: Assessing Potential Emergencies in Your Area
The first step in your preparedness journey is recognizing what threats are most likely to impact you and your loved ones. Every region has its unique set of risks. Coastal areas might face hurricanes or flooding, while mountainous regions could be more susceptible to wildfires or landslides. Research local history and consult resources like FEMA or the American Red Cross to get a clear picture of potential emergencies near you.
Additionally, consider factors such as your community’s infrastructure and any recent weather patterns that may hint at changing conditions. Speak with neighbors and local authorities to gain insights into specific vulnerabilities your area might face.
### Building Your Emergency Kit: Essential Supplies You Can’t Live Without
Once you’ve assessed the risks, it’s time to build an emergency kit—your lifeline during a crisis. Start with the basics: water (at least one gallon per person per day for three days), non-perishable food (think canned goods, energy bars), and a manual can opener (you’ll thank yourself later!).
Next, include medical supplies like first aid kits, necessary medications, hygiene items (toothbrushes, soap), flashlights with extra batteries, and important documents stored in waterproof bags. Don’t forget additional necessities like cash—ATMs may not function during power outages—and sturdy shoes, which can be crucial if you need to evacuate quickly.
Tailor your kit based on family needs; this includes infant formula if you have young children or pet supplies for furry family members.
### Creating a Family Emergency Plan: Communication and Safety Strategies
A well-thought-out emergency plan is crucial for ensuring that everyone knows what steps to take when disaster strikes. Begin by designating meeting points outside your home where family members know to gather if separated during an event.
Establish communication protocols—pick an out-of-town contact who can relay messages in case local lines are congested. Discuss potential evacuation routes from various locations around town and rehearse these plans regularly so everyone feels confident navigating them.
Also consider special needs within your family; ensure that elderly relatives or those with disabilities have tailored arrangements suited to their requirements.
### Staying Informed: Resources and Tools for Ongoing Preparedness
Preparedness doesn’t stop once you’ve assembled supplies and made plans; staying informed is equally vital! Utilize technology by downloading apps from trusted organizations like FEMA that provide real-time alerts about severe weather warnings or emergencies in your area.
Subscribe to local news outlets’ notifications via text or social media platforms for updates regarding ongoing situations affecting your community. Attend workshops offered by local agencies on disaster response techniques such as CPR training or fire safety measures—the knowledge gained could prove invaluable when seconds count.
By embracing these strategies—understanding risks specific to your area, building an essential emergency kit, creating robust family plans, and staying informed—you will empower yourself and those around you with confidence amid chaos. Remember: being prepared isn’t just about surviving; it’s about thriving through adversity!
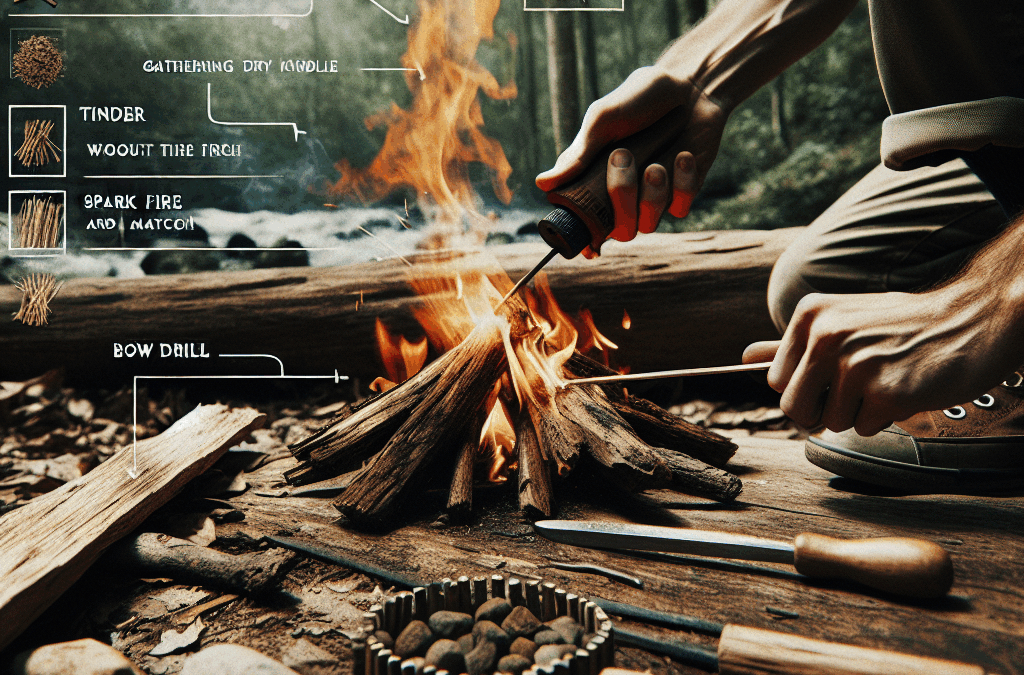
When it comes to starting a fire without matches, the first step is choosing the right materials. You need to gather dry tinder, kindling, and fuel wood. Tinder can be anything from dry leaves to the fluffy fibers found on certain trees. I’ve even used shredded paper when I was desperate out in the woods!
For kindling, look for small sticks and twigs that can easily catch fire. These should be about the thickness of a pencil at most. And for the large fuel wood, you want logs that will sustain a longer burn. Trust me, you’ll thank yourself later when you don’t have to keep re-stocking the fire.
The key here is to make sure everything is dry. Wet materials will only lead to frustration and a lot of smoke without any flame. So, scout around, and don’t rush this part!
Using Friction Techniques
The Bow Drill Method
One of the classic techniques for starting a fire without matches is the bow drill. This method takes a little practice, but once you get it down, it’s incredibly effective. You’ll need a bow, a drill (which is basically a stick), a fireboard (a flat piece of wood), and a hearth board for catching the ashes.
The idea is that the bow, which is a curved stick with a string attached, helps spin the drill quickly against the fireboard, creating friction and ultimately ash. You’ll want to create a small notch in your fireboard for the ash to fall into. After a bit of grinding, you should see some smoke and maybe even some glowing embers!
This technique takes a bit of strength and stamina, so be patient with yourself. It can be a workout, and the first few tries might not yield results. I remember my first time—it was a bit embarrassing, but oh, when I finally got that flame, it was worth every drop of sweat!
Creating Sparks with Flint and Steel
Assembling Your Tools
If you’re not into the whole friction thing, let’s talk about flint and steel. It’s an age-old method and super reliable once you learn how to wield it. You’ll need a piece of flint (or quartz) and some steel—often a back of a lighter works well in a pinch.
To use this method, you strike the flint against the steel in such a way that it creates a spark. This spark needs to land on your prepared tinder. I like to keep my tinder bundle loose so that all those fibers catch the spark quickly!
It’s pretty awesome to see that tiny spark turn into a fire. Just make sure to have your tinder nice and prepared. And hey, practice makes perfect, right? You might want to try this technique in your backyard before taking it into the wild!
Fire Plough Technique
Setting Up for Success
Another fascinating method is the fire plough. This is where you carve a groove into a piece of wood and then rub another stick against it. It’s all about the friction, just like the bow drill, but this time you’re going to be ploughing instead of drilling!
First, you need a sturdy base for your fire plough, which can be a thick piece of soft wood. Then, find a stick that fits snugly in your hand for the plough action. As you push the stick back and forth in the groove, tiny splinters of wood will start to form. With a bit of persistence, you’ll create some heat and hopefully catch some ember.
This technique might not be as popular or well-known, but it’s truly a nifty trick to have under your belt! I still remember the first time I successfully ploughed my way to a fire—there’s nothing quite like that satisfying glow of flames after some hard work!
The Importance of Fire Safety
Staying Safe and Responsible
Okay, so once you’ve got that fire going, let’s talk about fire safety. I can’t stress enough how crucial it is to respect fire and its power. Always make sure you’re in a clear area away from flammable materials.
Have a bucket of water or dirt handy to extinguish the fire when you’re done. It’s a good practice to create a small fire ring or put your fire in a fire pit to contain it better. Trust me, nobody wants their camping trip to be remembered for an out-of-control blaze!
Lastly, always check for fire restrictions in the area you’re at. Some places prohibit open fires to protect the wildlife or during dry seasons. It’s always better to be safe than sorry. Be a responsible adventurer!
Frequently Asked Questions
1. Can I use any type of wood for fire making?
Not all wood is created equal! You want dry, seasoned wood for the best results. Softwoods like pine or cedar work great. Just steer clear of damp or green wood, as it won’t ignite easily.
2. How long does it take to get a fire started without matches?
This really depends on the method you’re using and your skill level. Some might get it going in just a few minutes, while others could take longer if they are just starting out.
3. What if I can’t find flint or steel?
If you can’t find flint or steel, don’t worry! You can always resort to friction methods like the bow drill or fire plough. Nature offers plenty of alternatives; you just have to get a little creative!
4. Can I really start a fire with just my hands?
Well, sort of! Using your hands in the friction methods (like the bow drill) is common. However, you won’t start a fire simply by rubbing your hands together—sorry!
5. Is it okay to make a fire anywhere?
Nope! Always check for local regulations regarding fire making. Many places have specific areas for campfires to minimize risks to the environment, especially in dry seasons.
And there you have it, folks! A complete guide on how to start a fire without matches. Remember, it’s all about patience, practice, and safety. Go out there and impress your friends with your newfound skills!
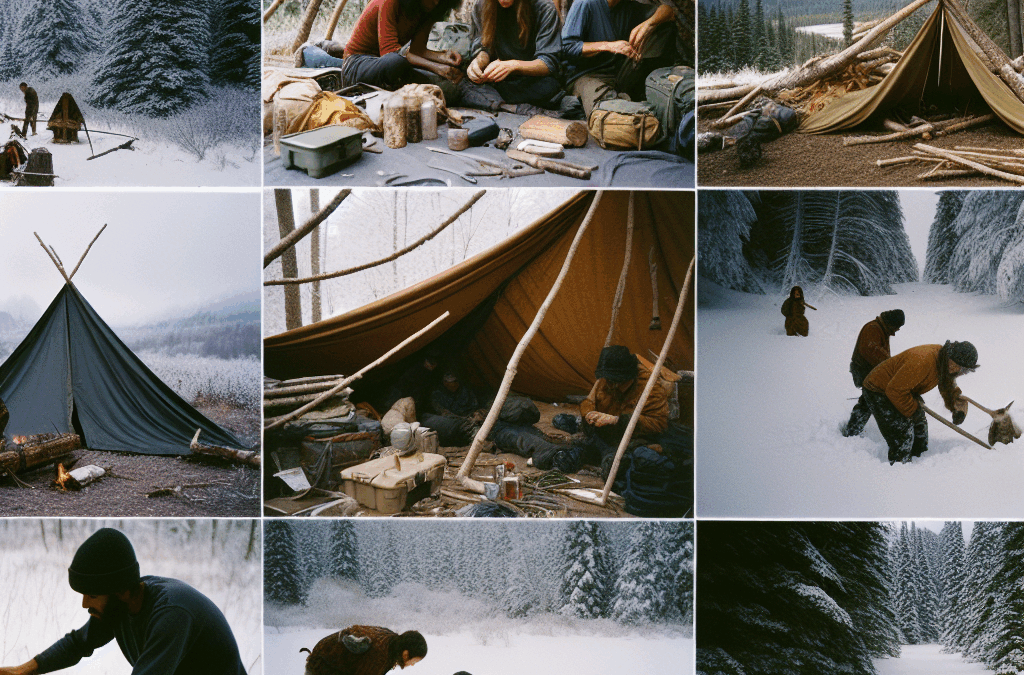
When I found myself needing temporary shelter, the first thing I did was to really sit down and assess my situation. It’s easy to panic, but taking a moment to gather my thoughts made all the difference. Ask yourself questions like: How long do you need the shelter? What amenities are essential for you right now? Understanding these elements helps you narrow down your options.
Also, think about your comfort levels. Being in a safe environment is a must, but do you also need privacy? Perhaps you’ve got some pets to consider as well. Listing down these needs can definitely be a game changer in crunch time.
In my experience, once I had a clear vision of what I needed, I felt empowered. It’s a huge relief knowing where to start instead of just wandering aimlessly through choices.
Consider Your Budget
Next up is figuring out your budget. When money is tight, or you just want to be smart about spending, you need to know what you’re working with. I remember going through my savings and determining how much I could realistically allocate for shelter without sacrificing my essentials. It’s not always easy, but it’s crucial.
Don’t be afraid to look for budget-friendly solutions like local shelters, community centers, or even short-term rentals that fit your needs. Websites that specialize in affordable housing can be super helpful. I found several options that were not only affordable but also met my other requirements.
Being mindful of your budget keeps you grounded and prevents any last-minute financial panic. Trust me, options like these can steer you clear of unnecessary stress!
Timeframe and Duration
Another important factor is how long you actually need the shelter. Are you in a situation that only requires a couple of nights, or are you looking for something more long-term? Knowing your timeframe allows you to filter out options that won’t serve your needs.
In my case, I needed a temporary solution for about a month. This helped me focus on places that offered flexibility. Some rental agreements can be rigid, so it’s always good to ask about short-term leases before committing.
Understanding your duration helps not only with finding the right place but also with planning your next steps. It’s like setting the stage for where you want to go from here.
Research Temporary Shelter Options
Local Shelters and Community Resources
Once you’ve got your needs outlined, it’s time to hit the research phase. I was amazed at the number of local shelters and resources available in my community. Many towns offer temporary housing through churches or non-profits at no cost or very low rates. Honestly, I didn’t even know these resources existed until I started looking.
Find out what local organizations are available, and don’t hesitate to reach out to them. They often have lists of available shelters that fit different situations, ensuring you have options tailored to you.
This can really save both time and stress – just be open and willing to ask for help! The community is often eager to assist when people are willing to reach out.
Online Platforms and Listings
The Internet can be a treasure trove when it comes to finding temporary shelter options. Websites like Airbnb, Vrbo, or even Craigslist had some fantastic leads for me. I loved how I could filter choices by price, location, and amenities. It saved me a ton of legwork!
Just make sure you’re careful and do your homework. Read reviews and look for verified listings. In my hunt, I found some hidden gems but also faced a few questionable ads! Trusting your gut is key in this phase.
Using digital tools not only broadens your options but can also help you keep track of leads as you explore various places. It helped me streamline my search so I didn’t get overwhelmed.
Networking and Community Connections
Don’t underestimate the power of networking! Friends and family may know of places or can provide referrals that can lead to securing a good temporary shelter quickly. When I reached out to my circle, I was surprised at how many people were willing to help.
I even discovered a friends’ family member who had a vacant property available for short-term rental. It felt great to connect and feel supported through those connections.
Putting it out there that you’re searching for temporary shelter can really open doors, sometimes in unexpected ways. You never know who might have a lead that works perfectly for you!
Prepare for Your Stay
Gather Necessary Supplies
When you finally lock down a shelter, preparing for your stay is key! I always made a checklist of the essentials I’d need day-to-day. Things like toiletries, clothing, and even a few comforts from home (like my favorite blanket) made settling in a lot smoother.
Depending on your situation, consider what appliances or items might be part of the shelter. Some places might not have basic kitchen supplies, so do a quick inventory to avoid surprises upon arrival.
Your comfort can significantly impact your mindset during this transitional period, so don’t skimp on these preparations!
Understand the Rules and Expectations
Each shelter or rental usually comes with its own set of house rules and expectations. Before you dive in, I always recommend taking the time to fully understand what’s expected of you, from checkout procedures to guests or noise policies. Clarity here can help you dodge potential conflicts later.
I remember staying with a friend in a community shelter where they had strict quiet hours. Initially, I didn’t realize this, but having a heads-up made it so much easier to coexist with others. Knowing these rules means you can quickly adapt without stumbling through any unwanted mistakes!
Plus, respecting the property and rules builds a good relationship with your temporary hosts or neighbors, which is so important during this time.
Document Condition Upon Arrival
Trust me, this one is a no-brainer. When you arrive at your temporary shelter, walk through and document its condition. Snap a few pictures and take notes on any issues you find. This way, if disputes arise later, you’ve got your base covered.
Keep it polite and respectful; we’re all human here. But being thorough saves you from potentially stressful situations with landlords or service providers. I learned this lesson the hard way once — flexibility is helpful, but protecting yourself matters, too!
By setting this foundation, you can focus on making the best out of your temporary stay, turning it into a positive chapter instead of a stressful one.
Know When to Transition
Assessing Your Current Situation
While temporary shelter offers relief, it’s essential to remember it’s just that – temporary. I always recommend checking in with myself regularly to gauge how I’m feeling in the shelter and to see if my needs are being met.
Are you still comfortable? Is it time for a change? Listening to your gut instincts can help you recognize when it’s time to transition to a more permanent solution.
Don’t let fear hold you back from making a change. A temporary situation doesn’t have to feel permanent if you’re actively seeking a way forward!
Start Planning for a Permanent Solution
Once you’ve begun to feel that itch for something more stable, it’s time to kick into planning mode. I started to search for longer-term rentals or housing options that aligned better with my goals.
Enlist the help of friends or family, and consult online resources to find suitable long-term accommodations. The process may take time, but knowing you’re on the right path can really give you a sense of purpose.
While you check out options, think about what you’ve learned from your temporary stay. Maybe you discovered you value being close to public transportation or found a particular neighborhood you love. Use this insight to guide your future decisions!
Reach Out for Assistance as Needed
Transitioning can be daunting, but remember, you’re not alone! Many organizations exist to help people move from temporary to permanent housing. I reached out to local housing authorities and charities that specialize in helping folks like us find stable homes.
They often have resources, advice, and even financial assistance programs to help ease the transition. It felt reassuring to know that support was available, and I wasn’t stuck figuring it all out by myself.
Always remember: asking for assistance isn’t a sign of weakness; it’s an important part of navigating life’s challenges. Use every resource at your disposal to secure the most stable situation you can!
Frequently Asked Questions
What is the best way to start finding temporary shelter?
The best way to start is by assessing your immediate needs, including your budget and desired timeframe for shelter. Understanding these factors can help you narrow down your search effectively.
Are there resources available if I don’t have a lot of money to spend?
Absolutely! Many communities offer free or low-cost shelters through non-profits, churches, or local organizations that can help those in need. Don’t hesitate to reach out to them!
How can I ensure my stay in temporary shelter is comfortable?
Preparing adequately by gathering necessary supplies, understanding the house rules, and documenting the condition upon arrival can all contribute to a comfortable stay.
When should I start looking for permanent housing?
You should start looking for permanent housing as soon as you feel your temporary arrangement is no longer serving your needs, or when you feel ready for a change. Regularly assess your situation to help inform this decision.
Is it okay to ask for help during this process?
Yes, definitely! Seeking assistance from friends, family, community support services, or housing organizations can provide valuable resources and support during your transition.