Restocking should begin with an inventory audit, not a shopping trip. Emergency demand often makes supply levels look worse than they are because opened packages, partial containers, duplicate purchases, and items stored in different rooms are easy to miss. Gather everything into one record and separate usable stock from damaged, expired, contaminated, or unidentifiable items. The result is a realistic baseline for replenishment.
Record the product, quantity, condition, expiration date, normal use, and replacement difficulty. A case of unopened shelf-stable food is not equivalent to several opened packets, and a partly charged battery pack should not be counted as a fully available power source. Check water containers for leaks, fuel storage for unsafe conditions, first-aid materials for missing components, and sanitation products for damaged seals.
A useful audit distinguishes three quantities: what is physically present, what is immediately usable, and what must be replaced. For example, a household may have six cans of food but only four that fit its dietary needs, or enough batteries for flashlights but none for a medical device. This distinction prevents a common failure: buying cheap or familiar items while leaving a critical gap unresolved.
Use the household’s actual consumption during the demand peak as a planning signal, but do not assume that one unusual week represents normal use. A power outage may increase battery consumption, while a boil-water notice may rapidly deplete containers and disinfecting supplies. Compare emergency usage with ordinary weekly needs and identify which increase came from the hazard itself. Readers building a broader how to replenish supplies after emergency demand peaks process should preserve these notes for the next review.
Rank Supplies by Risk and Replacement Time
Priority should reflect consequence and availability, not shelf appeal or price. A practical ranking puts items into three groups: essential for immediate safety, necessary for ordinary functioning, and convenient to replace later. Water, required medications, infant supplies, basic sanitation materials, and equipment-specific batteries generally deserve earlier attention than snacks, duplicate tools, or comfort purchases.
Replacement time changes the order. A common grocery item may return to shelves quickly, while a particular medication, filter, generator component, mobility aid, or specialized battery may require a supplier or prescription process. Identify those long-lead items before spending the restocking budget. The most expensive item is not automatically the most urgent; an inexpensive but difficult-to-find component can create the larger operational problem.
Risk also depends on storage and household conditions. Canned food may be practical for one home but unsuitable for someone without an opener. A large water container may offer efficient storage yet be difficult for a child or older adult to move. Fuel may be useful only when compatible equipment is available and storage is permitted and safe. Replenishment decisions should match the people, shelter, climate, and equipment actually involved.
Build a short priority list and attach a reason to each item. For example:
Replace first: items whose absence creates an immediate health, sanitation, or communication problem.
Replace next: supplies needed to maintain food preparation, lighting, cleaning, and mobility.
Delay or substitute: noncritical goods with several safe alternatives or reliable local availability.
The mistake to avoid is treating a preparedness checklist as a fixed shopping mandate. A checklist can reveal categories, but it cannot know whether a household already has enough, whether a product is compatible, or whether another need has become more urgent. Use it as an audit prompt, then make decisions from current conditions.
Use Staggered Orders and Local Alternatives
Staggered purchasing is usually safer than attempting to refill every category in one transaction. Place the first order for high-consequence items, wait for confirmed availability, and then fill lower-priority gaps. Smaller orders reduce the chance of tying up money in unsuitable products and make it easier to detect substitutions, backorders, or changing delivery estimates.
Check more than one channel, including local stores, established suppliers, pharmacies, agricultural or hardware retailers, and direct manufacturer listings where appropriate. Compare the actual unit cost, package size, delivery window, return terms, and compatibility rather than choosing the first listing marked available. A lower price is not a saving if the product arrives late, lacks a needed adapter, or cannot be stored safely.
Substitution requires judgment. Different brands of packaged food may be interchangeable, but a filter cartridge, charger, medication, respirator component, or fuel canister may not be. Confirm model numbers, dimensions, connector types, dosage instructions, and storage requirements. Do not improvise with safety-critical equipment simply because a similar-looking product is in stock.
Emergency demand can also distort behavior. Scarcity messaging, inflated prices, and seller claims about urgency may encourage bulk purchases that exceed practical use. Set a spending ceiling and a maximum quantity before browsing. If an item is unavailable, ask whether the gap can be reduced through a safe alternative, a shared household purchase, or a change in routine. A person needing a specific medical product should consult the relevant clinician or pharmacist rather than making an unverified substitution.
Keep a delivery log showing order date, expected arrival, actual quantity, and unresolved shortages. This makes a second purchasing round more deliberate. It also reveals whether the problem is a temporary stockout or a supplier that repeatedly fails to meet the promised schedule.
Inspect Deliveries and Rebuild a Sustainable Reserve
Replenishment is incomplete until new supplies are checked, stored, and incorporated into normal rotation. Count each delivery against the invoice, inspect seals and packaging, verify expiration dates, and test compatible equipment where testing is safe. Separate questionable items before they mix with usable stock. Delivery errors are easier to correct immediately than weeks later.
Store goods according to their actual requirements rather than convenience. Keep food, water, batteries, medicines, cleaning chemicals, and fuel-related products in locations that protect them from heat, moisture, contamination, children, and accidental mixing. Follow the product label and relevant official guidance for storage. A full shelf is not a successful reserve if its contents are inaccessible, unlabeled, or exposed to conditions that shorten useful life.
Use first-expiring, first-out rotation for dated supplies. Place newer items behind older ones and mark opened packages with the date they were started. This turns emergency stock into part of ordinary household consumption instead of a neglected cache. Rotation also exposes unrealistic purchases: if nobody will eat a particular food during normal life, buying more of it may not improve readiness.
Set reorder points based on normal use and supplier delay. For example, a household might choose to reorder when its usable stock falls below a defined amount rather than waiting until the shelf is empty. The threshold should be higher for items with uncertain availability and lower for products that are widely sold locally. Review the system after the next disruption, noting which supplies ran out first, which alternatives worked, and which purchases created waste.
A frequent mistake is rebuilding the old inventory without examining why it failed. If batteries disappeared quickly because several devices used the same size, consolidate or label them. If food remained untouched because preparation required unavailable fuel, add no-cook options or the equipment needed to use the food. A reserve becomes more reliable when each replacement addresses a documented failure rather than simply restoring a number on a checklist.
Know When the Restocking Cycle Is Working
A replenishment plan is working when essential gaps close without repeated panic buying, deliveries match the record, and ordinary consumption keeps older stock rotating. The clearest sign of progress is not a crowded storage area; it is a current inventory that shows usable quantities, expiration dates, substitutes, and the next reorder point.
Review the list at a quiet time and ask four operational questions: Can the household access the item quickly? Can the item be used with existing equipment? Is the quantity appropriate for realistic use? Can it be replaced before the reserve is exhausted? A “yes” to the first question but “no” to compatibility still represents a failure. A large quantity with no rotation plan may also create waste and reduce funds available for more urgent needs.
Compare two approaches: rapid bulk restoration and measured recovery. Bulk restoration may make sense when a critical item is reliably available, affordable, and unlikely to expire. Measured recovery is more suitable when prices are unstable, household needs are uncertain, or several suppliers are backlogged. The second approach takes more recordkeeping but provides better visibility and usually limits costly mistakes.
Keep one current copy of the inventory where household members can find it, while protecting sensitive medical or personal information. Include supplier names, compatible product details, and notes about what worked during the demand peak. That record supports a faster response if another emergency creates a similar shortage and makes supply replenishment decisions less dependent on memory.
Frequently Asked Questions
Should essential supplies be replaced all at once?
Usually not. Replace high-consequence items first, then use staggered orders for lower-priority goods so shortages, substitutions, and budget limits remain visible.
How can I tell what was actually consumed?
Gather supplies from every storage location, count usable units, inspect opened packages, and compare the result with receipts or notes from the emergency period.
What should take priority when stores are still short?
Prioritize water, required medications, sanitation, infant or mobility needs, communication, and items with long or uncertain replacement times.
Are similar products safe substitutes?
Only when compatibility and intended use are clear. Treat medicines, filters, chargers, respirator parts, and fuel-related equipment as product-specific unless qualified guidance confirms otherwise.
When should the inventory be reviewed again?
Review it when deliveries arrive, after normal use changes, before a seasonal hazard, and after the next emergency to update quantities and reorder points.
Evidence-informed sports nutrition resources and position stands for active people and athletes.
Conclusion
Replenishing an emergency reserve works best as a controlled recovery process rather than a race to refill shelves. Audit usable stock first, separate immediate safety needs from convenient purchases, and give scarce or long-lead items priority. Staggered orders protect the budget and make supplier failures easier to spot, while careful compatibility checks prevent unsafe substitutions. Once supplies arrive, count and inspect them, store them correctly, rotate dated goods, and record the reorder points that fit actual household use. The next practical step is to create one current inventory with quantities, condition, expiration dates, and replacement sources. Revisit that record after the demand peak has passed so the next reserve reflects what the household truly used, not what a generic checklist assumed.
A second-week outage exposes weaknesses that may not matter during a brief interruption. A household can tolerate limited lighting, reduced device use, and improvised meals for several days, but those measures become harder when batteries need recharging, fuel supplies shrink, temperatures remain uncomfortable, and normal services still have not returned. The central question changes from “How do we get through tonight?” to “Can this arrangement safely continue for another several days?”
Short-term plans usually assume that stores, fuel stations, pharmacies, banks, water systems, and local services will soon be available. Those assumptions may fail independently. A nearby shop might reopen while card payments remain unavailable, or a fuel station might have gasoline but no working pumps. A pharmacy may offer limited hours, yet a medication requiring refrigeration may still present a problem. Treat each service as a separate dependency rather than assuming that one sign of recovery means the whole area is functioning.
Resource accounting also becomes more useful than simple rationing. Record drinking water, cooking water, fuel, battery capacity, medications, cash, and food by days of safe use. Include hidden consumption: cleaning, handwashing, flushing, pet care, and preparing dry foods all draw from supplies. A generator that appears to have enough fuel for several days may provide far fewer hours if it is powering a refrigerator, space heater, chargers, and cooking appliances together.
One common mistake is preserving the original routine because it feels familiar. Running a generator on the same schedule as day two, taking long trips for uncertain information, or using disposable supplies without replacing them can create a sharper shortage later. Reassess every morning and evening, write down what changed, and set a specific threshold for seeking outside help or relocating.
Water, Food, Sanitation, and Health Priorities
By the second week, water and sanitation usually deserve more attention than food variety. Drinking water remains the first requirement, but water for hygiene, food preparation, wound care, and toileting determines whether the household can remain healthy. Use clearly labeled containers for drinking water and non-drinking water, and avoid treating an unknown source as safe merely because it looks clean. Follow the instructions for the treatment method being used, since boiling, chemical treatment, and filtration do not address every contaminant in the same way.
Food decisions should become more conservative. Refrigerated perishables should not be kept simply because they smell normal, and repeated brief power returns do not automatically make them safe. Shelf-stable foods are more useful now when they require little water, fuel, or cleanup. Canned beans, fish, vegetables, nut butter, crackers, oats, and ready-to-eat items can reduce cooking demands, but check sodium, allergies, chewing needs, and medical diets. Do not overlook the manual can opener.
Sanitation failures often develop gradually. Full waste containers, blocked toilets, standing dishwater, damp laundry, and poorly stored food attract pests and create odors before they become obvious health hazards. Establish a designated waste area away from food and water, keep hand-cleaning supplies accessible, and separate waste that may contain bodily fluids. Local authorities may issue specific instructions for sewage, refuse, or contaminated water; those instructions take precedence over improvised disposal methods.
Health needs can change quickly when sleep, temperature control, and routine medical care are disrupted. Make a written list of prescriptions, doses, allergies, medical devices, and provider contact details. Protect medicines from heat, freezing, moisture, and direct sunlight according to their labeling. People who depend on powered oxygen, mobility equipment, refrigeration, or electrically operated treatment should contact their care team and emergency services early rather than waiting until a battery is nearly empty.
Secure drinking and treatment water before expanding food choices.
Set a sanitation routine for waste, dishes, hand cleaning, and toilet use.
Use low-fuel foods and preserve special-diet supplies for the person who needs them.
Escalate medical concerns promptly; an outage is not a reason to delay urgent care.
The weak assumption is that a large pantry solves a long outage. Food without water, fuel, safe storage, or appropriate preparation may not be usable. A smaller supply of accessible, familiar food can be more valuable than a larger stock that requires extended cooking or produces difficult waste.
Power, Fuel, Communications, and Information
Second-week power management is a scheduling problem, not merely a battery problem. Decide which loads protect life, health, food safety, or communication, then assign operating windows. A refrigerator may need intermittent operation, while a medical device may require continuous power. Phones can be charged during a short generator run, but unnecessary video use, automatic updates, and repeated searches can consume that reserve without improving the household’s position.
Fuel should be treated as a finite reserve with safety limits. Never operate a generator, camp stove, or fuel-burning appliance indoors, in a garage, or near doors and windows where carbon monoxide can accumulate. Keep fuel in approved containers and away from ignition sources, following local fire-safety requirements. A generator may provide convenience, but it also creates noise, theft exposure, maintenance demands, and fuel dependence. In some households, a smaller power station used for communications and medical equipment is safer than attempting to run every appliance.
Communications should move from casual checking to a deliberate information schedule. Preserve one charged phone for emergency contact, use text messaging when voice calls are unreliable, and write down key numbers because contact lists may not be accessible. Battery-powered or vehicle-powered radios can provide local updates, but verify alarming claims through official local sources when possible. Information has practical value only when it changes a decision, such as where water is available, whether roads are open, or when a cooling center or medical facility is operating.
Compare two approaches: continuous low-level power use versus short, planned operating periods. Continuous use may protect a sensitive device but can exhaust fuel before replacement is available. Scheduled use may conserve fuel but requires temperature checks, charging discipline, and a clear priority order. Review the plan whenever weather changes, a vulnerable person develops symptoms, or official information indicates that restoration will take longer.
A common failure is assuming that a vehicle is an unlimited backup system. Idling a vehicle in an unsafe location can cause carbon monoxide exposure, and repeated short trips may consume fuel needed for evacuation or medical transport. Park vehicles so they can leave, keep keys accessible, and reserve fuel and mobility for the highest-consequence needs.
Deciding Whether to Stay or Relocate
Remaining at home is reasonable only while essential needs can be maintained safely. Evaluate water, sanitation, temperature, medication, food, communication, security, and the condition of everyone in the household. A familiar home may offer shelter and supplies, but familiarity does not compensate for unsafe indoor heat, worsening illness, contaminated water, or an inability to power critical equipment.
Use thresholds rather than waiting for a dramatic crisis. Relocation becomes more compelling when safe drinking water cannot be secured, sanitation is failing, indoor temperatures are dangerous, medication or medical-device power is running out, or reliable information and transport are unavailable. The destination must be more than “somewhere else.” Confirm that it has functioning utilities, space for the household, accessible transport, medication access, and a way to communicate arrival.
For example, a household with healthy adults, adequate water, shelf-stable food, and safe temperatures may be able to remain while monitoring restoration. A household with an infant, an older adult, or a person dependent on powered medical equipment may need to leave earlier, even if food supplies look sufficient. The relevant comparison is not comfort at home versus inconvenience elsewhere; it is the reliability of essential care in each location.
Prepare a departure kit before the decision becomes urgent. Include identification, prescriptions and medication lists, water, ready-to-eat food, chargers, cash, warm or weather-appropriate clothing, pet supplies, and copies of important contacts. Keep vehicles fueled when possible and avoid routes affected by downed lines, flooding, smoke, or official closures. Tell a trusted person where you are going, but do not publicize an empty home.
Do not confuse a restoration estimate with a guarantee. Conditions can change after equipment damage, access problems, or further weather. Recheck the plan at a fixed time each day, identify the next safe destination, and leave while transportation and health remain manageable rather than after reserves are exhausted.
Frequently Asked Questions
What becomes the biggest concern in the second week of an outage?
Water, sanitation, medical needs, indoor temperature, and fuel often become more urgent than lighting or entertainment. The answer depends on household health needs and local conditions.
Should food be rationed differently after seven days?
Use a written inventory and favor food that requires little water, fuel, and cleanup. Protect supplies for infants, medical diets, allergies, and people with limited ability to chew or cook.
How should generator fuel be prioritized?
Reserve it for medical equipment, essential refrigeration, communication, and carefully planned charging. Never operate a generator indoors or in an attached garage.
When should a household leave during a prolonged outage?
Consider leaving before water, sanitation, medication, temperature control, or medical-device power becomes unsafe. Confirm that the destination can actually provide the needed services.
Do short power restorations make an outage plan unnecessary?
No. Brief restoration may not stabilize refrigeration, water pressure, communications, or medical services. Continue monitoring official updates and keep essential reserves until service is dependable.
Evidence-informed sports nutrition resources and position stands for active people and athletes.
Conclusion
A second-week outage calls for a fresh operating plan, not a stretched version of the first few days. Count usable water, fuel, batteries, medication, food, and sanitation capacity; then match those reserves to the needs of the most vulnerable person in the household. Keep power use limited to health, safety, food protection, and communication, and treat every fuel-burning appliance as a carbon monoxide risk unless it is operated exactly as designed in a safe location. Set clear relocation thresholds and verify the destination before travel. Official restoration notices are useful, but household decisions should follow actual access to water, medical care, safe temperatures, sanitation, and transport. Reassess at scheduled times so that action occurs while options remain available.
Set the Capacity Around Real Evacuation Conditions
An evacuation pack for one adult is a mobility system, not a household pantry. Its value comes from keeping one person functional while traveling to a shelter, hotel, friend’s home, or safer area during the first part of a disruption. The right capacity depends on the likely route, weather, transportation, access to water, and whether the bag supplements supplies already stored at a destination.
A backpack is usually more useful than a suitcase because it leaves both hands available and works over uneven ground. A large hiking pack may hold more, but added capacity often encourages overpacking. A medium, comfortable pack with a supportive waist belt is a better choice for many adults than a heavy tactical-style bag with unused external features. The practical test is simple: load it with the intended contents and walk stairs, board a vehicle, sit down, and lift it from the floor. Pain, shifting weight, or difficulty reaching essentials signals a design problem.
Think in layers rather than a single number of days. The first layer covers immediate movement: shoes, weather protection, light, identification, medication, water, and communication. The second supports an overnight stay: food, hygiene items, spare clothing, and sleep protection. The third covers disruption at the destination: extra charging capacity, documents, cash, and personal comfort items. This approach is more useful than blindly targeting a particular pack size.
A common mistake is treating the bag as a substitute for a home emergency supply. A portable pack cannot realistically carry all the water, cooking fuel, bedding, and food needed for prolonged sheltering. Keep the bag focused on evacuation and maintain larger supplies separately. Review the evacuation bag for one adult against the conditions you may actually face, especially stairs, public transit, winter temperatures, or a long walk.
Build the One-Adult Supply Priorities
The first priority is the person’s ability to move, communicate, take medication, and remain protected from weather. Water should be accessible, while food can be compact and shelf-stable. A headlamp or flashlight is more useful than relying on a phone light because it preserves phone battery and leaves hands free. A small first aid kit should address ordinary problems such as blisters, minor cuts, and pain relief rather than attempting to replace professional medical care.
Personal needs deserve more space than generic gear. Pack prescription medicines according to the person’s medical plan, along with glasses, contact-lens supplies if used, hearing-aid batteries, mobility supports, and a written list of medications and relevant contacts. Include menstrual products, incontinence supplies, or other items that may be difficult to obtain during an evacuation. A generic checklist often fails because it assumes every adult has the same health requirements.
Documents and money are compact but high-value. Use a sealed pouch for identification copies, insurance information, emergency contacts, medication details, and relevant property or vehicle information. Keep some cash in small denominations because card readers, ATMs, or mobile payment systems may be unavailable. Do not place every original document in the bag if losing it would create a larger problem; copies and secure digital backups may be the better balance.
Use a priority order when space is limited:
Protect: seasonal clothing, rain protection, sturdy footwear, sun protection, and an emergency blanket.
Function: water container, food, medication, first aid, light, power bank, and phone cable.
Maintain: hygiene supplies, wipes, tissues, hand sanitizer, waste bags, and a small towel.
Adapt: work gloves, a whistle, basic repair tape, a multitool where lawful, and a small notepad with a pen.
Overpacking specialist tools is a frequent failure mode. A person who has never used a water filter, radio, or complicated stove may carry equipment that adds weight without adding dependable capability. Choose simple gear, learn its operation, and keep instructions with unfamiliar items. For a more personalized comparison, the evacuation bag for one adult should reflect whether the person is driving, walking, using transit, or going directly to a known host.
Pack Water, Food, and Health Items Intelligently
Water planning requires a tradeoff between carrying weight and knowing where safe resupply may occur. Carry at least a practical starting supply in sturdy bottles or a hydration reservoir, then account for the route and destination. Water is heavy, so a person traveling on foot may need a replenishment plan rather than attempting to carry every possible need. Never assume a stream, fountain, or public tap is safe without appropriate treatment or reliable local information.
Food should be edible without refrigeration, cooking, or extensive cleanup. Dense options include energy bars, nut or seed packets, crackers, dried fruit, shelf-stable pouches, and ready-to-eat meals that match the person’s allergies and dietary needs. Rotate foods that tolerate heat and do not crumble into the rest of the pack. Canned food can be useful when a destination has a can opener, but heavy cans are often a poor choice for a walking bag. A small spoon and resealable bags can make several foods easier to manage.
Health supplies should be chosen around interruption risk. Medication should remain in its labeled packaging when practical, and the user should confirm storage requirements for heat, cold, or light-sensitive products. A compact first aid kit can include adhesive bandages, gauze, antiseptic wipes, blister treatment, gloves, and any routinely used over-the-counter products. It should not create false confidence about treating serious injuries; severe symptoms, major bleeding, breathing problems, or other urgent conditions require emergency medical help.
Pack items in separate waterproof pouches so a leaking bottle does not ruin documents, medication, or electronics. Keep one water bottle, light, and essential medicine where they can be reached without unpacking the bag. Test the food before relying on it. A bar that melts, causes stomach trouble, or is impossible to open is not a good emergency choice. The useful signal is not how impressive the inventory looks; it is whether the person can access and use the contents under fatigue, darkness, rain, or stress.
Food and water also need a destination plan. A person driving may carry more water in the vehicle and keep the backpack lighter, while someone walking may prioritize a comfortable load and a refill strategy. Someone heading to a public shelter may need hygiene items and identification more than cooking equipment. These choices make an evacuation bag for one adult more effective than a fixed checklist copied without regard to travel conditions.
Organize, Test, and Maintain the Bag
Organization determines whether the bag works when visibility, time, and attention are limited. Put high-use items in exterior or top compartments: phone power, light, medication, documents, water, and a rain layer. Place heavier objects close to the back and centered between the shoulders. Keep sharp tools covered, liquids sealed, and clothing compressed only enough to prevent wasted space. Label unfamiliar pouches with short descriptions rather than requiring a tired person to remember the entire layout.
Run a realistic test before storing the pack. Wear the shoes intended for evacuation, walk the expected distance, climb stairs, and attempt to retrieve medication or a flashlight without emptying the contents. Notice hot spots on the shoulders, water bottle leaks, strap movement, food packaging problems, and battery compatibility. If the bag is too heavy, remove duplicate tools and comfort items before removing medication, water, weather protection, or communication equipment.
Maintenance is a schedule, not a once-a-year glance. Check expiration dates on food, medication, batteries, and chemical products. Replace clothing that no longer fits, update contact information, and inspect zippers, straps, seals, and water containers. Seasonal changes matter: warm-weather clothing does little during a cold evacuation, while heavy winter layers may become burdensome in hot conditions. A twice-yearly review, plus a check before a known storm or travel period, catches many predictable failures.
Keep the bag where an adult can reach it quickly but not where heat, moisture, or unauthorized access can damage its contents. If a car is part of the evacuation plan, decide whether the bag stays at home, in the vehicle, or in both places. Do not store all capability in a vehicle that may be inaccessible because of road closures or a damaged garage. A small duplicate kit for the vehicle may be worthwhile, but duplication should not replace maintaining the primary bag.
The most misleading assumption is that possession equals readiness. A sealed pack that has never been worn, opened, or matched to a route may fail at the first practical test. Repack it after every use, record missing items, and ask whether each item solves a plausible problem for this specific adult. The final standard is dependable access, manageable weight, and equipment the user can operate without guesswork.
Further Reading
Frequently Asked Questions
How large should an evacuation bag for one adult be?
Choose a pack that holds essential supplies without making walking, stairs, or public transit difficult. A medium backpack is often more practical than the largest model available.
How much food should one adult pack?
Pack compact, ready-to-eat food for the expected travel and initial shelter period, commonly enough for about three days when feasible. Match choices to allergies, medical needs, heat exposure, and access to cooking.
Should water be stored inside the bag?
Yes, carry a practical starting supply in leak-resistant containers, but plan for resupply because water adds substantial weight. Keep containers sealed away from documents and electronics.
What personal items are easiest to forget?
Prescription medication, glasses, menstrual products, hearing-aid batteries, comfortable shoes, charging cables, and copies of identification are frequently missed by generic checklists.
How often should the bag be checked?
Review it at least twice a year and after every use. Check expiration dates, batteries, clothing fit, weather suitability, packaging, medication storage, and contact information.
Evidence-informed sports nutrition resources and position stands for active people and athletes.
Conclusion
A reliable one-adult evacuation bag is built around movement, health, weather, communication, and the first destination—not around collecting every conceivable gadget. Put personal medication and mobility needs ahead of generic equipment, carry food that can be eaten without cooking, protect documents and electronics from leaks, and keep the load comfortable enough to move with confidence. Test the loaded backpack on stairs and outdoors, then remove anything that adds weight without a clear use. Review the contents when seasons change and after any evacuation drill or real-world use. The next practical step is to lay out the bag beside the adult’s shoes, phone cable, medications, and identification, then pack and walk with it before an emergency makes the choices for you.
Imagine being stranded in the middle of nowhere, with no immediate help in sight. Sounds scary, right? Now, imagine having a bug-out bag in your car, equipped with all the essentials to survive such a situation. Suddenly, the scenario seems less daunting.
Creating a bug-out bag for your car is a simple yet crucial task that can be a lifesaver in emergencies. This guide will provide you with a comprehensive step-by-step process to prepare your own bug-out bag.
From selecting the right bag to choosing essential items, we’ll cover all bases to ensure your survival kit is up to the task. So, buckle up and get ready to dive into the world of emergency preparedness, where safety is just a well-packed bag away.
What is a bug-out bag?
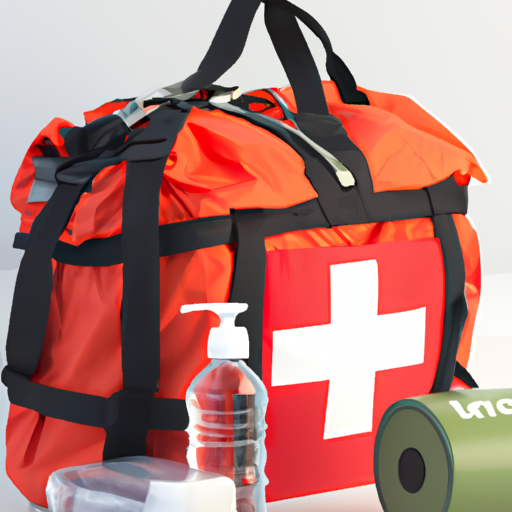
A bug-out bag, also known as a 72-hour kit, is a portable pack containing all the essentials needed to survive for at least three days in case of an emergency. It’s a crucial part of any emergency preparedness plan, especially for those who frequently travel by car.
The contents of a bug-out bag can vary depending on individual needs, but typically include items such as:
Food and Water: Non-perishable food items and water purification tablets or filters.
First Aid Kit: Bandages, antiseptics, pain relievers, and any necessary prescription medications.
Shelter and Warmth: Emergency blanket, poncho, and a compact sleeping bag.
Other items might include a multi-tool, flashlight, portable charger, local maps, and cash. Remember, the goal is to equip yourself with the necessary tools to manage in the face of a disaster.
Creating a bug-out bag for your car ensures you’re always prepared, whether you’re on a routine commute or embarking on a long road trip. It’s not just about surviving, but thriving during unexpected situations. The key is to tailor your bug-out bag to your specific needs and circumstances, ensuring it’s lightweight yet comprehensive. This way, you’re always ready to bug-out when the situation calls for it.
Why should I have a bug-out bag in my car?
Having a bug-out bag in your car is a practical measure for unexpected situations. It serves as your survival kit, equipped with necessities that can sustain you for at least 72 hours. Imagine being stranded due to a car breakdown or natural disaster. A bug-out bag would come in handy, providing essential items like food, water, first-aid supplies, and tools for repair or navigation.
Moreover, a bug-out bag can be a literal lifesaver during emergency evacuations. In situations where you need to leave your home immediately, you may not have time to gather supplies. Having a bug-out bag in your car ensures you have immediate access to survival essentials.
Creating a bug-out bag for your car, however, requires careful planning. It’s crucial to pack items that are compact, lightweight, and serve multiple purposes.
Food and Water: Non-perishable food items and water purification tablets can be a lifesaver.
First-Aid Supplies: A basic kit should include bandages, antiseptic wipes, tweezers, medical tape, and pain relievers.
Tools: Include a multi-tool, flashlight, batteries, and a fire starter.
Remember, a bug-out bag is not a one-size-fits-all solution. Customize it based on your personal needs and the specific conditions of your region.
What items are essential for a car bug-out bag?
When it comes to emergency preparedness, a car bug-out bag is an essential tool. For a comprehensive bug-out bag, several items are crucial. First, water and food are vital, specifically non-perishable items and water purification tablets.
Next, you’ll need a first-aid kit. This should include bandages, antiseptic wipes, tweezers, medical tape, and pain relievers.
Another critical item is a multi-tool. This versatile tool can serve multiple purposes, from opening cans to cutting rope. Speaking of rope, a paracord is another must-have. It is useful for tying items together, creating shelter, or even for first aid purposes.
Emergency blanket
Flashlight
Extra batteries
These three items can provide warmth, light, and power in challenging situations.
Maps and a compass are also essential for navigation, especially if you’re in an unfamiliar area or if your phone’s battery dies.
Lastly, personal items such as medications, cash, and important documents should also be included in your bug-out bag. These items can help you in various scenarios, whether you need to buy supplies, prove your identity, or manage health conditions.
Remember, the goal is to be prepared for any situation. Each item in your car bug-out bag serves a specific purpose and can be a lifesaver in an emergency.
How to pack a bug-out bag efficiently?
Packing a bug-out bag for your car requires careful consideration and strategic planning. The first step involves identifying essential items that meet your survival needs. Water, non-perishable food, first aid kit, multi-tool, flashlight, and blankets are some of the essentials you should never skip.
Prioritize items based on their importance and pack them accordingly. Water and food should be easily accessible as they are needed frequently. Use vacuum-sealed bags to save space and keep items organized.
The size of your bug-out bag also matters. It should be compact enough to fit in your car but spacious enough to accommodate all necessary items.
Regularly check and update your bug-out bag. Replace expired food and water, and ensure all equipment is in good working condition.
Personalize your bug-out bag based on specific needs. If you have a medical condition, ensure you pack necessary medications.
Here’s a quick checklist to help you pack efficiently:
Water
Non-perishable food
First Aid Kit
Multi-tool
Flashlight
Blankets
Remember, the goal is to be prepared for any emergency. So, pack wisely and stay ready.
Can I use any bag for my bug-out bag?
In the context of creating a bug-out bag for your car, it’s crucial to understand that not just any bag will suffice. The bag you choose must be durable, spacious, and easy to carry. A backpack is often the preferred choice for many, given its practicality and convenience.
It’s also essential that the bag is made of high-quality, rugged material that can withstand harsh conditions. Look for bags with multiple compartments for better organization of your emergency supplies.
Water-resistant properties are a significant feature to consider. This ensures your supplies stay dry, even in adverse weather conditions.
The size of the bag is another critical factor. It should be big enough to hold necessary items like food, water, first aid kit, clothing, and other essential survival gear, but not so large that it becomes cumbersome to transport.
Comfort should not be overlooked. A bag with padded straps and back support can make a significant difference, especially if you need to carry it for extended periods.
Remember, the goal is to have a bug-out bag that’s ready to grab and go in case of an emergency. Therefore, your choice of bag plays a pivotal role in your preparedness strategy.
How often should I update my car bug-out bag?
Regular updating of your car bug-out bag is crucial to ensure its effectiveness in case of emergencies. The frequency of updates typically depends on the items within your bag. For instance, perishable items like food and water should be replaced every six months. On the other hand, items such as first aid kits and emergency blankets may not require frequent updates, unless used or damaged.
Seasonal changes also warrant updates to your bug-out bag. For example, you might need to add extra warm clothes during winter or include sun protection items in summer.
It’s also a good practice to check and update your bag whenever you perform routine car maintenance. This way, you can ensure that all items are in good condition and ready for use when needed.
Here’s a quick guide on when to update certain items:
Food and Water: Every six months
Medications: As per expiry dates
Seasonal items: At the change of each season
Other items: During routine car maintenance
Remember, a well-maintained bug-out bag can be a lifesaver during unexpected situations. Regular updates ensure that your bag is always equipped with the necessary items, making your car a reliable refuge in emergencies.
What food should I pack in my bug-out bag?
When preparing your bug-out bag for your car, it’s crucial to consider the types of food that will provide sustenance and long-lasting energy. Non-perishable items are the best choice for a bug-out bag. These include canned goods, such as tuna, beans, and vegetables. However, remember to pack a can opener if necessary!
Dried foods are also excellent options, including jerky, dried fruits, and nuts. These provide a good source of protein and healthy fats. Similarly, energy bars, granola bars, and protein bars are compact and nutrient-dense.
Consider packing ready-to-eat meals (MREs). These are a staple in military rations and are designed to be lightweight, compact, and long-lasting. They offer a variety of meals, from pasta to stew, and only require water to prepare.
Don’t forget about hydration. Pack bottles of water, but also include water purification tablets or a LifeStraw for emergencies.
Instant coffee or tea bags can be a morale booster in stressful situations.
Lastly, remember to rotate your food stocks regularly to ensure they remain fresh and safe to eat. This way, you’ll be ready for any situation with a well-prepared bug-out bag in your car. Remember, the key is to prioritize long-lasting, nutrient-dense foods that require minimal preparation.
Are there ready-made car bug-out bags available?
Absolutely, there are numerous ready-made car bug-out bags available on the market. These bags come packed with essential survival items that you may need in case of an emergency. They are an excellent choice for those who prefer convenience or lack the time to assemble a bag themselves.
When choosing a ready-made bag, you should consider the quality of the items included, the bag’s durability, and whether it contains all the necessities you may need in a crisis. Some of the essential items to look for include:
– First Aid Kit
– Food and Water
– Warm Clothing
– Tools and Equipment
– Communication Devices
It’s crucial to note that while these bags are convenient, they may not be tailored to your specific needs. For instance, you may require specific medication or have dietary restrictions that ready-made bags do not consider.
Therefore, while ready-made car bug-out bags can be a good starting point, you might still need to customize them to suit your unique needs. Remember, the key to a successful bug-out bag is preparation and personalization.
Wrapping Up: How to Create a Bug-Out Bag for Your Car
In conclusion, the importance of having a bug-out bag in your car cannot be underestimated. This article has covered essential topics such as understanding what a bug-out bag is, why it’s necessary to have one in your car, and the crucial items required for an efficient car bug-out bag.
Packing a bug-out bag requires careful selection of items, and not just any bag can be used for this purpose. Regular updates to your bug-out bag are necessary to ensure its contents are always fresh and usable. The food packed should be non-perishable and easy to consume. For those not inclined to DIY, ready-made car bug-out bags are available.
The key takeaway is that a well-prepared bug-out bag can be a lifesaver in emergency situations. As the future unfolds, it’s likely that advancements in survival gear and emergency preparedness will continue to influence the contents and efficiency of bug-out bags. Therefore, it’s essential to stay informed and regularly update your knowledge on the subject. Remember, preparedness is not a one-time event, but a continuous process.
On a recent episode of the Daddy Pete Gardening podcast, Melvin York delved into the art of emergency food preparation and storage, drawing on his childhood experiences and gardening wisdom.
Growing up, Melvin recalls, “We canned everything.” The basement, with its earthen floor, served as their storehouse. Despite having freezers, he pointed out the unreliability of power, suggesting, “with power allergies, we might want to go more of the canned method.”
For those who missed out on winter planting, Melvin recommends visiting local farmer’s markets. He emphasizes the importance of preparing for winter by maintaining a diary of the crops you’ve grown, thus ensuring a diverse supply. Given the unpredictability of weather events, like the approaching hurricane off Florida’s coast, Melvin suggests planning ahead. Procuring seeds, dry goods, and canned food in the colder months can safeguard against potential shortages.
Melvin highlighted the utility of versatile crops like potatoes, notably the Kenny Becks variety. While regular potatoes have their merit, sweet potatoes, with their later harvest time, are ideal for storage in basements or cellars. Beans, too, offer dual benefits. “You can let green beans, pole beans, and other beans dry, can what you may, and also save the seed,” he says, mentioning that similar methods can be used for vegetables like carrots, rutabagas, and turnips.
Highlighting the resilience of old-timey pumpkins, Melvin noted their longevity, provided they are kept ventilated and off the ground. These pumpkins not only provide a food source, but their seeds can also be preserved for future planting. For those who’ve cultivated beets, Melvin advises monitoring the plants to watch them sprout greens in spring. Though these roots become tougher, they remain edible with a bit more peeling.
He continued, singing praises for easy-to-grow peanuts that, once dried, can be stored for extended periods. Not to be overlooked, peppers, tomatoes, herbs, onions, and garlic are essential components of a winter-ready pantry. “Keep them in a cool, dry area, and you will have them all the way through the winter season,” he suggests.
If you’re new to the art of canning, Melvin advises starting with a three-month supply, gradually adding to it. Such preparedness ensures you remain unfazed during power outages or unexpected shortages.
For listeners eager to explore more gardening insights, he directs them to the Daddy Pete Gardening website, where a plethora of resources awaits. From potting mixes to soil amendments, everything a gardener might need is available. The site also features a newsletter offering free gardening tips. Melvin emphasizes the interactive aspect of their platform, saying, “We have a place there for you to ask questions or leave comments.” True to his commitment, he personally responds to all emails, ensuring that every query is addressed.
In Melvin’s words, “The main thing is we want to help you grow.” It’s a sentiment that not only speaks of cultivating plants but nurturing a community of well-prepared and informed gardeners.
There are a lot of world challenges we are seeing every day in the media. Whether you believe what you hear on news reports or not, the reality is we are in difficult times. In fact, it’s likely to get more perilous before it improves.
With that, it is important to consider ways to get better prepared in the event things become more difficult. Even if you don’t think things will get worse, you would be wise to at least prepare for potential natural disasters that could be a short-term disruption to your normal life pattern. We will start by considering some food storage. So, let’s take a look at exactly how to begin your emergency food storage.
Are you looking to begin developing an emergency food storage? This is a great means to plan for emergency situations like natural catastrophes or any type of reason you need to be home for extended periods of time as well as may not have the capacity to buy more food.
Below are some very easy pointers for progressively developing your emergency food storage:
Build Your Emergency Food Storage Slowly
It can be alluring to go out and invest thousands of dollars on food for emergencies, however this isn’t handy or functional. You intend to begin slow-moving, and build it up simply a little at a time. One of the most convenient means to begin working with your emergency situation food storage is simply to acquire a little extra of specific sorts of food or mineral water.
If you buy one package of ground beef for tacos one week, you may want to go ahead and get 2 packages instead. Grab an gallon or two of bottled water when it gets on sale, or slowly add more things to your kitchen that you understand will certainly last for a long period of time.
Make Water Your Top Priority
Having clean drinking water and distilled water that can be utilized for various other things ought to be your top concern when it concerns emergency situation food storage. Water is the best item you can have in your home, given that it can be found in useful in numerous various emergency situation circumstances. You can use it as clean drinking water, for cooking, brushing your teeth, bathing, cleaning, and so much more.
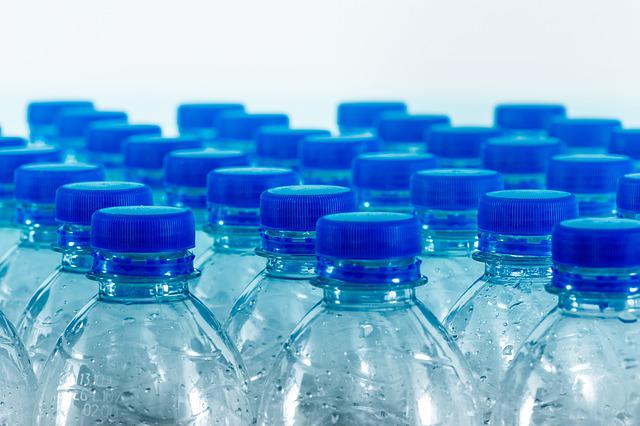
Try stockpiling bottled water either in the pantry or in other areas of your residence, like saving it in your garage or cellar. Just realize even bottled water has an expiration date, so you will need to develop a rotation system to use it when there is no emergency.
More Emergency Food Storage Tips
Here are a few more tips to follow when you are putting your emergency food storage together.
Stock up on more non-perishable food items.
Yes, even the processed ones! These are going to come in handy in an emergency. This should include canned and jarred foods, freeze-dried and dehydrated snacks, and anything that is pantry safe, like nut butters, granola bars, and other processed snacks.
Get vegetables in cans, not frozen.
While frozen vegetables are great for normal daily cooking, in emergencies, the power often goes out. Stocking up on frozen vegetables isn’t going to help you much in those situations. Get plenty of veggies and tuna in cans for emergencies.
Be smart about where food is stored.
For example, if there is a flood in your area, keeping all that food on the ground level of your home is only going to get it ruined. Make sure you choose an area higher up above the ground, and store it in containers that will protect it.