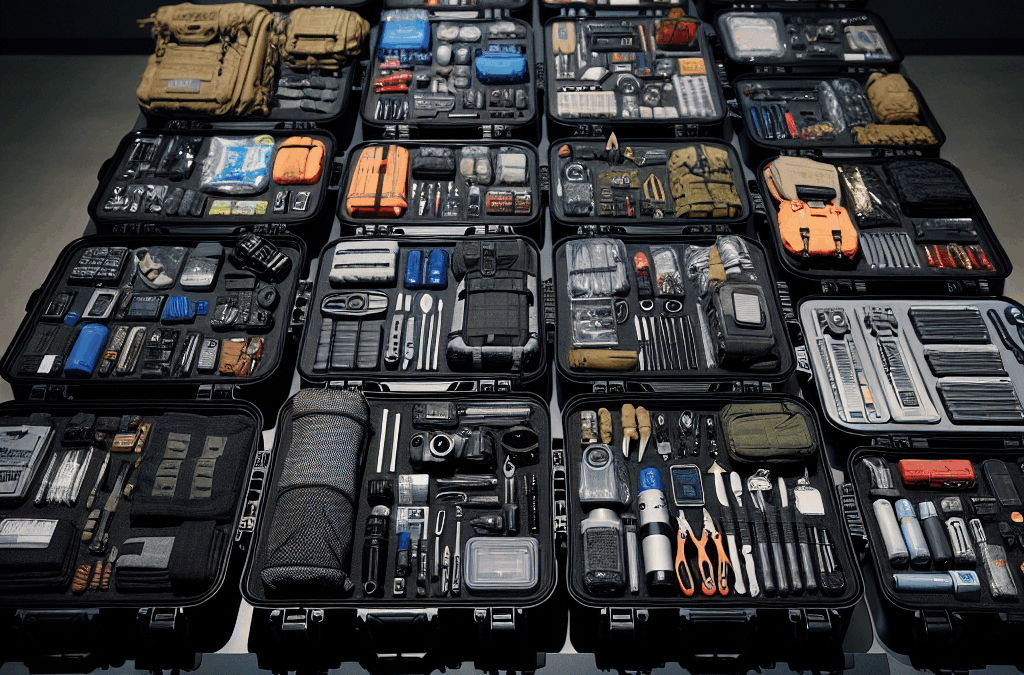
A one-week disruption may involve a power outage, a temporary water-service interruption, severe weather, a fuel shortage, or restricted travel. Those situations do not create identical problems, so the useful starting point is not a shopping list alone. Identify which services your household needs every day and what fails when electricity, refrigeration, card payments, or tap water are unavailable.
Count people, pets, and any visitor who may reasonably shelter with you. Record prescription medicines, mobility equipment, infant supplies, dietary restrictions, and work or school requirements. A person who depends on a powered medical device has a different priority order from someone preparing only for a brief winter outage. Similarly, a household with a gas range may still be unable to cook if the ignition or ventilation system depends on electricity.
Use three priority levels. First, cover life and health: water, essential medication, food, temperature control, and medically necessary power. Second, preserve basic function with lighting, sanitation, communication, and cooking. Third, add convenience items such as comfort foods, extra batteries, or entertainment. This approach prevents a common failure mode: spending on specialized gear while lacking enough drinking water or a reliable way to open canned food.
People and animals: Include age, health, mobility, allergies, and pet needs.
Utilities: Note dependence on electricity, water, natural gas, internet, and refrigeration.
Access: Decide whether you can leave for supplies, use a vehicle, or rely on nearby support.
Storage: Keep supplies cool, dry, accessible, and distributed if one room may become unsafe.
A useful reference point is your normal seven-day consumption. Look at how much water, coffee, baby formula, pet food, medication, and toilet paper you actually use. That record is more reliable than an arbitrary container size. The Basic prepper list for a one-week disruption should reflect your home rather than an imagined average household.
Build Food and Water Reserves
Water deserves first position because people can often simplify meals, but they cannot safely replace drinking water with soft drinks, alcohol, or untreated outdoor water. Store commercially packaged water or clean, food-grade containers, and protect them from heat, sunlight, chemicals, and freezing conditions that may damage containers. Include water for drinking, medication, limited food preparation, and essential hygiene; the actual amount depends on household size, climate, health needs, and whether municipal service remains available.
Food should match your cooking limits and eating habits. Choose shelf-stable items that can be eaten cold or prepared with a small amount of water: canned beans, fish, meat, vegetables, fruit, peanut or seed butter, crackers, oats, rice, pasta, shelf-stable milk, and ready-to-eat meals. Add calories and protein rather than filling shelves with only snack foods. A family that dislikes canned beans may technically own food but still have a poor reserve if nobody will eat it.
Refrigeration changes the decision. During a power outage, keep the refrigerator and freezer closed as much as possible, and do not taste food to judge whether it remains safe. Perishable food should not be allowed to become a week-long assumption. Build meals around shelf-stable items and treat refrigerated food as an early-use option when conditions allow.
Cooking requirements create another tradeoff. No-cook food is simple and reduces fuel demand, while hot meals may improve morale and make some foods easier to consume. If you use a camping stove, outdoor burner, or other fuel appliance, follow its instructions and use it only where the manufacturer permits. Carbon monoxide can accumulate rapidly indoors, even when a door or window is open. Keep a manual can opener, utensils, cups, a pot if appropriate, and a way to dispose of food scraps.
Rotate by placing newer goods behind older ones and label opened packages. Test one planned meal before an outage. If it needs more water than expected, produces excessive waste, or depends on a tool you cannot find, revise it. For a tailored approach, connect this food-and-water section with the one-week disruption supply list after you inventory your pantry.
Cover Power, Information, and Cooking
Backup power should be assigned to specific jobs rather than treated as a general solution. Lighting, phone charging, refrigeration, internet equipment, and medical devices have different energy demands. A small power bank may handle several phone charges but will not necessarily run a refrigerator or heating appliance. Write down the wattage or charging method for important devices and match equipment to that need.
Keep multiple lighting options: headlamps for hands-free work, lanterns for shared rooms, and a flashlight for moving outside. Store spare batteries in their original packaging or use rechargeable cells with a compatible charger. Candles may provide light but introduce fire risk, especially around children, pets, bedding, and oxygen equipment. Place lights where they can be found in darkness, not in a sealed container at the back of a closet.
Communication planning is more than owning a radio. Keep phones charged, store an external battery, and write down important numbers and addresses because contact lists may be inaccessible. A battery or hand-crank radio can provide local information when internet service fails, but reception varies by location. Agree on a check-in method with relatives and identify an out-of-area contact if local networks are congested. Do not assume every alert will arrive through one channel.
Cooking equipment should be selected for the disruption you are preparing to manage. A propane appliance may be useful during an outdoor cooking scenario, while an insulated food container or thermos can reduce fuel use for hot water. Never improvise fuel systems or use charcoal, generators, or outdoor heating appliances inside a home, garage, basement, or enclosed porch. Store fuel according to the product instructions and local requirements, away from ignition sources.
A practical test is a two-hour evening without normal lighting, internet, and kitchen appliances. Prepare a simple meal, charge one phone, receive local information, and move safely through the home. If the test reveals tangled cables, dead batteries, poor radio reception, or an unsafe cooking location, those are solvable problems discovered before the disruption rather than during it.
Handle Health, Sanitation, and Household Needs
Health supplies should begin with continuity of normal care. Maintain an organized supply of prescribed medicines according to the prescribing instructions and pharmacy guidance, and keep a current list of medications, doses, allergies, and healthcare contacts. Add ordinary first-aid items such as adhesive bandages, gauze, antiseptic supplies, disposable gloves, and a thermometer. A first-aid kit does not replace professional care for serious bleeding, breathing difficulty, chest pain, severe burns, or other urgent conditions.
Sanitation becomes a practical health issue when water service, toilets, garbage collection, or laundry are disrupted. Store toilet paper, soap, hand sanitizer, menstrual products, diapers, wipes, toothbrushes, toothpaste, heavy-duty bags, and cleaning supplies. Think through where waste will go and how it will be separated from food preparation areas. A household that stores plenty of food but lacks a way to manage used hygiene materials may create odors, pests, and contamination concerns within days.
Personal protection should fit the hazard rather than reflect a desire for more equipment. Work gloves can protect hands during cleanup, sturdy shoes reduce injury from broken glass, and eye protection may be useful for dusty or debris-filled tasks. Masks should be chosen for the specific exposure and used according to their instructions; a casual face covering is not a universal substitute for ventilation or hazard avoidance.
Consider temperature and accessibility. Blankets, warm layers, shade materials, fans, and extra drinking water may matter more than gadgets when indoor conditions become uncomfortable. Keep mobility aids, spare glasses, hearing-aid batteries, and pet leashes accessible. For pets, include food, water, medications, waste bags, a carrier or restraint, and vaccination or identification information if evacuation becomes necessary.
One misleading assumption is that a week at home means no need for cash or transportation. Electronic payment systems, fuel stations, elevators, and public transit may be unavailable. Keep a modest amount of small-denomination cash, maintain a reasonable fuel level when possible, and know two routes to a pharmacy, shelter, or trusted contact. These measures do not guarantee access, but they reduce dependence on a single failed service.
Test and Maintain the Supplies
Preparation works when supplies are usable under stress, not when they merely appear on a spreadsheet. Group items by task: water, meals, lighting and charging, health, sanitation, information, and evacuation. Store the most frequently needed pieces together, but avoid creating one heavy container that no one can move. A written inventory should show quantities, expiration dates, battery types, fuel locations, and the person responsible for checking each category.
Run a household exercise that lasts long enough to expose friction. Turn off nonessential lights, prepare food without the usual appliances, use the sanitation supplies, and practice contacting your designated person. Check whether children can find their lights, whether an older adult can open packages, and whether a pet becomes distressed by the equipment. The result should be a short list of corrections, not a performance test.
Maintenance is mostly routine. Replace expired or damaged goods, rotate food into ordinary meals, recharge power banks after use, inspect batteries for leakage, and review medication needs with appropriate healthcare or pharmacy support. Confirm that water containers remain intact and that fuel has not been stored in a way that creates a hazard. Seasonal changes may require different clothing, cooling supplies, or food choices.
Use the same review to distinguish a real gap from an attractive extra. If you cannot safely cook indoors, buying more cooking fuel does not solve the problem; favor no-cook meals or an approved outdoor setup. If charging is the weak point, another flashlight may not help as much as a compatible power bank and a charging plan. If storage space is limited, prioritize dense, familiar foods and multi-use hygiene items rather than duplicating specialized tools.
Recheck the list after any outage, illness, move, new pet, medication change, or household membership change. A one-week reserve is not a fixed package. It is a working arrangement that should become easier to use each time you test it.
Frequently Asked Questions
How much water should one person store for a week?
Use a recognized household baseline for drinking and sanitation, then adjust for heat, medical needs, pets, and cooking. Store more if you cannot count on prompt water restoration.
What foods work best during a one-week disruption?
Choose familiar shelf-stable foods with protein and calories, such as canned beans, fish, vegetables, fruit, nut butter, crackers, oats, and ready-to-eat meals. Include foods that need little or no cooking.
Should a generator be part of a basic prepper list?
Only if you can operate, fuel, and maintain it safely. Generators must remain outdoors and away from doors, windows, and vents because exhaust can cause carbon monoxide poisoning.
How can I prepare if I have limited storage space?
Prioritize water, medication continuity, compact calorie-dense foods, lighting, charging, sanitation, and a manual can opener. Rotate supplies through normal household use instead of storing duplicates.
How often should one-week supplies be checked?
Review them at least seasonally and after every use, household change, medication change, or move. Recharge batteries, replace damaged goods, and rotate food before quality declines.
Provides official advice for handling refrigerated and frozen food after a loss of power
Conclusion
A dependable one-week reserve is built around ordinary needs under unusual conditions. Put water, essential medicines, safe food, sanitation, and lighting ahead of specialized equipment. Then add charging, communication, cooking, cash, pet supplies, and seasonal comfort according to the services your home depends on.
Test the arrangement before an outage by preparing a meal, finding supplies in the dark, charging a phone, and handling waste without normal utilities. That exercise will expose missing adapters, unsuitable foods, unsafe fuel ideas, and inaccessible storage. Rotate what you store, update quantities when your household changes, and keep the most critical items ready to reach. The strongest list is not the longest one; it is the one your household can use safely for seven difficult days.
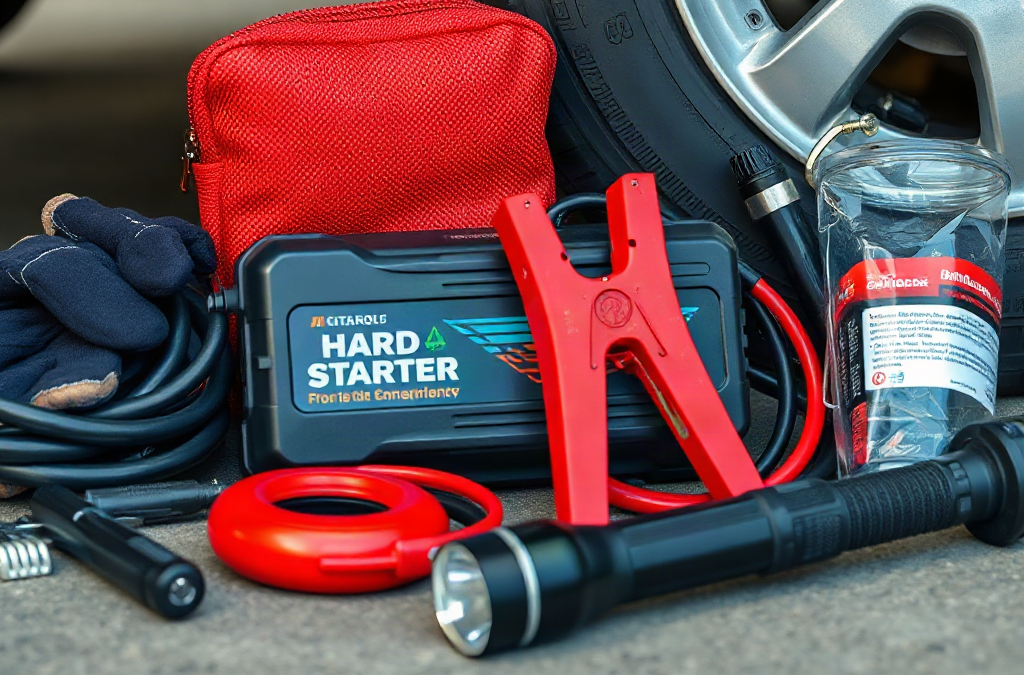
A vehicle emergency kit needs a dependable way to restore starting power before it needs extra accessories. A compact lithium jump starter is usually the most practical primary item because it can start a vehicle without another car. Select a unit whose instructions cover the engine type and displacement of the vehicle; a small pack intended for a compact gasoline engine may be a poor choice for a large truck, diesel, or vehicle with a deeply discharged battery.
Jumper cables remain useful, particularly when another vehicle is available, but cable quality matters. Thin, short cables may become hot or deliver too little current when the battery is weak. Look for sturdy clamps with clean contact surfaces and enough length to reach between battery locations. The vehicle owner’s manual should control the connection sequence, since some cars use designated jump points rather than direct battery terminals. Hybrid and electric vehicles require special caution: a conventional 12-volt system may power accessories, but the high-voltage drive battery is not a roadside jump-start target.
A 12-volt battery charger or maintainer can be valuable at home, yet it is not a substitute for roadside equipment. A charger generally needs access to mains power and time, while a jump pack is designed for immediate starting assistance. A spare vehicle battery is also an awkward emergency choice: it is heavy, needs secure storage, and can deteriorate if neglected. For most drivers, the better combination is a tested jump starter, compatible cables, and a small battery terminal brush.
Keep the power equipment away from the engine compartment when stored. Heat can shorten battery-pack life, and a discharged jump starter is no more useful than an empty fuel can. Add a charging cable that fits the pack, then inspect its charge indicator periodically. The Hard-start kit contents for a vehicle emergency should reflect the actual vehicle, not a generic shopping list copied from a smaller car.
Tools That Separate a Weak Battery From a Fault
Starting trouble is not always a battery problem. A hard-start kit becomes more useful when it includes simple diagnostic tools that prevent repeated, unproductive cranking. A digital multimeter can show battery voltage before and after an attempted start, although readings must be interpreted carefully. A low resting reading may indicate a discharged battery, while a normal reading does not prove that the battery can deliver sufficient current under load.
A basic test light, terminal brush, small socket set, adjustable wrench, insulated screwdriver, and pliers can address minor connection issues. Loose or corroded terminals create resistance, so the starter receives less usable power even when the battery appears charged. A driver may hear a single click, rapid clicking, or no response at all. Those sounds provide clues, but they do not identify every failure. Cleaning a terminal may help a poor connection; it will not repair a failed starter motor.
Fuel-related hard starts call for a different response. If the engine cranks at normal speed but does not fire, a jump pack may not solve the problem. A kit can include a vehicle-specific spare fuse assortment, but replacing a fuse with the wrong rating is unsafe and can damage wiring. Fuel additives and starting fluid deserve restraint. Starting fluid can be inappropriate for some engines, and spraying anything into an intake without following the manufacturer’s guidance creates avoidable risk.
A useful diagnostic sequence is simple: observe whether the engine cranks, note the sound and speed, inspect visible battery connections, and try one correctly performed jump-start attempt if low power is plausible. If the engine cranks normally without starting, shift attention away from the battery. If the cables become hot, the connection sparks heavily, or the jump pack reports a fault, stop rather than escalating the attempt. A vehicle emergency hard-start kit should reduce guesswork, not encourage repeated forceful starting attempts.
Safety and Visibility Items for Roadside Work
Roadside positioning is often more dangerous than the mechanical task. A flashlight or headlamp, reflective vest, warning triangles, and work gloves deserve space beside the starting equipment. Choose lighting with a spare battery or a separately charged backup, because a phone flashlight may be needed for communication and navigation. Reflective gear makes the person working near the vehicle easier for approaching drivers to see, especially at night, in rain, or on a shoulder with limited width.
Gloves protect against grime, sharp battery brackets, and hot surfaces, but they do not make an electrical system harmless. Avoid rings, bracelets, and loose clothing near belts or fans. Keep metal tools from bridging battery terminals. Eye protection is sensible when working around a damaged or leaking battery. A battery with a cracked case, bulging sides, strong odor, or visible leakage should not be jump-started casually; move away from the vehicle and request assistance.
Other useful items include a charged phone power bank, a weather-resistant pouch for documents, a compact rain shell, and a small absorbent cloth for handling grime. A tire inflator may not start the engine, but it can address a separate roadside problem and may prevent a driver from standing near traffic while waiting for help. A tow strap is not automatically useful: towing arrangements depend on the vehicle’s drivetrain, transmission, recovery points, and local conditions. Incorrect towing can cause expensive damage.
Do not place warning devices where they create a new hazard, and never stand in a live traffic lane to deploy them. If the shoulder is narrow, visibility is poor, or traffic is moving quickly, remaining inside the locked vehicle with a seat belt may be safer than attempting roadside diagnosis. The kit should support a safe decision to stop, not pressure the driver to use every item. Emergency supplies are valuable only when their use does not expose someone to greater danger than the original breakdown.
How to Pack, Test, and Use the Kit
A hard-start kit works best when its contents are organized around the first five minutes of a breakdown. Store the jump pack, cables, light, gloves, and vehicle manual together so the driver does not empty the entire cargo area beside traffic. Put tools in a closed pouch, separate sharp objects from electrical leads, and use a waterproof container for moisture-sensitive equipment.
Testing should happen at home. Charge the jump starter according to its instructions, inspect clamps for damaged insulation, confirm that the multimeter has working leads, and replace corroded batteries in the flashlight. Check the expiration or condition of chemical items such as fuses and batteries. A short practice session can reveal a major problem: some drivers discover that the battery is under a seat, that the positive jump point is remote, or that the hood release is difficult to operate.
Use the vehicle manual’s procedure rather than relying on a remembered cable order. Park the assisting vehicle as directed, switch off unnecessary electrical loads, and ensure both vehicles are secure before connecting anything. Keep clamps from touching each other. Once connected, allow only the interval specified by the equipment or vehicle instructions before attempting the start. If the engine starts, disconnect in the prescribed order and let the vehicle operate only as long as needed to reach a safe location or obtain a proper battery charge; idling is not guaranteed to restore a severely depleted battery.
Prioritize the contents this way when space or budget is limited:
First: compatible jump starter or quality cables, gloves, flashlight, and the vehicle manual.
Next: reflective warning gear, phone power bank, terminal brush, and basic tools.
Then: multimeter, tire inflator, spare fuses, and weather protection based on the vehicle and travel area.
A commercial all-in-one kit may save packing time, but its cable gauge, battery capacity, and tool quality vary. Building the kit individually takes longer yet makes it easier to match a diesel, motorcycle, classic car, or vehicle with unusual battery access. Review the hard-start kit contents after changing vehicles, because compatibility assumptions often survive longer than the equipment itself.
When a Hard Start Needs More Than Supplies
A jump-start is appropriate only when low electrical power is a reasonable explanation. Slow cranking, dim interior lights, a clicking relay, or electrical accessories that weaken during starting can point toward a discharged battery or poor connection. A normal cranking speed with no ignition suggests a different category of fault, such as fuel delivery, ignition, immobilizer, or engine-control trouble. The kit can provide observations and limited assistance, but it cannot replace a diagnosis.
Stop attempting to start the vehicle when there is smoke, burning insulation, repeated heavy sparking, a fuel smell, fluid leakage, a damaged battery, or a power pack warning. Repeated cranking can drain the battery further and heat the starter. If the engine turns unusually slowly after a correct connection, the battery may be internally damaged, the cables may be inadequate, or the engine may have a mechanical issue. A second jump attempt is not automatically better than the first.
Consider the situation rather than the tool inventory. A driver on a rural road in freezing weather may need roadside assistance sooner because battery capacity is affected by cold and waiting conditions are harsher. A driver in a safe driveway can test voltage, clean a terminal, and arrange a battery replacement. A vehicle that starts after a jump but fails again shortly afterward may have a charging-system problem, so driving far from help could increase the risk of another stop.
The most useful next step after a successful start is to have the battery and charging system checked, especially if the battery is old, the warning lamp remains illuminated, or the vehicle needed repeated assistance. Record what happened—slow crank, clicking, normal crank with no start, and any warning lights—because those details help a technician work faster. Supplies can bridge a short interruption; they should not disguise a defect that needs repair.
Frequently Asked Questions
What is the most important item in a hard-start kit?
A compatible, fully charged jump starter is usually the most useful single item because it does not require another vehicle. Quality jumper cables are a strong alternative when assistance is available.
Can a jump starter fix a bad alternator?
No. It may provide enough power to start the vehicle, but a failed alternator may leave the battery unable to recharge. Arrange testing and avoid relying on the vehicle for a long trip.
Should the kit include a multimeter?
A multimeter is useful for drivers who know how to measure battery voltage safely. It can reveal clues about low charge or connections, but it cannot perform a complete battery or starter test.
Are jumper cables enough for every vehicle?
No. Cable length, conductor size, engine size, battery location, and manufacturer instructions all matter. Hybrid and electric vehicles may have specific 12-volt jump points and procedures.
When should I stop trying to start the vehicle?
Stop for smoke, burning smells, heavy sparking, fuel odor, a leaking or damaged battery, repeated failed attempts, or a power-pack warning. Move to safety and request roadside assistance.
Conclusion
A useful hard-start kit combines starting power with the tools and visibility equipment that make a roadside decision safer. Match the jump starter or cables to the vehicle, keep the pack charged, and store the manual with the equipment. Add a flashlight, gloves, reflective warning gear, terminal brush, basic tools, and a phone power bank before expanding into diagnostic items such as a multimeter or tire inflator.
Use the kit for a likely low-power event, then reassess the result. A slow crank that improves after a correct connection supports a battery or connection theory; normal cranking without ignition points elsewhere. Smoke, fuel odor, damaged electrical parts, or repeated failure are reasons to stop, not to try a stronger jump. Test the battery and charging system after any recurring incident, and replace or recharge kit components after use.
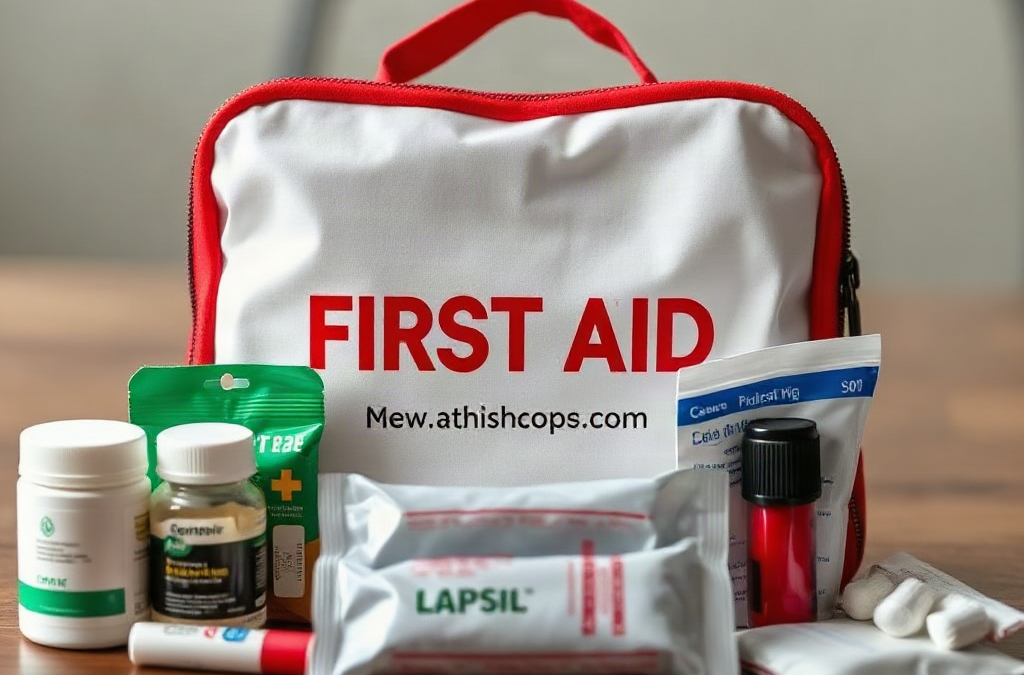
Premade kits are useful starting points, but their contents usually reflect a broad consumer market rather than one household’s risks, skills, climate, or duration of need. A compact pouch may be convenient for a vehicle or day trip, while a home kit needs greater quantities, better organization, and supplies for repeated minor injuries. The label “first aid” does not indicate that a kit covers every likely problem.
Manufacturers also face space and cost limits. Small boxes often contain several sizes of adhesive strips, a little gauze, antiseptic wipes, gloves, and perhaps a cold pack. Those items address minor cuts, but they may not cover burns, blisters, eye irritation, sprains, prolonged wound care, or a person’s regular medical needs. A kit can look full while having only one or two useful items for a particular injury.
Audit the kit by scenario rather than by item count. Ask what happens if someone cuts a hand while repairing equipment, develops a blister during an evacuation walk, or needs daily medication during a delayed return home. The answer reveals gaps more clearly than a generic inventory.
A practical review separates supplies into three layers: immediate first aid, ongoing care, and personal health requirements. Immediate first aid covers gloves, wound coverings, cleaning supplies, and simple tools. Ongoing care includes replacement dressings, waste bags, hygiene items, and additional lighting or labeling. Personal requirements may include prescription medicines, glasses, hearing-aid batteries, diabetes supplies, allergy medication, or mobility-related items. Each layer has different storage and replacement concerns.
Use the Premade first aid kit gaps preppers should address as a starting point for a household-specific inventory, not as a substitute for medical training. The most useful kit is one people can identify quickly, use correctly, and replenish after a small incident.
Wound Care and Bleeding-Control Shortfalls
Wound care is commonly underbuilt because premade kits favor low-cost, low-volume items. A few narrow adhesive strips are not equivalent to a system for cleaning, covering, securing, and monitoring wounds. Gauze may be present but insufficient for a larger injury, and a kit may lack a way to hold a dressing in place when adhesive does not work well on wet, hairy, or moving skin.
Look for a range of wound coverings, medical tape, rolled gauze, nonstick dressings, and a safe method for cleaning visible debris. Disposable gloves protect both the injured person and the helper from contact with blood or contaminated material. Small scissors can assist with cutting tape or clothing, but tools should be stored so they do not puncture sterile packaging.
Bleeding-control supplies deserve special attention, yet they should match the user’s training. A pressure dressing may be practical for someone who understands direct pressure and wound assessment. More advanced devices require instruction, careful storage, and an understanding of when they are appropriate. Buying specialized equipment without learning its use can create false confidence and delay a call for emergency help.
Consider a workshop or gardening scenario. A shallow cut may need cleaning and a small dressing; a deeper wound may require sustained pressure, larger coverings, and urgent professional care. A kit that contains only small bandages forces the responder to improvise with household fabric, which may be dirty, difficult to secure, or unsuitable for monitoring. Improvisation is sometimes necessary, but it should not be the planned baseline.
Burns, blisters, and eye exposures are other frequent omissions. Add dressings appropriate for minor burns, blister protection for people walking long distances, and eyewash or clean rinsing supplies where dust, chemicals, or workshop debris are plausible hazards. Avoid treating an antiseptic wipe as a universal solution; some injuries need flushing, protection, or medical evaluation rather than repeated application of a product.
Do not use a dressing checklist as permission to manage serious injuries at home. Heavy bleeding, deep wounds, severe burns, loss of function, embedded objects, and eye injuries can require urgent care. The kit should support immediate care while help is sought, not replace it.
Personal Medicines, Hygiene, and Protective Supplies
Personal health items are among the most consequential omissions in a generic kit. Commercial packages rarely include prescription medicines, adequate quantities of routine over-the-counter products, backup glasses, or supplies tied to a diagnosed condition. A household may have excellent gauze and still be unprepared if one person cannot access essential medication or monitoring equipment.
Build a private medication list that records names, strengths, instructions, allergies, prescriber information, and refill details. Store medicines according to their labeling, since heat, moisture, and freezing conditions can affect some products. Ask a pharmacist or clinician how to handle backup quantities, substitutions, and temperature-sensitive items. Do not place loose pills in an unlabeled bag, and do not assume that a medicine suitable for one adult is safe for another.
Hygiene supplies affect wound outcomes and usability. Add nitrile gloves in more than one size if needed, hand sanitizer, soap, disposable waste bags, tissues, and a way to keep clean materials separate from used ones. A compact kit may include one pair of gloves, but that is inadequate for repeated care or multiple people. Masks may be useful in dusty cleanup situations, although their protection varies by design and fit.
Age and activity change the inventory. Children may need appropriately sized coverings and dosing tools, while older adults may need hearing-aid batteries, skin-protection supplies, or mobility aids. A person with contact lenses may require glasses and lens-care planning; a person with severe allergies may need their prescribed emergency medication readily accessible. These are not optional “extras” if they determine whether someone can function safely.
Common assumptions create avoidable problems. Pain relievers can interact with existing conditions or medicines, and topical products can irritate sensitive skin. Antibiotics should not be added casually or used as a general response to every wound. A thermometer, written medical information, and emergency contacts may be more useful than another duplicated packet of adhesive strips.
Keep the personal section discreet and easy to remove when carrying the kit between locations. The Premade first aid kit gaps preppers should address will differ for a solo commuter, a family with young children, and a group working outdoors. The correct additions are determined by actual health needs and foreseeable tasks, not by the size of the box.
How to Audit, Pack, and Maintain the Kit
A useful audit begins with a written inventory and ends with a realistic practice check. Empty the premade kit onto a clean surface, record quantities and expiration dates, and discard damaged or unidentified items according to local disposal guidance. Then group supplies by use: bleeding and wounds, burns, sprains, medicines, hygiene, tools, and personal requirements. Grouping exposes duplication in one category and absence in another.
Prioritize additions in this order:
Personal necessities: prescription planning, glasses, hearing support, allergy needs, and condition-specific equipment.
Likely environment: blister care for walking, burn supplies for cooking, eye rinsing for dusty work, or cold protection for outdoor storage.
Duration and scale: enough consumables for the number of people and the period before resupply.
Organization: labels, a contents list, and quick access to the most frequently used items.
Pack for retrieval under stress. Clear pouches or labeled compartments are usually more useful than a tightly compressed assortment. Keep sterile dressings sealed, separate medications from general supplies, and place gloves where they can be reached without unpacking the entire kit. A duplicate small pouch can serve a vehicle or day bag, while a larger home cache holds replenishment stock.
Practice reveals failures that an inventory cannot. Have each responsible adult locate gloves, dressings, tape, and a flashlight without coaching. Check whether packaging opens with wet or cold hands, whether labels remain readable, and whether the kit fits its assigned storage location. If a user cannot identify an item or explain its purpose, replace it with a simpler option or obtain appropriate instruction.
Maintenance should follow use and calendar review. Replace opened, soiled, expired, leaking, or heat-damaged supplies immediately. Review the kit when seasons change, household members’ medicines change, or travel plans expand. A common mistake is buying a second premade kit before correcting the first one; duplication increases volume without improving capability. The better test is whether the kit covers the injuries and health interruptions your household can realistically face.
For additional planning context, use Premade first aid kit gaps preppers should address alongside recognized first-aid training and advice from qualified medical professionals. Supplies work best when their limits are understood.
For reliable guidance, consult recognized first-aid training organizations, local emergency medical services, pharmacists, and clinicians familiar with your household’s conditions. Official product labeling and training materials are more dependable than an unlabeled online packing list, especially for medicines and advanced bleeding-control equipment.
Frequently Asked Questions
What is the biggest gap in most premade first aid kits?
Personal medicines and enough supplies for repeated care are often missing. Many kits also lack varied dressings, adequate gloves, burn care, blister protection, and a practical cleaning method.
Should preppers add a tourniquet to a basic kit?
Advanced bleeding-control equipment may be useful in some settings, but users should receive appropriate training and understand its limits. It should supplement, not replace, basic first aid and emergency communication.
How much medication should be stored?
Ask a pharmacist or prescriber about lawful and medically appropriate backup quantities. Keep medicines labeled, protected from unsuitable temperatures, and reviewed whenever prescriptions or household needs change.
Are antiseptic wipes enough for wound cleaning?
Not always. Some wounds benefit from thorough rinsing and a suitable dressing, while chemical exposures or eye injuries may need prolonged flushing and professional assessment.
How often should a premade kit be checked?
Inspect it after every use and on a regular calendar schedule. Check expiration dates, package seals, storage temperature, quantities, labeling, and whether the contents still match the household’s activities and health needs.
Conclusion
A premade first aid kit is a container of starting supplies, not proof that a household is medically prepared. Review it against realistic injuries, personal health requirements, storage conditions, and the time that may pass before resupply. Add varied wound dressings, gloves, cleaning and burn supplies, blister protection, hygiene materials, and clearly managed personal medicines before buying more duplicates. Keep advanced tools within the limits of your training, and treat serious bleeding, deep wounds, severe burns, and eye injuries as situations requiring urgent professional help. Finish the audit with a hands-on retrieval test, then record what was used and replenish it promptly. A smaller, clearly organized kit matched to real needs is more dependable than a larger box filled with generic items.
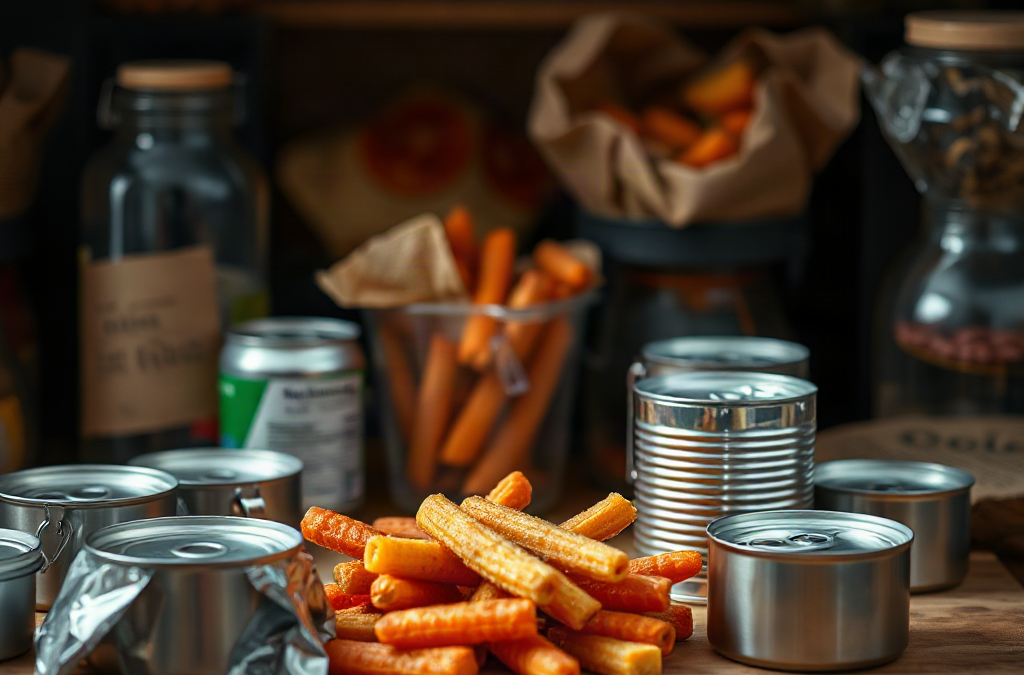
Food qualifies as ready to eat during an outage or evacuation when it can be consumed safely from its package without a stove, microwave, boiling water, refrigeration, or lengthy preparation. That definition excludes many products marketed for emergencies. Freeze-dried meals, dry rice, pasta, dehydrated vegetables, and powdered mixes may store well, but they depend on clean water and a way to heat or rehydrate them. They can be useful as part of a broader supply, yet they should not be counted as the only food available when cooking is impossible.
The practical test is simple: could a tired person open, portion, and eat the item in a dark room with limited water? Pull-tab cans, tear-open pouches, individually wrapped bars, and single-serving fruit cups generally perform better than large containers that require draining, refrigeration after opening, or several utensils. A shelf-stable meal that needs only a spoon is more useful than one that needs a pan, measuring cup, and added water.
Texture and appetite matter as much as storage life. People may reject an emergency supply made entirely of dry bars or salty crackers, especially during heat, illness, stress, or dehydration. Include moist foods, familiar flavors, and several textures. A meal of tuna, crackers, fruit, and shelf-stable milk is more workable than a pile of identical snack foods because it combines protein, carbohydrate, fluid, and variety.
A common misconception is that “no cooking” means “no equipment.” Keep a manual can opener even if most cans have pull tabs, along with disposable utensils, napkins, resealable bags, hand sanitizer, and a small amount of water for cleaning. Those items reduce contamination and make bulky or multi-serving packages manageable. For a fuller supply strategy, connect this food list with your Ready-to-eat emergency food without cooking storage inventory rather than treating food as a stand-alone purchase.
The Most Practical Foods to Store
The strongest no-cook supply uses several food groups instead of relying on one emergency product. Canned seafood, chicken, beans, and meat provide protein; nut or seed butter contributes concentrated energy; crackers, tortillas, and ready-to-eat cereals provide carbohydrates; fruit cups and canned fruit add moisture and variety. Shelf-stable milk or fortified dairy alternatives can contribute fluid and nutrients, although packaging and dietary needs vary.
Choose packaging according to the situation. Pull-tab cans are convenient but can have tabs that bend or break, so a backup opener remains worthwhile. Pouches are lighter for evacuation but may be less durable in a crowded storage bin. Single-serving items reduce leftovers and handling, while larger cans may cost less per serving but require a plan for what happens after opening. If power may return quickly, a large container can be practical; if the household may relocate, compact portions are usually easier.
Useful categories include:
Protein: canned tuna, salmon, chicken, beans, lentils, chickpeas, nut butter, and shelf-stable protein drinks.
Energy foods: granola bars, dense crackers, trail mix, dried fruit, and ready-to-eat cereal.
Moist foods: fruit cups, applesauce, canned vegetables, olives, and soups that are safe to eat cold if the label permits.
Product labels deserve close attention. “Shelf stable” does not mean every package is safe at every temperature, and a product that normally requires refrigeration should not be stored as an emergency item merely because it is sealed. Check the manufacturer’s storage instructions, allergen statement, serving size, and preparation directions. A ready-to-eat meal with a sauce packet may still require water, while a canned entrée may be edible cold but unpleasantly salty.
For example, a household with one vegetarian adult might choose beans, lentil pouches, nut butter, crackers, fruit, and shelf-stable milk rather than buying meat-heavy cases that will go unused. A person with swallowing difficulty may need softer foods such as applesauce, canned fruit, smooth spreads, or medically appropriate products. Dietary restrictions are not a minor detail: food that cannot be eaten is not part of the usable reserve.
How to Build a Balanced No-Cook Supply
Build the supply around eating occasions, not just individual packages. Start by estimating how many people need food, how long they may lack normal cooking, and whether the supply stays at home or travels. Then assign each eating occasion a protein source, an energy source, and a food with moisture or produce value. This approach exposes gaps that are easy to miss when shopping by category alone.
A simple example is a cold lunch: a tuna or bean pouch, crackers or a tortilla, fruit, and water. A breakfast could pair ready-to-eat cereal with shelf-stable milk and dried fruit. A snack may combine nut butter with crackers, provided no allergy concern exists. These combinations are not rigid menus; they are checks that prevent a stockpile from becoming all sugar, all sodium, or all dry food.
Prioritize the following in order:
Usability: no cooking, minimal water, accessible packaging, and suitable textures.
Safety: intact seals, appropriate storage conditions, and clear dates.
Dietary fit: allergies, medical diets, age, swallowing ability, and cultural preferences.
Variety: enough flavors and textures to make repeated cold meals tolerable.
Rotation: products the household already eats and can replace routinely.
Water must be considered separately. Some foods contain moisture, but they do not replace drinking water, and salty items may increase thirst. Foods requiring rehydration should be counted against the water budget rather than described as fully ready to eat. Likewise, canned fruit packed in juice may be easier to consume than dry fruit for someone with limited water, while dry crackers are lighter and less vulnerable to leakage.
Cost creates another tradeoff. Premium emergency entrees can simplify storage but may offer little advantage over ordinary canned foods, beans, nut butter, and crackers purchased during regular shopping. The cheaper option often works better when the household rotates it, understands the packaging, and actually enjoys the taste. A useful trial is to serve one planned meal cold at home. Notice whether the food needs a can opener, creates excessive waste, causes thirst, or leaves anyone hungry. Adjust before an emergency exposes the problem.
Keep a small “first access” container separate from deep storage. Place pull-tab foods, bars, fruit, utensils, and sanitation supplies where they can be reached without moving heavy cases. Link that container to your Ready-to-eat emergency food without cooking rotation notes so the easiest items do not quietly expire while less convenient products are consumed first.
Storage, Rotation, and Food Safety
Storage conditions determine whether packaged food remains usable. Keep supplies in a cool, dry, clean location away from direct sunlight, leaks, fuel, chemicals, and pest activity. Heat can shorten the quality life of some foods, while dampness can damage cardboard, labels, and outer packaging. A basement shelf may be convenient but unsuitable if it floods; a garage may provide space but experience temperature extremes.
Inspect packages whenever supplies are moved. Discard cans that are bulging, leaking, badly rusted, or deeply dented at the seam. Do not taste food to decide whether questionable packaging is safe. For pouches, look for swelling, punctures, broken seals, or unusual leakage. Follow the product’s storage directions and understand that a “best by” date commonly relates to quality, while safety also depends on package integrity and storage history. When uncertain about a specific product, use guidance from food-safety authorities or the manufacturer rather than guessing.
Rotation works best when it is built into ordinary meals. Put newer items behind older ones, mark the purchase month on cases, and review the supply when changing seasonal equipment. Use older cans in lunches and replace them during normal shopping. This method also reveals whether the chosen food is too salty, too dry, difficult to open, or disliked by a family member.
Opened food changes the risk picture. Without refrigeration, do not assume a partially eaten can or pouch can wait safely for later. Use single servings when possible, and if an opened product must be saved, follow safe refrigeration guidance and discard it if proper cooling is unavailable. Clean hands, utensils, and surfaces before eating. A sanitation failure can turn a useful food supply into an additional problem, particularly when clean water is limited.
Cold consumption may affect quality even when it does not affect safety. Some canned foods are designed to be heated, and their texture or flavor may be poor straight from the container. Test representative products before storing large quantities. The mistake to avoid is confusing technical edibility with practical acceptability: a meal people refuse, cannot chew, or cannot open has little emergency value.
Common Mistakes and a Better Shopping Method
The most frequent mistake is buying for storage life alone. A case of foods with long dates can still fail if it contains allergens, requires cooking, depends on a can opener, or produces more sodium and thirst than the household can manage. Another weak assumption is that one product can cover every need. Bars may travel well but become monotonous; canned meals provide moisture but add weight; nut butter is energy-dense but unsuitable for some allergies and difficult to portion without a utensil.
Shop in stages. First, list the people, likely duration, storage location, dietary limits, and available water. Second, select a small number of products from each useful category. Third, conduct a cold-meal test using the exact packaging and tools that would be available during an outage. Fourth, record what was eaten, what was wasted, and what caused difficulty. Only then buy larger quantities.
Use a practical inspection checklist:
Can every person eat it safely and comfortably?
Can it be opened without electricity?
Does it need added water, draining, refrigeration, or heating?
Is there a protein source and a filling carbohydrate nearby?
Will the package survive transport and storage?
Can older stock be rotated through ordinary meals?
Scenario testing improves the result. For a short power outage, refrigerated food may be consumed first while shelf-stable items remain untouched. For evacuation, weight, leakage, and compact packaging become more important. For a household with young children, familiar flavors and easy-to-chew textures may matter more than maximum calories per package. For someone managing diabetes, food choices should fit their established medical guidance rather than relying on generic emergency menus.
Build around real behavior, then refine the reserve. The right supply is not the most elaborate one; it is the set of foods people can open, tolerate, and eat safely under the specific constraints they face. Keep the related Ready-to-eat emergency food without cooking notes with the inventory, and update them whenever household needs change.
For product-specific storage advice and food-safety decisions, consult official USDA food-safety guidance, state or local public-health agencies, and the manufacturer’s label or customer documentation. These sources are more reliable than informal claims about dates, damaged cans, or shelf life.
Frequently Asked Questions
What foods can be eaten during an emergency without cooking?
Canned fish, chicken, beans, fruit, vegetables, nut butter, crackers, tortillas, dried fruit, bars, and suitable shelf-stable drinks are practical options. Verify the label before eating products normally intended to be heated.
Do ready-to-eat emergency foods require water?
They should not require water for preparation, but drinking water is still needed. Foods that must be rehydrated or mixed should be counted separately because they are not fully ready to eat without added resources.
Are canned foods safe to eat cold?
Many commercially canned foods are safe to eat cold when the container is intact and the product is labeled for normal consumption, although some are designed for better flavor when heated. Never use bulging, leaking, or severely damaged cans.
How should no-cook emergency food be rotated?
Store newer items behind older ones, mark purchase dates, and use the older products in ordinary meals. Replace them during routine shopping so the supply reflects current dietary needs and preferences.
What equipment belongs with a no-cook food supply?
Keep a manual can opener, disposable or washable utensils, napkins, resealable bags, hand-cleaning supplies, and a way to manage waste. These tools address packaging, hygiene, and leftovers when electricity or running water is limited.
Conclusion
A dependable no-cook food reserve is built around usability rather than impressive packaging. Select intact, shelf-stable foods that provide protein, energy, moisture, and acceptable textures, then test them cold with the tools and water actually available. Balance convenience against cost, weight, sodium, allergies, and the need to handle leftovers safely. Keep supplies cool and dry, rotate them through regular meals, and inspect packages before use. A short trial meal can reveal more than a product description: it shows whether anyone dislikes the texture, needs a can opener, becomes unusually thirsty, or remains hungry. Make those corrections while conditions are normal, and the stored food will be far more useful when cooking is unavailable.
An hour kit is a compact set of supplies for the first 60 minutes after a power outage, severe weather alert, water interruption, household accident, or unexpected need to leave a room or building. It is not a substitute for a multi-day emergency supply or an evacuation bag. Its value comes from reducing delays while you determine what has happened and what action is safe.
The first hour often creates small but consequential problems. A dark hallway makes it harder to find medication. A dead phone prevents access to contact information. A person who has not eaten may make poor decisions, while a lack of water becomes especially inconvenient if stores are closed or travel is restricted. A useful kit keeps these immediate needs together instead of scattering them across drawers, vehicles, and kitchen cabinets.
Prioritize supplies by function rather than by novelty. Water and essential medication outrank extra tools; a dependable flashlight outranks a large collection of gadgets. A phone power bank is useful only if it is charged and paired with the correct cable. Likewise, a radio is worth packing when someone in the household knows how to operate it and understands that broadcasts may not provide detailed local instructions.
Consider two scenarios. During a short outage, the kit may provide light, phone power, and a snack while you check breakers and weather updates. During a sudden departure, the same container may offer identification copies, medication information, cash, and a small amount of food while a larger bag is collected. The mistake is expecting one small kit to handle every emergency. A narrow purpose makes the kit lighter, faster to use, and easier to maintain.
Use the hour kit checklist for first-time preppers as a starting point, then adapt it to the location. A kit kept beside the bed should emphasize light, shoes, and medication access. A kitchen kit can include water, food, and sanitation supplies. The best placement is the place where the first problem is likely to be noticed, not necessarily the place with the most empty storage space.
The Practical Hour Kit Checklist
A first-time prepper can build a useful hour kit with a small container, pouch, or backpack. Select compact items that work without mains power, internet access, or a special skill. Store supplies in a clear or brightly labeled container, but do not rely on the label alone; every household member should know where it is.
Water: Include a bottle for each person who may use the kit. A sealed bottle is simple for short-term use, while a collapsible bottle saves space but should be checked for leaks.
Food: Choose shelf-stable, ready-to-eat foods such as nut-free snack bars, crackers, applesauce pouches, dried fruit, or other familiar items. Account for allergies and swallowing or dietary restrictions.
Light: Pack a reliable flashlight or headlamp with spare batteries stored separately to reduce accidental drain. A headlamp leaves both hands free for stairs, doors, or first aid.
Communication: Add a charged power bank, the cables used by household phones, a written contact card, and a small battery radio if local alerts are a regular part of your area’s risk picture.
Health: Include essential prescription medication according to the person’s safe storage and refill arrangements, plus a basic first-aid supply, glasses, hearing-aid batteries, and relevant medical information.
Sanitation and comfort: Pack tissues, hand sanitizer, masks if appropriate for the household, menstrual supplies, wipes, and a warm layer or emergency blanket where temperatures make exposure a concern.
Practical backup items: Add cash in small denominations, a pen, paper, spare keys if appropriate, and copies of identification or critical phone numbers protected in a sealable sleeve.
The list should be adjusted to the kit’s location. A car-based hour kit needs water that tolerates temperature swings, while a bedside pouch may need sturdy footwear and a whistle more than canned food. A kit for an apartment should avoid items that create unnecessary weight on stairs. A family with an infant may need formula, feeding supplies, and diapers; those items cannot be replaced by generic “family” equipment.
Do not confuse quantity with usefulness. One familiar snack and one bottle of water may be adequate for a short wait, whereas a large food supply adds bulk without solving the immediate problem. If a household member has diabetes, severe allergies, or a time-sensitive prescription, that need changes the priority order. A general checklist is a framework, not permission to omit a person’s essential care items.
Choosing Supplies For Real Household Needs
Personalization determines whether an hour kit works under stress. Start with the people, pets, and spaces involved rather than shopping for a preassembled package. Commercial kits may provide a convenient container, but they often contain unfamiliar food, weak lights, generic first-aid pieces, or tools no one has practiced using. A smaller custom kit can be more useful than a larger sealed box.
Food deserves more attention than its size suggests. Pick products that can be opened quickly, do not require heating, and are acceptable to the person who will eat them. A bar containing peanuts is unsuitable for a household with a serious nut allergy, even if it has a long shelf life. For a young child, a familiar pouch may work better than dry emergency rations. For an older adult, packaging that requires strong grip or sharp tools may be a poor choice.
Medication planning also requires restraint. Do not transfer medicines into unmarked bags or store temperature-sensitive products in a hot vehicle without following the product’s storage instructions. Instead, keep a current medication list with names, strengths, schedules, allergies, and prescriber or pharmacy details. Ask a pharmacist or clinician about safe ways to maintain an emergency reserve when a prescription is essential.
Household hazards shape the right equipment. People who live in earthquake-prone areas may need sturdy shoes and gloves near the kit, but gloves should not be treated as protection against every hazard. A flashlight helps locate a safe route; it does not make damaged structures safe to enter. In wildfire or severe-weather areas, the kit may support a quick move to a safer location, but official instructions and a larger evacuation arrangement remain more important than any single item.
Pets need deliberate planning as well. A small packet of pet food, a collapsible bowl, leash information, waste bags, and a photo or identification detail may be more useful than another human snack. Keep in mind that water needs rise with heat and exertion. The same principle applies to mobility devices, communication aids, and sensory needs: pack the accessory that makes the primary device usable, such as a charger, spare battery, or protective case.
The hour kit checklist for first-time preppers should therefore be divided into “everyone needs” and “specific person needs.” This prevents a common failure mode: a kit appears complete on paper but lacks the one item that allows a household member to function safely.
Packing, Testing, And Avoiding Common Mistakes
Pack the kit so the first-use items are visible and reachable. Put the flashlight, water, phone cable, and contact card near the top. Keep medications and personal care items in a clearly marked pouch, with storage instructions respected. Use zip bags to separate liquids from electronics, but do not seal anything so tightly that it cannot be opened without scissors.
Test the kit at home rather than assuming new products work. Turn on the flashlight in a dark room, connect the power bank to the correct phone, open every food package, and check whether the written contact card is legible. Have another household member locate the kit without assistance. If they cannot find it or do not know what the radio controls mean, the problem is the system, not the person.
Maintenance is simple when tied to ordinary routines. Check batteries, expiration dates, medication information, clothing sizes, and phone cables on a recurring schedule. Replace food after it has been exposed to heat, moisture, or rough handling. Recharge the power bank after use. A kit that has not been opened for years may look reassuring while containing dead batteries, outdated numbers, or clothing that no longer fits.
Several common mistakes are avoidable. Overpacking makes the container difficult to carry and encourages people to leave it behind. Storing it in a locked room defeats its purpose if the key is unavailable. Relying only on a smartphone fails when the phone is damaged or its battery is empty. Packing candles without considering fire risk can create a new hazard, particularly during an outage. Choosing cheap equipment without testing it may produce a false sense of readiness.
Use a short review sequence: locate the kit, confirm access, inspect light and power, verify water and food, check personal items, then practice retrieving it in low light. If the kit takes several minutes to assemble before it can be used, reorganize it. If one person’s needs dominate the container, create a second small pouch rather than making the primary kit unwieldy. The target is not a perfect inventory; it is dependable access to the supplies that buy time for a calm assessment.
For broader household preparation, connect this small kit with an hour kit checklist for first-time preppers, a larger water-and-food reserve, and a communication arrangement. Each layer has a different job. Keeping those jobs distinct prevents the first-hour container from becoming an overloaded substitute for a complete preparedness plan.
Frequently Asked Questions
What is an hour kit?
An hour kit is a compact supply container intended to cover immediate needs for roughly the first 60 minutes of a disruption, including light, water, communication, health items, and basic sanitation.
Should an hour kit include food?
Yes, but keep the amount modest. Choose familiar, ready-to-eat food that matches allergies, age, medical needs, and the likely short duration of use.
Where should a first-time prepper store the kit?
Store it where the first problem is likely to occur and where every household member can reach it without a key. Many homes benefit from a bedside pouch plus a main kit near a commonly used exit.
How often should the kit be checked?
Review it on a regular household schedule and after every use. Check batteries, power-bank charge, food condition, medication information, contact details, and clothing or personal items.
Is a preassembled emergency kit enough?
Not by itself. A commercial kit can supply a container and basic tools, but it should be tested and supplemented with household-specific medication, food, chargers, documents, pet supplies, and accessibility items.
Conclusion
A dependable hour kit is deliberately small, easy to find, and matched to the people who may use it. Put immediate priorities first: water, safe light, ready-to-eat food, phone power, essential health information, medication needs, and sanitation. Then test the kit in realistic conditions, including low light and a dead-phone scenario. Remove bulky items that duplicate supplies stored elsewhere, and replace anything that has expired, leaked, stopped charging, or no longer fits the household. Once the first-hour container works, connect it to larger water, food, evacuation, and communication arrangements. That layered approach gives first-time preppers a practical starting point without pretending that one bag can solve every emergency.
Build a Reliable Evacuation Record While Details Are Fresh
A useful post-evacuation record captures what happened in sequence, not merely how the experience felt. Begin with the first warning, the information source that prompted action, the time the household began preparing, the time each person left, and the time the group reached its destination. A simple timeline exposes delays that are difficult to remember later. For instance, a departure that seemed immediate may have included an unplanned search for identity documents, a medication refill, or a missing pet carrier.
Use separate notes for observed facts, decisions, and assumptions. “The road was closed at the west junction” is different from “the road was probably closed because of flooding.” The first can be checked against official notices; the second should remain marked as an interpretation. This distinction prevents a later plan from being built around a mistaken explanation.
Write down successful actions as carefully as failures. A pre-packed document pouch, a charged power bank, or a neighbor’s warning may have reduced confusion. Preserving those details matters because people often redesign a plan by removing frustrating elements while overlooking the small measures that actually worked. A record that lists only problems produces an incomplete lesson.
Keep the first account short enough to finish. A phone note, voice memo followed by transcription, or two-page worksheet is more useful than an ambitious narrative abandoned halfway through. Add timestamps, screenshots of alerts, receipts for emergency purchases, and photographs of relevant conditions when they clarify the sequence. Avoid sharing private addresses, medical information, or identifying details in a public post.
One common mistake is writing the review while exhaustion, fear, or anger is still driving every conclusion. Immediate notes are valuable, but final judgments can wait until everyone has slept and urgent recovery tasks are handled. The goal is not to assign blame. It is to identify where the plan, equipment, information flow, or household expectations diverged from reality. Readers comparing their own experience with lessons to record after a real evacuation should preserve both the first raw account and the later edited version.
Examine Departure Timing, Routes, and Information
Timing records reveal whether the household reacted to a clear trigger or spent too long waiting for certainty. Note when the first credible alert arrived, what threshold was used for leaving, and which tasks consumed the final minutes. A plan may say “leave when advised,” yet the real process may depend on finding a charger, contacting relatives, or deciding whether to secure outdoor equipment. Those dependencies belong in the review.
Route analysis should include more than the chosen road. Record the planned route, actual route, delays, closures, fuel stops, traffic conditions, and points where navigation failed. A route that worked in daylight may be unsuitable in darkness, poor visibility, or heavy traffic. An alternate road may look attractive on a map but lack fuel, reliable reception, safe turnaround points, or access for a large vehicle. Comparing the preferred route with the route actually used shows whether the problem was poor planning or changing conditions.
Information quality deserves its own section. Identify which alerts were authoritative, which messages were delayed, and which informal reports caused confusion. Save the wording and time of important instructions where possible. Official guidance can change as conditions develop, so a household should record not only what it heard but how it decided which source to trust. The useful lesson may be a better alert hierarchy rather than a new piece of equipment.
Consider two competing errors: leaving too late because every detail seemed uncertain, or leaving too early based on an unverified rumor. The correct response depends on hazard speed, local instructions, mobility needs, road capacity, and the consequences of being stranded. A post-event review should not turn one successful departure into a universal rule. It should identify the signals that were available, the signals that were missed, and the point where waiting stopped adding useful information.
Record whether communication worked between household members and outside contacts. Did everyone know the destination? Could a person who became separated find the meeting point? Did low battery, overloaded networks, or unclear wording interfere? A short contact script and a backup method may be more valuable than adding multiple apps. The recording process should explain why a communication step succeeded or failed, not simply label it “good” or “bad.”
Audit People, Supplies, Vehicles, and Property
The most revealing inventory is the one made under real pressure. List what each person needed, what was available, what was inaccessible, and what had to be purchased or left behind. Include medications, mobility aids, glasses, infant supplies, pet items, identification, financial cards, water, food, chargers, and clothing suited to the destination. A supply that exists but cannot be found quickly should be treated as unavailable for planning purposes.
People-related observations are equally important. Record who knew their assignment, who needed hands-on help, who became separated, and which decisions required repeated discussion. A child, older adult, person with a disability, or anxious pet may change the pace of departure more than the packing list suggests. Avoid describing a person as the problem when the actual weakness was an unrealistic timetable or unclear responsibility.
Vehicle notes should cover fuel level, loading time, available seating, child restraints, tire or mechanical concerns, navigation access, and whether a second vehicle created coordination difficulties. A larger vehicle may carry more supplies but take longer to load and maneuver. A single vehicle may simplify communication but create a single point of failure. These tradeoffs should be written down rather than resolved through assumption.
Property actions also need a factual review. Note which doors, windows, utilities, documents, outdoor items, and animals were addressed, and which actions were skipped because time ran out. Do not let property protection delay an urgent departure. The lesson may be to create a short “leave now” sequence and a separate optional sequence for conditions that allow more time. Photographing damage or conditions can support later insurance and repair records, but personal safety and official evacuation instructions take priority.
A compact audit can use four columns: needed, available, reachable, and change required. This exposes a common misconception: a well-stocked home is not automatically an evacuation-ready home. Supplies stored in a basement, documents spread across rooms, or a pet carrier buried behind seasonal items may fail at the exact moment they are needed. Link the findings to specific lessons and revisions, not to a general instruction to “be more prepared.”
Turn Observations Into Specific Plan Changes
A record becomes useful only when it changes a future action, location, trigger, or responsibility. Review each observation and ask: what happened, why did it happen, what consequence followed, and what change would reduce the chance or cost of repetition? “Packing took too long” is an observation. “Move documents and medications into one labeled grab pouch beside the exit” is a testable correction.
Prioritize changes by consequence and reliability. A missing prescription, unsafe route, or inability to account for a household member deserves attention before an inconvenience such as uncomfortable clothing. Favor low-cost changes that remove repeated friction: duplicate critical documents in a secure location, keep chargers with the departure kit, label pet supplies, and write the destination and contact details on paper. More expensive purchases may be justified when the event exposed a genuine capacity problem, but buying equipment should not substitute for clearer decisions.
Use a short action register with five fields:
Finding: the specific event or gap.
Cause: confirmed reason, or a clearly marked hypothesis.
Change: the new action, item, location, or rule.
Owner: the person responsible for maintaining it.
Test date: when the change will be checked in a calm setting.
Testing matters because a correction can create a new problem. Moving all supplies to one location may improve speed but make the kit too heavy. Switching routes may avoid one closure while increasing distance or reducing fuel options. A rehearsal should measure retrieval time, loading order, communication clarity, and whether anyone is overlooked. If the revised process only works when every person is present, it is not complete.
Review the record after official information about the incident becomes available, but do not rewrite firsthand observations to match a later story. Conditions may have changed between neighborhoods, and a route that appeared open at one time may have become dangerous later. Preserve uncertainty where it remains. The strongest lesson is often a modest, specific adjustment that can be maintained: an earlier trigger, a second destination, a printed contact card, or a monthly check of medications and vehicle readiness.
Frequently Asked Questions
When should an evacuation review be written?
Make brief notes as soon as practical, then complete the considered review after urgent recovery and rest. Early notes preserve timing and details; later review improves judgment.
What if household members remember the evacuation differently?
Keep differing accounts and label them by person. Compare timestamps, alerts, receipts, and route records before deciding what can be confirmed.
Should successful actions be included?
Yes. Record actions that reduced delay or confusion so they remain part of the revised plan rather than being discarded during a problem-focused review.
How detailed should a post-evacuation checklist be?
Make it detailed enough to identify a responsible person, location, trigger, and test date, but short enough to use under pressure. Separate urgent steps from optional tasks.
What is the biggest recording mistake?
Turning an assumption into a fact is a common error. Mark uncertain causes clearly and base plan changes on verified conditions whenever possible.
Evidence-informed sports nutrition resources and position stands for active people and athletes.
Conclusion
A strong evacuation review preserves the sequence of events, the conditions people faced, and the choices that shaped the outcome. Record warning times, route changes, communication performance, supply access, vehicle limitations, household needs, and unfinished property tasks. Separate observations from explanations, and protect private information when storing or sharing the notes. Then convert the findings into a small action register with an owner and a test date. Prioritize changes that affect safety, medication access, accountability, and departure speed before comfort upgrades or additional gear. Rehearse the revised process under ordinary conditions and keep the successful parts intact. The value of the record is measured by whether the next departure becomes clearer, faster, and more realistic—not by how long the document becomes.