One of the first things I do when I hear there’s unrest is to turn on the news. It’s super important to know what’s going on, right? I always stick to reliable sources. We’ve got to sift through the noise and be sure we’re getting accurate updates about what’s happening around us. Sometimes it feels like the news can be sensational, so I focus on channels that maintain credibility.
Also, don’t forget about social media. While it can be a double-edged sword, platforms like Twitter can give real-time updates. Just be cautious though; not everything you see online is true. Cross-checking info from multiple sources has saved me from panicking over false alarms more than once!
Setting up alerts on my phone for breaking news allows me to stay in the loop wherever I am. I’d rather be overwhelmed with info than caught off guard. In moments of uncertainty, being informed is your best weapon.
Understand Your Surroundings
Before heading out, I always take a moment to survey my environment. Is there a crowd nearby? Are people congregating for a specific reason? Knowing my surroundings helps me gauge potential risks. I’ve learned the hard way that sometimes trouble can brew out of nowhere, and recognizing early signs can be vital.
Also, I make it a habit to know the locations of safe spots nearby. Whether it’s a police station, a government building, or just a good ol’ café, having a plan is key. If things get dicey, I want to have places in mind where I can seek refuge.
And let’s be honest, it’s not just about staying safe from conflict. Sometimes you just want to escape the noise and grab a cup of coffee until it’s safe to venture out again. Knowing the lay of the land can be a game changer.
Disengage When Necessary
This one’s a biggie for me. I’ve learned the hard way that it’s okay to walk away from a situation if it’s escalating. There’s no shame in choosing safety over bravado. If you find yourself in the midst of a protest or a crowd that’s turning volatile, my best advice is to exit the scene as discreetly and calmly as possible.
Resisting the urge to document everything on my phone has also been a crucial lesson. Sometimes, wanting to capture the moment can put you in harm’s way. Instead, I focus on getting to a safe zone and then assessing the situation if necessary. Trust me; there’s a time for releasing the shutter and a time for self-preservation.
Finally, don’t hesitate to seek help if things get out of hand. Whether it’s from law enforcement or fellow community members, reaching out for assistance can make a real difference.
Keep Your Communications Open
Stay Connected with Loved Ones
During unrest, I like to keep my friends and family in the loop. It gives everyone peace of mind knowing that I’m okay, and I also want to know they’re safe too. Group chats can be a lifesaver; it’s a quick way to pass on updates without having to individually reach out every time.
Before heading out, I usually let a friend or family member know my plans and intended routes. That way, if anything goes sideways, they’ll have an idea of my last known whereabouts. This simple step offers both me and them some extra reassurance.
Moreover, I make sure my phone is charged and I have backup power sources handy. Losing communication can lead to panic, so keeping my devices operational through this type of chaos is crucial.
Utilize Technology Wisely
Apps can be awesome tools during civic turmoil. I like to have a few downloaded that help with navigation, like Google Maps, but also ones that can keep me informed. Some apps send alerts about local disturbances or provide updates on safe areas in real-time.
Social media can be both an advantage and a disadvantage, so I use it wisely. Following local organizations that provide real-time updates can help ensure that I have access to factual information as situations evolve.
And if you have someone who can help from a distance, communicate with them. Having someone keeping an eye on the news can help guide your decisions. In essence, leverage those digital connections for your safety.
Prepare Your Emergency Kit
When unrest is on the horizon, I always make sure I have an emergency kit ready. I keep things simple: water, non-perishable snacks, and a first-aid kit. It’s surprising how calming it is to know that I have some essentials within reach if things take a turn.
I also include medications I might need, along with important documents. While it seems basic, having everything in one place ensures that I grab it quickly if I need to leave. I can’t tell you how many frantic searches I’ve avoided by being prepared.
Additionally, I pack a flashlight and spare batteries. Sometimes, disruptions lead to power outages or blocked roads and having a light source can keep me oriented. A little preparation goes a long way when the unexpected happens.
Be Aware of Legal Rights
Understand Your Rights to Assemble
As a citizen, I think it’s important to know my rights when it comes to demonstrations and civic engagement. It can be daunting to step out during unrest, but knowing that I have the right to voice my opinion can be empowering. I make a point to educate myself on local laws and regulations regarding gatherings.
However, I also remind myself that this isn’t a free pass to act recklessly. Understanding the framework can help me navigate situations much better and make informed decisions about participation or withdrawal from a protest.
Being prepared with this knowledge not only reassures me but also empowers me to stand by fellow citizens if something untoward happens. Community awareness of legal rights fosters a culture of support and protection.
Know How to Document Events
If I find myself in a situation where things turn chaotic, it’s essential to know how to document events conscientiously. This can include capturing video or photos, but here’s the catch: I prioritize my safety first. If documenting puts me in danger, I choose to step back.
When safely recording, I always make sure to be respectful of others’ privacy. The intent should never be to exploit someone else’s situation, and I believe it’s crucial to have empathy in such tense times. Remember, we’re all humans in distress, right?
Ultimately, I think documenting can play a significant role in providing accountability, but I emphasize staying aware of my environment. Balancing awareness and documentation can be tricky, but with practice, we can all share experiences while staying safe.
Have a Plan for Evacuation
Know Your Escape Routes
Planning an escape route can really save my skin during civil unrest. It’s like chess – you need to think a few steps ahead. I prefer to familiarize myself with multiple pathways out of crowded areas, as sometimes the most direct route might be blocked.
Mapping out escape routes might feel a bit paranoid, but trust me, a little forethought can go a long way. I find it useful to choose routes that take me away from potential conflicts rather than directly toward them. Keeping eyes peeled for alternate exits can provide that extra layer of assurance.
Also, when I’m at events, taking mental notes of where security personnel are positioned can guide my decisions should I need assistance or a faster exit. Better safe than sorry, right?
Practice Situational Awareness
I always stay tuned to what’s going on around me, even if I’m just grabbing lunch. It’s about cultivating that sixth sense for danger. This isn’t just being hyper-vigilant; it’s about being aware of body language, sounds, and any changes in the crowd’s behavior.
If things suddenly feel off, I pay attention and don’t hesitate to depart from the area. Trusting instincts has saved me on more than one occasion, and I believe it’s a skill anyone can cultivate with time.
Besides, I think it’s about being engaged with your community, too. The more familiar I am with the people around me and their usual behavior, the easier it becomes to detect when something’s not quite right.
Rehearse Your Exit Plan
Run through scenarios in your head; it may sound goofy, but I often visualize what I’d do if I needed to evacuate. Think of it as a fire drill for civil unrest. Preparing for potential situations mentally can bolster my confidence during an actual event.
Sometimes I even practice with friends and have discussions about what we would do together. This not only solidifies plans but helps keep everyone on the same page. A safer community starts with collective awareness and preparedness.
And if I’ve ever doubted the value of practicing, I look back on times when my gut instincts kicked in because I had prepared. Every little bit of readiness can make a significant difference when it counts the most.
Frequently Asked Questions
1. What should I do if I find myself in a Civil Unrest situation?
It’s crucial to remain calm. Assess your surroundings and decide whether it’s better to stay put or leave the area. Stay informed through reliable news sources and communicate with loved ones about your status.
2. How can I prepare my emergency kit for civil unrest?
Your emergency kit should include essentials like water, snacks, a first-aid kit, medications, important documents, and a flashlight with batteries. Keep everything in one place for quick access.
3. Are there legal considerations to be aware of during protests?
Yes, it’s essential to understand your rights to assemble and voice your opinion. However, ensure you’re aware of local laws to navigate situations responsibly.
4. How can I ensure my safety while documenting events?
Prioritize your safety first. If you can document events safely without putting yourself at risk, do so. Always avoid exploiting situations; approach documentation with empathy and respect.
5. What steps can I take if I feel unsafe in a crowd?
If you feel unsafe, trust your instincts to leave the area calmly and discreetly. Familiarizing yourself with escape routes and maintaining communication with friends can help elevate your safety during unrest.
Before heading out into the backcountry during winter, it’s crucial to understand how snowpack operates. Over the years, I’ve spent many hours studying snow layers. Each one behaves differently based on temperature, moisture, and wind. For instance, when new snow falls on a weak layer, it could lead to instability. Recognizing these signs is key to avoiding danger.
I often rely on local reports and guides who provide insights on conditions. Checking resources like the Avalanche Forecast Center can save you from potentially fatal trips. I learned the hard way that even slight changes in weather can make a big difference; for example, a beautiful sunny day can turn a solid snowpack into a risky situation.
Ultimately, understanding the dangers of avalanche terrain isn’t just about knowledge; it’s about being observant. Whenever I’m on the slopes, I make it a point to look for any signs of instability, like cracking or collapsing snow. It pays off to be vigilant.
Planning Your Route
Choosing Safer Terrain
Planning your route is a big deal in the snow. I can’t stress enough how important it is to choose the right terrain. I’ve quickly learned to respect the mountains and dodge steep, open slopes after hearing too many horror stories from fellow adventurers. Ideally, I stick to well-trodden paths or areas known to be safer in winter conditions.
When mapping out my route, I make sure to factor in the current snow stability reports and weather forecasts. Using modern navigation tools like GPS can be a lifesaver; just make sure you fully understand how to use them before you need them. I can’t tell you how many times I’ve had to rely on my device when visibility hit rock bottom!
An important part of route planning is also checking for potential escape routes. When traversing snowy landscapes, keeping your options open can mean the difference between safety and disaster. I have found that mentally navigating the area multiple times can be immensely helpful when you’re focused on getting back safely.
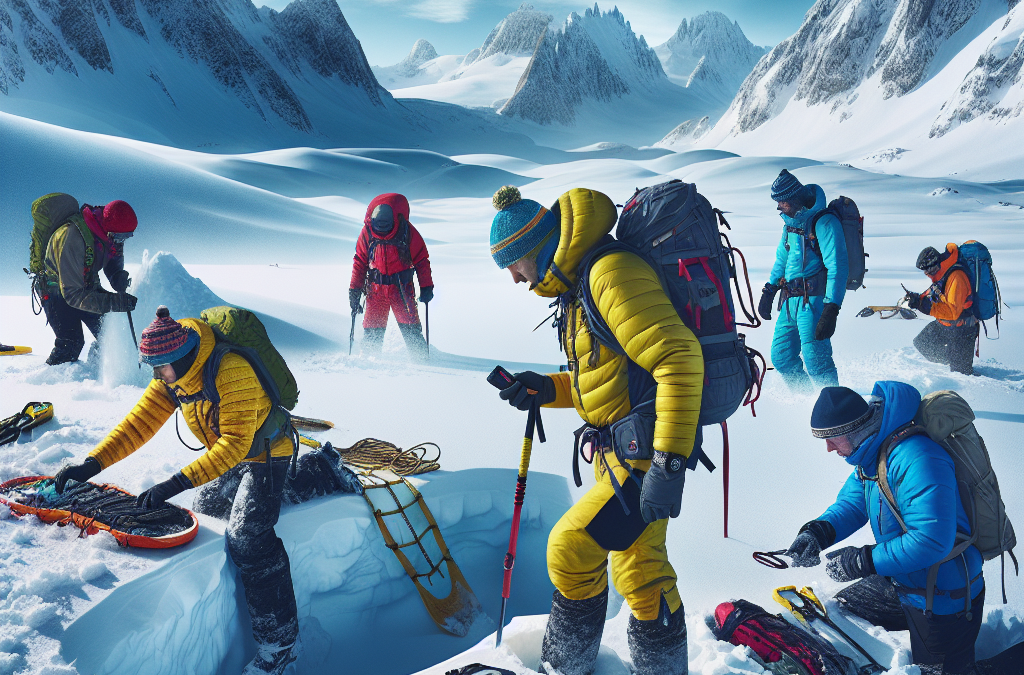
Essential Gear for Survival
Required Avalanche Safety Equipment
Now let’s chat about gear. There’s a bunch of crucial equipment I never hit the slopes without. A beacon, probe, and shovel are the holy trinity for avalanche safety equipment. I can’t stress enough how wearing a personal avalanche transceiver (beacon) can help rescue teams find you in the event of a tragedy.
Choosing a reliable probe is also essential; it can make the process of locating a buried person faster and more efficient. When I first got equipped, I spent time practicing with it before heading out. Learning how to deploy and use my gear in a controlled environment gives me confidence in real emergencies.
Lastly, my shovel – it might seem basic, but I can tell you that having a lightweight, durable shovel can make digging someone out an achievable task. I recommend going for one that’s easy to handle, especially with gloves on. Trust me, you don’t want to deal with a flimsy shovel in a panic!
Rescue Techniques and Practices
Understanding Search Methods
In the scary event that someone is caught in an avalanche, knowing how to conduct a search is crucial. I remember the first time I went through a search and rescue training. It was eye-opening! You’ve got to utilize your avalanche beacon because it dramatically reduces search time, but if the beacon fails, a systematic search is key.
The foundational technique I practice is the “parallel search.” This means moving back and forth across the likely burial area while listening for beeping signals. It’s like something out of a spy movie at times, but I assure you, it works effectively when you keep your focus. Knowing how to fine-tune your listening and watching for the slightest clue can be what saves a life.
And let’s not forget about teamwork. When I’m out there, everyone needs to play their part, keeping constant communication. We’ve got each other’s backs, so knowing who’s looking where and what techniques each person is using can make a big difference in how smooth the rescue goes.
First Aid in the Wilderness
Addressing Cold Injuries
Cold injuries can sneak up on you faster than you think. I recall a chilly day out on the slopes when I began feeling numb in my fingers. I had to immediately educate myself about frostbite and hypothermia symptoms; sometimes it’s just a little tingle that can lead to serious issues. Always be prepared!
Having basic first aid skills can prove invaluable. I’ve made it a rule to carry a first-aid kit whenever I’m out exploring. Basic supplies, including gauze, adhesive tape, and a good antiseptic, can address minor injuries and keep things from escalating. Nothing’s worse than having a long trek back with an injury you didn’t take care of!
Lastly, if you see someone else showing signs of cold injury, don’t hesitate to step in. I’ve learned that sometimes, a simple hot drink or warm pack of hand warmers can make a gradual difference. Keeping an eye on your friends is crucial because, in the snow, we can all get a little too focused on having fun—and safety often gets overlooked.
Frequently Asked Questions
What should I do before heading into avalanche terrain?
Always check avalanche forecasts, understand snowpack conditions, and learn to recognize signs of instability in the snow. It’s essential to plan your route around safer terrains and stay updated.
What gear do I need for avalanche safety?
Key gear includes an avalanche beacon, probe, and shovel. It’s also a good idea to carry a first aid kit and emergency supplies just in case.
How can I effectively search for someone buried in an avalanche?
Utilize your avalanche beacon first. If the beacon isn’t available, perform a systematic parallel search across the last known location of the victim, looking for clues and listening for signals.
What are the signs of cold injury in the wilderness?
Common signs of frostbite include numbness, discoloration of the skin, and pain. Hypothermia symptoms consist of shivering, slurred speech, and confusion. Be aware of these and act quickly!
How can I best prepare for first aid in snow emergencies?
Take a first aid course focused on outdoor scenarios. Always carry a well-stocked first-aid kit on your trips and familiarize yourself with the contents and their uses before you head out.
From my own adventures in the mountains, I quickly learned that altitude sickness isn’t just a myth. It’s a real condition that kicks in as you ascend. The air gets thinner, which means less oxygen gets to your muscles and brain, leading to headaches and nausea.
It’s essential to recognize the symptoms early. Mild forms can leave you with a headache and fatigue, but serious cases may result in confusion or even pulmonary edema. Knowing the signs can be your first line of defense on the mountain.
I remember the first time I experienced it – it felt like a hangover without the fun night before. Knowledge is power here, so do not dismiss the importance of educating yourself on altitude sickness.
How to Prevent Altitude Sickness
Prevention is better than cure, right? What I’ve found really works is to ascend slowly. Give your body time to adjust to the change in altitude. Take regular breaks and don’t skip your hydration; dehydration only worsens the symptoms of altitude sickness.
Another surprising tip I’ve discovered is to eat carbs before embarking on a hike. Your body uses carbohydrates for energy, which can help mitigate some of the effects of altitude sickness. Trust me, your body will thank you later.
And don’t forget to listen to your body. If you feel like crap, don’t push your limits. It’s okay to turn back, as frustrating as that may seem—your health is paramount.
First Aid for Altitude Sickness
If altitude sickness hits you hard, it’s essential to have a plan. Descending quickly can often relieve symptoms, which I learned the hard way. If someone in your group is struggling, keep an eye on them, and don’t hesitate to initiate a descent.
It’s a good idea to carry medications like ibuprofen or prescribed drugs such as acetazolamide. I’ve used them during high-altitude hikes, and they can make a world of difference.
Being prepared with first aid knowledge is crucial. Know how to recognize severe symptoms, like difficulty breathing or unconsciousness, and don’t shy away from asking for help if you need it.
Essential Gear for High Altitude
Packing Wisely
Your gear can literally make or break your high-altitude adventure. I’ve packed plenty of times with half the stuff still sitting in my closet. So, I learned to pack lightweight, moisture-wicking clothing as it helps regulate body temperature.
Don’t forget a high-quality pair of hiking boots; trust me, your feet deserve the very best, especially with rough terrains at high altitude. I made the mistake of choosing style over comfort once, and my feet were not happy campers!
A good backpack is also essential. It needs to be spacious but not cumbersome. I often go for backpacks that allow easy access to water and snacks on the go. Trust me, your future self will appreciate that foresight!
Hydration Systems
At high altitudes, staying hydrated is even more critical than at sea level. I personally recommend a hydration reservoir system. It’s easy to sip while trekking and doesn’t involve fumbling with bottles.
Try to drink regularly, even when you don’t feel thirsty, because you might not feel it at altitude. Trust me, chugging water when I remember isn’t enough. Maintaining hydration is a commitment!
Also, consider electrolyte supplements; they can work wonders in keeping your energy levels up when you’re sweating through your layers while tackling tough climbs.
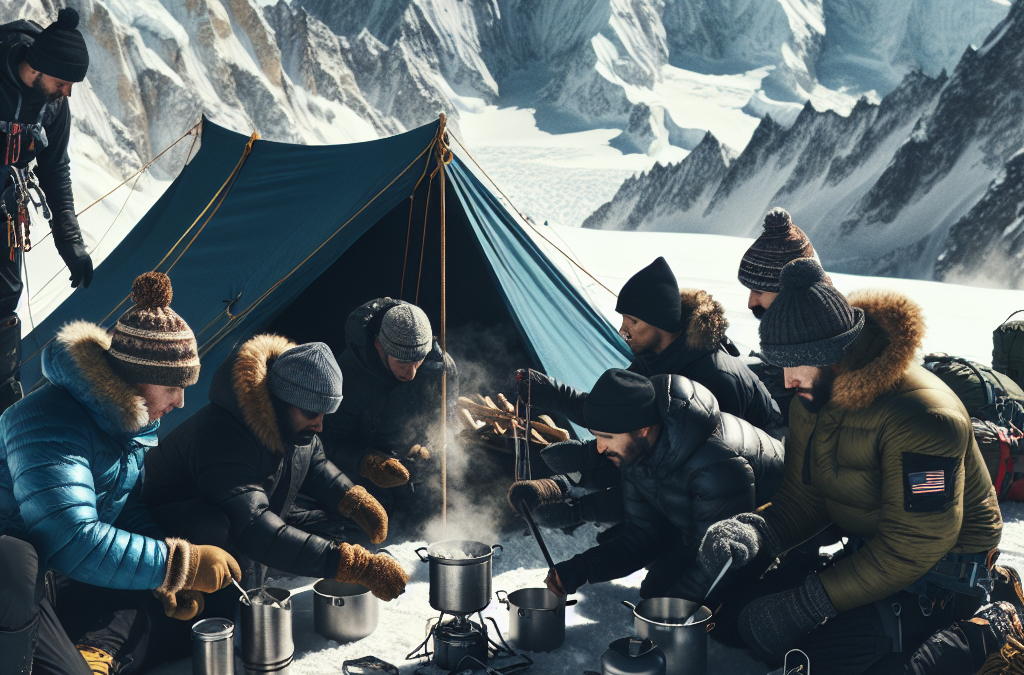
Cold Weather Check
Cruising through high altitudes often means dealing with cold weather. I remember one hike where I was woefully unprepared, and let me tell you, chills up by those peaks are no joke.
Layering is your best friend. Go for thermal base layers, insulating mid-layers, and a good waterproof shell. I typically follow this setup, and it keeps me cozy regardless of the temperature!
Don’t skimp on gloves and hats! I learned that the hard way when my fingers felt like ice cubes. Keep those extremities warm as they can be the quickest to suffer in the cold!
Navigating Terrain
Understanding Your Route
Whether you’re shuffling up a snowy trail or scaling rocky inclines, knowing your route is an absolute game changer. I can’t emphasize enough how scouting the area, even doing some online research, can save you from getting lost.
Use topographical maps or GPS devices. I once got caught in a snowstorm, and if it hadn’t been for my trusty GPS, I would’ve been even more disoriented than I already was.
A little planning goes a long way. Always have a backup route planned, and let someone know your itinerary. It’s not just smart; it’s necessary—trust me!
Footing Techniques
I’ve learned that good footing can mean the difference between a triumphant ascent and a nasty fall. Pay close attention to your steps; it’s easy to get distracted by the scenery.
Practice your footing when you encounter tricky areas: lean slightly forward for balance and distribute your weight wisely. I know it sounds simple, but every mountain has its hidden obstacles!
And remember, it’s okay to take your time. I’ve had to remind myself that slow and steady wins the race, especially when fog rolls in or the terrain gets tough.
Emergency Navigation
Even with all the planning, things can go south quickly. If you find yourself in an emergency, being able to navigate without a clear path becomes crucial. Always carry a compass and know how to use it. I’ve seen too many adventurers rely solely on technology.
In challenging situations, try to stay calm. Panic can lead to poor decisions, which I’ve seen firsthand. I’ve learned to focus on small steps: finding landmarks, retracing my steps, and staying put if necessary.
You never know who might be able to help if you wait. A little patience and a solid plan can lead you back to safety. Always have that safety net in place, folks.
Team Communication
Pre-Hike Briefing
Before you start your journey, gather your group for a pre-hike briefing. Discuss everyone’s skills, limitations, and expectations. This has been invaluable for me in ensuring everyone is on the same page.
Set clear signals for communication during the hike—like hand signals or specific whistles. When we used these, it really minimized confusion and kept the group moving smoothly.
Encourage an open floor where everyone feels comfortable sharing their concerns. I’ve seen too many hikes derail because someone felt they couldn’t speak up. Make safety your priority!
In-Trail Check-Ins
During the hike, it’s smart to have regular check-ins. Whether you’re taking a breather or just finding a good view, this is a great time to gauge how everyone’s feeling. I often do brief stops every hour or so to see where we stand.
These moments are also an excellent chance to assess energy levels and adjust the pace as necessary. I like to maintain an adaptable mindset, recognize group dynamics, and be ready to focus on supporting each other.
Don’t rush! This is all about enjoying the experience together. Building camaraderie while navigating the trails is typically what sticks with me long after the hike.
Emergency Response Strategies
If things go awry, it’s vital to have a clear and concise emergency response plan. I always involve everyone in this discussion before hitting the trails—no one wants to be in a panic later on.
Be prepared to designate a leader if an emergency arises, and have clear responsibilities. This helps keep chaos at bay. I learned that having a plan makes people more likely to step up when the going gets tough.
Don’t forget to practice this plan sometimes! It’s crucial everyone knows what to do. A little rehearsal can make all the difference when you’re faced with a real crisis.
Conclusion
Navigating altitude challenges can be daunting, but with the right skills and preparation, you can take on even the highest peaks. Use knowledge to your advantage and definitely listen to your body along the way.
Embrace the journey, learn from the experience, and never hesitate to adapt to unpredictable mountain conditions. Happy hiking!
FAQ
What is altitude sickness?
Altitude sickness is a condition that occurs when your body cannot get enough oxygen due to a high elevation. Symptoms include headaches, nausea, and fatigue.
How can I prevent altitude sickness?
To prevent altitude sickness, ascend slowly, stay hydrated, eat carbs, and listen to your body. If you feel unwell, don’t hesitate to descend.
What essential gear do I need for high-altitude hikes?
You should have moisture-wicking layers, sturdy hiking boots, a good backpack, a hydration system, and weather-appropriate outer layers.
How can I improve my navigation skills in the mountains?
Familiarize yourself with your route, learn how to use a map and compass, and practice good footing techniques to navigate effectively in challenging terrains.
What should I do if there’s an emergency during the hike?
Have a clear emergency plan. Make sure everyone knows their roles, and practice your strategies beforehand. Staying calm and communicating effectively can save lives.
In a world where natural and man-made disasters can strike without warning, being prepared is not just wise; it’s essential. Understanding the risks that loom in your area is the first step toward fortifying yourself and your loved ones against the unexpected.
*Understanding the Risks: Identify Potential Disasters in Your Area**
Every region has its unique set of hazards. From hurricanes and earthquakes to floods and wildfires, knowing what you’re up against is crucial. Start by researching local history—what types of disasters have occurred in your community before? Engage with local emergency management agencies or visit their websites for insights on prevalent threats. This knowledge empowers you to take specific actions tailored to your environment, helping you anticipate challenges before they arise.
*Creating a Comprehensive Emergency Plan**
Once you’ve identified potential risks, it’s time to craft an effective emergency plan. Involve every member of your household to ensure everyone knows their role during a crisis. Establish meeting points both near home and outside your neighborhood where you can regroup if separated. Discuss evacuation routes and practice them regularly. Importantly, designate a point of contact outside your area who can help coordinate communication if local lines are down. Remember, clear plans minimize panic when disaster strikes.
*Building a Preparedness Kit: Essential Supplies You Must Have**
A well-stocked preparedness kit is your lifeline during emergencies. Gather essential supplies that cater to various scenarios: food and water that can sustain each individual for at least three days, first aid items, flashlights with extra batteries, sanitation products, and any necessary medications should be at the forefront of your collection efforts. Don’t forget important documents—insurance papers, identification cards—and consider including cash since ATMs may be non-operational during crises.
Additionally, think about incorporating specialized items like pet food if you have furry friends or baby supplies if there are young children involved in your household. Customizing kits based on individual needs ensures everyone will be adequately taken care of when faced with adversity.
*Communication Strategies: Staying Connected During a Crisis**
Effective communication during an emergency can save lives. Consider using group texting apps or social media platforms as alternative means to stay connected if traditional telephone services fail. Moreover, familiarize yourself with two-way radios as they often provide reliable communication when cell networks are overwhelmed or out-of-service entirely.
Encourage family members to keep charged power banks handy for their devices; this small effort could make all the difference when trying to reach loved ones amidst chaos.
*Regular Drills and Updates: The Importance of Training and Preparedness Reviews**
Preparedness isn’t a one-time task; it requires ongoing commitment through regular drills and updates. Schedule periodic practice sessions to ensure everyone remembers protocols clearly—rehearsing will help solidify roles within the family unit while building confidence in handling real-life situations efficiently.
Moreover, review and update your emergency plan annually or whenever life circumstances change—new family members arrive or kids grow older may necessitate adjustments in responsibilities or supplies required.
In conclusion, disaster preparedness hinges on awareness and proactive measures tailored specifically to individual needs and environmental realities. By understanding risks, creating robust plans, assembling thorough kits, maintaining open lines of communication, and committing to regular training exercises—all these steps culminate into effective strategies that empower individuals facing the unpredictable storms of life!
In a world where unpredictable events seem to be the new norm, the significance of emergency preparedness cannot be overstated. Whether it’s natural disasters like hurricanes and earthquakes or man-made emergencies such as power outages and pandemics, being ready can mean the difference between chaos and calm. Understanding the importance of emergency preparedness is your first step towards safeguarding yourself and your loved ones.
To embark on this journey, you must begin with a thorough assessment of your risks. Start by identifying potential hazards in your area. Are you living in a flood-prone zone? Is there a history of wildfires nearby? Perhaps severe storms frequently disrupt life in your community? Pinpointing these risks will help shape an effective plan tailored to your unique circumstances. Make a detailed list, categorizing threats based on their likelihood and severity; this will serve as your foundation for further planning.
Once you’re aware of potential dangers, it’s time to create your emergency action plan—a blueprint designed to guide you through various scenarios. Begin by outlining clear roles for every member of your household. Who will grab the emergency kit? Who’s responsible for pets? Establish meeting points both at home and outside, ensuring everyone knows where to go if separated. It’s also crucial to designate an out-of-town contact person—someone who can relay information if local communication is disrupted. Write down these strategies and keep them easily accessible; clarity breeds confidence when chaos strikes.
A well-stocked emergency kit is central to any effective action plan. What should it contain? Start with the essentials—non-perishable food items, water (at least one gallon per person per day), first aid supplies, flashlights, batteries, hygiene products, important documents (like IDs and insurance papers), and any necessary medications. Don’t forget about comfort items! A favorite book or toy can provide solace during stressful times. Regularly review and update this kit; expired food or outdated medicines won’t serve you well when every minute counts.
Communication during a crisis can often become challenging as regular channels may fail or get overwhelmed. Therefore, establishing solid communication strategies beforehand is vital. Ensure all family members have a list of important contacts saved in their phones—and written down somewhere safe in case of battery failure! Consider utilizing messaging apps that function effectively even under pressure since they may work when traditional calls do not. Additionally, familiarize yourself with local alert systems or apps that provide real-time updates during emergencies.
Lastly, remember that practice makes perfect! Conducting drills ensures everyone is familiar with their roles and responsibilities before disaster strikes—think fire drills but for various scenarios like evacuation or shelter-in-place situations. Schedule regular reviews of your plan—perhaps quarterly—to refresh everyone’s memory and adjust any details as needed (after all, life changes!). These practices build confidence among family members while reinforcing readiness.
When faced with uncertainty, preparation transforms panic into empowerment. By assessing risks, crafting a robust action plan complete with essential supplies, maintaining communication strategies, and regularly practicing drills—the path from panic to prepared becomes clearer than ever before. Take charge today; after all, an ounce of prevention is worth a pound of cure!
Urban foraging is essentially the quest for edible plants and food sources within city environments. It can be a thrilling adventure, akin to a treasure hunt, but with a delicious twist! What’s even better is it connects us with nature, even in the most urban settings.
From foraging for berries in a park to harvesting herbs from a community garden, there are plenty of opportunities. Plus, there’s an undeniable joy in finding something fresh and free. It’s about making the best of what our cities can naturally offer.
As I delved into foraging, I discovered the vast amount of edible flora often overlooked. Like, did you know that dandelions are not just pesky weeds, but also packed with vitamins and can be tossed in salads? It’s eye-opening!
Why Urban Foraging is Beneficial
One of the main perks of urban foraging is that it’s eco-friendly. By sourcing food locally, even within our city streets, we reduce our carbon footprint. It’s a win-win for both our health and the planet!
Additionally, foraging can save you some cash. Imagine strolling through your neighborhood and picking fresh herbs instead of buying them at a store. It’s not just budget-friendly; it’s also a fun way to spice up your meals!
Finally, foraging invites curiosity and learning. Every time I headed out, I learned to identify different plants and their uses. This not only sharpened my knowledge but also deepened my respect for local ecosystems.
Getting Started with Foraging
If you’re keen to start your own foraging journey, it’s essential to first educate yourself about what to look for. I recommend using field guides or mobile apps that help identify edible plants. Believe me, it makes a huge difference.
Next, start simple. I remember my first adventure included gathering wild garlic in a nearby park. It was a small step but felt like an epic success. Starting small ensures that you don’t feel overwhelmed.
Lastly, join community foraging groups or workshops. Not only will you learn a lot, but you’ll also meet fellow food lovers. Many of these experiences are filled with laughter and camaraderie—it’s just a bonus!
Identifying Edible Plants
Look at the Environment
When I first started foraging, I quickly learned that the local environment plays a big role in identifying safe edible plants. Certain areas in the city may have pollution or chemicals that can contaminate what you’re looking to eat, so the location matters!
Urban parks, gardens, and even backyards can often provide safer choices compared to well-trafficked streets where dirt and grime may end up on the plants. Pay attention to where the plants grow and avoid areas near roads, factories, or heavy foot traffic.
During my early outings, I’d often take pictures of plants in different environments and research afterward. It’s a fantastic way to learn beyond what you might find in books!
Know Your Plants
Identifying specific plants is pivotal, as many have look-alikes that can be toxic. I’ve made it a habit to get up close and personal with plants—their leaves, stems, and roots all tell a story. Familiarize yourself with the characteristics of common edible plants in your area.
Field guides or apps can be phenomenal resources. One time, a friend and I stumbled upon a patch of stinging nettles. I almost walked away thinking they were weeds, but after checking my app, we were able to identify them and cook them up as a delicious soup!
Also, smell and taste are your friends. Many edible plants have distinct aromas. Just remember to only taste a tiny bit at first to ensure you don’t have any adverse reactions!
Practice Responsible Foraging
As you venture into foraging, it’s crucial to respect the environment. This means only taking what you need and being conscious of the overall ecosystem. Foraging isn’t just about getting your fill; it’s about maintaining the balance of nature.
I’ve experienced cities that have particular regulations on foraging. Researching and ensuring you are complying with local laws is essential, and it helps preserve these areas for other foragers in the future.
Lastly, spread the word about responsible foraging! The more we educate others, the greater the chances we can keep our foraging spots healthy and plentiful for years to come. Plus, it fosters a sense of community!
Cooking and Using Foraged Foods
Experimenting with Recipes
Once you’ve gathered your kitchen treasures, the fun truly begins in the kitchen! Using foraged plants can elevate your meals and add seasonal flair. I’ve experimented with fresh wild greens in salads, added berries to my morning oatmeal, and even made pesto out of dandelion greens!
One delicious find was wild mustard. It added a sharp and piquant twist to my grilled cheese sandwiches—definitely a dish to be proud of. It’s simply amazing how foraged foods can make me feel like a gourmet chef.
Don’t hesitate to get creative. Try making herbal teas from foraged leaves, or use the flowers in your salads for some colorful garnishing. There are endless possibilities, and experimenting is part of the fun!
Preserving Your Finds
If you’ve foraged more than you can eat right away, preserving your foods can ensure their longevity. You can dry herbs, make jams out of fruits, or even pickle wild vegetables. I love making pesto and freezing it in ice cube trays for later use.
Once, I went wild raspberry picking and made a whole batch of raspberry jam. It was nostalgic, reminding me of summer days as a kid. Those flavors captured in jars are perfect for spreading joy on cold winter days!
Don’t forget about freezer space too—blanching and freezing wild greens is a lovely way to have fresh flavors handy when out of season.
Sharing Your Foraging Adventures
Finally, sharing your foraging experience with friends and loved ones enhances the joy of this buddy-up journey. Organizing foraging picnics where everyone brings a dish made from foraged foods is an incredible way to celebrate your bounty.
Social media can be fun for this too! I often post my finds and what I’ve cooked up to inspire others. You never know, your adventures might ignite someone else’s passion for nature and foraging!
Plus, sharing knowledge with friends makes it even more fulfilling. I’ve learned so much from friends, and I’ve been happy to pass my knowledge onto others as well.
Safety Tips for Urban Foraging
Stay Informed
As with any culinary endeavor, safety is paramount when foraging. I always research species thoroughly before trying anything new. An evening spent reading up on local flora can make all the difference when you’re outdoors.
Be mindful of potential allergens! That means knowing if you’re allergic to any plants. I’ve shared foraging experiences where someone had a reaction. Ensuring everyone knows what they can and cannot eat is key when foraging in groups.
Remember the old saying: “When in doubt, throw it out.” If you can’t identify a plant confidently, it’s better to err on the side of caution.
Climate Awareness
Climate factors like pollution can affect the edibility of the plants. I always consider the surroundings of where I’m foraging. It’s wise to avoid areas with heavy pesticide or herbicide use. Gathering from well-maintained gardens or community plots is a safer bet.
Also, pay attention to seasonal changes. Some plants may only be edible at certain times of the year, while others may carry toxins in different growth stages. Education and awareness go hand in hand when foraging.
I often jot down notes on when I found which plants, making it easier in future seasons to know the best times to go back for more.
Be Cautious with Wildlife
Be on the lookout for wildlife too! Bugs, snakes, and other critters can sometimes share your foraged space. They might be lurking around, especially in little patches of wild urban greenery.
Always respect their habitats and stay safe. I’ve had my encounters with bees when picking nearby flowers—just a friendly reminder to watch where you tread!
Bringing a buddy along can also be a great safety measure. Sharing this journey with a friend not only boosts morale but ensures you’re safer if an unexpected situation pops up.
Conclusion
Urban foraging has been such a rewarding experience for me, both for my culinary creations and my appreciation for nature within the city. I encourage everyone to give it a shot; you might just find yourself with the tastiest meals and a newfound love for the plants around you!
FAQs
1. What are some common edible plants found in the city?
Common edible plants include dandelions, clover, wild garlic, and various berries. Always research and verify before consumption!
2. How do I know if a plant is safe to eat?
Use reliable field guides, apps, or consult with experienced foragers. If in doubt, don’t consume it!
3. Can I forage anywhere in the city?
Not necessarily. It’s essential to check local laws and regulations regarding foraging in public spaces and parks.
4. What should I bring for a foraging trip?
A good foraging guide, a basket or bag, gloves, a small knife, and possibly a notebook for jotting down notes are excellent essentials.
5. Are there any risks associated with urban foraging?
Yes, risks include polluting, mistaken identity of plants that may be toxic, and potential allergens. Always ensure you know what you’re gathering!