by Preparation | Aug 3, 2025 | Preparedness
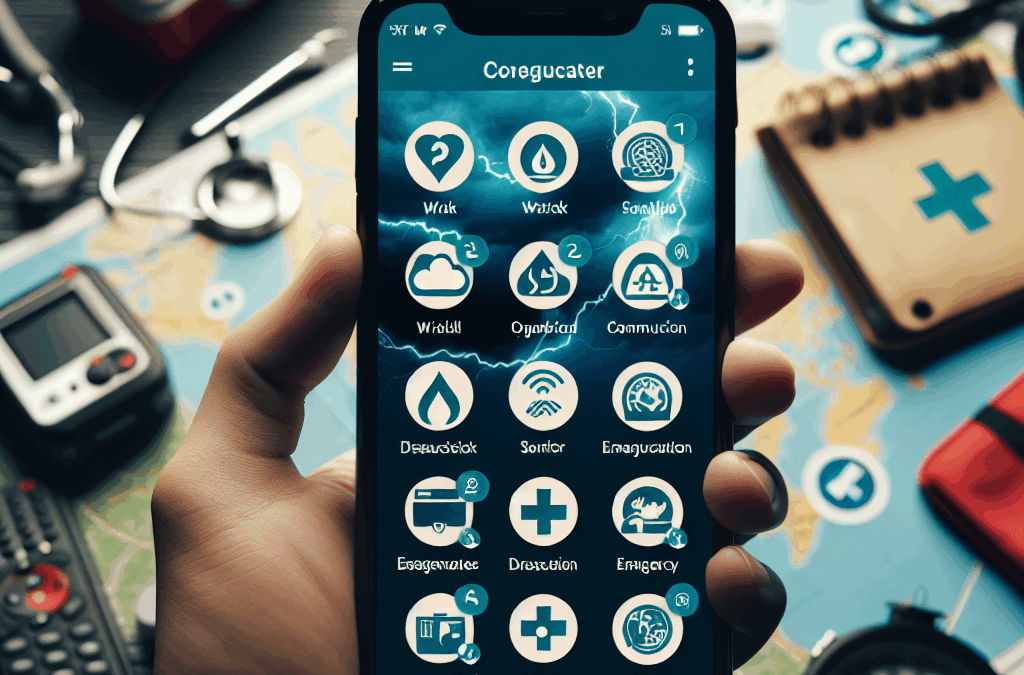
Real-Time Alerts and Notifications
Understanding the Importance
When a disaster strikes, time is of the essence. Real-time alerts are vital to keeping us informed about what’s happening as events unfold. Personally, I’ve found that notifications can make all the difference in how I prepare and respond. If a tornado warning comes through, I want to know instantly so I can take action.
Many apps today leverage GPS technology to deliver alerts specific to your location. This means, for example, if you’re in a flood zone, you’ll be alerted about worsening conditions before anyone else in a different area. This localized information isn’t just convenient; it’s crucial.
In my experience, being proactive rather than reactive saves lives. So, ensuring you have an app that gives you real-time updates on disasters is no longer a nice-to-have—it’s a must.
Top Apps for Alerts
Among the myriad of applications out there, a few stand out. For instance, the FEMA app is fantastic for federal alerts and puts safety tips at your fingertips. On the other hand, alerts from AccuWeather and The Weather Channel can provide localized storm warnings that are invaluable.
Social media platforms like Twitter have also become unofficial but sometimes reliable sources for real-time updates. Following local news stations and governmental agencies can fill gaps and provide a community feel to the updates.
Whichever app you choose, make sure they can deliver timely warnings to your device. I’m always tweaking my settings to make sure I won’t miss a beat when matters get serious.
Customization for Individual Needs
Not everyone has the same needs during a disaster, and that’s where customization comes in. Some folks only want alerts when a natural disaster is imminent, while others may follow local emergencies like wildfires or even civil unrest.
Apps that allow you to pick which alerts you receive are invaluable to me. They help cut through the noise, so I only get the most relevant updates without being overwhelmed. I always check the settings on my apps to tailor notifications just the way I like them.
In the end, your app should not just serve a purpose but fit seamlessly into your lifestyle—making your life easier rather than adding to the chaos.
Community-Based Updates
The Strength of Local Knowledge
One of the best things about community-driven platforms is that they bring together information from those right in the thick of it. I’ve found that a local resident’s experience during a disaster often delivers insights that official alerts might miss.
Platforms like Nextdoor or Facebook groups can be lifesavers during emergencies. I remember being in a flood situation where my neighbors were posting real updates about road conditions and where to find sandbags. It was that community knowledge that helped keep me safe.
Not to mention, the camaraderie established during a crisis can help ease anxiety. Having a network of people sharing updates can instill a feeling of solidarity, making you feel less isolated during a scary time.
Sharing Information Quickly
During disasters, time is money—or in this case, safety. The critical nature of sharing information quickly can’t be overstated. I’ve had instances where knowing about road closures or available shelters made a massive difference in my decision-making.
Apps that facilitate quick and easy sharing of updates help combat misinformation and keep us in the loop. It’s essential that we share accurate information as quickly as possible to help others, not just ourselves.
Whether you’re forwarding news articles or sharing your insights, immediate communication can significantly reduce panic and keep the community informed.
Establishing Trust in Communication
It’s crucial to have apps that you trust during emergencies. Misinformation can spread like wildfire, especially during a disaster when fear and confusion reign. I’ve learned to stick to well-known, reputable sources that have a track record of reliability in times of crisis.
Additionally, familiarizing myself with who’s behind the apps I’m using adds a layer of security. I’m always on the lookout for apps developed by governmental agencies or established organizations that have the means to provide essential updates.
Building trust in communication tools can significantly influence how efficiently you react to disaster alerts. It’s worth the time to research ahead of time so that when an emergency does hit, you can react clearly and confidently.
Offline Accessibility
The Need for Offline Features
I’ve personally encountered connectivity issues during disasters more than once. Standing in the aftermath of a storm with no phone service made me realize just how valuable offline features are. One app that’s saved me during past emergencies is one that downloads essential information ahead of time.

Offline maps, emergency contact lists, and checklists can be incredibly useful if the power goes out or if cell towers are overloaded. Knowing I can access essential information without internet provides a sense of security that’s hard to quantify.
Some apps, like the Red Cross emergency app, allow you to download safety tips and first aid guides for offline use. That kind of planning ensures I can still be resourceful even when technology lets me down.
Preparing Ahead of Time
Preparation is key for ensuring you are set during a disaster, and that preparation often includes downloading and setting up your apps in advance. I always make it a point to download emergency apps before the storm systems roll in.
Taking into account battery usage is also crucial. I learned the hard way during a hurricane when I needed my phone for updates, but my battery was drained after continuous use. Utilizing features that allow apps to work in low-power mode has been a game-changer.
The more steps we take in preparation, the better we can handle whatever circumstances come our way. It’s about minimizing risks and ensuring we can respond effectively.
Integration with Other Safety Tools
Connecting Multiple Tools
In my experience, the best approach to disaster preparedness is using an arsenal of tools in synergy. I love apps that can connect directly with my home security system or emergency services for added peace of mind.
For example, if I have a connected smart home device that can send alerts to my phone, I instantly have the capability to receive updates while I’m on the move. Those connections bolster my sense of safety knowing that I’m informed even when I’m away from home.
Furthermore, integration between apps means I can funnel all information in one place. It helps simplify the chaos of information that is often present during a disaster.
Emergency Contacts and Network
Having a dedicated app that helps me coordinate with family and friends during a crisis is invaluable. I like to use apps that allow me to create a network of emergency contacts, ensuring my loved ones can check in easily.
Being able to share location data with trusted friends or relatives gives everyone that extra layer of reassurance. I’ve often designated a “safe word” or signal that everyone in my network understands, which makes communication smoother.
Establishing who will be responsible for which updates can ease the burden when disaster strikes. You’re not relying on just one person in the group; everyone can pitch in, keeping the lines open and effectively communicating.
Feedback and Continuous Improvement
Lastly, a tool’s efficacy relies heavily on user feedback. Many of the apps I use have a feature for reporting issues or difficulties that I find helpful. When developers listen to users, they continue improving the experience, making it better for everyone.
After a disaster is a great time for me to assess which apps I found beneficial and which could be improved. I often send feedback to app creators so they know what works and what doesn’t, and I encourage others to do the same.
Creating a circle of continuous improvement means our tools evolve to meet our needs. This feedback loop can truly enhance your experience and contribute to overall community safety.
Frequently Asked Questions
1. Why are real-time alerts crucial during disasters?
Real-time alerts keep you informed about imminent dangers, allowing for quick responses that can save lives. They help people make urgent decisions, whether to evacuate or seek shelter.
2. How can community-based updates be beneficial?
Community updates provide first-hand accounts and information that may not be available from official sources, helping you make informed decisions based on actual conditions.
3. What features should I look for in disaster communication apps?
Look for features like real-time alerts, offline accessibility, customization options, and integration with other safety tools to ensure you’re fully prepared for emergencies.
4. How can I ensure information accuracy during a disaster?
Stick to trusted apps and official channels for updates. Verify information through multiple sources to avoid falling victim to misinformation.
5. What should I do if I can’t access the internet during a disaster?
If you can’t access the internet, having offline features like stored maps, emergency contacts, and safety guides will be vital. Download these ahead of time to prepare for potential outages.
by Preparation | Aug 3, 2025 | Preparedness
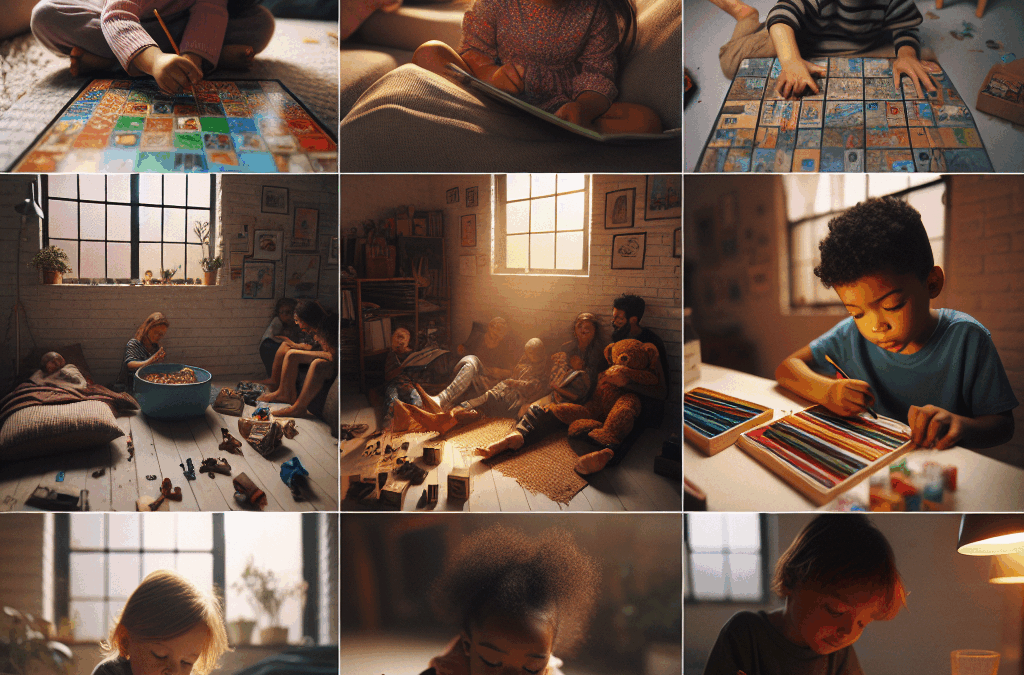
Creativity and Arts & Crafts
Encouraging Imagination
When a long emergency hits, it can be tough for kids to channel their energy. That’s where arts and crafts come into play! My experience has shown that providing kids with some basic supplies like paper, crayons, and craft materials can unleash their creativity. I often set up a “craft corner” in our house with everything ready to go.
I love to give my kids prompts for what to create. For example, I say things like, “Why don’t you draw your dream home?” or “Can you create a monster using these shapes?” This not only keeps them engaged but also sparks their imagination in fun ways.
Additionally, taking time to showcase their masterpieces by creating a little gallery on the wall adds a personal touch. Kids enjoy seeing their work displayed, and it gives them a sense of pride and accomplishment even during challenging times.
Homemade Games
Another exciting way to keep kids occupied is to create some homemade games. The best part? You don’t need fancy materials! I’ve made games using just a few cups, marbles, or even old puzzles. It’s amazing how much fun you can have just by getting a bit creative with what you have around.
My favorite is a scavenger hunt. I’ll make a list of items found around the house or yard and send the kids on an adventurous hunt. The laughter and enthusiasm during these games are priceless and perfect for lifting spirits.
Don’t forget to let them invent their games too! I’ve found that kids can be extremely innovative if you just give them the freedom to play. Encouraging them to come up with the rules fosters critical thinking and creativity while they have a blast!
Interactive Storytelling
Reading is a fantastic way to not only keep kids occupied but also fuel their imagination. I’ve created family reading hours where we dive into exciting books together. Each time, I let the kids pick the story, and I often find myself delighted with their choices!
For a twist, I often encourage interactive storytelling where we take turns to create a story. I’ll start with a sentence and let each child take a turn to add on. This activity often has us rolling with laughter and builds their narrative skills, all while having tons of fun.
And don’t forget, adding sound effects or silly voices can make stories come alive! It’s these small touches that keep kids engaged and present during tough times, and we all get to bond a little more in the process.
Physical Activities
Indoor Exercises
Keeping kids active, especially when indoors, can be a challenge, but it’s absolutely essential! From my perspective, simple indoor exercises can work wonders. Think about dance parties, obstacle courses, or even yoga sessions. I love putting on some upbeat music and letting the kids just let loose!
Jumping jacks, stretches, and dance moves not only get their bodies moving but also help release pent-up energy. My living room often turns into a mini dance floor, and I join in too. Seeing them giggle as they try out new moves together is a memory I cherish.
Indoor games like “Simon Says” can be both fun and a sneaky way to squeeze in some physical activity. My kids always love when I throw in some silly commands, and it’s a great way to get everyone laughing while still moving around!
Outdoor Exploration
If the weather allows, step outside! Being outdoors is revitalizing, and I always suggest a neighborhood exploration that can turn into a mini-adventure. Kids are naturally curious, and I often take them on walks where we can search for interesting plants, bugs, or simply enjoy nature.
I usually pack a small picnic and make it a fun day out! It feeds our bodies and does wonders for our spirit. Plus, it allows my kids to experience the world around them in a different light, making beautiful memories even during stressful times.
Organizing simple outdoor games like tag or catch can be a perfect way to encourage teamwork and camaraderie among your kids. Those little bursts of joy can keep their spirits high when essentially, they just need to run and play!
Setting Fitness Challenges
Why not turn fitness into a fun challenge? I often create a chart with various activities that the kids can complete each day. Challenges can include how many jumping jacks they can do or how long they can balance on one foot. The competitive spirit takes over, and they love to beat each other’s records!
This method encourages not only physical health but also gives them a goal to work towards. Celebrating their achievements, even in small ways, can significantly boost their confidence, especially when things around us seem uncertain.
Creating a “family fitness night” where everyone engages in these challenges together can be a nice bonding experience. Believe me, nothing beats a good laugh when someone tries to outdo their sibling by attempting cartwheels in the living room!
Educational Activities
DIY Science Experiments
Science can be both fun and educational! I usually have a stash of everyday items I can use for simple experiments. For instance, vinegar, baking soda, and food coloring can become a volcanic eruption in seconds. The kids are fascinated and often want to repeat it multiple times!
We follow up experiments with discussions: What did we learn? What were the outcomes? That way, they not only get to see the science in action but also understand the logic behind it. It’s a win-win situation!
Moreover, allowing them to suggest their own experiments taps into their inventive side. They often surprise me with ideas, and it encourages communication and teamwork as we figure it out together.
Learning Through Play
Board games and puzzles can also provide a great learning experience while engaging kids in critical thinking without them even realizing it! I keep a variety of educational games at home, especially ones that promote math or language skills. They think they’re just playing, but they’re learning a ton!
Assessing their skills can be fun too! For example, I can set challenges in math games and reward them with points or stickers. It motivates them and adds a little excitement to learning.
Integrating educational apps or videos also keeps them entertained while ensuring they’re gaining knowledge. I find that balance is key, so mixing screen time with hands-on activities is always my go-to strategy!
Storytime and Discussions
Engaging children in deep discussions about topics they find interesting can be enlightening. I often initiate these meaningful conversations around stories or themes from books we’ve read. It enhances their understanding and promotes critical thinking.
Moreover, storytime becomes a platform for discussions about emotions, friendship, and moral lessons. Kids can reflect, relate, and learn qualities that will serve them well in life. I find that they become more articulate and open when discussing their perspectives.
I love asking open-ended questions like, “What would you have done in the character’s situation?” or “How do you think the character felt?” Their imaginative answers are often trendy and enlightening, to say the least!
Digital Resources
Online Learning Platforms
In our tech-savvy world, turning to online platforms for learning can be a fantastic option. Websites like Khan Academy or PBS Kids offer great resources tailored for various age groups. I found my kids engaging with these platforms, finding topics that genuinely interest them.
These platforms often have interactive and visually stimulating content, which helps retain their attention longer than standard textbooks. It’s exciting to watch them tackle subjects they’ve previously found challenging with newfound enthusiasm.
We often set a goal and reward them with a little treat after completing certain modules. It’s essential to keep it fun and lighthearted, even when they’re learning, to ensure they associate education with positivity.
Interactive Educational Games
Games that challenge their thinking while being fun can keep kids occupied for hours! Whether it’s math challenges or trivia games, I’ve discovered that a healthy dose of competition can do wonders for their engagement.
Apps often have tracks to follow, and my kids love seeing how they stack up in comparison to others. I feel that it adds a layer of motivation, especially when they can work towards mastering skills through gameplay.
Make sure to regularly check in on what they’re doing. I like to play alongside my kids and see how they’re faring with the challenges, as it creates a sense of connection and encourages them even further!
Virtual Field Trips
Believe it or not, but there are tons of virtual field trips available! Museums, zoos, and even national parks offer online tours perfect for sparking kids’ curiosity. I have taken my kids on “field trips” to various locations around the world without ever leaving the house.
These experiences can be an eye-opener and an excellent segue into discussions about different cultures, animals, and more! I always make it a point to discuss what they observed and learned after each virtual trip.
Pairing virtual trips with related crafts or activities can also enhance the learning experience. For instance, after visiting a virtual museum, we might create our own art pieces inspired by what we saw. It adds a tactile experience to their virtual adventures!
Frequently Asked Questions
How can I keep my kids engaged during an emergency?
Using a variety of creative activities such as arts and crafts, educational games, and interactive storytelling can help keep them engaged. It’s essential to provide a mix of physical and mental stimulation to prevent cabin fever.
What are some effective indoor physical activities for kids?
Creating fun challenges, having dance parties, or setting up indoor obstacle courses work wonders. Simple family games like “Simon Says” or indoor tag can be exciting and beneficial for physical movement!
How can I encourage my kids to learn during emergencies?
Incorporate educational activities that feel fun! DIY experiments, interactive learning platforms, and even virtual field trips can help maintain their interest while providing valuable learning experiences.
Are there any digital tools you recommend for keeping kids occupied?
Absolutely! Online learning platforms like Khan Academy, interactive educational games, and resources for virtual field trips are all excellent ways to engage children and spark their learning interests.
How can I balance screen time with other activities?
Setting structured times for screen use and mixing them with hands-on activities is key. I often designate specific times for digital learning, followed by physical or creative tasks, to create a balanced routine.
by Preparation | Aug 3, 2025 | Preparedness
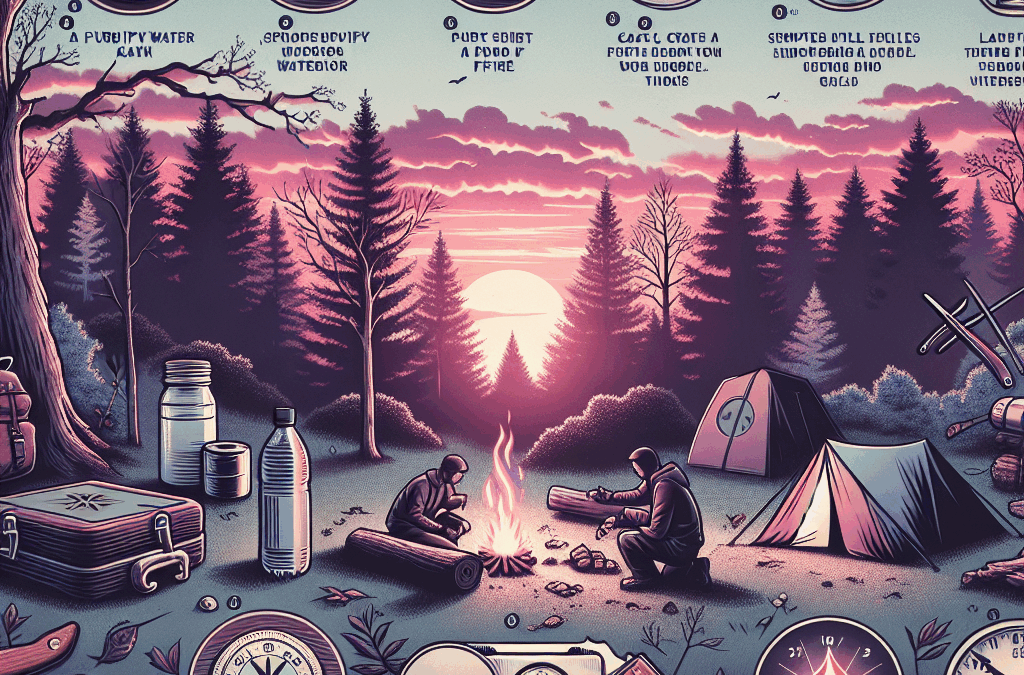
Essential Outdoor Skills
Building a Shelter
One of the first things you’ll want to master in any survival situation is building a shelter. Trust me, finding a good spot can make all the difference between a comfy night and a cold, miserable one. You’ll need to look for natural cover, like trees or rock overhangs, and make sure you’re off the ground to avoid cold winds.
My personal go-to is the lean-to method. You just take a sturdy branch, lean it against a tree, and cover it with smaller branches and leaves for insulation. It’s simple and effective. Plus, it’s always helpful to use whatever materials are available to you, and remember—nature often provides.
Lastly, don’t forget about ventilation! If your shelter doesn’t breathe, you’re just inviting condensation and moisture—two enemies of a good night’s rest. A well-ventilated shelter can keep you cozy through those chilly nights.
Finding Food
When it comes to food, foraging and hunting are vital skills to develop. You don’t need to be Bear Grylls, but knowing the basics of edible plants can keep you fueled. Look for familiar sources like berries, nuts, and greens. Keep in mind that if you’re not sure—don’t eat it!
Fishing is another avenue you can explore. If you have a basic fishing line or even a makeshift rod, you can often find food in local streams or lakes. I’ve learned the hard way that catching fish isn’t just about luck; you’ve got to be patient and know your fishing spots.
Lastly, don’t underestimate small game hunting. Carrying a slingshot or a simple trap can help you catch rabbits or squirrels. It’s all about innovation and using what you have, so think outside the box!
Water Sourcing
Finding safe drinking water should be at the top of your priority list. I always suggest looking for streams, lakes, or even collecting rainwater. However, never just drink from a source without purifying it first.
Boiling water is the most reliable method. Just bring it to a rolling boil for at least a minute, and you’re good to go! You can also use purification tablets if you’ve packed them in your survival kit. It’s like a little safety net.
Don’t forget about filtering techniques—you can use a cloth or a coffee filter to remove any debris. I’ve learned that it’s all about being resourceful and using what’s around you!
First Aid Skills
CPR Basics
Knowing CPR can literally save lives, period. It might sound intimidating at first, but the basics are pretty straightforward. If someone’s unresponsive, start with chest compressions—about two per second. Count it out, and you’ll get into a rhythm.
One night, I was camping, and a buddy tripped and hit his head. This is where my limited training kicked in. I checked if he was breathing—thankfully he was fine—but having CPR skills on hand eased my mind in that situation.
If you’re unsure about proper techniques, look for local courses to get certified; it’s invaluable knowledge that can come in handy anywhere, anytime.
Wound Care
Injuries can happen when you least expect it. That’s why I always carry a basic first aid kit—it’s like having a mini hospital in your backpack. But even without that, there are simple ways to deal with cuts or scrapes.
Cleaning the wound is crucial. I’ve made it a habit to have some alcohol wipes with me; using soap and clean water will work too. Just make sure you get rid of any dirt.
Then, cover it with a bandage or cloth. Keeping it clean helps it heal so much faster. I’ve seen too many friends neglect their scrapes only to deal with infections later on. Trust me on this—bandage it up!
Recognizing Shock
Shock can happen after a traumatic injury or severe emotional distress. It’s important to recognize the signs. Most people will look pale, feel dizzy, or breathe quickly. If you see someone acting like this, get them to sit or lie down and keep them warm.
One time, I was hiking and witnessed a fellow hiker fainting after falling down. It was super scary! I had to stay calm, position them properly, and talk to them until help arrived.
Being aware of shock can make you a superhero in the wilderness; knowing what to do can save someone from suffering unnecessarily.
Navigation Skills
Map Reading
Understanding how to read a map is a skill I picked up through trial and error. Trust me, knowing how to find your way without a GPS is essential. Start with the basics like identifying landmarks, understanding scale, and knowing how to use a compass.
When I first started camping solo, looking at a map felt overwhelming. With practice, I learned to pinpoint where I was relative to trails, roads, and water sources. It really boosts your confidence in the wild.
Pro tip: always carry a physical map, just in case. Technology can fail, but a good ol’ paper map will never die on you!
Using a Compass
Complementing map reading with a compass is a game changer. I personally love my compass—it brings me back to childhood days of being a little explorer. Understanding how to hold it and align it with the map makes navigating a breeze.
You can use the compass to determine which direction is north, and from there, plot your course. You might be surprised how liberating it feels to know where you’re headed, especially in a dense forest.
Always practice your compass skills regularly! It’s easy to forget if you don’t, but keep it handy and get familiar with it. This skill can turn you from lost to found in no time!
Using Natural Navigation
Learning to use natural signs, such as the position of the sun and stars, can also help guide your path. I never thought about this until I found myself stranded with no compass one day. Flowers tend to always face the sun, and moss often grows on the shady side of trees. Little tricks like that go a long way!
As the sun travels across the sky, it can help you estimate the time. Knowing this lets you gauge the direction you’re heading or how long you’ve got until dark. It feels magical once you start noticing these patterns.
Practice these methods while enjoying the outdoors—it’s fun, and you’ll feel more connected to the environment around you!
Mental Resilience
Staying Calm Under Pressure
This one can be tough! When you’re out there and things start going awry, it’s easy to panic. But I’ve learned that staying calm is crucial. Take a breath, look around, and assess your situation.
Remember, panicking leads to bad decisions. In my experience, I usually take a moment to find my center, maybe even do a little breathing exercise or two. It can really clear your mind and help you focus on what needs to be done.
Whatever you do, don’t let fear control you! Use that adrenaline to fuel your next move instead.
Positive Visualization
When facing tough times, I like to visualize positive outcomes. Picture yourself successfully finding your way back or taking care of an injury. This practice helps me maintain a hopeful outlook and keep pushing forward.
The more you practice this, the easier it becomes to harness that positive mindset. I can’t tell you how many times it’s turned a tough situation into a motivational experience for me!
Remember, your mentality is your strongest tool in a survival situation. Use it wisely!
Setting Goals
Lastly, setting small, achievable goals while you’re in a sticky situation is vital. Instead of thinking about how long you’ll be out in the wilderness, focus on the next step: make a shelter, find food, or signal for help. Break it down into manageable tasks!
When I focus on short-term goals, it helps me feel less overwhelmed. I can check things off my list and celebrate those small victories, which builds my confidence as I tackle bigger challenges.
Remember, survival isn’t just about physical strength; it’s about mental agility as well. Nurture that mindset to thrive!
Frequently Asked Questions
1. What should I pack for a survival situation?
Your survival kit should include a first aid kit, water purification tablets, fire-starting materials, a multi-tool, a map and compass, and sufficient food supplies. Personalize it with items you feel are necessary for your adventures!
2. How can I improve my navigation skills?
Practice is key! Spend time using maps and compasses during hikes or day outings. You can also attend outdoor navigation workshops for hands-on learning.
3. What food should I prioritize in the wild?
Focus on finding high-energy foods like nuts, berries, wild greens, and small game. Educate yourself about local edible flora and fauna before venturing out!
4. Why is mental resilience important in survival situations?
Mental resilience helps you maintain clarity and make better decisions when under stress. Staying calm and focused can significantly enhance your chance of survival.
5. How do I keep my shelter warm?
Insulate your shelter with leaves, branches, or any natural materials to retain heat. Also, avoid direct wind exposure by situating your shelter away from strong gusts.
by Preparation | Aug 3, 2025 | Preparedness
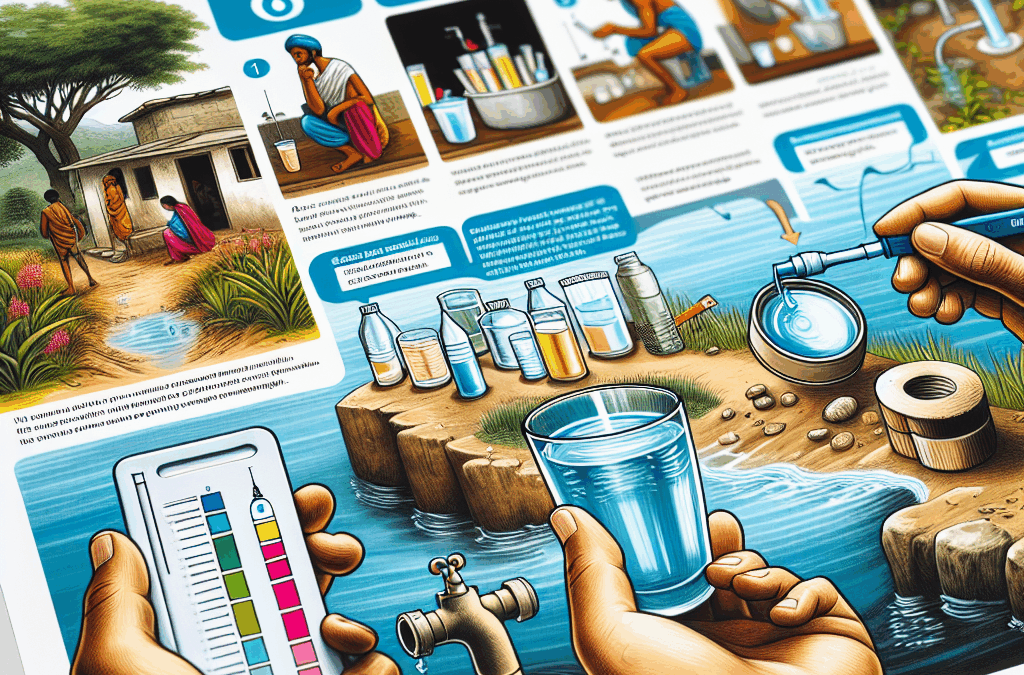
Visual Inspection of Water
Look for Color Changes
One of the first things I always do when checking the safety of my drinking water is to look for any changes in color. If your water suddenly looks murky or has a peculiar tint, that’s a big red flag. Typically, clear water should be the goal, so any deviation from that should raise concerns.
Sometimes this discoloration can come from rust, algae, or sediment. Communication with your local water authority might help you understand if any disturbances in the water supply might have caused it. Trust me, you definitely don’t want to drink anything that doesn’t look clear.
In my personal experience, I found that even small color changes can indicate larger issues. So always keep your eyes peeled! If you notice something off, err on the side of caution.
Check for Sediment and Particles
Next up in my checklist is the presence of sediment or floating particles. If you pour a glass of water and see little specks or cloudy elements, it might mean contaminants are lurking. Sediment could indicate that the water source isn’t properly filtered, or that there’s an issue with the plumbing.
I’ve taken the liberty to run some tests on my water at times. I simply fill up a clear glass and let it sit for a few minutes. If you notice anything settling at the bottom, that’s not a good sign – it’s time to investigate further!
It’s a simple test, but it can tell you a lot without the need for fancy equipment. And honestly, our health is definitely worth a little bit of vigilance.
Smell Your Water
Don’t underestimate your sense of smell! If my water has a funny odor, it’s usually the first warning sign that things might be off. A foul smell could indicate bacteria or other contaminants that can make you sick. That’s not something I want in my body!
For instance, if I notice a chlorine-like smell, I often wonder if there’s been an issue with how the water is being treated. Conversely, if it smells earthy or like rotten eggs, that could indicate sulfur compounds that I definitely don’t want to drink.
I always encourage family and friends to take a sniff of their water, too. It’s a quick and easy check that could save you from some nasty surprises later on.
Using Water Testing Kits
Understanding Water Testing Kits
Using a water testing kit is a lifesaver in my home, especially if I’m uncertain about the tap water. These kits are relatively inexpensive and very accessible. They usually come with all the tools you need to get a quick read on what’s in your water.
Typically, these kits can test for chlorine levels, nitrates, bacteria, and pH levels. I’ve always found it reassuring to have a kit on hand, just in case I need to perform a quick test. It empowers me to take the necessary precautions without relying solely on municipal water reports.
When I’m testing, I make sure to follow instructions closely to get accurate results. It’s a small investment for peace of mind, and it allows me to keep my family safe.
How to Read the Results
So, you’ve tested your water—now what? Reading the results can sometimes feel overwhelming. But I’ve learned that it doesn’t have to be that way. Most kits come with clear instructions on how to interpret the data. I keep mine handy to ensure I’m not missing any important indicators.
For example, if I find high nitrate levels, I know it could signify agricultural runoff, which fans the flames of concern about safety. I always bookmark any numbers that seem off. If I’m unsure, I Google them or call up the local water authority.
Staying informed is key! It’s way better to ask questions than to just shrug it off thinking it might not matter. After all, your health and safety come first.
When to Seek Professional Help
If my testing kit shows something alarming, I’m not shy about reaching out for professional assistance. I’ve learned that sometimes it’s best to let the pros handle things. If you find troubling results showing up constantly, you may need a more detailed analysis.
Furthermore, if there’s any change in the taste of the water or if the issues persist, I don’t hesitate to ring up an expert. After all, it’s better to be safe and thorough than to put anyone at risk.
In my experience, knowing when to call in a professional can make a huge difference. They can offer solutions that I might not think about, and at the end of the day, a proactive approach always pays off.
Taste Testing Your Water
What Does Safe Water Taste Like?
Your taste buds can be a surprisingly good indicator of water safety. Safe water typically has a clean, neutral flavor. Nothing fancy, right? I mean, water shouldn’t have any weird metallic or chemical taste.
In my daily life, I think about when I’ve tasted water with a subtle sweetness; that usually indicates it’s spring water, which I find refreshing. However, if the water tastes off-prone to an alkaline or metallic flavor, it’s usually time to take further action.
Being aware of how my water tastes has helped me make decisions about what to drink or not. If it tastes bad, it’s my cue to pour it down the drain and look into filtration options.
How to Perform a Taste Test
To conduct my taste test, I sip on some water after letting it sit in a glass for a bit. It’s important to take that moment because certain flavors can mellow out, revealing underlying issues. I often give it a swirl before trying! It may feel silly, but trust me, you’ll be glad you did.
If I’m unsure, I often ask a friend or family member to taste it as well—you know, a second opinion never hurts. It might surprise you how sensitive other people can be to flavors you might miss.
Ultimately, it’s a straightforward process that can shine a light on any concerns. If something seems off, I always go back to the testing options or seek professional guidance.
Document Changes Over Time
I also keep an eye on how my water tastes and smells over different periods. By taking notes, I can track problematic patterns or trends in my water quality. It’s really eye-opening, actually!
When I spot consistent issues, I know it’s time to investigate further, whether by retesting, seeking help, or looking into filtration solutions. This documentation can be absolutely critical if I need to report issues to the water authority.
In my experience, noticing small changes early can save a ton of headaches further down the line. So grab your notepad and start documenting—it’s worth the effort!
Consulting Local Water Quality Reports
What Is a Water Quality Report?
Water quality reports—aka Consumer Confidence Reports—are a fantastic resource. I always make it a habit to check these reports for my area. They’re an annual overview provided by water suppliers and reveal a lot of valuable insights, like contaminant levels and safety metrics.
You’ll find the presence of various substances and whether they exceed federal regulations. Understanding these reports helps me gauge whether I can trust my drinking water or if I need to take precautions.
When I look through these reports, I usually look for anything unusual or unexpected. If I see contaminants listed, I take it as a heads-up to either filter my water or consult an expert for a further review.
How to Access These Reports
Accessing these reports is often as easy as a few clicks online. Most water suppliers have websites where you can find reports for your area. I’ve bookmarked mine to stay on top of changes when they come! You can also request a copy by mail if you’re more old-school.
If your water comes from a private well, things can get trickier. In those cases, I always recommend testing regularly. It’s a good way to keep track of any possible changes in quality.
Staying informed through local reports arms me with the knowledge I need to protect myself and my family from unsafe water. Never skip this step; knowledge is power!
Interpreting the Report
Once I have the report in hand, the real fun starts—actually understanding it! A lot of people get lost in the jargon, but I can assure you it’s not as complicated as it seems. Each report usually has a summary explaining the health risks related to finding specific contaminants.
I often take notes while reviewing to better comprehend each section. If there are terms I don’t grasp, quick online searches can help me understand—like, what is lead doing in my water?!
In short, taking the time to read and comprehend these reports can enhance my understanding of my water quality. It’s totally worth the effort to ensure everything is safe for my family!
Frequently Asked Questions
What are key indicators of unsafe water?
Key indicators include unusual color or odor, presence of sediment, and odd tastes. If you notice any of these, it’s time to investigate further.
How do I use a water testing kit?
Simply follow the included instructions carefully. Most kits will involve filling a vial with water, adding specified reagents, and comparing color changes to a chart.
Why is it important to check local water quality reports?
Local water quality reports provide important insights on contaminants, treatment processes, and safety levels, helping you make informed decisions about your drinking water.
When should I consult a water professional?
If you notice consistent issues in taste, smell, or unusual test results, consulting water professionals can provide deeper insights and solutions.
Can I rely solely on taste to determine water safety?
While taste is a good initial indicator, it’s essential to perform visual, smell, and testing methods for a comprehensive understanding of water safety.

by Preparation | Aug 3, 2025 | Preparedness
In an era marked by unpredictability, emergency preparedness has transformed from a mere suggestion into a critical necessity. Understanding emergency preparedness is the first step toward navigating chaos and regaining control during unforeseen events. It’s not just about being ready for natural disasters; it encompasses a wider spectrum of potential threats, from pandemics to civil unrest. The reality is that emergencies can strike at any moment, making it imperative to be equipped with the knowledge and tools necessary to protect yourself and your loved ones.
Assessing your risks is paramount in this journey. Start by identifying potential hazards specific to your region; these could include hurricanes, earthquakes, wildfires, or even industrial accidents. Consider personal vulnerabilities as well—do you live in a flood-prone area? Do you have elderly family members who may require special assistance? By evaluating these factors, you gain clarity on what scenarios you may need to prepare for and can tailor your emergency plan accordingly.
Building an effective emergency plan involves several essential steps. Begin by establishing communication strategies among family members. Designate meeting points and ensure everyone knows how to reach one another if phone lines are down. Then, outline specific roles for each family member during a crisis—who will grab the emergency kit? Who will check on neighbors? This collective approach not only fosters accountability but also instills confidence in individuals when faced with adversity.
Next comes assembling a comprehensive emergency kit—a vital aspect of any preparedness strategy. Your kit should include basics such as water (at least one gallon per person per day), non-perishable food items, flashlights with extra batteries, first-aid supplies, medications, multi-tools, and important documents stored securely but accessibly. Don’t forget additional necessities like hygiene products or pet supplies if applicable! Regularly review and update your kit every six months; perishables have a funny way of sneaking up on their expiration dates.
Staying informed plays an equally crucial role during crises. Reliable communication channels can make all the difference when minutes count. Subscribe to local alerts and notifications regarding severe weather or emergencies in your area; apps designed for real-time updates can also be lifesavers. Social media platforms are invaluable for sharing information quickly but remain discerning about sources—misinformation can spread as swiftly as news itself.
Finally, let’s talk about mental resilience—the often-overlooked component of emergency preparedness. Coping strategies become essential tools for navigating the emotional turmoil brought on by uncertainty and fear. Establishing routines amidst chaos provides stability while mindfulness practices like meditation or deep-breathing exercises enhance emotional regulation. Connect with community resources such as support groups or therapy services; seeking help is not a weakness but rather an act of strength.
In conclusion, transitioning from chaos to control requires intentionality in our approaches to emergency preparedness. By understanding its significance and methodically assessing risks while implementing actionable plans and assembling thorough kits—we equip ourselves not just physically but mentally too for whatever challenges lie ahead. In uncertain times, remember: preparation today paves the way for resilience tomorrow!

by Preparation | Aug 3, 2025 | Preparedness
Understand Your Fuel Type
Different Fuels, Different Needs
When it comes to storing emergency fuel, the first thing you gotta do is understand the different types of fuel you’ll be dealing with. Gasoline, diesel, and propane all have their quirks. Trust me; I’ve had my fair share of experiences that taught me this. For instance, gasoline has a short shelf life and can go stale. That’s something you definitely want to keep in mind.
So, when you’re choosing your emergency fuel, ask yourself whether you want a fuel that’s easy to find but needs special care, or if you’d prefer something like propane, which can store for ages. What I’ve learned is that knowing the ins and outs of your fuel type can save you a heap of headaches down the road.
By the way, don’t forget about safety. Different fuels have different risks, and knowing what you’re dealing with will help you store it safely. Always read up about the specific needs of your chosen fuel to avoid any accidents.
Choose the Right Storage Containers
Container Materials and Designs
Choosing the right storage container can make a huge difference, my friend. I still remember the time I got a cheap plastic can for my gasoline. Big mistake! Gasoline can eat through most plastics and can expose you to some nasty chemical reactions. Instead, I recommend using metal containers specifically designed for fuel storage.
Look for containers that meet safety standards, like the Underwriters Laboratories (UL) or American Society for Testing and Materials (ASTM) certifications. They might cost a bit more upfront, but they could save you a ton of trouble later on. Trust me, you don’t want a leaky container!
Also, consider the size of your container. If you’re stockpiling for emergencies, think about how much fuel you realistically need. I’ve been guilty of going overboard and ended up with containers that were too big to handle. Stick to what you can manage, and ensure that it’s easy to access when you need it most.
Location, Location, Location
Where to Store Your Fuel
Finding the right spot to store your fuel is crucial. Over the years, I’ve experimented with various locations, and lemme tell you, not all of them worked out. Ideally, you want a cool, dry place away from direct sunlight. Too much heat can cause vapors and expand the fuel, leading to pressure build-up – yikes!
Another thing I’ve learned the hard way is to keep it away from living areas and anything flammable. A shed in the backyard or a well-ventilated garage is a great choice. Just make sure the area is secure, so no critters or curious kids can get into it.
Don’t forget about local regulations. Some places have rules about fuel storage that you’ll need to follow, so do your research. You don’t want to be toting around an emergency supply of fuel only to find out it’s against the law!
Regular Checks and Maintenance
Keep an Eye on Your Supply
Now that you’ve got your fuel stored, the last thing you wanna do is just forget about it. I’ve made that mistake, and it was a major hassle when I really needed it. Regularly check your fuel levels and the condition of your containers, and make sure everything is still sealed tight.
Also, keep track of expiration dates. If you’ve got gasoline, remember that it does have a shelf life. When I realized my supply was stale, it was a major bummer, and I had to dispose of it properly, which is a whole other headache!
Take the time every few months to inspect and rotate your supplies. This simple step can save you from unexpected surprises when you’re in a pinch. You’ll thank yourself later for keeping everything fresh and in tip-top shape!
Emergency Preparedness and Safety Protocols
Be Prepared for the Worst
While I’m all about being prepared, I also believe in doing it safely. Having a plan in place for what you’ll do if something goes wrong with your fuel storage is super important. For instance, do you have a fire extinguisher handy? I keep one close to my fuel storage area just in case, because better safe than sorry!
I also recommend having a buddy system—get a friend involved in your emergency preparedness plan. We started a fuel storage check-in system where we help each other keep our supplies in check. It’s not just about the fuel; it’s also about having someone who can support you when the going gets tough.
Lastly, educate yourself and anyone else involved in your plans about proper fuel handling techniques. The last thing you want during a crisis is chaos. A little training and communication can go a long way toward ensuring safety.
Frequently Asked Questions
What types of fuel are best for emergency storage?
It really depends on your needs! For most people, gasoline is common for generators, while propane is excellent for long-term storage. Diesel is also a great choice if you have the right equipment, as it lasts longer than gasoline.
How can I safely store fuel at home?
Store fuel in approved containers, place them in a cool, dry area away from flammable materials, and check on them regularly for leaks or expiration. Make sure the storage area is well-ventilated!
How often should I check my fuel supply?
I recommend checking your supply every few months. This way, you can address any issues before they become bigger problems and ensure you have fresh fuel when you need it.
Are there any regulations for fuel storage?
Yes, many places have regulations regarding fuel storage. It’s best to check local laws and ordinances to ensure you’re compliant and safe. You don’t wanna run afoul of the authorities!
What should I do if my fuel goes bad?
If your fuel has gone bad, do not use it! You can dispose of it at a hazardous waste facility. Always follow proper disposal guidelines to keep you and the environment safe.


