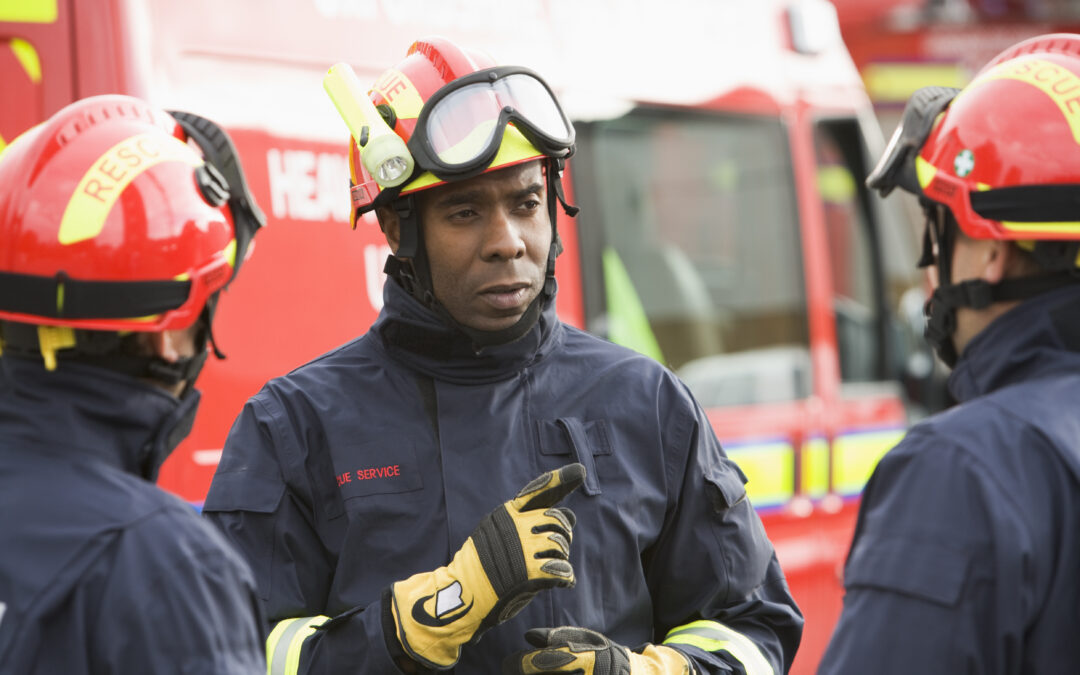
When it comes to emergencies, being prepared is key. Natural disasters and other unexpected events can happen at any time, so it’s essential to be ready for anything. In this blog post, we will cover the basics of emergency preparedness, including building an emergency kit, creating a family communication plan, staying informed during an emergency, and more.
Building an Emergency Kit
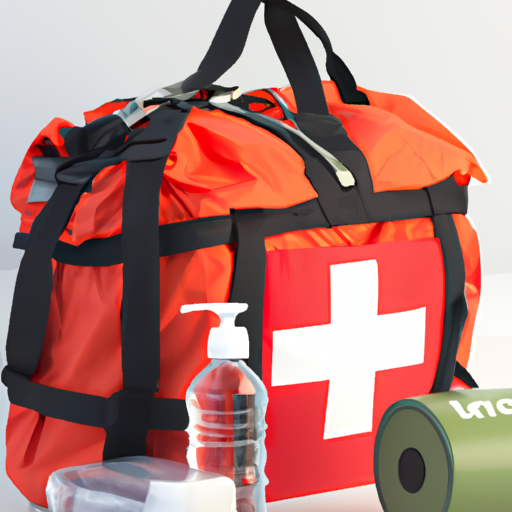
One of the most important steps you can take in preparation for an emergency is to build an emergency kit. This should include supplies that will help you survive until help arrives or until the situation has been resolved. Some essentials to include in your emergency kit are:
In addition to having an emergency kit, it’s also crucial to have a family communication plan in place. This ensures that everyone knows what they need to do in case of an emergency. Here are some tips for creating a family communication plan:
Choose a meeting spot where everyone can gather if separated during an emergency.
Establish a contact person who lives out of town as someone everyone can check in with after an emergency.
Make sure everyone has each other’s phone numbers saved in their phones.
Staying Informed During an Emergency
During an emergency, it’s essential to stay informed about what’s happening around you. Here are some ways to stay informed during an emergency:
Listen to local news stations on the radio or TV.
Check social media for updates from official sources such as police departments or firefighters.
Sign up for alert systems through your city or county government websites. These may send text messages or emails when there is an emergency.
Conclusion
Being prepared for an emergency can make all the difference in how well you weather the storm. By following these simple steps, you can ensure that you and your loved ones are safe and protected in the event of an emergency. Remember to build an emergency kit, create a family communication plan, and stay informed during an emergency.
Are you ready for any emergency situation? Do you have a plan in place to keep your family safe and protected during unexpected disasters or crises? If not, it’s time to start preparing. One of the most important steps you can take is building a 72-hour survival kit. In this guide, we will cover everything you need to know about how to build a comprehensive survival kit that will help you stay alive and well until help arrives.
Introduction to Emergency Preparedness
Emergencies can happen at any moment, and being prepared is critical to ensuring the safety and wellbeing of yourself and your loved ones. A 72-hour survival kit is essential because it provides you with the necessary supplies to make it through the first three days of an emergency situation when resources may be scarce or unavailable. By having a survival kit on hand, you can ensure that you are equipped to handle whatever challenges come your way.
The Importance of Building a 72-Hour Survival Kit
A 72-hour survival kit should include all the essentials needed to sustain life for up to three days. This includes food, water, shelter, lighting, communication devices, and first aid supplies. These items can mean the difference between life and death in a crisis situation. It’s also crucial to remember that during an emergency, basic services such as electricity, gas, and running water may not be available. Having a survival kit on hand helps ensure that you can maintain your independence and self-sufficiency until help arrives.
What to Include in Your Survival Kit
Here are some key items that should be included in your 72-hour survival kit:
1. Water – Store enough drinking water for each person in your household for at least three days (one gallon per day).
2. Food – Pack non-perishable food items that won’t spoil quickly, such as granola bars, trail mix, or canned goods.
3. First Aid Supplies – Include bandages, antiseptic wipes, pain relievers, and other medical supplies in case someone gets injured.
4. Lighting – Flashlights or lanterns are essential for navigating dark spaces and signaling for help.
5. Communication Devices – Make sure you have a working phone or walkie-talkies so you can communicate with others during an emergency.
6. Shelter – Bring a tent or emergency blankets to provide warmth and protection from the elements.
How to Pack Your Survival Kit
Once you have gathered all the necessary items for your survival kit, it’s essential to pack them properly. Consider storing your supplies in a durable backpack or container that is easy to carry. Organize your items by category, starting with the most essential items like water and food, followed by first aid supplies, lighting, communication devices, and finally, shelter. Remember to check expiration dates regularly and replace any items that have passed their shelf life.
Storing and Maintaining Your Survival Kit
It’s vital to store your survival kit in a location where it is easily accessible but also secure. Avoid placing it in areas that are prone to flooding or extreme temperatures. Check on your survival kit periodically to ensure that nothing has been lost or damaged, and always replenish any used or expired items promptly.
Additional Items to Consider
In addition to the basics, there are several additional items that you might want to consider adding to your survival kit. These include:
1. Multi-tool or knife
2. Matches or lighter
3. Map and compass
4. Extra batteries for flashlights and radios
5. Sunscreen and insect repellent
Conclusion
Building a 72-hour survival kit is an essential step towards emergency preparedness. By taking the time to gather the necessary supplies and organizing them effectively, you can rest assured knowing that you and your family will be able to weather any storm. Don’t wait until it’s too late; start building your survival kit today!
As the world becomes more unpredictable, it’s essential to be prepared for any emergency. Natural disasters can strike at any time and without warning, leaving devastation in their wake. However, by taking proactive steps towards emergency preparedness, you can minimize the impact of a natural disaster on your family or business. In this article, we will provide you with a step-by-step guide on how to prepare for a natural disaster.
Step One: Introduction to Emergency Preparedness
The first step in preparing for an emergency is to understand what constitutes as one. A natural disaster refers to any event that occurs naturally and causes significant damage to life or property. Some examples include hurricanes, earthquakes, floods, tornadoes, wildfires, and blizzards. Understanding these events and their potential impact on your area will help you create an effective emergency plan.
Step Two: Creating an Emergency Plan and Kit
Creating an emergency plan involves identifying potential risks, developing strategies to mitigate them, and establishing communication protocols with loved ones. You should also consider creating a contact list of local authorities, hospitals, and other important numbers. Additionally, having an emergency kit ready beforehand can make all the difference during a crisis. Your emergency kit should contain non-perishable food items, water, flashlights, batteries, first aid supplies, and any necessary medications. It’s crucial to have these supplies readily available so you don’t have to rush around looking for them when disaster strikes.
Step Three: Preparing Your Home for Natural Disasters
Preparing your home for a natural disaster requires some additional measures beyond having an emergency kit. For example, securing loose outdoor furniture or equipment that could become projectiles during high winds. You may also want to install storm shutters or reinforce doors and windows to protect against flying debris. If you live in an area prone to flooding, elevating valuable possessions off the ground or investing in sandbags can help prevent water damage. Taking these precautions can go a long way in keeping your family safe and reducing the risk of injury or loss during a natural disaster.
Step Four: Staying Safe During a Natural Disaster
Staying safe during a natural disaster often depends on the specific type of event. For instance, if there’s a tornado warning, seeking shelter in a basement or interior room away from windows is recommended. Similarly, during a hurricane, evacuating to higher ground if possible or staying indoors on the highest floor of a sturdy building is advised. Regardless of the situation, always follow the advice of local officials and stay informed through reliable news sources.
Step Five: Recovering After a Natural Disaster
Recovering after a natural disaster can take weeks, months, or even years depending on the severity of the event. The first few days following a disaster are critical, as they involve searching for survivors, restoring power and utilities, and providing medical assistance to those in need. As the recovery process continues, it’s essential to document any damages or losses and file insurance claims promptly. Additionally, reaching out to community organizations or volunteering opportunities can help speed up the recovery process while providing support to others who were affected by the disaster.
In conclusion, being prepared for a natural disaster is vital to ensuring the safety and wellbeing of yourself and your loved ones. By following our step-by-step guide, you can develop an effective emergency plan and reduce the impact of a natural disaster on your life. Remember, stay calm, stay informed, and above all else, stay safe.
Are you ready for the unexpected? Natural disasters can strike at any time, and being prepared is essential to keeping your family safe. In this step-by-step guide, we’ll cover everything from creating an emergency plan to recovering after a natural disaster. Let’s get started!
1. Introduction to Emergency Preparedness:
Emergency preparedness is crucial in ensuring that you and your loved ones are protected during times of crisis. It’s important to have a plan in place so that everyone knows what to do if a natural disaster strikes. Start by identifying potential risks in your area such as hurricanes, earthquakes or wildfires. Once you know what types of disasters could occur, it will be easier to prepare accordingly.
2. Creating an Emergency Plan and Kit:
The first step in preparing for a natural disaster is to create an emergency plan. This should include information on how to evacuate safely, where to go in case of an emergency, and who to contact in case someone gets separated from the group. You may also want to designate a meeting spot outside of your home in case you need to evacuate quickly.
Next, put together an emergency kit with supplies that will last for at least three days. Your kit should include items like non-perishable food, water, flashlights, batteries, first aid supplies, and extra clothing. Make sure to store these items in a convenient location so they can be easily accessed when needed.
3. Preparing Your Home for Natural Disasters:
There are several steps you can take to protect your home from natural disasters. For example, if you live in an area prone to flooding, consider elevating furniture and valuables off the ground. If you live near a fault line, secure heavy objects to walls and brace overhead light fixtures. You may also want to install shutters or plywood over windows to prevent damage from wind and flying debris.
4. Staying Safe During a Natural Disaster:
During a natural disaster, stay calm and follow your emergency plan. Listen to local news reports for updates on the situation and follow instructions from authorities. If you need to evacuate, do so immediately and take your emergency kit with you. Avoid using electrical appliances and equipment until the storm has passed, and always wear appropriate safety gear such as helmets and gloves when cleaning up after a disaster.
5. Recovering After a Natural Disaster:
After a natural disaster, it’s essential to take care of yourself and your family. Seek medical attention if necessary and reach out to friends and family members for support. Contact your insurance company to file claims for damages to your property, and document all losses thoroughly. Be patient throughout the recovery process, and don’t hesitate to ask for help when you need it.
In conclusion, emergency preparedness is critical in ensuring that you and your loved ones remain safe during times of crisis. By following these simple steps, you can create an effective emergency plan and kit, prepare your home for natural disasters, stay safe during a disaster, and recover quickly afterwards. Remember, being proactive is key to surviving a natural disaster.
Imagine being stranded in the middle of nowhere, with no immediate help in sight. Sounds scary, right? Now, imagine having a bug-out bag in your car, equipped with all the essentials to survive such a situation. Suddenly, the scenario seems less daunting.
Creating a bug-out bag for your car is a simple yet crucial task that can be a lifesaver in emergencies. This guide will provide you with a comprehensive step-by-step process to prepare your own bug-out bag.
From selecting the right bag to choosing essential items, we’ll cover all bases to ensure your survival kit is up to the task. So, buckle up and get ready to dive into the world of emergency preparedness, where safety is just a well-packed bag away.
What is a bug-out bag?
A bug-out bag, also known as a 72-hour kit, is a portable pack containing all the essentials needed to survive for at least three days in case of an emergency. It’s a crucial part of any emergency preparedness plan, especially for those who frequently travel by car.
The contents of a bug-out bag can vary depending on individual needs, but typically include items such as:
Food and Water: Non-perishable food items and water purification tablets or filters.
First Aid Kit: Bandages, antiseptics, pain relievers, and any necessary prescription medications.
Shelter and Warmth: Emergency blanket, poncho, and a compact sleeping bag.
Other items might include a multi-tool, flashlight, portable charger, local maps, and cash. Remember, the goal is to equip yourself with the necessary tools to manage in the face of a disaster.
Creating a bug-out bag for your car ensures you’re always prepared, whether you’re on a routine commute or embarking on a long road trip. It’s not just about surviving, but thriving during unexpected situations. The key is to tailor your bug-out bag to your specific needs and circumstances, ensuring it’s lightweight yet comprehensive. This way, you’re always ready to bug-out when the situation calls for it.
Why should I have a bug-out bag in my car?
Having a bug-out bag in your car is a practical measure for unexpected situations. It serves as your survival kit, equipped with necessities that can sustain you for at least 72 hours. Imagine being stranded due to a car breakdown or natural disaster. A bug-out bag would come in handy, providing essential items like food, water, first-aid supplies, and tools for repair or navigation.
Moreover, a bug-out bag can be a literal lifesaver during emergency evacuations. In situations where you need to leave your home immediately, you may not have time to gather supplies. Having a bug-out bag in your car ensures you have immediate access to survival essentials.
Creating a bug-out bag for your car, however, requires careful planning. It’s crucial to pack items that are compact, lightweight, and serve multiple purposes.
Food and Water: Non-perishable food items and water purification tablets can be a lifesaver.
First-Aid Supplies: A basic kit should include bandages, antiseptic wipes, tweezers, medical tape, and pain relievers.
Tools: Include a multi-tool, flashlight, batteries, and a fire starter.
Remember, a bug-out bag is not a one-size-fits-all solution. Customize it based on your personal needs and the specific conditions of your region.
What items are essential for a car bug-out bag?
When it comes to emergency preparedness, a car bug-out bag is an essential tool. For a comprehensive bug-out bag, several items are crucial. First, water and food are vital, specifically non-perishable items and water purification tablets.
Next, you’ll need a first-aid kit. This should include bandages, antiseptic wipes, tweezers, medical tape, and pain relievers.
Another critical item is a multi-tool. This versatile tool can serve multiple purposes, from opening cans to cutting rope. Speaking of rope, a paracord is another must-have. It is useful for tying items together, creating shelter, or even for first aid purposes.
Emergency blanket
Flashlight
Extra batteries
These three items can provide warmth, light, and power in challenging situations.
Maps and a compass are also essential for navigation, especially if you’re in an unfamiliar area or if your phone’s battery dies.
Lastly, personal items such as medications, cash, and important documents should also be included in your bug-out bag. These items can help you in various scenarios, whether you need to buy supplies, prove your identity, or manage health conditions.
Remember, the goal is to be prepared for any situation. Each item in your car bug-out bag serves a specific purpose and can be a lifesaver in an emergency.
How to pack a bug-out bag efficiently?
Packing a bug-out bag for your car requires careful consideration and strategic planning. The first step involves identifying essential items that meet your survival needs. Water, non-perishable food, first aid kit, multi-tool, flashlight, and blankets are some of the essentials you should never skip.
Prioritize items based on their importance and pack them accordingly. Water and food should be easily accessible as they are needed frequently. Use vacuum-sealed bags to save space and keep items organized.
The size of your bug-out bag also matters. It should be compact enough to fit in your car but spacious enough to accommodate all necessary items.
Regularly check and update your bug-out bag. Replace expired food and water, and ensure all equipment is in good working condition.
Personalize your bug-out bag based on specific needs. If you have a medical condition, ensure you pack necessary medications.
Here’s a quick checklist to help you pack efficiently:
Water
Non-perishable food
First Aid Kit
Multi-tool
Flashlight
Blankets
Remember, the goal is to be prepared for any emergency. So, pack wisely and stay ready.
Can I use any bag for my bug-out bag?
In the context of creating a bug-out bag for your car, it’s crucial to understand that not just any bag will suffice. The bag you choose must be durable, spacious, and easy to carry. A backpack is often the preferred choice for many, given its practicality and convenience.
It’s also essential that the bag is made of high-quality, rugged material that can withstand harsh conditions. Look for bags with multiple compartments for better organization of your emergency supplies.
Water-resistant properties are a significant feature to consider. This ensures your supplies stay dry, even in adverse weather conditions.
The size of the bag is another critical factor. It should be big enough to hold necessary items like food, water, first aid kit, clothing, and other essential survival gear, but not so large that it becomes cumbersome to transport.
Comfort should not be overlooked. A bag with padded straps and back support can make a significant difference, especially if you need to carry it for extended periods.
Remember, the goal is to have a bug-out bag that’s ready to grab and go in case of an emergency. Therefore, your choice of bag plays a pivotal role in your preparedness strategy.
How often should I update my car bug-out bag?
Regular updating of your car bug-out bag is crucial to ensure its effectiveness in case of emergencies. The frequency of updates typically depends on the items within your bag. For instance, perishable items like food and water should be replaced every six months. On the other hand, items such as first aid kits and emergency blankets may not require frequent updates, unless used or damaged.
Seasonal changes also warrant updates to your bug-out bag. For example, you might need to add extra warm clothes during winter or include sun protection items in summer.
It’s also a good practice to check and update your bag whenever you perform routine car maintenance. This way, you can ensure that all items are in good condition and ready for use when needed.
Here’s a quick guide on when to update certain items:
Food and Water: Every six months
Medications: As per expiry dates
Seasonal items: At the change of each season
Other items: During routine car maintenance
Remember, a well-maintained bug-out bag can be a lifesaver during unexpected situations. Regular updates ensure that your bag is always equipped with the necessary items, making your car a reliable refuge in emergencies.
What food should I pack in my bug-out bag?
When preparing your bug-out bag for your car, it’s crucial to consider the types of food that will provide sustenance and long-lasting energy. Non-perishable items are the best choice for a bug-out bag. These include canned goods, such as tuna, beans, and vegetables. However, remember to pack a can opener if necessary!
Dried foods are also excellent options, including jerky, dried fruits, and nuts. These provide a good source of protein and healthy fats. Similarly, energy bars, granola bars, and protein bars are compact and nutrient-dense.
Consider packing ready-to-eat meals (MREs). These are a staple in military rations and are designed to be lightweight, compact, and long-lasting. They offer a variety of meals, from pasta to stew, and only require water to prepare.
Don’t forget about hydration. Pack bottles of water, but also include water purification tablets or a LifeStraw for emergencies.
Instant coffee or tea bags can be a morale booster in stressful situations.
Lastly, remember to rotate your food stocks regularly to ensure they remain fresh and safe to eat. This way, you’ll be ready for any situation with a well-prepared bug-out bag in your car. Remember, the key is to prioritize long-lasting, nutrient-dense foods that require minimal preparation.
Are there ready-made car bug-out bags available?
Absolutely, there are numerous ready-made car bug-out bags available on the market. These bags come packed with essential survival items that you may need in case of an emergency. They are an excellent choice for those who prefer convenience or lack the time to assemble a bag themselves.
When choosing a ready-made bag, you should consider the quality of the items included, the bag’s durability, and whether it contains all the necessities you may need in a crisis. Some of the essential items to look for include:
– First Aid Kit
– Food and Water
– Warm Clothing
– Tools and Equipment
– Communication Devices
It’s crucial to note that while these bags are convenient, they may not be tailored to your specific needs. For instance, you may require specific medication or have dietary restrictions that ready-made bags do not consider.
Therefore, while ready-made car bug-out bags can be a good starting point, you might still need to customize them to suit your unique needs. Remember, the key to a successful bug-out bag is preparation and personalization.
Wrapping Up: How to Create a Bug-Out Bag for Your Car
In conclusion, the importance of having a bug-out bag in your car cannot be underestimated. This article has covered essential topics such as understanding what a bug-out bag is, why it’s necessary to have one in your car, and the crucial items required for an efficient car bug-out bag.
Packing a bug-out bag requires careful selection of items, and not just any bag can be used for this purpose. Regular updates to your bug-out bag are necessary to ensure its contents are always fresh and usable. The food packed should be non-perishable and easy to consume. For those not inclined to DIY, ready-made car bug-out bags are available.
The key takeaway is that a well-prepared bug-out bag can be a lifesaver in emergency situations. As the future unfolds, it’s likely that advancements in survival gear and emergency preparedness will continue to influence the contents and efficiency of bug-out bags. Therefore, it’s essential to stay informed and regularly update your knowledge on the subject. Remember, preparedness is not a one-time event, but a continuous process.
Are you ready for the unexpected? Emergencies can strike at any time, and being prepared is essential to keep your family safe. In this blog post, we will show you how to build a home emergency kit in just 30 minutes or less.
Introduction:
Emergency Preparedness Starts with You!
An emergency can happen anywhere, anytime. It could be a natural disaster like an earthquake or hurricane, or it could be something more personal like a house fire or medical emergency. When an emergency strikes, having a plan and being prepared can make all the difference. Building a home emergency kit is one of the most important steps you can take to ensure that you are ready for whatever life throws your way.
What to Include in Your Emergency Kit:
The key to building a comprehensive emergency kit is to think about what you would need if you were suddenly forced to evacuate your home or shelter-in-place for several days. Here are some essentials that should be included in every emergency kit:
1. Water – One gallon per person, per day (minimum three-day supply)
3. Flashlights/Batteries – Make sure they are easy to find and accessible
4. First Aid Kit – Bandages, antiseptic wipes, pain relievers, etc.
5. Multi-Tool – Knife, pliers, screwdriver, etc.
6. Radio – Battery operated radio with extra batteries
7. Whistle – To signal for help
8. Dust Masks – N95 respirator masks to protect against airborne contaminants
How to Organize Your Emergency Kit:
Organizing your emergency kit is crucial so that you can quickly locate everything when you need it most. Consider using a plastic container or backpack to store your supplies. Label each item clearly so that everyone knows where everything is located. Keep your emergency kit in a designated area that is easily accessible, such as near your front door or in a closet by the garage.
Where to Store Your Emergency Kit:
Ideally, your emergency kit should be stored somewhere close to your exit point, such as near your front door or in a closet by the garage. If you live in an area prone to flooding, consider storing your emergency kit on higher ground or elevating it off the floor. Remember, your emergency kit should be easily accessible so that you can grab it quickly in case of an emergency.
Additional Items to Consider:
In addition to the basics listed above, there are many other items that you may want to include in your emergency kit depending on your specific needs. Some additional items to consider include:
1. Extra clothing and blankets
2. Pet food and water bowls
3. Important documents (passports, birth certificates, insurance policies)
4. Cash and change
5. Matches or lighters
6. Sewing kit
Conclusion:
Being prepared for an emergency takes planning and practice. By taking the time to build a home emergency kit now, you can rest easier knowing that you and your loved ones will be able to weather any storm. Remember, emergency preparedness starts with you!