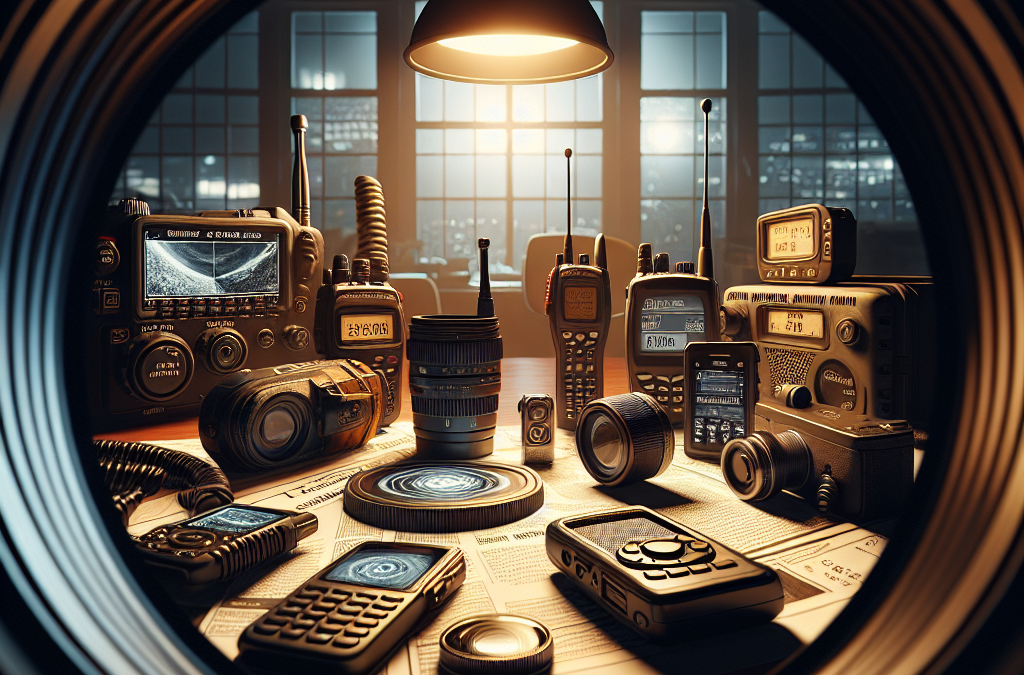
When the power goes out and cellular networks crash, emergency radios can be a lifesaver. I remember a time during a big storm when my neighborhood was plunged into darkness. I pulled out my trusty emergency radio, which has both AM and FM capabilities. It was my window to the outside world, giving updates on the storm and safety instructions from local authorities.
These handy gadgets don’t just offer weather updates, though. Many models can pick up NOAA weather alerts, so you’ll also be informed about any tornado warnings or flash floods in real-time. Plus, they tend to have solar charging options or hand crank mechanisms, so you’re not stuck without power.
In emergencies, it’s calming to know that I can tune into something reliable. There’s a sense of security that comes with being informed. So, if you’re considering investing in an emergency radio, think about one that combines reliability with additional features, like USB ports for charging your devices!
How to Choose the Right One
Choosing the perfect emergency radio can feel overwhelming. Here’s the deal: consider your primary needs. Will you be needing it mainly for weather updates, or do you want something versatile that can also boost your phone battery? Look for multi-band radios to give you the broadest access.
Durability is another biggie. You want something that can withstand the elements; after all, emergencies can hit hard! I suggest looking for models that claim to be weather-resistant. It’s also a good idea to check the battery life. Some radios come with long-lasting batteries that can outlast a few days of emergencies.
Lastly, read the reviews. Other users can provide insight into how the device performed in real situations. I learned a lot from others regarding usability and sound clarity. Giving it a good read through can help you narrow down your options!
Staying Updated
Having an emergency radio is only part of the equation. The other part is knowing how to use it effectively. When I first got mine, I did a practice run. I sat there, flipped through the channels, and made sure I understood how to get updates during different scenarios.
Be sure to understand how to set alerts. Many emergency radios allow you to save specific channels that will keep you updated on various emergencies. Setting this up in advance takes the stress out when things go south.
Lastly, don’t forget to regularly check the functionality. There’s nothing worse than reaching for a device you’ve saved for a rainy day, only to find its batteries are dead or it’s broken. Make it a routine to check it every few months!
Satellite Phones
Why You Need One
While smartphones are our go-to for communication in daily life, they might fail when you’re off the grid. During my last hiking trip, a friend relied on his satellite phone when our phones couldn’t get a signal anywhere. It was a relief knowing he could contact emergency services if things went sideways.
Satellite phones operate independently of cellular networks and can connect to satellites overhead, which provides coverage almost anywhere. Whether you’re camping in the wilderness or traveling to remote areas, these phones can be invaluable. Just remember, they tend to be pricier than your regular phone, so keep that in mind while making a decision.
Plus, many satellite phone providers offer plans with different features like text messaging and data services. Make sure you understand what you’re getting into before you invest. In emergencies, being able to communicate could make all the difference!
Choosing the Right Provider
Once you’re ready to go with a satellite phone, picking a provider is the next step. Research is key—I turned to online reviews and comparison sites to check coverage maps. Some providers may not cover regions you’ll be visiting, so it’s vital to analyze their service area.
Also, think about the plans they offer. Some are pay-as-you-go, while others might lock you into a contract. Depending on how often you think you’ll need it, one could work better for you than the other.
Finally, ask yourself: what will you be using it for? If it’s just emergency calls, you probably don’t need the fanciest model. But if you’re planning on traveling or staying put in a remote area, investing in a high-quality device pays off.
Staying Connected
Using a satellite phone requires a little bit of a learning curve, but it’s worth it. I practiced sending texts and making calls before heading out on my next trip. Knowing how to reach someone quickly if you’re in a tough spot helps ease that panic that can creep in during emergencies.
Additionally, familiarize yourself with the device’s user manual. It can contain useful tips and emergency procedures you might need to remember. Building up that knowledge ahead of time can make emergencies a lot less stressful!
Finally, consider carrying a backup power source for your satellite phone. When you’re out and about, you might find yourself in a situation where charging isn’t an option. Being prepared can mean the difference between staying in touch or being alone when you need help.
Two-Way Radios
Understanding Two-Way Radios
Two-way radios are downright fun, and they can also be practical in emergency situations. During a family camping trip a few years ago, we used them to keep in touch while hiking separately. It added a playful layer to our adventure, but they also served a serious purpose, ensuring we could coordinate in case of emergencies.
These devices come with varying ranges, so depending on how far apart you think you might get, you’ll want to choose accordingly. In most cases, they’re much more reliable than cell phones when it comes to in-the-field communication.
It’s also worth noting that some two-way radios utilize GMRS or FRS frequencies, so be sure to check regulations if you’re outside the country. If you find yourself in a situation where you need to use one of these radios, you’ll want to comply with local laws!
Choosing the Right Model
When selecting a two-way radio, you’ll want to consider the distance you need to cover. I found that while some brands might advertise an impressive range, the actual performance can vary greatly in different environments, like forests or mountains. Always check the actual test results that users report!
Battery life can be a big deal too. Look for radios with good battery conservation features, especially if you expect to be using them extensively. Also, check how easy it is to switch batteries in case you need to replace them on the fly.
I always recommend going with a model that feels comfortable in your hand and is easy to use. In an emergency, you want something that’s straightforward, without a million buttons you have to fiddle with!
Advantages in Emergency Situations
What I love about two-way radios is their immediate connectiveness. Just press a button, and bam—you’re talking to your buddy or family member. There’s no dialing or waiting for a connection like with phones, which can be crucial in urgent situations.
Also, they’re a great option for group communications. Plus, when you’re in a large group, you can coordinate with your friends and family seamlessly without needing everyone to have phone service. It just helps keep everyone on the same page.
Lastly, they’re generally more rugged and portable than smartphones, so if you’re out in the wild, your risk of damage is lower. Toss them in your pack and go! Just don’t forget to establish a communication plan ahead of time.
Signal Flares
When to Use Them
Signal flares are old-school but incredibly effective for getting attention in emergencies. I remember practicing how to use one during wilderness survival training, and it gave me a real sense of confidence knowing I had a last-resort method to signal for help.
They’re particularly useful in situations where you might be lost or needing to draw attention—like if you’re hurt and can’t move easily. The bright colors and smoke can cut through even dense wilderness, signaling your location to rescue teams or passersby.
However, using a signal flare requires some safety precautions. They can be hazardous if not used properly, so always follow instructions carefully and use them in open areas where there’s no fire risk!
Types of Flares
There are generally two types of flares: handheld and aerial. Handheld flares are great for close-up signalling, but they burn out quickly. Aerial flares, on the other hand, can shoot high into the sky, making them visible from miles away.
When I first chose my flares, I opted for both types, since I couldn’t foresee every situation I might land in. This combo has provided flexibility while staying safe when I’m out and about!
Ensure you check the expiration dates and storage of your flares. Over time, they can become less effective, and you don’t want that to be the case when you need them most!
Storing and Handling
Proper storage is critical. I keep my flares in a waterproof bag, ensuring they stay dry and functional whenever I need them. Just storing them in my backpack is a no-go. Having dedicated storage protects them from any bumps or moisture during travel.
Additionally, familiarize yourself with the activation process. During emergencies, your adrenaline will be pumping, and remembering how to use them without a hitch could save valuable moments.
Lastly, be aware of local regulations regarding signal flares. They can be classified differently based on your location, and it’s smart to know what you can and can’t do with them to avoid any issues down the line.
Online Communication Apps
Why They Matter
In this digital age, we can’t overlook the power of online communication apps, especially during emergencies. I have found apps like WhatsApp and Signal to function even when phone lines are down in certain areas, as long as there’s Wi-Fi or a cellular signal available.
The great thing about these apps is the ability to send texts, make calls, and even share locations with friends and family. During a past event, my group used an app to coordinate when we got separated during a festival, and it made a huge difference in keeping us all together.
Moreover, many apps now have built-in features for emergency contact alerts and location sharing, which can be instrumental in a pinch. Just remember, though, that they require connectivity; you need Wi-Fi or a data connection, so always have backup options.
Best Apps for Emergencies
Some popular emergency apps include Zello, which works like a walkie-talkie, and Life360, which provides location sharing for friends and family. I’ve met people who swear by these for large events, providing peace of mind knowing everyone is safe or can be quickly located. Staying connected is practically at our fingertips!
Check if the app has a user-friendly interface—trust me, the last thing you want is to fumble around during an emergency trying to find the “send” button!
Don’t forget to encourage your friends and family to download the same apps! Communication is easier when you’re all working with the same tools. After all, you want to ensure your entire network is on the same page in emergencies.
Limitations to Consider
While these apps are convenient, they come with limitations. For starters, battery life can be a significant factor in emergencies. Phones can drain quickly, especially when you’re in a high-stress situation or if multiple apps are running.
Moreover, if the internet is down (like during a natural disaster), these apps become useless. Again, thank heavens for radios or two-way systems as a backup! Mixing various communication devices ensures you have reliable options.
Be sure to update your apps regularly, too. This can provide you with the most current features and security enhancements, which can prove especially valuable in emergencies where privacy and efficiency are key.
FAQ
1. What is the most reliable communication device during emergencies?
It really depends on your situation, but most people find emergency radios and satellite phones to be the most reliable options because they don’t rely on cellular networks.
2. How often should I check the battery life of my devices?
I recommend checking at least every few months to ensure they’re ready when you need them. After all, nothing is worse than pulling out a dead device during a crisis!
3. Can signal flares be reused?
No, signal flares are one-time-use devices and should be disposed of properly after activation. Always check your local regulations regarding disposal.
4. Are two-way radios legal everywhere?
Most places allow you to use them, but some regions have specific frequencies that require a license. Always check local regulations to avoid issues.
5. Why should I invest in multiple communication devices?
Having a mix provides greater reliability. If one device fails due to power loss or lack of connectivity, you’ll have alternatives to ensure you can stay connected.
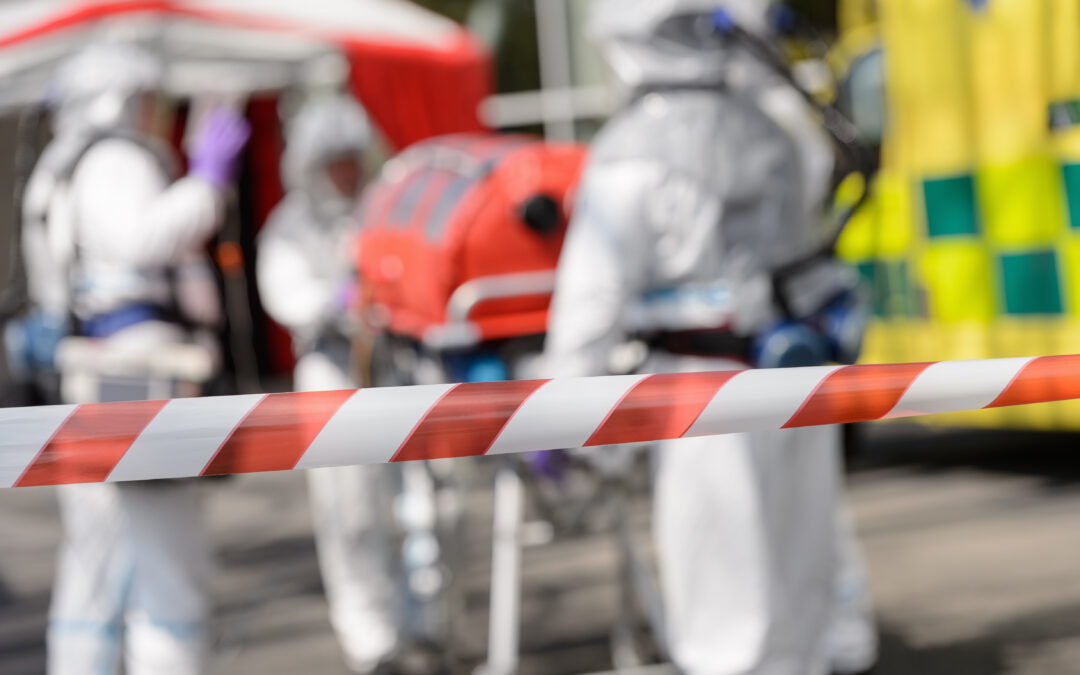
First and foremost, it’s crucial to understand what nuclear fallout is and what risks it carries. Living in a world where geopolitical tensions can escalate rapidly means that preparation is key. I’ve spent a fair bit of time researching nuclear fallout—because you never know when you’ll need that knowledge! Understanding the fallout zones and how radiation behaves is essential. You see, nuclear explosions create a significant number of radioactive particles, which can linger in the atmosphere for quite some time.
Knowing the wind patterns in your area can also be a game-changer. For instance, when a blast occurs, the fallout will likely spread in the direction of the wind. If you live near potential targets, you need to stay informed about local emergency management plans and the proximity of fallout shelters.
Additionally, understanding the differences between sheltering in place versus evacuation is important. Sometimes, staying put, especially in a well-prepared home, can be safer than hitting the road when everyone else is trying to evacuate. Create a plan that considers all potential scenarios, so you’re not left scrambling if an emergency arises.
Building a Comprehensive Emergency Kit
When the talk turns to emergencies, I can’t stress enough the importance of having an emergency kit. You never know when you’ll need that stash of supplies! Your kit should include basics like bottled water, non-perishable food, a flashlight, extra batteries, and of course, a first-aid kit. I’ve found it helpful to have portable chargers and radio devices to stay connected during a crisis.
Moreover, consider adding specific items for radiation exposure. Potassium iodide (KI) tablets can help protect your thyroid from radiation, so it’s worth looking into. Of course, while having these supplies is great, make sure to check their expiration dates periodically—nothing worse than discovering your emergency stash has expired!
Last but not least, don’t forget to include items that suit your family’s specific needs. If you have pets, think about their food and any necessary medications. That’s right, your pets are part of your family too! Tailoring your emergency kit to your unique situation can make a huge difference when the chips are down.
Regular Drills and Training
Preparation isn’t just about having stuff; it’s also about practice. Trust me, scheduling regular drills with your family is super important! When I first started, we practiced evacuating the house and moving to our designated safety area. It felt a little silly at first, but when you’re actually facing a real emergency, you’ll be glad you practiced!
Incorporating basic first aid and survival training can also empower you and your loved ones. Local organizations often offer courses, and there are tons of online resources available too. Being knowledgeable about what to do in an emergency will make you feel more at ease—and that’s priceless. Plus, it’s kind of fun to learn those skills together as a family or with friends!
Finally, don’t forget to include any elderly or differently-abled family members in your drills. It’s crucial that everyone knows the plan and feels capable of following it, no matter their age or ability. The last thing you want is anyone feeling lost or confused when the time to act comes.
Understanding Fallout Shelter Options
Building or Finding a Shelter
So, here’s where it gets a bit more detailed: if you’re serious about preparing for nuclear fallout, consider a shelter. There are multiple options, whether you’re building one from scratch or finding a pre-made one. Building your own fallout shelter can be quite a project—if that’s something you’re into! I watched a bunch of YouTube videos and checked out numerous guides before diving in myself.
For those not quite ready to build, there are various existing structures that can serve as effective shelters, like basements or even community shelters. Familiarize yourself with your local offerings, as they might surprise you. There’s comfort in knowing that a proper shelter can shield you effectively from radiation.
Whatever route you choose, it’s essential to stock the shelter appropriately. I ensured mine was stocked not only with food and water but also with entertainment options! Trust me, you don’t want to go stir crazy in there. So, think books, games, maybe even a portable movie player—whatever keeps the morale up!
Maintaining Your Shelter
Now here’s a crucial point: once you have your shelter set up, maintaining it is key! Over the years, I’ve learned that regular checks are vital to keep your supplies fresh. I like to set a reminder on my phone to do a comprehensive check every few months. That way, I’m always ready for anything.
Ensure that the ventilation system is functional, and that your shelter has no leaks that could allow dangerous particles inside. It’s not just about stockpiling supplies; keeping everything in good order means you won’t face nasty surprises later.
Don’t forget about updating your plans and supplies, too. Your needs may change over time, as your family grows or circumstances shift. Keeping everything up-to-date will save you a whole lot of trouble when that day arrives.
Accessibility and Comfort
Let’s talk about comfort—because let’s face it, if you’re stuck in a shelter for an extended period, you want it to be as cozy as possible. You might want to consider how accessible your shelter is for every family member. Accessibility is essential, particularly for the elderly or those with mobility issues.
Consider adding things like seating, blankets, and even board games or art supplies. When I added a few personal touches to my shelter, it turned it into a space that felt less like a bunker and more like a home. That psychological aspect can really help ease stress in times of uncertainty.
Ultimately, remember that in any emergency, your state of mind matters. Creating a warm and inviting atmosphere can make a world of difference when you’re hunkering down for safety. I like to think of my shelter as our little sanctuary during uncertain times.
Post-Fallout Procedures
Safety First: When to Emerge
After a nuclear event, patience is critical. Knowing when it’s safe to leave your shelter is as important as knowing how to get in it! I’ve often thought about how crucial it is to stay updated with reliable news sources. Most people will be eager to dash outside and assess the situation, but caution is essential!
Listen for announcements regarding radiation levels and when it’s deemed safe by officials to emerge. I advise against sticking your head out when you think it’s clear; that’s where mistakes can happen. Keeping a radio and batteries in your shelter can keep you informed without risking exposure.
In addition, always use protective gear once you do decide to leave your shelter. This is not the time for casual attire; think masks and coveralls to prevent exposure to any lingering particles. Preparation will serve you well, and when you’re prepared, you’ll feel more confident in your decisions!
Assessing the Area
Once you’re outside, you’ll want to survey the area before fully exiting your shelter. Start by checking the condition of your home and surrounding areas, watching out for damaged infrastructure or radiation hotspots. I’ve learned to keep a pair of binoculars handy for this reason; they can really help you safely assess things from a distance.
Look for signs of danger and listen for instructions from emergency personnel. Approaching the situation carefully and making sure to gather reliable information will be your best friend at this stage. This part can get overwhelming, but remember to breathe and take it step by step.
If you plan to return to your home, have a plan for decontamination. This might involve changing clothes, washing up, or even sealing your home if necessary. It might seem overwhelming, but just take it in stride; you’ve prepped for this moment!
Long-term Recovery and Adaptation
Lastly, let’s discuss long-term recovery. After the initial chaos, going back to a sense of normalcy might take time. I’ve found that maintaining a community spirit can be incredibly helpful. Check up on your neighbors, share resources when you can, and help each other adapt during the recovery process.
Your mental health is equally important during this time. It’s natural to feel anxiety about the fallout and what it means for your future. Engaging with family and friends, sharing experiences, and connecting can be a lifeline for anyone feeling isolated.
Lastly, keep an eye on the news for updates or guidance from authorities. Adapting to a new way of life can be challenging, but remember, you’re not alone—many are on this path with you! Tackle it together and rebuild your community with resilience.
Frequently Asked Questions
What should I include in my emergency kit?
Your emergency kit should contain essential items like water, non-perishable food, a flashlight, batteries, a first-aid kit, and, ideally, potassium iodide tablets. Always customize your kit to include items suited for your family and lifestyle.
How do I determine if my shelter is safe?
Listening to information from local authorities will guide you on safety levels. Additionally, checking for radiation levels with a Geiger counter, if available, can help assess your shelter’s conditions.
How can I make my shelter more comfortable?
Adding personal touches like blankets, seating, and entertainment options can make a big difference. You want to create an environment where you feel safe and relaxed during your time inside.
What if I have mobility issues with respect to my shelter?
Make sure your shelter is accessible to all family members. Plan for any special needs based on their abilities and consider investing in items that ease mobility, like ramps or seating options.
How long should I stay in my shelter after the fallout?
The guidance from emergency services is critical here. Stay informed and heed their instructions, as they will provide updates on when it’s safe to emerge.
In any emergency, the first step is figuring out what’s going on. Trust me, panic can cloud your judgement and that’s when mistakes happen. I’ve been there—stressed out and not thinking straight. Take a deep breath and try to get the situation under control. Is it a natural disaster, a medical emergency, or perhaps something else entirely? Knowing the nature of the emergency helps determine the local resources you’ll need.
Once you know what’s happening, you can focus your energy on what you need to do next. For instance, if it’s a flood, you might need to consider evacuation routes or local shelters. If it’s a medical emergency, knowing where the nearest hospital is can make all the difference. It can feel overwhelming, but breaking it down into smaller, understandable pieces will help you manage your response effectively.
Also, remember to think about timing. Emergencies can evolve quickly, and the resources available to you might change. Keep assessing the situation as you gather information. Being adaptable during times of crisis might just save the day!
Connecting with Local Authorities
Finding Reliable Information
When you’re in an emergency, local authorities are a crucial lifeline. They can provide vital information regarding evacuations, safety procedures, and resources available to assist you. Never underestimate the power of a quick phone call or a check on local news stations. Even social media can serve as a real-time information source during crises.
I’ve always found that having the contact information for local emergency services saved time when it came to figuring out what needed to be done. Whether it’s the local fire department, police, or emergency management offices, they are well-informed. Reach out to them if you’re unsure of what’s happening or what to do next. It’s like having a compass in a storm; they can guide you back to safety.
And don’t forget about community bulletins or websites. Many local governments have online portals where they post updates during emergencies. Staying connected and informed through these channels can provide insights that are crucial to navigating challenges effectively.
Utilizing Community Resources
Engaging with Local Organizations
Your community is a treasure trove of resources during emergencies. Local organizations—like Red Cross branches or food banks—often spring into action when crises hit. They come equipped with supplies, food, and emotional support services. I can’t emphasize enough how important it is to know who these organizations are before disaster strikes.
I remember once when there was a major storm in my area, and our local Red Cross set up a shelter. They provided food, blankets, and, most importantly, a safe space for those who were displaced. Don’t hesitate to reach out to nearby organizations; they are ready and willing to lend a helping hand in tough times.
Also, local churches and community centers often have resources or can connect you with those who do. You’d be amazed how people come together during emergencies. They really know how to rally and support each other in times of need, so be proactive in tapping into that network!
Creating a Support Network
Reaching Out to Neighbors
Never underestimate the power of your neighbors. Having a support network can be a lifesaver. I remember during a local crisis, we banded together to share resources like food, water, and even generator power. Just a quick chat or a message can let you know who’s around and ready to help!
Consider forming a neighborhood group to discuss emergency plans. Being proactive about this can ease fears and strengthen bonds. If you know each other’s strengths—like having someone with medical training—you can create plans that maximize everyone’s resources during an emergency.
And let’s not forget about the emotional support. When you’re in a crisis, simply knowing someone else is right there with you can make all the difference in the world. Keep that line of communication open and support one another as best as you can.
Preparing for Future Emergencies
Developing an Action Plan
Once the dust settles, it’s time to reflect on the experience and prepare for the future. Think about how you responded and what resources helped the most. Maybe you discovered that your local organizations were super helpful, or perhaps you found that your network of friends and neighbors was absolutely invaluable. Whatever it is, jot it down!
Creating a solid action plan for future emergencies is essential. Make a checklist of handy contacts, important resources, and a strategy to utilize them effectively. I even keep a “go-bag” with supplies just in case, which I’ve found handy during unexpected emergencies.
Lastly, don’t forget to share your insights with others. Help build a culture of preparedness in your community. When the next emergency strikes, everyone will be better equipped to handle it, and you’ll inspire others to take action, too.
FAQ
1. What should I do first in an emergency?
Assess your situation to understand what kind of emergency you’re facing. This will help in determining the resources and the actions you need to take.
2. How can I find local resources during an emergency?
Reach out to local authorities, check community boards, or browse social media channels where local emergency updates might be posted.
3. Are community organizations really helpful in emergencies?
Absolutely! Local organizations, like the Red Cross, are usually quick to mobilize resources and support during crises. They can offer food, shelter, and essential supplies.
4. How can I strengthen my support network?
Get to know your neighbors and build connections ahead of time. Forming a neighborhood plan can foster cooperation and ensure everyone knows how to support each other.
5. What is the best way to prepare for future emergencies?
Reflect on past emergencies and create a detailed action plan. Include emergency contacts, resources, and keep a well-stocked go-bag ready for any unforeseen situations.
During my numerous outdoor adventures, I’ve picked up some crucial lessons on spotting the red flags animals exhibit when they feel threatened. When a creature is in ‘fight or flight’ mode, it’s not just about their aggression—it’s about their body language. A stiff posture, pinned ears, or baring teeth are all classic signs that an animal is ready to defend its territory. Paying attention to these signals can be a lifesaver.
One key takeaway I’ve learned is to stay calm and not panic. When you notice these warning signs, it’s easy for your heart to race, but remember: animals often react to our energy. If we can remain steady, there’s a better chance the animal will sense our calmness and not see us as a threat.
Another aspect I always keep in mind is the actual environment surrounding us. Certain animals are more aggressive when protecting their young or resources. Being aware of these dynamics can give me a leg up in avoiding a tricky situation altogether.
Knowing the Species
It’s essential to understand which animals are more likely to exhibit aggressive behaviors and why. For example, bears typically become defensive near their cubs, while some birds could dive bomb if you’re too close to their nest. Knowledge of these habits has saved me from more than one close encounter.
When I’m in unfamiliar territory, I always do a bit of homework. Before heading out, I research local species, their behaviors, and what to expect. Honestly, taking the time to get to know the wildlife is not just safer but also enhances the overall experience with nature.
Moreover, there’s a whole different approach when dealing with primates or canines. These creatures are often more intelligent and aware of human behaviors, which means I always stay cautious and respectful when crossing paths with them.
Knowing Escape Routes
After getting a solid grip on animal behavior and species knowledge, my next priority is ensuring I have a clear escape route. I cannot stress enough how important it is to know my surroundings. I once hiked in an area where I didn’t scope out a safe way out, and wouldn’t you know it—I ended up startling a moose. Thankfully, I remembered a side path I had seen earlier, which got me out of there quickly!
While exploring, I tend to have a mental map of potential hazards, whether they’re cliffs, dense forest, or areas where wildlife is known to roam. This mental preparation allows me to react swiftly if I sense aggression from a critter.
Moreover, when I hike with friends, I talk about our escape routes. It’s super important everyone is on the same page, so if something goes south, we can navigate together without chaos.
Keeping Calm During Encounters
Staying Present and Grounded
In the heat of the moment, I’ve found that my heart races and my mind races with it. Whether it’s a bear blocking the trail or a wild boar snorting nearby, I focus on my breath to stay grounded. In my experience, an instinctive reaction often leads to panic, which can escalate the situation quicker than you think.
I try not to make sudden movements or loud noises. Instead, I focus on remaining still and assessing the situation. Sometimes just standing quietly might lead the critter to lose interest and wander off. I know it sounds simple, but this really works when I’m faced with an animal that’s aggressive.
A fun tip I learned from a fellow outdoorsman is to keep your eye on the animal’s movements. I usually take mental notes of where they’re going, which helps me understand better how to navigate around them if that becomes necessary.
Using Your Voice Wisely
On one unforgettable trip, I found myself surprisingly close to a group of aggressive raccoons. Instead of panicking, I raised my voice to establish a human presence. Speaking firmly, yet not yelling, often diffuses tension—this approach has proven effective time and time again.
I’ve learned that making noise can also serve as a warning to oncoming wildlife that I’m in the area. A whistle or clap works like a charm. Just remember, though, not to overdo it; I’m not trying to startle them further!
Additionally, following up with a calm yet firm “Go away!” can signal that I am not a threat, but I’m also not backing down. It’s a balancing act, but one worth mastering to avoid escalating a situation.
Managing Fear and Anxiety
Handling encounters isn’t just about physical safety; it’s also about managing that gut-wrenching fear. I’ll admit, facing a mountain lion is a chilling thought. But there are ways I’ve learned to manage anxiety in these moments. Preparation is key. When I’m mentally ready for wildlife encounters, I feel more in control and less anxious.
Sometimes, I remind myself that most animals would rather avoid confrontation just like I would. Reflecting on this can help ease the panic, allowing me to breathe and focus on my next step.
Practicing mindfulness techniques while out in nature has been another game changer for me. Whether it’s focusing on my surroundings or taking deep breaths, it helps me navigate precarious moments with grace and focus.
Preventive Measures
Dressing Appropriately for Wildlife Encounters
When hitting the trails, I’ve learned that being dressed appropriately isn’t just about comfort—it can also prevent dangerous wildlife encounters. Wearing bright colors can make me more visible to animals such as deer, which actually helps in avoiding interactions altogether.
Additionally, I always pack some bear spray when I’m hiking through regions known for bear activity. Just the feeling of having it on hand gives me peace of mind. Knowing how to use it and recognizing when it’s necessary is a part of my pre-hike routine.
Footwear matters too! Last summer, I found myself in a sticky situation when crossing some rocky terrain while chasing an animal off my path. Good grip and proper footwear can save me from slips and stumbles when quick movements are essential.
Choosing the Right Hiking Locations
I’ve come to realize that being picky about hiking trails can also absorb a bit of risk. I always check local trail reviews and websites, noting any recent wildlife sightings or warnings. Sometimes, it’s simply not worth the risk if the area has had reported aggressive wildlife activity.
Sticking to established paths teaches me a lot too. Animals often avoid areas with heavy human traffic, so busier trails tend to lower risk. I make it a habit to choose places where I can enjoy nature while being as safe as possible.
And let’s not forget about group hiking! I always prefer a buddy over heading solo, as it decreases my chances of encountering aggressive wildlife. Plus, exploring nature is always more fun with friends anyway!
Creating Wildlife Awareness
When I’m out with friends or family, I emphasize the importance of wildlife awareness. The more we chat about our surroundings and potential dangers, the more prepared everyone feels. Having a plan in place empowers all of us to react better if we find ourselves face-to-face with creature intentions.
We often utilize local experiences or story-sharing sessions around a campfire. Sharing anecdotes from previous encounters can really drive home the seriousness of wildlife behaviors in an engaging way.
Finally, I encourage everyone to respect wildlife. We’re just passing through their territory, after all. A core principle I believe in is leaving no trace—maintaining wildlife habitats goes a long way in promoting harmony between humans and animals.
FAQs
1. What should I do if I encounter aggressive wildlife?
Stay calm, don’t run, and assess the situation. Back away slowly and avoid sudden movements while trying to make your presence known.
2. How can I recognize animal warning signs?
Look for body language such as pinned ears, growling, or bared teeth. Understanding these signals can help you react properly.
3. Should I use bear spray if I see a bear?
Yes, bear spray can be effective if used correctly. Make sure to familiarize yourself with its use before heading out.
4. Is it safer to hike in a group?
Definitely! Hiking in a group decreases the chances of a close wildlife encounter and provides support in emergencies.
5. How can I prepare mentally for a wildlife encounter?
Mental preparation includes understanding what to expect and practicing mindfulness techniques to stay calm in stressful situations.
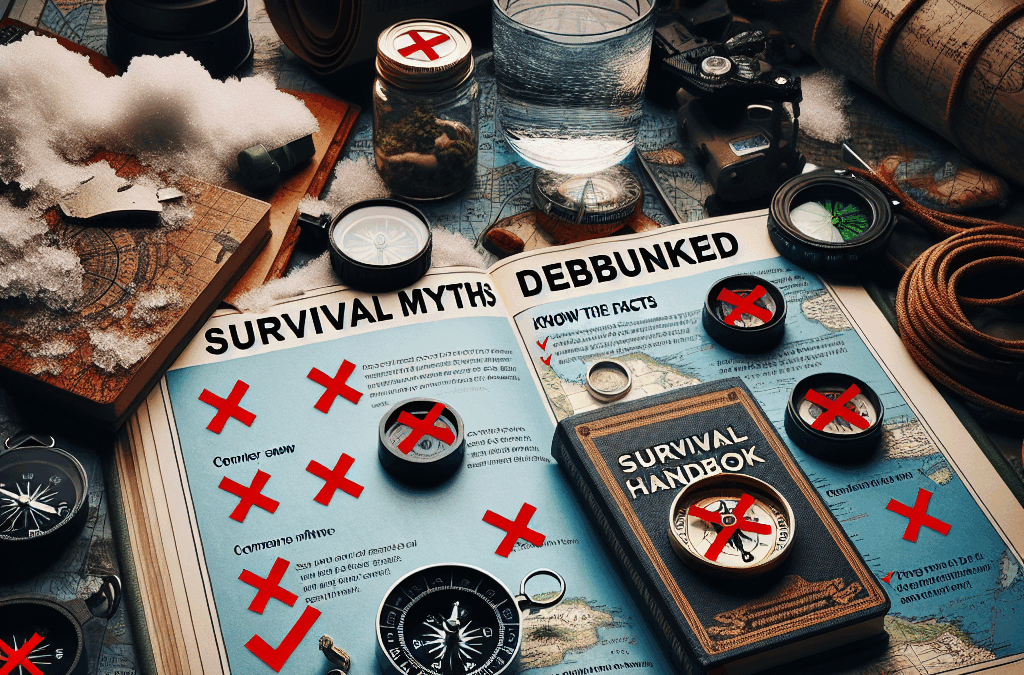
First off, boiling water is a great step for killing bacteria and viruses, but it’s not a catch-all solution. Some contaminants, like heavy metals and certain chemicals, won’t be eliminated just by boiling. Having spent time learning about various water sources, I found that ensuring you have a clean supply is just as important as purification methods.
When in the wild, I often carried portable water filters, and trust me, they can save your health. If you come across murky water, it’s smart to think about what might be lurking beneath the surface—bacteria, parasites, and yes, even chemicals that just don’t remind you of a refreshing mountain spring.
So, next time you’re out and about, remember: boiling is crucial, but it’s not a magic wand. Always assess the water source’s potential contaminants before you drink up!
Boiling Isn’t Enough
Another thing I learned the hard way? Not all boiling methods are equal! If you’re in a hurry and think a few minutes on the campfire will do, think again. It’s recommended to boil water for at least one minute (or three at higher altitudes) to ensure effective sterilization.
This little tidbit can save you from some nasty surprises. I once thought I knew better and ended up with a serious case of Giardia. Now, I’m a stickler for the right time!
So, if you’re ever in doubt about your water supply, it’s always worth taking extra precautions. Better safe than sorry, right?
Storing Water Effectively
Okay, so you’ve boiled it—what’s next? Storing your water correctly is another crucial element people often overlook. Using clean containers is paramount because even the best water can get contaminated if it’s in the wrong vessel. I tend to use BPA-free bottles or stainless steel canisters when I’m hiking.
Also, if you’re thinking about long-term storage, regular maintenance is necessary. Rotating your water supply every few months can help stave off any surprises. I always make a note in my calendar to check and refill these containers periodically.
So, remember to think about how you store your water as much as how you purify it. It’s all part of staying safe and hydrated!
Myth 2: You Can Survive on Just Fruits and Nuts
The Importance of Balanced Nutrition
I get it; fruits and nuts are great, but living off just those? Not so much! My attempts at a fruit-and-nuts-only diet during a survival trip made me realize that while they can give you a quick energy boost, your body craves variety.
While I munched on berries and nuts blissfully, my energy levels spiked and crashed like a rollercoaster. There’s a lot to be said about getting protein and healthy fats, which these staples fail to provide adequately.
Next time you find yourself pondering a survival diet, make sure to include some protein sources—think lean meats if you can catch them or maybe some fish if you’re by the water!
Foraging Wisely
And let’s not forget, while foraging, you’ve got to be smart. Some berries are delicious, while others can send you on a rollercoaster to the ER. One of my buddies got brave with wild mushrooms, and it didn’t end well! I settled for dandelion greens and other known edibles.
Make sure to equip yourself with knowledge beforehand. It’s more than just spotting something green and putting it in your mouth; learn the basics before you go nom nom on the wilderness. You’ll thank yourself later!
And really, it’s not just about what’s “good” but also about understanding what might be lurking in your environment—play it safe and do your homework.
Essential Supplements
Considering how challenging it can be to source a complete meal in the wild, I started bringing protein bars and multivitamins. You don’t want to end up malnourished while trying to survive! A little boost can go a long way.
Pack some of your favorite energy bars or shakes in your bag for the days you’ll be away from home and, trust me, this will make a world of difference. You don’t want to be out there feeling weak—energy is key!
Keep in mind that your diet needs to be well-rounded, even when out exploring! It’s all about keeping that stamina up.
Myth 3: Fire is Only for Cooking or Warmth
Understanding Fire’s Versatility
When I first started camping seriously, I thought fire was just for cooking food and staying warm. Boy, was I in for a surprise! Fire has many uses that can enhance your survival experience dramatically.
For instance, did you know fire can help purify water? Simply boiling it, as mentioned earlier, is one method! Moreover, fire can also signal for help—you can create smoke signals or a brightly visible flame if you need to attract attention.
Once, during an outing, I used a fire to create a signaling smoke. A couple of hikers spotted me and ended up giving me a lift back. You just can’t underestimate the power of fire!
Fire as a Deterrent
This one is a biggie: fire can be an excellent deterrent for wild animals. When I was camped in grizzly bear territory, I kept a roaring fire going at night. It not only provided warmth but also gave me peace of mind that my campsite was relatively safe from unwelcome visitors.
Fire can act as a barrier, a way to ward off potential threats. I learned this through my experiences and the stories of more seasoned survivalists. Trust me, the more you know about fire’s role, the better prepared you are.
So, remember that keeping a well-managed fire could mean the difference between a cozy night under the stars and a wild encounter.
Creating Tools from Fire
Now, let’s get creative! I’ve used fire for charcoal to make primitive tools. It’s pretty incredible what you can accomplish! If you’re into foraging or crafting, you can create fire-hardened wooden tools, which can be very beneficial for various tasks.
Once, I crafted a makeshift spear using the fire to harden the point. It was impressive to see how nature, with a little help from a flame, can turn a twig into a mighty tool!
So think beyond the basics when you start your fire next time. It’s an essential survival element and not just for the obvious reasons.
Myth 4: All Knives are Created Equal
Choosing the Right Knife for Your Needs
Believe me, not all knives are made equal! In my early days, I packed a generic kitchen knife for my outdoor adventures thinking it would suffice. Major rookie mistake! I learned the hard way that having the right knife can make or break your experience.
A good survival knife should be robust, fixed blade, and easy to grip. I’ve found that a solid knife can assist in everything from food prep to shelter making—trust me, you don’t want something flimsy that can’t handle tough tasks.
So when browsing at the outdoor store or online, test a few out! The right fit can make all the difference in your survival gear setup.
Maintenance Matters
So, you’ve selected your trusty blade? Now, maintenance is key! A dull knife isn’t just ineffective—it can be downright dangerous. I always bring a whetstone to keep my knife sharp during excursions.
I’ve experienced the frustration of a dull blade when trying to skin a catch or chop firewood. Sharpening tools take a few minutes but save you a heap of trouble in the long run. That’s one lesson I never forget!
Plus, cleaning your knife after every use helps prevent rust and prolongs its life; getting into this habit supports your overall preparedness.
Innovative Knife Uses
Moreover, I’ve discovered that a knife can serve multiple functions. You can use it to carve, scrape, or even open packages. On one camping trip, I fashioned a trap using my knife that helped catch dinner! It was a great feeling to use that tool creatively.
Remember, thinking outside the box will keep you from getting stuck in a rutted routine. Don’t be afraid to experiment a little, but always keep safety at the forefront.
Your knife can become an invaluable ally if treated correctly and wielded wisely. Embrace its potential!
Myth 5: Survival is Solely About Gear
The Importance of Knowledge
It’s super tempting to think that having the best gear means you’re set for survival, but let me tell you—it’s not just the gadgets! In reality, your knowledge and experience are even more crucial.
I’ve seen some campers with all the fancy gear struggle because they lack understanding and practical skills. On the flip side, I’ve made do with a few basic tools simply because I knew how to improvise and adapt to my situation.
Educating yourself through books, courses, or actual experiences can empower you more than any piece of gear ever will. That confidence and curiosity will take you far!
The Value of Practice
One essential lesson I learned is to put my skills to the test. Knowledge without practice is like having a map without knowing where you’re going. I regularly practice skills like building shelters and starting fires without matches—just to keep those skills sharp!
One time, I set up a weekend retreat focused on practicing various survival skills with friends, and we learned so much—invaluable things that no gear could replicate.
So, challenge yourself! Get out there and get your hands dirty. There’s no substitute for experience.
Teamwork in Survival
Lastly, let’s talk about camaraderie. Survival isn’t always a solo endeavor. That often-forgotten aspect of survival is knowing how to work with others. I recall a camping trip where teamwork made a big difference in keeping our spirits up and achieving our goals. We all had different skills to contribute.
Pool your knowledge with others. Collaboration during tough times can forge unbreakable bonds while also giving you diverse solutions to every problem you encounter. The collective effort can lead to success and safety.
Never underestimate the power of a well-rounded team. You might be the best survivalist, but a little help can go a long way.
Frequently Asked Questions
1. What’s the most common survival myth?
Many believe you can drink any water after boiling it. While boiling kills most pathogens, it doesn’t remove chemicals or heavy metals, so be cautious of your water source!
2. Can I really survive on just fruits and nuts?
While they can provide quick energy, they lack essential nutrients. A balanced diet is crucial, so try to incorporate protein and other food sources when in a survival situation.
3. How important is fire in survival situations?
Fire is incredibly versatile. It’s not just for cooking and warmth, but can also purify water, signal for help, and keep wildlife at bay.
4. What should I look for in a survival knife?
A good survival knife should have a fixed blade, be sturdy, and feel comfortable in your hand. It’s the ultimate tool for various tasks in the wild.
5. What is more important, gear or knowledge?
While gear is helpful, knowledge and experience are more critical for survival. Skills can often outlast any fancy device you might own. Always invest time in learning!
When disaster strikes, the stakes can be high. Whether it’s a natural calamity like a hurricane or an unexpected event such as a power outage, understanding the risks is your first step toward effective emergency preparedness. Acknowledging what could happen allows you to tailor your readiness efforts accordingly. Research local hazards—earthquakes, floods, wildfires—and assess how they might impact your home and community. This awareness not only equips you with knowledge but also fosters a proactive mindset.
Once you’ve grasped potential threats, it’s time to create a comprehensive emergency plan. This blueprint should map out what actions to take in various scenarios. Consider where you would go if you needed to evacuate and identify safe routes out of town. Designate a meeting point for family members in case you’re separated. It’s essential that everyone understands their roles; assign tasks based on age and capability so that each person knows what to do when the time comes. Document your plan clearly and ensure that every family member has access to it—this could save precious moments during a crisis.
Next comes the creation of an essential emergency kit, which serves as your lifeline when chaos unfolds. Start by gathering non-perishable food items such as canned goods and granola bars, enough to sustain each household member for at least three days. Don’t forget about water—aim for one gallon per person daily! Include medications, important documents (like IDs and insurance papers), first aid supplies, flashlights with extra batteries, and tools for communication like a battery-operated radio. Personalize this kit according to your family’s specific needs; toddlers may require diapers while elderly family members may need additional medical supplies.
In our fast-paced world inundated with information, staying informed is crucial during emergencies; hence effective communication plays a vital role in preparedness. Sign up for local alerts regarding weather updates or safety announcements from government agencies via smartphone apps or text messages. Establish group chats within your community or family networks so that everyone remains connected during crises—this can facilitate quick decision-making and resource sharing.
Lastly, practicing preparedness through drills ensures that everyone is ready when disaster strikes unexpectedly. Conduct fire drills at home or practice evacuation routes regularly—familiarity breeds confidence! You can even simulate other scenarios: What would you do in case of an earthquake? How would you respond if faced with severe flooding? Engage all family members in these exercises so they feel empowered rather than anxious about what lies ahead.
Emergency preparedness isn’t just about gathering supplies; it’s about cultivating resilience amid uncertainty. Equip yourself with knowledge about potential risks while crafting solid plans tailored to those situations—it transforms fear into readiness! As daunting as it might seem initially, taking small steps consistently will make all the difference when facing unforeseen challenges down the line.
So remember: Be prepared—not scared! Embrace this roadmap towards emergency readiness today!