Water is an essential part of our lives, but what happens when it becomes contaminated? It’s a serious issue that affects millions globally. Today, I’m here to share some personal insights and techniques that I’ve picked up over the years on purifying contaminated water. Let’s dive right in!
Filtration Techniques
Understanding the Basics of Filtration
First things first, let’s talk about what filtration really means. Basically, it’s the process of removing particles from water by using a barrier. This can be anything from a simple cloth to advanced filters. I’ve often found myself using a homemade coffee filter in a pinch. It’s amazing how effective a basic cloth can be in clearing up cloudy water!
Now, when we talk filtration, we’re really looking at various methods suited to different water sources. In my experience, gravity filters are super handy. You set them up, and they do the work for you while you’re busy with other tasks—like brewing a cup of tea!
Another method I’ve tried is using sand and gravel layers. It’s kinda cool to see nature’s way of cleaning water mirrored in our DIY efforts! Setting this up in a bucket was surprisingly rewarding, and it provided me with clean water for days.
Boiling Water
The Age-Old Method
Boiling water is one of the oldest techniques known to humanity—and for a good reason! I remember my camping trips where boiling our drinking water was a must. Just bring that water to a rolling boil for about 3 to 5 minutes, and voila! You’ve killed off most pathogens, bacteria, and parasites. It’s definitely an essential skill to take along on outdoor adventures.
However, keep in mind that this method may not remove chemical contaminants. So, if you’re dealing with heavily polluted options, boiling is more like a safety net. It’s reliable but not foolproof. I usually complement it with other techniques, just to be safe!
Plus, the whole process of watching the bubbles form and feeling reassured that you’re getting your water hot enough can be quite soothing. Just make sure you have a good pot, or you might be running into issues when it’s time to pour it out!
Chemical Treatment
Cleansing with Chemicals
I’ve found that chemical treatments are a game-changer. Water purification tablets, which usually contain chlorine or iodine, are my go-to when I’m in a bind or traveling. Simply drop one of those tablets in and wait a bit. It completely takes the worry out of drinking from questionable sources!
However, I advise checking the instructions on your tablets. Different brands might require different waiting times. I’ve had my fair share of hasty decisions, and believe me, nobody wants to deal with the fallout of not waiting long enough—yikes!
Another option I’ve dabbled with is using household bleach. It’s not the most glamorous option, but it’s effective! Just remember to dilute it properly! I can’t stress that enough—too much bleach can turn your water into a swimming pool. Fun for a swim, but not for sipping!
Solar Water Disinfection
Harnessing Sunlight
This one’s a unique method that really highlights how nature can be our ally. You simply fill clear plastic bottles with contaminated water and leave them in direct sunlight for a few hours. I learned about this technique from a friend who spent time in a region where clean water was scarce. It actually works, and I’ve tried it during summer picnics.
What’s fascinating about this method is that UV rays from the sun help kill microorganisms. It’s an eco-friendly way of ensuring you stay hydrated without burning a hole in your pocket.
However, I’ve made the mistake of underestimating the time required. Make sure you leave your bottles out long enough; don’t just assume an hour will do the trick! The longer, the better—sunlight is your homie in this case.
Reverse Osmosis
The High-Tech Approach
Now, reverse osmosis is where things get a bit more technical—yet, it’s super effective! This method uses a semipermeable membrane to remove ions, molecules, and larger particles from water. I’ve been fortunate enough to have access to a reverse osmosis water filter at home, and let me tell you, it’s a game changer! Having that access to clean water on a daily basis is a luxury I don’t take lightly.
While it’s not a method for the everyday person on a camping trip, it’s invaluable for home use. Setting it up can require a bit of effort, but once it’s working, you can just sit back and enjoy your fresh water. I often joke that it’s like having a personal chef, but for water!
But remember, maintenance is key! You have to change those filters regularly, or else all that hard work is for naught. I learned that the hard way with some funky-tasting water—definitely not something you want to sip on!
Frequently Asked Questions
What is the best method for purifying water at home?
The best method often depends on your specific needs. For everyday use, reverse osmosis is great for ensuring clean water. However, boiling and chemical treatments are also reliable options for emergency situations.
Can sunlight really purify water?
Absolutely! Solar disinfection is effective, especially in sunny climates. Just remember, it requires clear bottles and ample sunlight exposure to work its magic.
What should I do if the water looks clean but smells bad?
If water smells bad, it could indicate chemical contamination you can’t see. In such cases, it’s best to boil or use chemical treatments to purify it. Trust your senses!
Is it safe to use bleach for water purification?
Yes, but you must follow dilution guidelines carefully. Too much bleach can make your water unsafe to drink. Always measure accurately!
How often should I maintain my water purification system?
Maintenance frequency generally depends on the system you use. However, it’s a good practice to check filters monthly and replace them according to the manufacturer’s recommendations.
I hope these techniques truly empower you to tackle any water purification challenge you might face. Remember, clean water is key to good health, and with these methods, you can ensure that you and your loved ones stay hydrated and safe!
Imagine you’re a firefighter, and suddenly you hear there’s been an incident at a nuclear plant. Understanding radiological hazards is crucial in these situations. Radiological hazards can range from exposure to radioactive materials to contamination of the environment.
It’s all about knowing how these materials behave and the health risks involved. For example, short-lived isotopes dissipate quickly while others can linger for years. A solid grasp of what’s at stake is vital, especially if you ever find yourself in the thick of a radiological event.
Being informed can mean the difference between safety and danger. Familiarize yourself with common terms and concepts in nuclear science. It won’t take long before you feel more confident when discussing these hazards with your colleagues or emergency responders.
Recognizing the Sources
In my journey to understand radiological hazards, I learned that knowing where these hazards might come from is just as important. Be it medical facilities using diagnostic imaging or nuclear power plants—these are hotspots of potential issues.
You should also consider the impact of natural occurrences, like radon exposure in some areas. Understanding these sources helps us prepare our response strategies better. You want your response to be smart, not just a knee-jerk reaction!
Getting to know the industry regulations and safety standards can also guide you in identifying these key sources. Knowledge leads to action, and understanding your environment is a huge part of that.
The Impact of Radiation on Health
Now, let’s dive deeper into why understanding radiological hazards matters—how does radiation impact health? Personally, once I grasped the basics, it completely changed my perspective.
A short dose might cause immediate effects like radiation sickness, but what about long-term consequences? Increased cancer risk or even genetic mutations are serious potential outcomes. This isn’t just theory; it’s reality for people affected by radiological events.
Hence, being knowledgeable about these health risks allows us to communicate effectively with the public and reassure them with facts. We need to educate, not scare people, and that requires a solid understanding ourselves.
Effective Communication Skills
Crafting Clear Messages
Communication is key when it comes to emergencies. I learned this early on in my career. Crafting clear, concise messages can help prevent panic and confusion. You want to make sure your message is understood, not just heard.
One effective way to do this is to avoid using overly technical jargon. Use straightforward language that anyone can understand. If you’re speaking to people who are already stressed, the last thing they need is to be confused.
I’ve practiced this method time and again, especially when I needed to explain complex terms like “radiation exposure” or “contamination.” Keeping it relatable and simple is the way to go!
Building Trust with the Community
Building trust within a community can be an uphill battle, but it’s essential for effective communication. I found that being transparent about potential risks and ongoing actions really helps.
When communities understand that you care and are working with them for safety, they’re more likely to listen and follow guidelines. I always strive to show that I’m on their side. Sharing personal stories or experiences can help humanize the message too.
Trust also comes from consistency. Regularly updating the community with accurate information helps establish that you’re a reliable source during emergencies.
Listening to Feedback
Don’t forget, communication is a two-way street! Actively listening to community feedback is just as important as conveying information. I can’t stress enough how valuable input from others can be. It helps us to adjust our messages for clarity and relevance.
Often, community members have unique insights into their own fears and concerns. Engaging with them allows us to tailor our communication strategies more effectively. It’s all about partnership!
Whenever I’ve hosted community forums or Q&A sessions, I’ve made it a point to really listen. This not only helps improve our response but also shows the community that their voices matter.
Preparedness Training
Creating Training Programs
Training is the backbone of preparedness. If there’s anything my experience taught me, it’s that creating thorough training programs is essential. These programs should cover radiological basics to proper emergency procedures—everything that could come up in a real scenario.
For me, hands-on training works wonders. Simulations can help your team practice their skills under pressure, which can be very different from theoretical knowledge. Have drills and make them as realistic as possible!
Incorporating different learning styles—visual, auditory, and kinesthetic—will help ensure the information sticks. Remember, not everyone learns the same way!
Engaging the Community
Training isn’t just for professionals; engaging the community is equally vital. I love organizing workshops where community members can learn life-saving skills. This not only empowers them but also fosters a culture of preparedness.
Demonstrating personal emergency kits, evacuation routes, and communication methods helps to instill confidence within the community. When they know what to do, they feel more secure.
It’s an amazing feeling to see people take ownership of their safety. Empowerment is a key component of a truly resilient community.
Continuous Learning
Preparedness training mustn’t be a one-off event. Continuous learning is crucial. As you might expect, things change—guidelines, policies, and even potential threats evolve over time.
I’ve made it a habit to stay updated with new research and best practices. This are also great opportunities for further training—for instance, workshops or online courses often provide insights into the latest methodologies.
The more informed we are, the better equipped we’ll be to handle real emergencies. The key takeaway? Stay curious and always look for ways to expand your knowledge!
Collaboration with Agencies
Building Relationships
Collaborating with various agencies can significantly enhance our preparedness efforts. Building relationships with local emergency services, health departments, and even national agencies can be immensely beneficial. These partnerships can lead to better resource sharing and communication during a crisis.
I’ve seen firsthand how effective these relationships can be; when everyone knows their roles and has established connections, the response is much smoother. Regular meetings and joint exercises can solidify these relationships.
Creating a network with diverse agencies means you can tap into various expertise and resources, making your response more comprehensive and efficient.
Resource Sharing
We’ve all heard the saying, “teamwork makes the dream work.” Resource sharing among different agencies can elevate preparedness to a new level. Whether it’s sharing manpower, funding, or even equipment, collaboration can enhance overall efficacy.
From my experience, pooling resources often results in better training initiatives, better equipment for responders, or even public awareness campaigns that reach wider audiences.
In moments of crisis, these partnerships can literally mean saving lives. We must embrace a collaborative mindset if we want our efforts to be as effective as possible.
Joint Training Exercises
Joint training exercises are another fantastic way to prepare—these simulations let different organizations practice how they would work together in an emergency. Playing out various scenarios helps identify strengths and weaknesses in our plans.
Personally, I’ve seen how these trainings can spark creative ideas and solutions. When multiple agencies come together, they can share insights that might not have surfaced otherwise.
These exercises can also help establish trust and understanding between agencies. Ultimately, it lays the groundwork for more fluid coordination when it really matters.
Community Awareness Programs
Educational Workshops
Fostering community awareness about radiological preparedness is something I feel passionate about. Educational workshops are hands-down one of the best ways to get the word out. In my experience, they provide hands-on learning, which people really benefit from.
Workshops can cover a whole range of topics, from basic radiological safety to emergency response actions. Not only does this empower individuals, but it also strengthens the community as a whole.
Seeing participants engage and ask questions reinforces the idea that they take it seriously. It’s vital to ensure everyone leaves with actionable knowledge they can apply.
Community Drills
Drills are another effective tool for increasing community preparedness. I’ve watched as communities come together for these events, feeling that surge of collective responsibility. Practicing evacuation routes, communication plans, and response strategies can really boost confidence.
Creating scenarios that simulate potential radiological incidents helps everyone in the community visualize their roles. It’s like preparing for a play—you wouldn’t go on stage without rehearsals, right?
The more familiar people are with the response procedures, the less anxious they will feel when it’s time to act. Trust me, repetition solidifies knowledge and decreases panic!
Public Information Campaigns
Last but not least, never underestimate the power of public information campaigns! Social media, flyers, or community announcements can be effective ways to disseminate information. I’ve found that creative and engaging content captures attention far better than just plain facts.
Using relatable language and visuals can make your message resonate more with the community. Sharing testimonials or stories can underscore the importance of preparedness without creating fear.
Ultimately, it comes down to fostering a culture of awareness and readiness in the community. The more people know, the better prepared they will be!
This is an informative article on the essential skills for radiological emergency preparedness, presented in clean HTML format with a friendly and personable tone.
One of the first things I learned was the importance of keeping my vehicle in tip-top shape. Regularly checking your tires, brakes, and lights is essential. You don’t want to be caught in the middle of nowhere with a flat or a headlight out. I mean, who wants to deal with that stress, right?
What I like to do is set reminders on my phone for these checks. It can be as simple as checking my tire pressure every month or giving my car a regular oil change. This keeps everything running smoothly and helps me avoid breakdowns when I least expect them.
Plus, a well-maintained vehicle usually saves money in the long run. You avoid those expensive repair bills that can sneak up on you if you’re not careful. Trust me, learning this the hard way wasn’t fun at all!
Fluid Levels
Another crucial aspect of maintenance is ensuring your fluids are at the right levels. This includes engine oil, coolant, brake fluid, and transmission fluid. It’s kind of like feeding your car; if it doesn’t get the right stuff, it’ll run into problems.
Checking these levels can be a quick task. I usually do it while I’m waiting for my coffee to brew in the morning. Just pop the hood, take a look, and top them off if needed. It honestly doesn’t take much time and can really save you a lot of headaches later.
If you’re unsure about how to check them, there are plenty of video guides out there. They can walk you through the process step-by-step. Once I learned how easy it was, I was hooked on keeping my fluids in check!
Battery Health
Let’s not forget about your battery. A dead battery can leave you stranded faster than you can say “help!” and knowing how to check its health is crucial. Look for corrosion on the terminals and make sure the connections are tight.
If you’re running into issues with starting your car or if the lights look dim, it might be time for a battery replacement. I remember once, my battery died out of the blue before a big trip, and I had to scramble for a jump start – not a fun scenario!
I recommend having a simple multimeter at home. It’s a small investment that can be a lifesaver. You’ll be able to check if your battery is still holding a charge effectively. Just a quick check before heading out can make all the difference.
2. Create an Emergency Kit
Basic Supplies
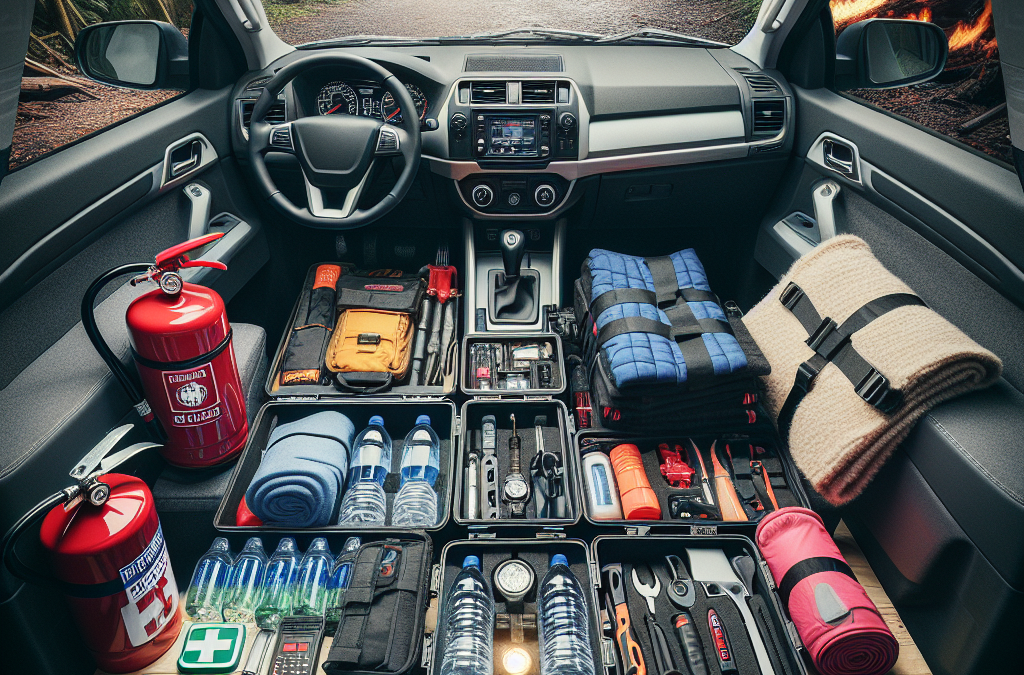
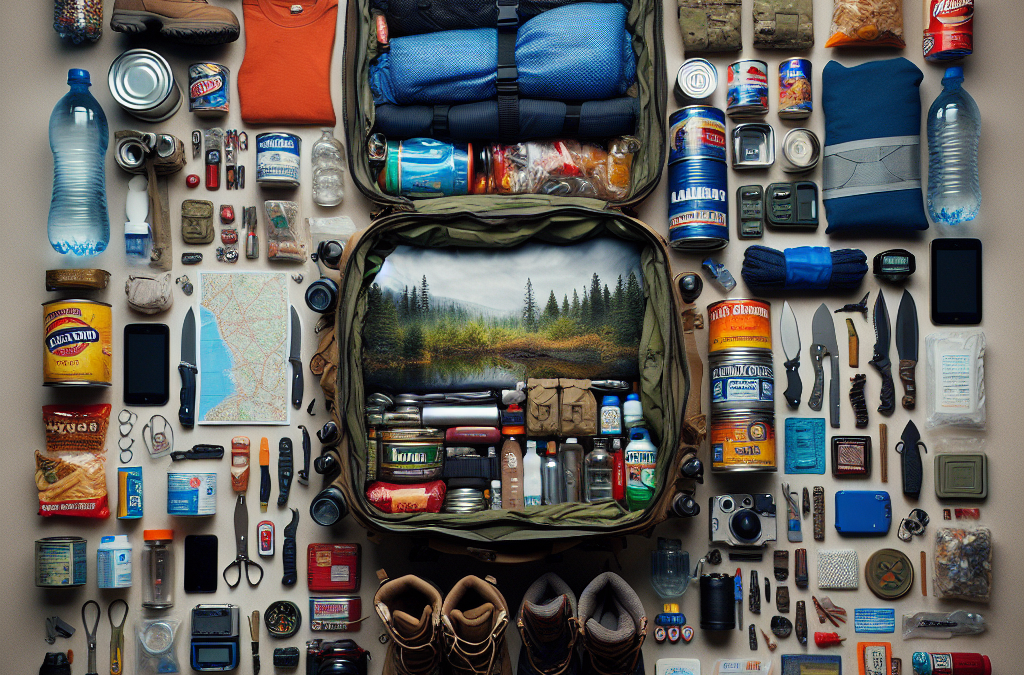
Now let’s talk about creating an emergency kit. I can’t stress how important this is! I’ve put together a bag loaded with the basics: first aid supplies, water, non-perishable snacks, and a flashlight. These items can come in handy if you find yourself stuck somewhere.
I usually keep everything in a sturdy backpack in the trunk of my car. That way, it’s easy to grab if I need it. And it’s really good peace of mind to know that I’m prepared for whatever could happen on the road.
Also, don’t overlook things like a multi-tool or a blanket. They may seem minor, but trust me—they’re lifesavers in tricky situations. Having them can keep you comfortable and safe until you get help!
Roadside Assistance Tools
Having the right tools is essential too. I always make sure to have a spare tire, jumper cables, and a basic tool kit in my vehicle. You never know when you might need to change a tire or jump your battery.
Learning how to use these tools can really help you feel empowered during emergencies. I remember the first time I had to change a tire by myself. It took some time, but I felt so accomplished afterwards! Plus, it saved me from waiting for a tow.
Consider joining a roadside assistance club as well. Having quick access to help can be a game changer, especially if you’re in a sketchy area or late at night.
Staying Informed
Part of being prepared is staying informed about any potential emergencies in your area. I’ve signed up for alerts on my phone, which notifies me about severe weather or road conditions. It’s a simple step, but it can prevent you from being caught off guard.
Additionally, familiarize yourself with local emergency services and how to reach them. Knowing the quickest route to the nearest service station can save precious time if you ever face a breakdown.
Educating yourself about common road issues in your area is also super helpful. If you’re in an area known for heavy snowfall, for example, just know what to expect and how to handle such conditions. It’s all about staying a step ahead!
3. Develop a Communication Plan
Who to Contact
In case of an emergency, having a plan for who to contact is crucial. I’ve designated a couple of friends and family members who I can call if I ever get into a pickle. It’s reassuring to know that I’ve got people who will drop everything to help me out if needed.
Make sure your emergency contacts are saved in your phone. I even have a little note in my wallet with important numbers, just in case my phone dies. Old school, but it works!
Think about what information you would need to relay in an emergency. You’ll want to share your location and a brief summary of your situation. Practice that communication in advance, so you’re ready to go when the time comes.
Sharing Your Plan
Don’t just keep your emergency plan to yourself—share it with those close to you. Talk through it with your family, so they know what to do if something goes wrong while driving. It can be helpful to discuss how each person would handle different scenarios.
I’ve found that meeting up with my family and discussing our emergency plans has really boosted everyone’s confidence. It’s a relief knowing we’re all on the same page and can help each other out if need be.
Consider using a messaging app where everyone can access important information like your routines or schedules for added convenience. It keeps communication flowing smoothly during emergencies.
Using Technology
Leverage technology as much as you can. There are some fantastic apps out there designed for emergency assistance. I have a few on my phone that allow me to quickly reach out for roadside help or know where local emergency services are located.
GPS tracking apps can be useful too. If you find yourself lost or in trouble, these apps can help responders know exactly where you are. Just sharing your location with a trusted contact can make all the difference.
Always ensure that your phone is charged before embarking on long trips, and consider investing in a portable charger. That little bit of preparation can be a lifesaver when you find yourself in a tough spot.
4. Understand Road Conditions
Seasonal Changes
Understanding how road conditions change with the seasons is also key. I’ve learned that winter weather can catch you off-guard if you’re not prepared. Snow, ice, and rain can turn a routine drive into a real adventure, and not always in a fun way!
During winter, I take extra precautions—more than just putting snow tires on. I keep an ice scraper and salt in my trunk, just in case. I also make it a point to check the weather before heading out so I’m not blindsided by unexpected storms.
Similarly, in the rainy season, watching out for areas prone to flooding can be a lifesaver. Knowing which routes to avoid can keep you safe and dry.
Traffic Patterns
A solid understanding of local traffic conditions helps as well. I like to use navigation apps to find the best routes during rush hour or when there’s an accident. Those little shortcuts can save a ton of time and frustration!
Beyond knowing traffic patterns, it’s good to be aware of common trouble spots in your area. For instance, if a certain intersection is known for accidents, always approach with caution. Keeping those mental notes can help prevent more serious situations.
Being proactive about these conditions means I can focus on driving safely instead of stressing over unexpected delays. It’s really made my driving experience much smoother!
Vehicle Preparedness for Environment
Your vehicle should be prepared for your specific driving environment. For example, if you live in a rural area, you might want to have a bit more gear handy compared to someone in the city. Out here, you might face more wildlife or even remote terrain challenges.
Understanding how your car performs in different conditions is important, too. I’ve spent time learning how to manage my vehicle’s braking and traction control in various scenarios. This knowledge can be a real lifesaver when the conditions turn tricky.
Sometimes, simply swapping out air filters or using the right fluids for hot or cold climates can help your vehicle perform optimally. The more I’ve learned about my car’s needs, the better prepared I feel!
5. Practice Your Skills
Hands-on Learning
Finally, practice makes perfect! I can’t tell you how many times I’ve watched tutorials on car care and emergency maneuvers, but nothing beats actually getting my hands dirty. Whether it’s changing a tire or using a first aid kit, putting knowledge into action builds confidence.
This past summer, I took a little weekend workshop on basic automotive skills. And let me tell you, it was a game changer! I left not only feeling proud of my new skills but also more prepared for any situation.
Ask a friend or family member if you can practice with them. You can swap skills—teach each other what you know. It’s a great way to bond and reinforce your emergency response skills!
Simulating Scenarios
I also like to simulate emergency scenarios. It sounds a bit silly, but role-playing what to do if my car breaks down or if I get into an accident really helps me think on my feet. You can even practice using your emergency kit!
This isn’t about creating anxiety; it’s about being prepared. Remember the first time I got stranded? My buddy and I had practiced what to do beforehand, and it made a world of difference in how calm I could stay.
Don’t forget to include your loved ones in these scenarios. It’s important they know what to do too. The more you all practice, the smoother it’ll go if you ever find yourselves in a tough spot.
Regular Refreshers
Lastly, keep learning and refreshing your knowledge. I like to read articles or watch videos every few months on car care and emergency preparedness. Things can change, and what I learned a couple of years ago might need updating!
Taking a class or seeking out local workshops can also help. Staying up-to-date makes sure I won’t be shaking in my boots if something goes wrong. Plus, it’s a good excuse to meet new people and share experiences!
So, always keep that curiosity alive! The more you know, the better prepared you’ll be in every driving scenario. Your future self will thank you!
FAQs about Preparing Your Vehicle for Emergency Situations
1. What should be included in my emergency kit?
Your emergency kit should include basic supplies like a first aid kit, non-perishable snacks, water, a flashlight, and a multi-tool. Items tailored to your specific needs, like jumper cables, blankets, and tire-changing tools are also really helpful.
2. How often should I maintain my vehicle?
I recommend doing routine checks every month. This includes looking over your fluids, tire pressure, brakes, and lights. Regular maintenance can catch small issues before they become big problems.
3. What technology can I use for emergency preparedness?
Using navigation apps can help you get roadside assistance quickly. Additionally, there are apps that offer local emergency services, and can even share your location with someone you trust in an emergency.
4. Why is it important to know local road conditions?
Being aware of seasonal changes, traffic patterns, and potential hazards in your area allows you to drive more safely and confidently. Knowledge about road conditions helps you avoid accidents or getting caught in bad situations.
5. How can I practice my emergency response skills?
Hands-on learning is key! Try changing your tire or going to a workshop on basic car care. Simulating scenarios with friends or family can also help prep you for real-life emergencies.
In today’s unpredictable world, being prepared for emergencies can mean the difference between chaos and calm. Whether it’s a natural disaster, a medical emergency, or an unforeseen event, having a solid plan in place is crucial. Let’s explore the ultimate emergency preparedness checklist you need to ensure safety for yourself and your loved ones.
## Understanding the Importance of Emergency Preparedness
Think about it: emergencies can strike at any moment. From hurricanes and earthquakes to fires and power outages, preparation is key to minimizing risks and ensuring survival. By understanding the importance of emergency preparedness, you equip yourself with knowledge that can save lives. It’s not just about having a stash of supplies; it’s about creating a culture of readiness within your household. A proactive mindset fosters resilience and confidence when faced with unexpected challenges.
## Essential Supplies Every Household Should Have
So, what should be in your emergency kit? Start with the basics: food, water, first aid supplies, and tools. Aim for at least three days’ worth of non-perishable food items—think canned goods, energy bars, or dehydrated meals—and one gallon of water per person per day. Don’t forget essential medications! A well-stocked first aid kit should include bandages, antiseptics, pain relievers, and any prescription medications you might need.
Also consider including flashlights with extra batteries, blankets for warmth, multi-tools for various tasks, and hygiene items such as hand sanitizer and wipes. If you have specific dietary needs or allergies within your household—be sure to account for those too! An often-overlooked item is important documents; keep copies of identification cards, insurance policies, medical records—all neatly packed in a waterproof container.
## Creating a Comprehensive Emergency Plan
Having supplies is just one step; crafting a comprehensive emergency plan is equally vital. This plan should outline evacuation routes from your home as well as designated meeting points for family members if you’re separated during an event. Discuss these plans regularly so everyone knows what to do when panic sets in.
Moreover, identify local shelters or safe zones if evacuation becomes necessary. Practice drills periodically—this helps build familiarity with the procedures while alleviating anxiety when real situations arise.
## Communications: Staying Connected During a Crisis
In times of crisis, staying connected can be challenging but paramount. Establishing communication protocols ensures that every family member knows how to reach one another during emergencies. Designate an out-of-state contact who will serve as a central point of communication; this helps alleviate confusion if local lines are down.
Consider investing in battery-powered radios or walkie-talkies as they can be invaluable when mobile networks fail.
## Special Considerations for Families and Pets
When preparing for emergencies, don’t forget about your furry friends! Create an emergency plan that includes pet care; ensure you have enough food supplies and medications specifically tailored to their needs. Keep leashes or carriers readily accessible in case evacuation becomes necessary.
For families with children—engage them in discussions about safety while providing age-appropriate education on what steps they should take during different scenarios.
## Regularly Reviewing and Updating Your Preparedness Plan
Lastly—and perhaps most importantly—make it standard practice to review and update your preparedness plan at least once each year (or whenever significant changes occur). Life evolves: new family members join us while others may leave; personal circumstances change that require adjustments in our plans.
By routinely assessing your readiness level—as well as refreshing supplies—you ensure that everyone remains secure no matter what life throws your way!
In closing: being prepared isn’t just about gathering supplies; it’s about fostering resilience through knowledge-sharing within families so all stay safe come what may!
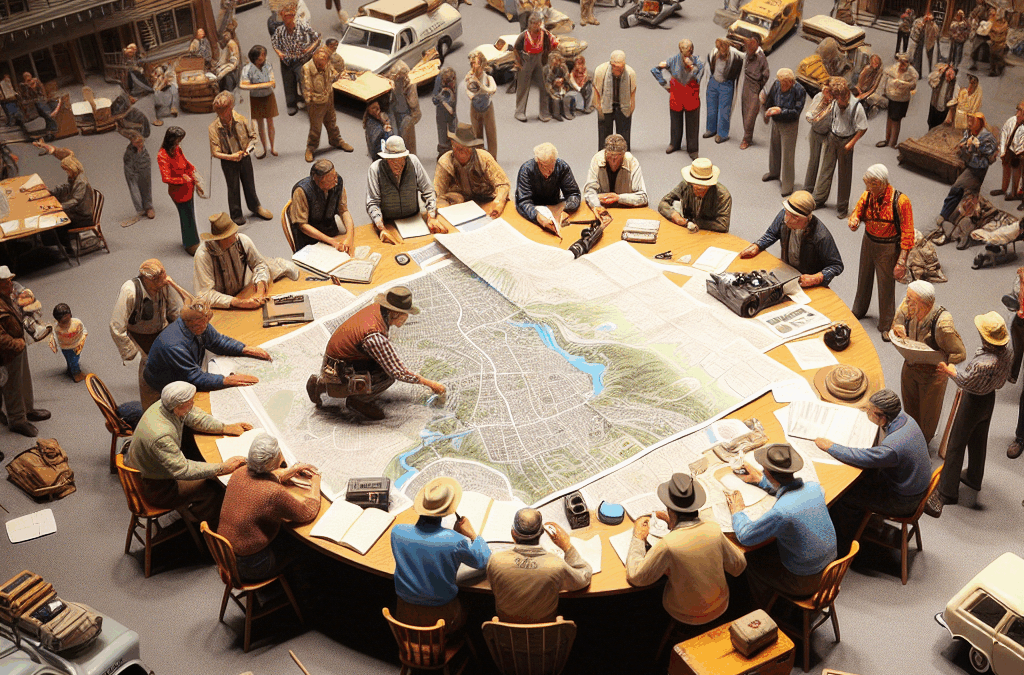
In my experience, understanding the local terrain can be a game changer when it comes to preparedness. Whether it’s knowing the nearest routes for evacuation or identifying natural barriers, a good grasp of the geography allows us to make informed decisions. If disaster strikes, those who know the lay of the land have a head start on escaping or finding safe havens.
I’ve often relied on my knowledge of local parks, rivers, and hills during emergencies. These features can act as natural refuges or obstacles, and knowing where they are can be crucial when time is of the essence. Take a moment to explore your area and envision how you would navigate it in a pinch. It can really pay off!
Plus, we have a bunch of hidden gems right in our backyards that can serve as rallying points or shelters. When we utilize these spots for preparedness, we’re not just planning— we’re engaging with our community and making connections that could save lives.
Community Networks and Resources
Local Organizations and Support Groups
Building a strong local network can make all the difference during a crisis. In my town, we have numerous organizations dedicated to disaster preparedness. From volunteer fire departments to local Red Cross chapters, these groups provide essential resources and support when things get tough.
Engaging with these organizations not only keeps us informed about safety protocols and resources but also allows us to form relationships with people who will be there for each other in challenging times. I’ve met some incredible folks while volunteering, and these connections have proven invaluable during emergencies.
Moreover, these local groups often offer workshops and training courses. I’ve attended a few myself and learned critical skills, like first aid and emergency response tactics. Knowledge sharing among community members leads to collective strength—a pillar of preparedness that shouldn’t be overlooked!
Cultural Insights and Local Traditions
Understanding Community Responses
One thing I’ve learned is that local cultures influence how communities respond to disasters. What might work in one area could fall flat in another due to differing values or traditions. Knowing these subtleties can help tailor our preparedness efforts to resonate with the folks around us.
For instance, family gatherings during holidays often serve as excellent opportunities to discuss emergency plans. Since many folks prioritize family, integrating preparedness discussions into these settings can ensure that information is communicated effectively. I’ve seen this work wonders in my community, fostering a sense of shared responsibility.
Plus, utilizing local traditions can serve as a way to strengthen the community fabric. Incorporating cultural events into preparedness activities not only makes learning fun but also ensures everyone feels included—because let’s be honest, nobody wants to feel left out during a crisis!
Local Emergency Services Knowledge
Contacts and Services Available
When it comes down to it, knowing who and what is available locally can save your life. I’ve spent time familiarizing myself with local emergency services, and trust me, it’s worth it. From understanding the closest hospital’s location to knowing the contact numbers for the fire department, having this knowledge at my fingertips is empowering.
Another aspect of this is knowing the capabilities of local services. Some areas might have specialized units like swift water rescue teams or hazmat responders. I can’t tell you how many times I discovered resources that I had no idea even existed until I started digging around!
And let’s not forget about social media; many local services have active online presences now. Following them keeps us informed on immediate responses during emergencies—updates that can be critical for preparedness.
Preparedness Education Tailored to Locale
Workshops and Training Resources
Last but not least, continuously learning about preparedness is vital. Participating in local workshops not only equips us with skills but also connects us to fellow community members on the same mission. These trainings often focus specifically on the types of disasters common in our area, ensuring that we are prepared for genuine threats.
For example, I attended a workshop that focused solely on hurricanes, which was super helpful because my region faces this risk. Learning about storm preparedness, like securing homes and creating a disaster supply kit, was eye-opening. The local emphasis on our specific risks made it all the more relevant.
There’s also an empowerment aspect; taking charge of my preparedness journey has helped me feel less anxious about potential threats. By sharing these experiences with others, we create a ripple effect of knowledge that enhances community resilience.
FAQ
Why is local knowledge crucial in emergencies?
Local knowledge provides insight into geography, resources, and community dynamics that can significantly impact preparedness and response efforts. It helps us navigate effectively during emergencies.
How can I start learning about my area’s resources for preparedness?
Begin by connecting with local organizations like the Red Cross or community centers. They often offer programs, workshops, and information about local emergency services.
What role do local networks play in crisis management?
Local networks provide support, share knowledge, and foster collaboration among community members. They enhance collective preparedness and ensure everyone has access to essential information and resources.
How can cultural insights impact preparedness strategies?
Cultural insights can shape how communities view emergencies and respond to them. Tailoring preparedness strategies to fit local customs can lead to more successful engagement and compliance.
Why should I participate in local preparedness training?
Participating in local training equips you with practical skills tailored to your area’s specific threats, creating a sense of community while building personal confidence in handling emergencies.
Alright folks, let’s get right into it! When you’re choosing a bug-out bag, you have to think about what you’re gonna need it for. Are you planning for a natural disaster, a road trip, or maybe just some wilderness adventure? Each scenario will require different items, so sit down and really consider what your top priorities are.
I remember when I first put together my bug-out bag; I just grabbed the biggest backpack I had lying around. That was a mistake! A bag that’s too big can get heavy fast, so ensure it’s not just spacious but organized enough to find everything you need quickly.
Also, your bag should be durable. Look for something made out of tough materials, with water-resistant properties. You want this bag to last through rough conditions, not fall apart after a few uses.
Different Sizes and Styles
Next, consider the size and style of your bag. You don’t want to go overboard; usually, something that holds 72 hours’ worth of supplies is ideal. That’s about 50-75 liters for most people. For me, I found that a medium-sized backpack with compressible features does wonders because it keeps everything compact.
Then there are different styles. You’ve got the classic backpack, sling bags, or even tactical options. I personally lean towards a tactical bag because of the versatility and extra features. They can be handy for attaching gear and organizing tools, which is super important when you’re on the go.
So, think about what fits comfortably and suits your style. If you don’t like carrying it, you won’t use it, and that’s the last thing you want in an emergency!
Budget Considerations
Let’s not forget about budget! I get it; you want to stock up on all the cool gadgets and tools, but it’s crucial to set a budget for your bug-out bag. You can find quality bags and supplies without breaking the bank. Check out sales or even second-hand options; sometimes, you can score fantastic gear for much less.
On my journey, I discovered that there’s no single “perfect” bag for everyone. Sometimes you find a decent bag that just needs a few tweaks with added pockets or pouches. Do a bit of research and read reviews before plopping your cash down.
Remember, the goal is to be prepared, so don’t skimp on quality where it really matters—like the bag itself—but also know you don’t need to spend a fortune to be ready for anything.
2. Essential Supplies
Food and Water
Moving on to supplies! When it comes to food and water, the rule of thumb is to pack enough for at least three days. I usually throw in some energy bars, freeze-dried meals, and even a couple of nice protein packs that I know won’t spoil quickly. High-calorie foods are your best friend here!
Water is a huge must-have. I always include a portable water filter and a few collapsible water containers. Trust me, carrying bottles around can become cumbersome. With a filter, you can refill from almost any fresh water source.
Don’t forget about the space! Keep everything compact to save room. You might want to consider some waterproof bags to keep your food fresh and dry in case of mishaps.
First Aid Kit
Now let’s talk about the first aid kit. I can’t stress how crucial this is! A well-stocked first aid kit can be your lifesaver. I started with a basic one and added my personal touch over time: more antiseptic wipes, bandages, and even some pain relievers.
Make sure you have items tailored to your specific needs, especially if you have allergies or chronic conditions. I’ve also found it helpful to keep a little instructional guide in my kit for emergencies. You never know when someone’s going to need some basic first aid!
Don’t forget to check your kit regularly and replace items that have expired. If you’re not prepared, it can lead to bigger problems when you actually need it.
Tools and Gear
Alright, now let’s cover tools and gear. You might be a whiz at survival skills, but having the right tools can make a massive difference. I always keep a multi-tool in my bag; they’re incredibly versatile and save space.
Flashlights, fire starters, and emergency blankets are also a must. And trust me, a good rope can come in handy in various situations—from securing items to makeshift shelter—in case you find yourself in a bind.
Lastly, don’t forget a map and compass or a satellite communicator if you’re going off the grid. Technology can fail, but the classics will always work. These tools can help you navigate back to safety when things go haywire.
3. Clothing and Shelter
Choosing the Right Clothing
Clothing should never be overlooked in your bug-out bag preparations. I mean, think about it—it’s your first line of defense against whatever Mother Nature throws at you! I always pack moisture-wicking base layers, a durable outer layer, and of course, a warm hat and gloves.
The trick is to layer, layer, layer! That way, you can adjust according to the temperature. Also, try to stick to neutral colors that blend in with your surroundings. Bright colors can attract attention you might not want!
Water-resistant fabrics are essential, so consider that when you’re selecting your clothing. I once got caught in the rain with cotton clothes, and trust me, you don’t want to feel soaked when you could be warm and dry.
Personal Shelter Options
When it comes to shelter, I always prioritize lightweight options, like a compact tent or a hammock with a rainfly. The last thing you want is to be weighed down by heavy gear. I remember the first time I set up a tent; it was a game changer. Having a place to stay dry and shielded from the elements is crucial.
Consider a thermal or emergency protection blanket too. They don’t take up much room, and boy, they work wonders in keeping your body heat in when the temperatures drop at night!
Plus, a tarp can provide versatile options, whether you’re building a makeshift shelter or covering your gear during poor weather. It’s about thinking ahead and preparing for the unknown!
Adjusting for Seasons
Now, don’t forget to adjust your clothing and shelter based on the season. In the summer, you might prioritize breathable fabrics, while in winter, insulating layers become essential. I try to review my bug-out bag every few months, swapping out items as the seasons change.
Also, keep an eye on the weather, and if you’re going somewhere specific, make the necessary adjustments! You wouldn’t want to be caught in the wrong gear during extreme conditions.
This attention to detail can greatly increase your chance of survival and comfort while you’re out adventuring. Always think about where you’re headed and prepare thoroughly!
4. Important Documents
Identification and Legal Papers
When I first put together my bug-out bag, I completely overlooked documents! Your ID, insurance papers, and any legal documents should always be on your packing list. You never know when you might need to prove your identity or access emergency services!
Make copies of important documents and store them in a waterproof bag. Even a digital copy stored on a USB can come in handy, so you have access regardless of what happens to the physical copies.
Think about things like financial information, medical records, and any permits you require depending on where you’re heading. These details can make navigating emergencies that much easier!
Emergency Contacts
Keep an updated list of emergency contacts, too. If you’re in a bind, you need to reach your family, friends, or even emergency services quickly. I keep mine in my wallet and a copy in my bug-out bag in case I misplace my phone.
Consider including an emergency communication plan with instructions on how to contact each other in case of separation. This can ease a whole lot of stress during chaotic situations.
It helps to ensure that you are on the same page with those closest to you, reducing panic if something goes wrong. Plus, it’s good to have everyone’s contact information in one place.
Miscellaneous Documents
Additional documentation like property deeds, titles for your vehicle, and financial information can help you get back on your feet later if disaster strikes. I like to keep these in a separate, waterproof pouch just to be safe.
In some situations, you might also need maps of your area or lists of critical resources nearby. Think about your location and what kind of documents could be beneficial, and then stash them in your bag!
Having these important papers at your fingertips when you need them can make a huge difference, so don’t overlook this aspect of your emergency preparation!
5. Regular Maintenance and Updates
Check and Replace Supplies
Last but definitely not least is the regular maintenance of your bug-out bag. It’s easy to throw stuff in there and forget about it, but trust me, you need to check your supplies regularly! You don’t want to find out that your food has expired or your flashlight batteries are dead when it’s go-time.
I usually set a reminder to go through my bag every six months. I check the food items, swap out batteries, and ensure everything is still in working condition. It’s a quick process if you stay on top of things!
Plus, you’ll probably spot things that need to be reinforced or improved. Each review means your bug-out bag just keeps getting better!
Stay Informed
Staying updated on potential threats in your area and new survival techniques can impact your bug-out strategy. I like to read up on survival blogs or join local prepping groups to stay in the loop; there’s always something new to learn!
Also, try practicing your skills. Go out camping or hiking and actually use your gear! It helps you know how to best utilize your bag when you really need it.
Knowledge is power in emergency situations, so keeping your skills sharp is as important as the supplies you carry!
Adapt to Changes in Life Circumstances
Your needs might change based on your lifestyle, so don’t forget to adapt your bug-out bag accordingly. Whether you have kids, pets, or new hobbies, think about how these elements fit into your kit.
As life evolves, so should your bug-out strategy. If you know you’re gonna be in a different region soon, adjust your supplies to fit that area’s specific needs. Every detail matters!
Remember, being prepared for anything means being adaptable. Take that to heart as you review and update your bug-out bag regularly!
FAQs
1. What is a bug-out bag and why do I need one?
A bug-out bag is a portable kit that contains everything you might need in an emergency situation where you have to leave your home quickly. It’s essential for being prepared for situations like natural disasters or unexpected evacuations.
2. How often should I check my bug-out bag?
It’s a good idea to check your bug-out bag every six months. This way you can replace any expired supplies and ensure everything is in working order.
3. What should I prioritize when preparing my bag?
Your priority should focus on food, water, shelter, first aid supplies, and important documents. Outside of essentials, think about your personal needs and preferences!
4. Can I pack my bug-out bag too heavily?
Absolutely! A heavily packed bag can slow you down. Aim for lightweight, essential items and regularly assess what you truly need.
5. What if I have special needs or kids to consider?
If you have special needs or children, ensure your bug-out bag reflects their needs. Pack any necessary medications, foods, and supplies that are specific to them for a successful evacuation.