When I think about survival situations, one of the first things that pops into my mind is how to treat wounds. I’ve had my fair share of scrapes and cuts, and herbal compresses truly come to the rescue. Using fresh herbs like chamomile or calendula made into a compress can help reduce inflammation and promote healing.
You can make a compress by steeping the herbs in hot water and then soaking a clean cloth in this infusion. When you press it onto the wound, you’re not just applying moisture—you’re delivering those healing properties right where you need them. I’ve found this method incredibly soothing.
Just a heads-up though, always make sure the wound is clean before applying anything. It’s essential to avoid any kind of infection, which can really complicate healing. Trust me on this—I’ve learned the hard way!
Essential Oils for Disinfection
Essential oils like tea tree, lavender, and oregano come in really handy for disinfection. I always keep a small bottle of tea tree oil with me, as it’s known for its antibacterial and antifungal properties. When faced with a wound, diluting a few drops of the oil with a carrier oil can provide a natural disinfectant without the sting of conventional products.
Application is super easy; just dab it gently with a cotton ball on the affected area. I love the scent of lavender, plus it helps with relaxation—perfect when you’re stressed about being in a tough situation.
But remember, essential oils are potent! Always do a patch test to ensure you don’t have any allergic reactions. I can’t stress this enough; knowing your body’s reactions can make a world of difference.
Nutrients for Accelerated Recovery
Nutrition plays such a critical role in recovery that I can’t overlook it. I make it a point to consume plenty of vitamin C-rich foods like berries and citrus whenever I’m dealing with a wound. They help with collagen production and healing processes. If you can forage or have access to these foods in the wild, don’t skip them!
Additionally, incorporating protein sources like beans or nuts is vital in building new tissues. I’ve relied on nuts for energy and protein on numerous outdoor trips, and they’ve never let me down.
Remember, every little nutrient counts! Your body needs all the help it can get when bouncing back from injuries, so keep that diet packed with natural goodness.
Digestive Aids
Herbal Teas for Upset Stomachs
Upset stomach? Yikes! I’ve been there, especially after being out in nature for a few days with questionable cuisine. That’s when herbal teas come to the rescue. Peppermint or ginger tea can work wonders for soothing digestive issues. Just a few sips can help ease nausea and discomfort.
In the wild, I’ve managed to make ginger tea with wild ginger roots. It’s refreshing and works incredible magic on a troubled tummy. Make sure to steep the ginger properly, and you’ll feel that warm embrace soothing your insides.
And don’t forget about chamomile! That little flower has a calming effect on both your stomach and mind. Perfect combo in a tense situation, right?
Probiotics from Natural Sources
Keeping gut health in check is a survival priority, and fermented foods are packed with probiotics that can really help. Though in a tough situation, options might be limited, look for wild edibles that could have some fermentation properties.
I’ve often found wild dandelion greens—great for promoting digestion. They’re super nutritious, and I like munching on them when I feel off. Plus, they can help with nutrient absorption—so again, totally worth it!
If you have access to yogurt, that’s also a fantastic source of probiotics. Just one serving can boost your gut health immensely. I treat it like liquid gold during my adventures.
Natural Laxatives
In the world of survival, constipation isn’t just uncomfortable; it can actually become a serious issue. That’s why I always keep my eye out for natural laxatives like senna leaves or prunes, which help keep everything moving along.
Senna is a powerful herb that’s been traditionally used for its laxative properties. Just be cautious on dosages; I’ve learned the hard way that a little goes a long way! Steeping senna in hot water is the way to go for a relaxing drink.
And if you can find some wild berries or apples, they’re not only delicious—especially after a rough day—but they’ll also keep your digestive system functioning like clockwork. Easy, natural remedies right from nature!
Respiratory Relief
Steam Inhalation Techniques
Breathing issues? They can really put a damper on your survival situation. I’ve found that steam inhalation can work wonders. Whenever I have a cold or am dealing with congestion, simply boiling water and inhaling the steam can provide immediate relief. Adding a few drops of eucalyptus oil elevates the benefits even more.
To do this safely, I always keep a safe distance from the boiling pot—no one wants a face full of steam burns! Covering my head with a towel creates a mini steam tent that traps all that therapeutic goodness. It’s like a spa treatment wherever you are!
The warmth and moisture also help with throat irritations, which let’s be real, can happen way too easily when you’re out and about. Just give it a try next time you feel stuffy.
Natural Expectorants
If you’ve got a phlegmy cough, nature’s got your back! Some herbs like thyme and peppermint work as natural expectorants. I usually brew a strong herbal tea from these plants when I feel my throat getting scratchy. They’re not just soothing; they help loosen mucus too!
Making a simple syrup from honey and thyme is another trick I keep in my toolkit. If you’ve never tasted it, you are missing out! Not only is it sweet and enjoyable, but it works brilliantly to ease throat discomfort.
So next time you’re feeling under the weather, turn to your local herbs and see what they can do to help you breathe easier!
Herbal Cough Syrups
When I’m dealing with a nagging cough, I’ve found that homemade herbal cough syrups work wonders. Combining honey with herbs like marshmallow root or slippery elm creates a soothing mixture that coats the throat. It’s a game-changer for those stubborn coughs!
This is super easy to make—just mix the herbs with honey and let it infuse over a couple of days. I’ve even improvised with other sweeteners when honey wasn’t around, and it still did the trick. The key here is to keep it natural and gentle while soothing your throat.
It’s pretty cool knowing that I can whip up something effective from my surroundings or pantry, rather than relying on store-bought options that might not even be handy in a pinch!
Skin Care for Harsh Conditions
Natural Sunscreens
When you’re out in nature, protecting your skin from harsh sun rays is non-negotiable. I’ve experimented with various natural sunscreens using ingredients like coconut oil infused with shea butter and zinc oxide. It’s not only effective but also moisturizing, which is a bonus!
Mixing a little bit of carrot seed oil into the blend gives it added sun protection benefits. You can easily create a homemade sunscreen in a jar and warm it up before applying it as needed. I swear by applying this every few hours, especially during long hikes or outdoor activities.
But always remember to patch test any new concoctions on your skin before slathering it on. The last thing you want is a reaction that could ruin your adventure!
Moisturizers from Nature
Harsh environments can lead to dry, cracked skin, which is where natural moisturizers come into play. I’ve often used shea butter or even plain coconut oil to keep my skin hydrated. They’re simple yet incredibly effective and totally safe for sensitive skin too.
In addition, if you find aloe vera while out there, grab it! The gel is fantastic for soothing sunburns or dry patches. Trust me; I’ve turned to the aloe plant more times than I can count, and it never lets me down.
Making sure your skin stays soft can help avoid further complications or infections, so make this a priority when you’re in survival mode.
Natural Insect Repellents
Insects can really make survival situations harder, especially mosquitoes. I learned how to whip up natural repellents using essential oils like citronella and lemongrass mixed in carrier oils. Applying this blend, not only keeps the bugs away, but it smells good too!
I’ve also used witch hazel mixed with essential oils as a spray. It’s light, refreshing, and really practical. If I can’t find any ready-made version, this DIY spray comes in handy to keep those pesky insects at bay.
Remember, reapplication is key! These natural options might not last as long as chemical ones, but it’s still worth it to avoid those nasty bites.
FAQs
1. What are the best natural remedies for treating wounds?
Using herbal compresses, essential oils for disinfection, and ensuring good nutrition can greatly aid in wound healing.
2. How can I soothe an upset stomach naturally?
Herbal teas like peppermint or ginger are fantastic for settling stomach issues. Also, looking for wild edibles that can aid digestion is beneficial.
3. What should I do about respiratory issues while in the wild?
Steam inhalation and herbal expectorants, as well as making your own cough syrup with honey and herbs can help ease respiratory discomfort.
4. How can I protect my skin from the sun naturally?
Natural sunscreens made from coconut oil, shea butter and other ingredients provide a great barrier against sun damage while moisturizing your skin too.
5. What are some effective natural insect repellents?
Essential oils like citronella and lemongrass, mixed in a carrier oil or witch hazel, work effectively to keep insects at bay.
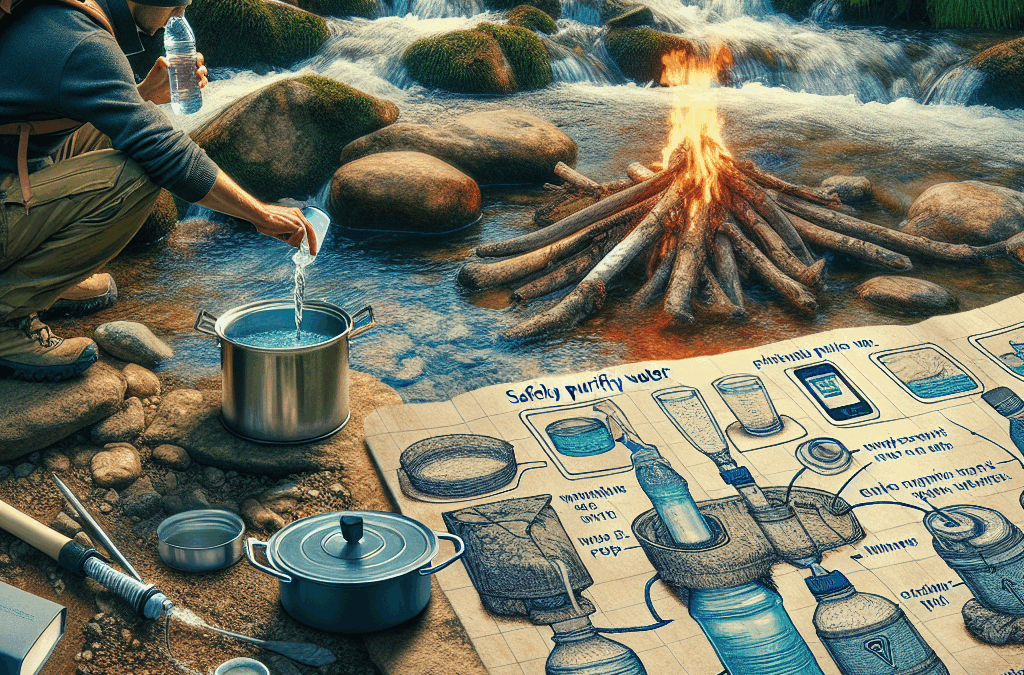
Hey there! So, you’re out in the wild, maybe hiking or camping, and you realize you need water. The good news is that nature provides, but you gotta be smart about it. Let me share what I’ve learned about purifying water in the great outdoors, covering five major methods that can keep you hydrated without getting sick!
Boiling Water
Why Boiling is Effective
Boiling water is one of the oldest and simplest methods, and it always amazes me how straightforward it is. The high temperatures kill off bacteria, viruses, and parasites. Basically, if you bring water to a rolling boil for at least one minute, you’re in the clear. If you’re at higher altitudes, you might wanna crank it up to three minutes just to be safe!
In my experience, I usually look for clear water—it’s a good sign that it’s probably cleaner than murky options, even though it’s not a guaranteed sign. Once I’ve got my water boiling, I’ll wait for a few minutes, and I can usually go back to enjoying the scenery while I wait.
One thing to remember when boiling water: it can take time. If you find yourself in a rush, this method could delay your plans a bit. Just keep your fire going and make sure you have everything set up before you get parched!
How to Boil Safely
Setting up an efficient boiling process is crucial. First up, make sure you’ve got a clean and suitable pot to hold that water, something you can use without worrying about toxins melting into your drink. Camping gear is often designed for this, but if you’re improvising, feel cautiously creative.
Next, keep your fire and the pot steady. Fire tends to just have its own feelings sometimes, especially when the wind kicks in. I always say, find a nice sheltered spot where you can keep the flames going strong.
Lastly, once you’re done, let the water cool before sipping. Trust me; you don’t wanna gulp down boiling hot water and end up with a nasty burn. Patience is key here!
Limitations of Boiling
While boiling is fantastic, it’s not without its limits. First off, it won’t remove chemical contaminants. If your water source is near industrial activities or agricultural areas, boiling might not help much. So it’s important to take a good look at where your water is coming from.
Another thing to keep an eye on is that boiling can use up precious firewood. If you’re in a spot where resources are limited, you might want to save that energy for cooking or warming up instead.
Lastly, don’t forget about the taste! Some folks find boiled water can taste a bit flat. You can always let it cool and add a bit of flavor if that’s your thing. A pinch of salt or some herbs might make your hike a bit more enjoyable!
Using Water Filters
The Benefits of Filtering
Water filters are arguably one of my go-to tools when I’m out exploring. They’re portable, usually lightweight, and super efficient. Filters can remove a range of contaminants, including sediment and bacteria. Plus, they often improve the taste of your water—definitely a bonus after a long day of hiking!
When I use my filter, I love how easy it is. Just scoop up your water and let it pass through. It’s like magic! Many personal filters can handle a surprising amount of water before needing replacement, which is a game-changer for those longer trips.
It’s essential to know that not all filters are created equal, though. Some are designed for wilderness conditions, while others are more suited for treating water that is already relatively clean. So definitely do your homework on what you’re buying!
Setting Up Your Filter
Setting up a filter is usually straightforward. I generally start by checking my filter’s instructions (not the most fun part, I admit!). It’s important to know how to assemble and use it properly so you don’t find yourself in a bind.
You’ll want to attach it to your water container or drink directly from the outlet if you can. I have found that there’s some finesse involved; make sure there are no leaks to avoid wasting good water. Once you’re set up, just collect the water as per the guidelines!
Don’t forget to clean your filters after use; they can get clogged up quickly if you don’t. Keep them washed and stored properly for your next adventure to keep them in tip-top shape.
Potential Downsides of Filters
While handy, filters can have their downsides too. For starters, they generally don’t handle chemicals or heavy metals well, which is another reason to keep an eye on your water source. Depending on your location, you may still catch a nasty illness.
Also, filters can be finicky. If you don’t maintain them, they can jam, leading to a frustrating experience when you’re in a pinch. I’ve had to deal with a slow filter before—talk about an exercise in patience!
Lastly, while many are lightweight, carrying a filter along with all your other gear can add extra ounces to your pack. Just keep that in mind when you’re packing for your trip!
Treating Water with Chemical Purification
Understanding Chemical Purification
Chemical treatments like iodine or chlorine tablets are lifesavers. They’re lightweight and simple to use—just pop one in a bottle of water and wait. I love how efficient they are, especially when I’m carrying a lot of gear and need to conserve weight.
These chemicals work by killing harmful bacteria and viruses. Most of the time, a simple wait of about 30 minutes is all it takes before you’re good to drink! They don’t need boiling water—another big plus when you’re on the go.
However, be aware that chemical purification does come with some flavor drawbacks. Some people find that the taste of iodine is pretty off-putting. I usually carry a little flavoring to help mask those strong tastes when necessary.
How to Use Chemical Purification
When using chemical tablets, start by following the manufacturer’s instructions closely. More tablets don’t mean faster purification, and that could lead you to a bad experience. I usually set a timer and take a moment to relax while I wait for it to do its magic.
Another tip is to mix the water beforehand if you can. Shaking it up ensures that the chemical distributes evenly. Just don’t get too carried away and splash it everywhere—you’ll only have that much water to work with!
Lastly, keep track of expiration dates on those tablets. Old chemicals can lose their effectiveness, and you definitely want your purification methods to be reliable, especially when you’re far from home.
Safety Concerns of Chemical Treatments
While chemical treatments can be effective, they also have their risks. Iodine is not recommended for pregnant women or those with thyroid issues. Plus, prolonged use isn’t advised either, so it’s best for short trips.
Another thing to remember is how chemicals can affect the taste and smell of water. You might tolerate it, but it could be a bit much for guests. This is when carrying some sugar or flavoring can come in handy to make things more pleasant!
Lastly, don’t forget that chemical purification doesn’t address physical contaminants or sediment. So if you’re dealing with muddy or foul-looking water, it’s best to filter or let sediment settle before you drop those tablets in.
Using UV Light Purifiers
The Magic of UV Light
Ultra-violet light purifiers are some truly cool gadgets. They’re compact and efficient, completely taking out bacteria and viruses with their light. No chemicals, no boiling—just light! I can’t tell you how awesome it feels to push a button and know the water is getting zapped.
However, you need to have batteries or a rechargeable source, which can sometimes be a pain to manage when you’re off the grid. I always try to plan ahead and bring extra batteries just in case!
Another thing to watch out for is water clarity. If your water has a lot of particulates, UV light won’t work as well. Turbid water can block the light, so always aim for clearer sources!
How to Utilize a UV Purifier
Using a UV purifier is typically straightforward. First, check to make sure your unit is functioning and the batteries are good to go. It’s also important to have a clear receptacle for the water—some purifiers require drinking bottles, while others can be used in any container.
Then, immerse the UV light in the water for the time specified in the instructions (usually around 30 seconds to several minutes). I love how simple it is—just watch the light and know that you’re treating your water effectively!
Once time’s up, your water is ready to drink. Just give it a quick shake if your purifier allows for that, and you’re set! Easy peasy.
The Limitations of UV Light Purification
Even though UV light is great, it’s not a complete replacement for other methods. Like I mentioned, it won’t deal with sediment and particulates. If your water is cloudy, you should probably filter it before zapping it with UV light.
Also, when using the UV light method, don’t forget that it requires a power source. If you’re camping for an extended time, keeping those batteries charged might become an issue! I usually scope out solar chargers if I think I’ll be relying on it a lot.
Lastly, make sure you’re aware of how long it takes to purify your water. This method can be quick, but if you don’t pay attention, it may hold you back from your plans. Timing is everything, especially when there’s adventure calling!
FAQ Section
1. Is it safe to drink water directly from rivers or lakes?
Not without purifying it first! Natural water sources can contain harmful bacteria and viruses that can make you sick, so always use a purification method before drinking.
2. How long does it take to boil water for purification?
You need to bring it to a rolling boil for at least one minute. If you’re at a higher altitude, run it for at least three minutes to ensure it’s safe.
3. Are chemical purification tablets effective?
Yes, they are effective for killing bacteria and viruses. Just make sure to follow the instructions and check for any health concerns with iodine if that’s what you’re using.
4. What water filter should I use for wilderness camping?
A good backpacking filter is essential. Look for one that’s lightweight and can handle pathogens and particulate matter. Do your research to find a product that’s reputable for wilderness conditions.
5. Can UV light purifiers handle cloudy water?
No, UV light won’t be effective on cloudy or turbid water as particulates can block the light from reaching pathogens. You should always filter the water first if it appears murky.
Disasters can strike at any moment, often without warning. Whether it’s a natural calamity like a hurricane or earthquake, or a man-made crisis such as a chemical spill or terrorist attack, understanding the types of disasters that could impact your area is crucial. By familiarizing yourself with potential threats—like floods, wildfires, tornadoes, and public health emergencies—you can better strategize your preparedness efforts. Each region has its own unique risks based on geography and climate; knowing these allows you to anticipate what you need to prepare for.
Once you’ve grasped the landscape of potential disasters, it’s time to create an emergency plan tailored to your household’s specific needs. Start by discussing the various scenarios with family members. Ensure everyone understands how to communicate during an emergency—whether through phone calls or texts—and designate meeting points in case you get separated. Identify safe locations nearby where you can seek shelter if necessary, and consider including neighbors in this planning process for added security and support.
Moreover, think about the resources each family member may require. This includes not only basic needs but also any medical assistance required for children or elderly relatives. Once you’ve discussed these details openly and established a clear action plan, document it all in writing. Keep copies accessible at home and stored digitally so that they’re easy to access when needed most.
Next on your preparedness checklist should be assembling a disaster supply kit—a vital resource that could mean the difference between chaos and calm during an emergency situation. Your kit should contain essential items like non-perishable food, bottled water (one gallon per person per day), first aid supplies, flashlights with extra batteries, personal hygiene products, important documents (such as IDs and insurance papers), and even cash in small denominations.
Additionally, don’t forget about unique needs! If you have pets, include their food and medications too. Other useful items might include multi-tools or Swiss knives, blankets for warmth or comfort during uncertain times, and maps of your local area for navigation when technology fails.
But preparedness doesn’t stop once you’ve created a plan and gathered supplies; staying informed is equally important for effective disaster response. Various resources are available to help keep you updated on safety protocols and emerging threats specific to your community. Local government websites often provide alerts regarding weather patterns or emergency declarations while organizations like FEMA offer comprehensive guidelines on readiness.
In addition to official channels, consider community networks—social media platforms can serve as critical lifelines during crises—but ensure you’re following trusted sources only to avoid misinformation during chaotic times. Also look into local workshops on disaster preparedness; many communities host training sessions that cover everything from CPR techniques to evacuation drills.
In conclusion, being prepared means taking proactive steps today so that you’re ready tomorrow when disaster strikes unexpectedly. Understanding potential dangers unique to your region lays the groundwork for developing an actionable emergency plan while building a well-stocked supply kit ensures you’re equipped to handle whatever comes your way. Staying informed through reliable resources keeps knowledge fresh as conditions evolve over time! Remember: disasters don’t wait—neither should we!