In an unpredictable world, being prepared for emergencies is not just a smart choice; it’s a crucial responsibility. Whether natural disasters like hurricanes and earthquakes are frequent in your area or man-made crises loom, understanding the risks and preparing accordingly can make all the difference when the unexpected strikes.
*Understanding the Risks: Assessing Potential Emergencies in Your Area**
The first step towards emergency preparedness is recognizing what threats you might face. Each region has its unique set of challenges—coastal areas may contend with floods or hurricanes, while urban settings could be more susceptible to industrial accidents or civil unrest. Start by researching local historical data about disasters that have occurred. Engage with community resources and local government websites to glean information on potential hazards. This knowledge isn’t merely academic; it empowers you to take proactive measures tailored to your specific circumstances.
*Essential Supplies: Building Your Comprehensive Emergency Kit**
An emergency kit is invaluable during crises. But what should it contain? Begin with the essentials: non-perishable food items, bottled water (at least one gallon per person per day), first aid supplies, flashlights, batteries, and a multi-tool can form the backbone of your kit. Don’t forget medications you or any family member may need, as well as important documents stored in waterproof bags.
Consider adding comfort items too—a favorite book, games for children, or extra blankets. You never know how long you might be without power or access to normalcy during an emergency. Regularly check and update your kit every six months; replace expired food and medications and adjust according to changing family needs.
*Creating a Family Emergency Plan: Communication, Evacuation, and Safety**
A well-thought-out family emergency plan can save lives. Begin by establishing clear communication lines among family members—who will call whom? Designate an out-of-town contact who can serve as a central point of communication if local lines go down.
Next, outline evacuation routes from your home and identify safe meeting points where everyone knows they should go if separated. Familiarize yourself with local shelters too—they might be necessary if staying at home isn’t feasible due to safety concerns.
Incorporating drills into this plan can be beneficial as well; practice fire drills or evacuation exercises so that everyone feels confident in their roles during real emergencies.
*Staying Informed: Utilizing Technology and Resources for Real-Time Updates**
In today’s digital age, staying informed is easier than ever but requires intentionality. Sign up for alerts from local weather services or disaster management agencies via text message or app notifications—these tools provide real-time updates on emergencies unfolding in your vicinity.
Social media platforms can also serve as valuable resources for community-driven updates; follow local news outlets for immediate information about unfolding situations. Moreover, consider downloading emergency preparedness apps that offer checklists, tips on coping strategies during crises, and even maps that guide you toward safety locations.
Preparedness isn’t just about stuffing supplies into a bag; it’s creating a culture of readiness within yourself and your loved ones through awareness and action. By assessing risks specific to your area, curating essential supplies carefully tailored for your needs, establishing effective communication plans within your household, and leveraging technology for timely information—you’re not only safeguarding yourself but also reinforcing resilience within your community.
When it comes to disaster preparedness, the mantra “hope for the best but prepare for the worst” resonates deeply. Whether it’s a natural catastrophe like a hurricane or an unforeseen event such as a wildfire, being ready can make all the difference. Here’s how you can ensure your family stays safe no matter what challenges arise.
*Understanding the Risks: Assessing Potential Disasters in Your Area**
The first step toward effective disaster preparedness is understanding what hazards could impact your home. Each region has its unique risks; coastal areas often face hurricanes or flooding, while places prone to earthquakes may require different strategies. Research local historical events and consult resources like FEMA (Federal Emergency Management Agency) or your state’s emergency management office for insights into potential disasters in your vicinity. By identifying these risks, you can tailor your emergency plan accordingly.
*Creating Your Emergency Plan: Steps to Keep Your Family Safe**
Once you’re aware of the threats lurking outside, it’s time to create an emergency plan that outlines specific actions you and your loved ones should take. Start by designating a meeting point both inside and outside your home—this ensures that everyone knows where to go if things get chaotic. Next, ensure each family member understands their role during an emergency. Discuss escape routes from your home and establish communication protocols if separated. Remember, clarity is vital; practice makes perfect!
*Essential Supplies: Building Your Disaster Preparedness Kit**
An essential part of any preparedness plan is having a well-stocked disaster kit ready at all times. Aim for enough supplies to last at least three days; this includes water (one gallon per person per day), non-perishable food items, first-aid supplies, flashlights with extra batteries, and vital medications. Don’t forget personal documents—keep copies of identification and insurance papers in a waterproof container within your kit. Incorporate items that cater to unique family needs like baby formula or pet food as necessary.
*Staying Informed: Utilizing Alerts and Information Sources**
In times of crisis, having access to real-time information is crucial. Sign up for local alerts through government websites or mobile apps that provide updates on weather warnings or evacuation orders relevant to your area. Additionally, consider investing in a NOAA weather radio which broadcasts emergency messages 24/7—even when cellular networks might be down. Staying informed not only keeps you aware but also empowers you to make timely decisions.
*Practicing Your Plan: Drills and Preparedness Activities**
Drafting an emergency plan is just the beginning; practicing it brings it to life! Schedule regular drills with your family so everyone feels confident about what to do when danger strikes—whether it’s simulating an evacuation or finding shelter during severe weather conditions. Use these practice sessions as opportunities for constructive feedback so that improvements can be made over time.
*Community Resources: How to Collaborate for Better Safety**
Lastly, remember that disaster preparedness doesn’t happen in isolation—it thrives through community collaboration! Connect with neighbors, local organizations, and emergency services about upcoming workshops or training sessions focused on safety measures within your neighborhood. Pooling resources fosters resilience among residents while creating communal bonds that strengthen support networks during emergencies.
By taking these proactive steps toward disaster preparedness at home and beyond, you’re not just safeguarding yourself but also contributing positively towards building resilient communities capable of facing whatever challenges may lie ahead.
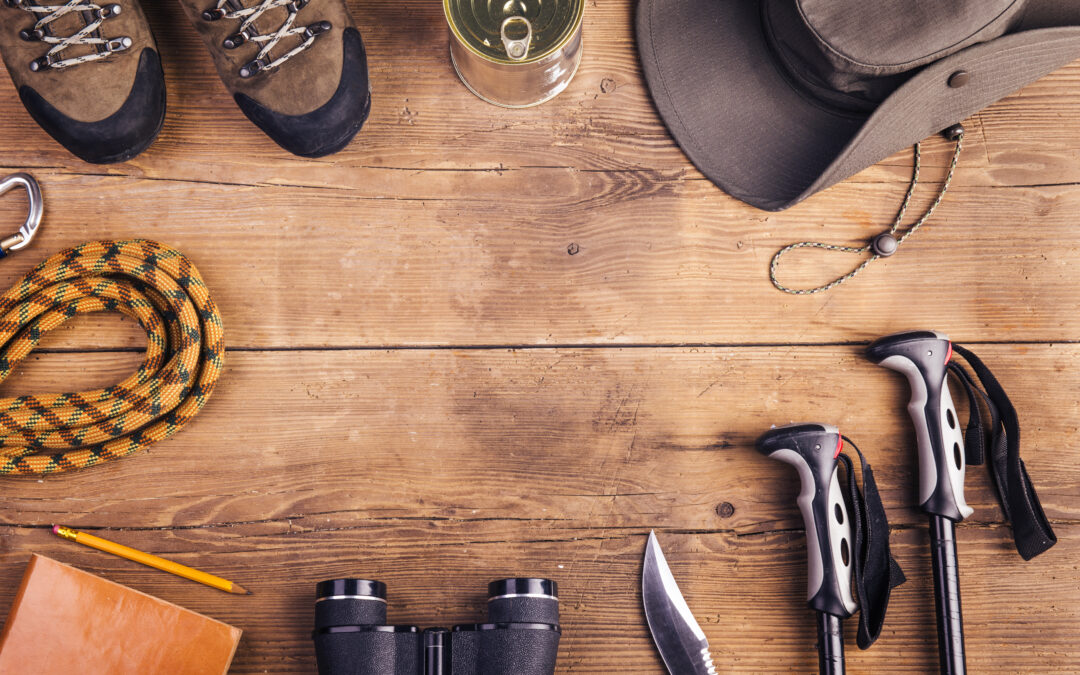
Surviving in tough situations often requires creativity and a bit of resourcefulness. I’ve found myself in some predicaments where household tools have come to the rescue in surprising ways. Here, I’m going to share five essential areas where you can leverage common household tools to enhance your survival skills. Grab your toolbox and let’s jump right in!
Creating Shelter
Using Tarps and Ropes
When it comes to building a quick shelter, nothing beats a sturdy tarp. I’ve found tarps to be incredibly versatile; they can be used to create a makeshift tent. Just find some sturdy trees, drape the tarp over, and secure it with ropes. It’s an efficient way to keep dry, especially if rain isn’t in your favor.
Ropes, or even strong cords, are your best friends here. I usually keep an extra roll of paracord handy for various outdoor tasks. Tying knots can turn a simple tarp into a robust structure; learn a few basic knots like the bowline or taut-line hitch, and you’ll be well-prepared.
Don’t underestimate the importance of windbreaks. Even if you can’t create a full-fledged shelter, arranging tarps to block wind can significantly improve your comfort level. A little creativity goes a long way when you’re crafting your survival setup.
Improvising Walls
If you find yourself in an urban area, I recommend looking around for materials you can use to shore up your shelter. Old pallets, cardboard boxes, or even large pieces of furniture can work wonders as additional walls. I once used furniture from a friend’s yard to create a barrier against wind and cold—desperate times call for imaginative measures!
Secure these materials with whatever fasteners you have on hand; screws, nails, or even heavy-duty tape can do the trick. Make sure everything is secure once you put it together. Trust me, there’s nothing more unsettling than feeling your shelter collapse during a storm.
Ventilation is key. If you’re sealing off a space for warmth, ensure there’s some airflow to avoid suffocation. A simple opening between barriers can help keep things breathable while offering some protection from the elements.
Insulating for Warmth
Once you’ve set up your shelter, keep it warm. Blankets, sleeping bags, or even old clothes can be used for insulation. I often use my old comforters to line the ground inside the shelter; it makes a world of difference for heat retention.
You might even consider gathering leaves or pine needles to further insulate your shelter. They’re plentiful in the wild and surprisingly effective. Layer them against the walls of your shelter for added warmth; just be cautious of critters who might want to take up residence too!
Lighting a small fire nearby, while ensuring it’s safe, can also help. I always have a small portable stove or camping kettle handy to heat up some food or drink, it not only nourishes but helps in heating the surrounding areas. Just remember, fire needs to be managed and always watch it closely!
Finding Food
Using Knives and Cutting Tools
A good knife is a vital tool in any survival situation. Whether I’m foraging for edible plants or preparing gathered berries, having a sharp blade at my side makes things a million times easier. I actually got my first bushcraft knife years back and have adjusted to relying on it for countless culinary gaps in the wild.
When you’re on the hunt for food, make sure many knives can do more than one job. Your kitchen knives can slice fruits and gut fish. I’ve often skinned small game using a sturdy knife, and trust me, it’s a lot easier than using your bare hands!
Also, having cutting tools helps in creating traps for small game. A simple mechanism made with branches and your knives can catch some pretty decent meals. It takes patience, but it can pay off when hunger strikes.
Foraging for Local Plants
It’s essential to familiarize yourself with local flora. I can’t stress enough how learning what’s edible can save your butt. From dandelions to wild berries, the woods are teeming with food. I remember the first time I discovered an abundant patch of wild raspberries; it felt like striking gold!
Books or apps on foraging can help in identification. I always carry a small guide with me if I’m venturing into new areas. You never know what may catch you off guard, and knowing what to eat is key. Just remember to be cautious of poisonous lookalikes!
And for those who can’t identify, it’s generally safer to stick to widely known edible plants. Ensure you research or ask someone knowledgeable beforehand; nobody wants a wild mushroom turning into a bad trip!
Fishing and Gathering
A good fishing rod isn’t always available, but that should not stop you. Household items like a coat hanger can make a decent fishing hook. Line it with string or use some thread and a sturdy stick. I’ve successfully caught fish with makeshift rods more times than I can count!
Don’t overlook gathering either. Things like snails, clams, or other seafood can also become part of the meal if you find yourself by a water body. Just make sure you check local guidelines for collecting, taking too many can affect the ecosystem.
Learn some basic fishing techniques: casting, baiting, and reeling in your catch are vital skills. It’s like riding a bike—it takes a bit to get the hang of it, but the dividends of freshly caught fish make it worthwhile!
First Aid and Safety
Improvised Bandages
When injuries occur in survival situations, having a means to provide first aid can be life-saving. Old t-shirts or bandanas can be transformed into bandages for cuts and scrapes. I often rip an old shirt into strips to make sure I always have something handy.
For deeper wounds, I recommend packing the cloth into the wound and applying pressure. Your goal is to control bleeding, and sometimes a bit of creativity can save a trip to the hospital if you take a bad fall!
Don’t forget to keep your tools clean. If you can get your hands on some disinfectant—be it rubbing alcohol or even soap and water—it’s essential to take that extra measure to prevent infection. It’s always worth it to have a clean environment when tending to injuries.
Using Tape for Splints
When you’re in a pinch, tape can work wonders. Duct tape is incredibly rigid, and I’ve used it to create splints for sprained or broken fingers. Simply align the injured limb alongside a sturdy stick, pad the area, and wrap it securely with tape. It might look a little goofy, but hey, we’re here to survive, right?
Some creative use of tape can help with other minor injuries too. Tape can also be used to pull together small cuts or secure bandages in place. It may seem simple, but it’s a real game changer in the field.
It’s important to assess how serious the injury is. If someone’s in critical condition, it’s best to look for professional help instead of solely relying on makeshift solutions.
Establishing Communication
In survival scenarios, communication can often save lives. Simple items like whistles can be useful to signal for help if you find yourself lost. It’s easier to blow a whistle than scream until your throat is raw!
If you have a mobile phone with a charge, even better! I’ve found myself in remote areas but with some semblance of service. Always check in with your loved ones before going on adventures, as it’ll make life easier if something goes awry.
Map reading is also a handy skill. If you’re venturing out, downloading offline maps or jotting down key details from brochures can guide you when technology fails. I’ve gotten turned around on trails before and a quick glance to a map can save you from wandering too far.
Purifying Water
Using Filters
Water purification is crucial for survival. Simple filters can be crafted using charcoal, sand, and small rocks. Brush up on your DIY filtration skills; I never go hiking without learning a few tricks to make this! Simply layer these materials in a container and pour dirty water through. It might not be perfect, but it’ll help get rid of larger impurities!
Always remember that boiling water is an effective method too. If you have access to a heat source, boil the water for about 5 minutes. It’s a tried and true way to make sure most pathogens are eradicated.
It’s also wise to carry a few purification tablets if you can. They don’t take up much space and can be a lifesaver if you find yourself without clean drinking water.
Collecting Rainwater
If you’re stuck in a place long enough, rainwater can be collected for drinking. I usually set up a makeshift collection system using a tarp to funnel water into a container. It’s a simple and effective way of gathering fresh water.
However, always ensure you’re collecting in a safe area away from contaminants such as roadside debris or animal waste. Nature sounds beautiful, but it has its dirt too!
Once collected, always strive to purify this water before drinking. Even though it may seem clean, there could be impurities that we can’t see.
Using Household Items to Store Water
Having containers is a must for water storage. Old soda bottles or jars can be repurposed beautifully for this need. Make sure they’re cleaned properly before use to avoid mixing odors or tastes from their previous contents.
When storing water long-term, designate containers solely for this purpose. They can be conveniently stashed in your emergency kit and delivered away in case of any necessity.
My best tip? Make sure to label your containers. You’re less likely to drink from something you accidentally thought was a potion during a midnight snack!
Frequently Asked Questions
1. What tools are essential for household survival?
Some essential tools include knives, paracords, tarps, and basic first aid supplies. These can help you create shelter, gather food, and take care of injuries.
2. How do I purify water in a survival situation?
You can purify water by boiling it for at least five minutes, using DIY filters made of sand and charcoal, or using purification tablets.
3. What’s the best way to create a makeshift shelter?
The easiest way is to use a tarp and ropes to create a cover between trees, ensuring it’s secured well and insulated for warmth.
4. How can I find food in the wild?
You can find food by foraging for edible plants, making makeshift traps, or using simple fishing techniques with household tools.
5. What if I get injured while out in the wild?
Use improvised bandages made from clothing, tape for splints, and try to keep the area clean. Seek help as soon as possible if seriously injured.