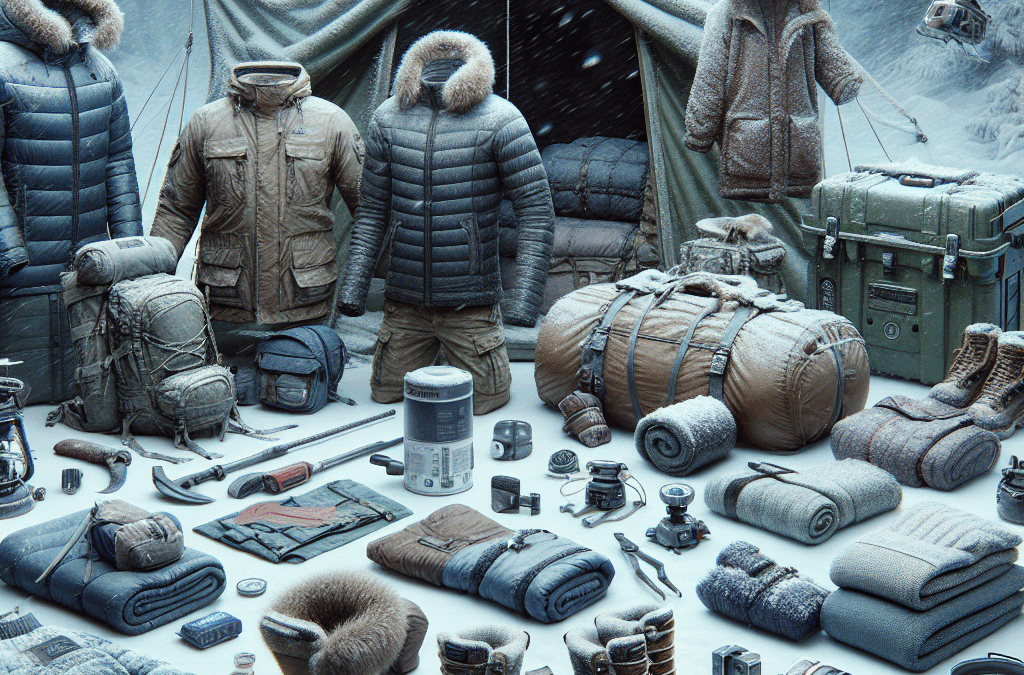
When it comes to surviving harsh weather, layering is a game changer. I always start with a moisture-wicking base layer that keeps the sweat away. Trust me, feeling soggy is the last thing you want when the temperatures drop.
Next, I add an insulating mid-layer. This could be a fleece or down jacket, depending on how cold it is. I remember one trip where my fleece saved me from freezing; I was so grateful for that extra warmth!
Finally, I finish off with a waterproof and windproof outer layer. A good shell jacket protects me from harsh winds and rain. I once got caught in a downpour, and my high-quality jacket was the only thing keeping me dry—worth every penny!
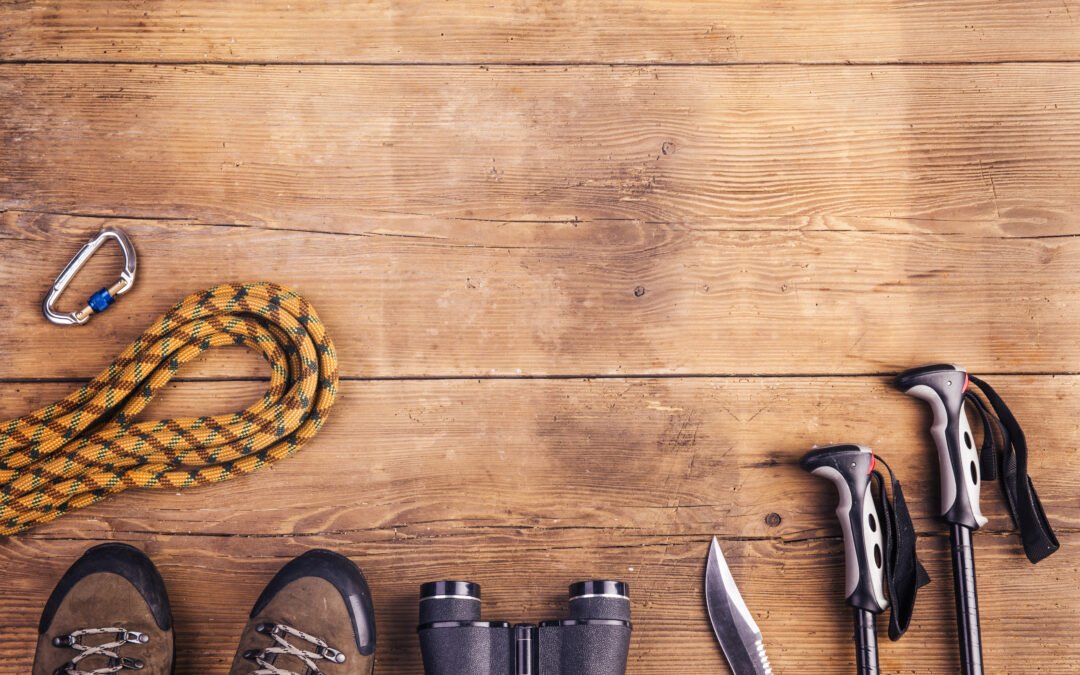
Footwear Matters
Let’s talk boots. I’ve learned the hard way that the right footwear is crucial. Insulated and waterproof boots are essential to keep my feet warm and dry. You wouldn’t want to be hiking in soggy shoes—trust me!
I also make sure my boots have good traction. Slips and falls in snowy or icy conditions can really ruin a good trip. I like to pick ones with Vibram soles, as they help grip better on slippery surfaces.
Lastly, don’t forget about warm socks! Wool socks are my go-to. Not only do they keep my feet cozy, but they also wick away moisture, which helps prevent blisters during long treks.
Accessories for Protection
Accessories may seem minor, but they make a big difference. I always pack a good hat that covers both my head and ears. On cold days, it can trap warmth and stop the chilling wind from making my ears turn red.
Gloves are just as important! I prefer layered gloves: a thinner glove underneath for dexterity and a thicker, insulated glove on top. I once tried to make a fire with cold fingers, and let’s say it didn’t go too well.
Lastly, don’t overlook sunglasses! Snow glare can be brutal, and UV rays reflect off white surfaces surprisingly well. Protecting your eyes can save you from headaches and enhance your visibility in those bright snowy landscapes.
Navigation Tools
Compasses and Maps
In the wilderness, relying solely on technology can backfire. I always have a trusty compass and a physical map handy. GPS devices can fail, especially in remote areas, so it’s essential to know how to read a compass.
When I first started hiking, I got lost because I didn’t have a map. It was a learning moment! Now, every adventure comes with a printed map of the area, annotated with trails I plan to take.
Plus, learning how to navigate can be incredibly rewarding. There’s something empowering about orienting yourself with a map and compass—it connects you to the land in a way that technology rarely does.
Portable GPS Devices
While maps are important, I do enjoy the convenience of portable GPS devices. They can provide real-time information about your location, altitudes, and even track your route. Just make sure to carry extra batteries or a solar charger!
During my last camping trip, the GPS really came in handy when we accidentally wandered off the track. It helped us get back on a safe path quickly. Technology can be your buddy if used wisely!
However, it’s crucial to know how to use them properly. Don’t just rely on it. Always check any devices before heading out to ensure they’re updated and functional.
Emergency Beacons
In the event of a serious situation, having an emergency beacon can be a lifesaver. These devices send out distress signals that can go a mile in getting you help. I always keep one in my pack, just in case.
I remember a camping trip in a remote area where our group faced sudden weather changes. Having that beacon gave us peace of mind that if things took a drastic turn, we could call for help.
Moreover, many beacons are now compact and lightweight, making it easy to include them as part of my gear without adding much bulk. Safety is always worth the extra weight!
Shelter and Sleeping Gear
Tents and Tarps
A good shelter is critical. I prefer those lightweight tents that are easy to set up and pack away. They provide a cozy place to sleep and protect me from wind, rain, and critters.
Tarps also play an important role. I often use a tarp in versatile ways, whether it’s as an extra layer for my tent or even to create a makeshift shelter when I need it. There’s something satisfying about finding multiple uses for one item!
Just remember to check the weather forecast before your trip and choose a tent suited for the conditions you might face. There’s nothing worse than being caught unprepared!
Sleeping Bags
Choosing the right sleeping bag can make or break your outdoor experience. I always look for bags that are rated for at least ten degrees cooler than the expected night temperatures. Trust me; you won’t want to wake up shivering!
Also, pay attention to the weight and compressibility. If I’m hiking, the last thing I want is to haul around a bulky bag. I’ve found that a good down bag strikes the balance between warmth and packability.
Before heading out, I always check for drafts, zippers issues, and any holes in my sleeping bag. A good night’s sleep can keep you energized for the adventures ahead!
Ground Pads
Never underestimate the comfort of a good ground pad! It serves as insulation from the cold ground and adds a bit of cushioning. After trying multiple types, I usually opt for inflatable pads as they’re lightweight and easy to pack.
I remember a backpacking trip where I didn’t bring an insulated pad, and I ended up feeling every rock underneath me! It was a rough night, and I realized comfort is key to enjoying the journey.
Investing in a good ground pad is worth every penny, especially on long expeditions where good rest can make a huge impact on your physical and mental state.
Cooking Gear
Portable Stove
Having a reliable stove transforms camping meals from bland to delightful. I always carry a lightweight portable stove, which makes cooking outdoors super easy. Even boiling water for coffee feels like a treat!
When choosing a stove, consider its fuel efficiency and ease of use. Some stoves run on multi-fuel options, allowing me to adapt to the resources I have at hand. Nothing is worse than running out of fuel miles away from camp!
Plus, cooking can be a fun activity, especially with friends or family, making mealtime a shared adventure. Good food not only warms your belly but warms your spirit, too!
Cookware and Utensils
In my experience, lightweight and durable cookware is essential; it should be able to withstand the rigors of the outdoors yet not weigh you down. I typically pack a multipurpose pot and pan that can handle various meals.
Don’t forget utensils! A good spatula and a sturdy spoon have saved me countless times while preparing meals. It pays off to have a dedicated set of easy-to-clean utensils so that I can enjoy great food without unnecessary hassle.
Lastly, be sure to bring along a trash bag for proper disposal of waste. Keeping nature clean is important, and it also makes life easier when you pack out your garbage with your gear!
Food Supplies
When it comes to food, preparing ahead can save you time and stress. I always pack non-perishable items like nuts, dried fruits, and energy bars for quick snacks on the trail. They keep me fueled up throughout the day!
For meals, I prefer dehydrated food packets. They’re lightweight and easy to cook; just add water. I couldn’t believe how enjoyable dehydrated meals could be until I tried them!
Lastly, don’t forget about hydration! Carry a water filter or purification tablets to ensure you have access to clean drinking water. Staying hydrated keeps my energy levels up, especially after long hikes!
First Aid and Emergency Gear
First Aid Kits
A well-stocked first aid kit is essential for any outdoor adventure. I always make sure mine contains items like adhesive bandages, antiseptic wipes, and pain relief medication. A little preparation goes a long way in case of a minor mishap.
Additionally, I add some specialized items like blister pads or even a snake bite kit, depending on the terrain I’ll be exploring. It’s all about considering the unique risks of your specific adventure.
Taking a wilderness first aid course can also enhance my skills significantly. Knowing how to handle injuries on the spot can make a world of difference in an emergency situation!
Emergency Blankets
Compact emergency blankets are lifesavers. They’re lightweight and keep heat in, which can be crucial if someone is feeling overly cold. I always pack a couple in my pack, just in case.
Using an emergency blanket isn’t just about warmth, either; it can serve multiple purposes, like reflecting light for signaling or shielding from rain when necessary. It’s such a versatile piece of gear to have!
One day, we got stuck out in unseasonably cold weather, and having those emergency blankets made a big difference for our comfort level. You never know when they’ll come in handy!
Whistles and Flashlights
A whistle is a simple tool that packs a big punch in emergencies. It can carry much farther than a shout, making it invaluable if you’re separated from your party or in need of help.
Flashlights (along with extra batteries) are essential for navigating dark conditions. I prefer headlamps because they keep my hands free for tasks. The last thing I need is to fumble around in the dark!
These small pieces of gear can really provide comfort and security in unfamiliar situations, making them must-haves in my survival kit.
Conclusion
Equipping yourself with the right survival gear for harsh weather conditions isn’t just about surviving; it’s about thriving during your adventures. Each piece of gear has a specific role that can make your journey safer and more enjoyable.
Whether you’re trekking through snow, rain, or extreme temperatures, proper gear makes all the difference. Listen to your instincts, rely on what works for you, and enjoy the great outdoors without fear!
FAQs
1. What are the most important layers of clothing for harsh weather?
The most important layers are a moisture-wicking base layer, an insulating mid-layer, and a waterproof outer layer. This combination helps regulate temperature and keep you dry.
2. How do I choose the right cooking gear?
Opt for lightweight and durable cookware that fits your needs. Consider the types of meals you plan to prepare and pack multipurpose items to save space and weight.
3. What should I include in my first aid kit?
Include adhesive bandages, antiseptic wipes, blister pads, pain relief medication, and emergency items specific to your needs or the environment you’ll be in.
4. Are portable GPS devices reliable?
Yes, but it’s important to have backup options like maps and compasses. Always check that the devices are functioning properly before heading into the wilderness.
5. How can I stay safe in extreme weather conditions?
Be prepared with the right gear, know your limits, stay informed about the weather, and always have an emergency plan in place. Trust your instincts while in the outdoors!
In a world that often feels unpredictable, the importance of emergency preparedness cannot be overstated. Natural disasters, health crises, and unexpected emergencies can strike at any time. Understanding the need for preparation is the first step in safeguarding yourself and your loved ones.
*Understanding the Need: Why Emergency Preparedness Is Critical**
Why should you invest time and resources into preparing for emergencies? The answer is simple—uncertainty. From hurricanes to pandemics, various events can disrupt our lives without warning. These situations may lead to power outages, food shortages, or even evacuation orders. Preparedness allows individuals and families to respond effectively rather than react impulsively when faced with a crisis.
*Essential Supplies: What to Include in Your Emergency Kit**
An effective emergency kit is your frontline defense. Start by stocking up on essentials such as water (one gallon per person per day for at least three days), non-perishable food items, a flashlight with extra batteries, a first-aid kit, and any necessary medications. Don’t forget important documents like insurance papers and identification—store them in a waterproof container! It’s also wise to include tools like multi-tools or duct tape; these versatile items could prove invaluable during an unforeseen event. Tailor your kit based on the specific risks you face in your area—whether it’s floods, earthquakes, or wildfires.
*Creating a Family Emergency Plan: Communication and Safety Strategies**
Having supplies is only part of the equation; creating a family emergency plan is equally crucial. Sit down with your family members and discuss potential scenarios you might encounter. Determine meeting points in case you’re separated and designate an out-of-area contact who can relay messages if local communication fails. Practice escape routes from your home; ensure everyone knows how to respond when danger strikes. This proactive approach not only enhances safety but also fosters unity among family members during stressful times.
*Staying Informed: The Role of Information in Crisis Situations**
Knowledge is power—especially during emergencies! Make staying informed part of your preparedness strategy by subscribing to local alerts through weather apps or community notification systems. Social media platforms can provide real-time updates as well but remember to verify information before acting on it; misinformation can lead to panic or poor decision-making. Also consider keeping a battery-operated radio handy—it can be a reliable source of updates if power goes out.
*Practicing Preparedness: Drills and Training for All Scenarios**
Preparedness isn’t just about gathering supplies; it requires practice too! Conduct regular drills with your family so everyone understands what actions they need to take during various emergencies—from fire evacuations to severe weather warnings. Consider enrolling in classes that teach basic first aid or CPR techniques; these skills could save lives when seconds matter most.
*Beyond the Basics: Community Resources and Support Networks**
Finally, don’t underestimate the value of community resources! Local organizations often provide training sessions or disaster response workshops that equip residents with vital skills and knowledge. Building relationships within your neighborhood creates a support network that can be indispensable during tough times—a united front tends to weather storms better than individuals alone.
Emergency preparedness isn’t just about surviving; it’s about thriving amid chaos. By understanding its importance and taking proactive steps now, you’ll feel more secure facing whatever uncertainties lie ahead!
After a disaster hits, the first thing that rushes to my mind is checking on everyone around me. Are we all safe? It’s not just about me—I’m looking for my family, friends, and even neighbors. I usually shout out names to make sure everyone is accounted for. This can feel a bit chaotic, but I think it’s important to ensure everyone is still standing on their feet, both physically and mentally.
If someone is hurt, that’s a whole different ballgame. I’ve learned that staying calm is key. First aid knowledge comes in handy, so I try to remember those basic steps. If medical help is needed, I wouldn’t waste time; I’d grab my phone and call for assistance right away. Time is of the essence, after all!
Sometimes, though, it’s the emotional safety that needs checking too. I try to observe how people are reacting—anxiety, fear, even shock are common. Sometimes all it takes is a reassuring word or even just being present to help someone feel a little more grounded again.
Evacuate if Necessary
Know When to Leave
Now, trying to figure out if I need to head out of dodge can be tricky. Disasters can come in all forms—flood, fire, hurricanes—each with their own set of warning signs. A few years back, I was caught in a flash flood warning and didn’t think much of it until I saw water creeping into my living room. It was a wake-up call. I had to learn that sometimes, leaving is the best option.
I keep an eye on alerts, whether it’s through an app or local news. It’s surprising how quickly conditions can change, and I don’t want to be the person hanging around just for the sake of it. I’d rather be safe than sorry. Plus, knowing the routes to safe zones beforehand helps keep the stress levels down when things get hectic.
A solid evacuation plan is something I can’t stress enough. I usually have a bag packed with essentials—water, ID, meds, and some snacks. It’s just a reminder that being mentally prepared can make a world of difference when the unexpected happens.
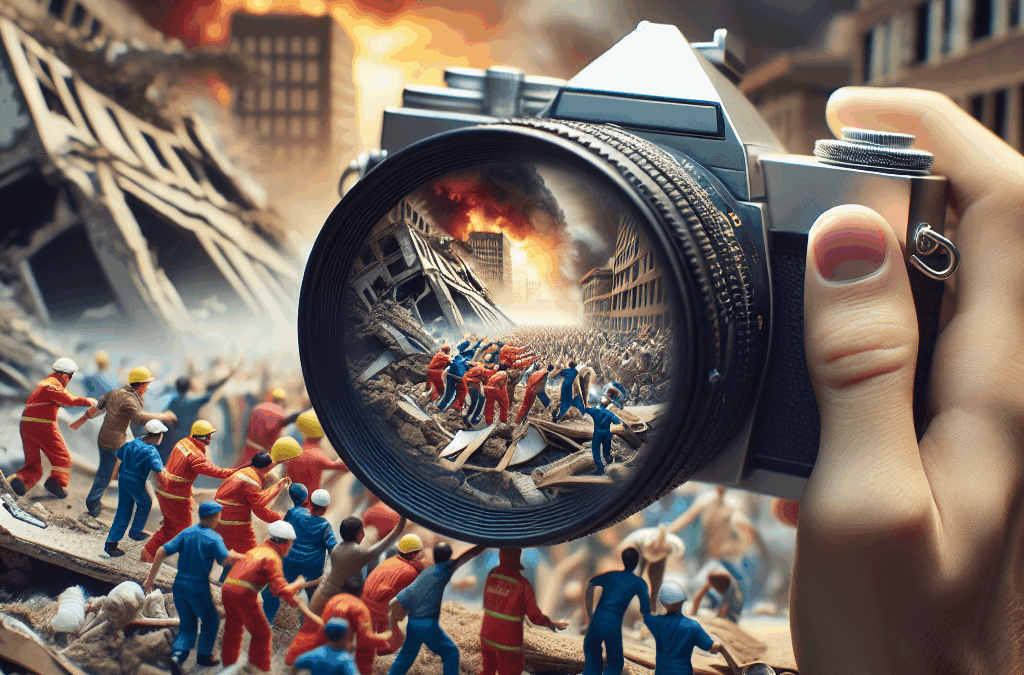
Document the Damage
Take Photos and Notes
Alright, once the immediate danger is over and I’ve ensured safety, I can’t forget to document what’s happened. I’ve learned the hard way that having a record of damage is crucial—especially for insurance claims. I whip out my phone and start snapping away, taking pictures of everything—it’s kind of therapeutic in a weird way, too. I find myself looking for details I might not think to mention otherwise.
But it’s not just about photos; I jot down notes of what I see, where it’s located, and any other specifics that could come in handy later. I remember when a storm hit last year, and I was so caught up in the chaos that I forgot key details. Those notes could’ve made dealing with the aftermath so much smoother.
Also, sharing this info with neighbors is something I try to do. If we all keep track, it builds a stronger community support network. Plus, I find it can be empowering to come together and review what we’ve gone through as a group!
Contact Your Insurance Provider
Report the Damage
Getting in touch with your insurance provider might seem like a chore, but trust me, it’s vital. My experience taught me that waiting too long can result in headaches down the road. So, I have my policy numbers written down in my emergency kit, ready to go. I swear by having those tools handy; it saves me from a frantic search when I’m already stressed.
When I finally reach them, I make sure to be clear and concise about what happened. I’ve experienced the importance of being detailed about damages—I once left certain parts out and it came back to bite me later. So I ensure every little thing is accounted for and push through the process. Sometimes, I do feel like I’m getting nowhere fast, but persistence pays off!
Lastly, I keep a record of conversations. You know, names and any claim numbers I can jot down. I don’t want to be that person who gets lost in the shuffle. Keeping everything documented adds that extra layer of control back into an otherwise chaotic situation.
Reach Out for Support
Tap into Your Network
Once everything starts settling, it hits me how lonely the aftermath can feel. Reaching out for support is something I prioritize—friends, family, even community groups. Talking it out really helps my mental clarity. I remember after a minor disaster, gathering a group of friends to share stories made the burden feel lighter.
Social media also comes in handy; a quick post can connect me with others who might be going through similar situations. It’s comforting to know I’m not alone. Sometimes, just knowing someone out there understands what you’re going through makes it a tad easier to face.
I also make it a point to look for local resources that provide guidance and support for disaster recovery. Whether it’s a local shelter, church groups, or even psychological support services, having help around me gives me a sense of peace amidst the chaos.
FAQ
1. What should I prioritize immediately after a disaster?
First, ensure personal safety for you and those around you. Once you’re sure everyone is okay, assess if you need to evacuate and then start documenting damages for insurance purposes.
2. How can I prepare for a disaster before it strikes?
Having an emergency kit, establishing an evacuation plan, and keeping important documents organized can make a huge difference. Being proactive now helps you stay more calm and collected later.
3. Why is it important to document damages?
Documenting damages is crucial for filing insurance claims. Providing photo evidence and detailed notes can help ensure you get full compensation for your losses.
4. Who can I turn to for emotional support post-disaster?
Reach out to friends, family, or local community groups. Don’t hesitate to seek professional help if needed, as talking to someone who understands can facilitate the healing process.
5. How can I stay informed about disaster alerts in my area?
Utilizing weather apps, local news updates, and signing up for community alerts are great options. Staying informed helps you to react more quickly when a disaster occurs.
When it comes to natural disasters, preparation can make all the difference. Whether it’s hurricanes, earthquakes, floods, or wildfires, understanding your risks and preparing accordingly is vital for safeguarding your family. Here’s how you can disaster-proof your life with essential steps every household should take.
*Understanding the Risks: Assessing Your Vulnerabilities**
The first step in disaster preparedness is assessing the specific risks that affect your area. Are you living in a flood zone? Is your region prone to seismic activity? Understanding these vulnerabilities allows you to tailor your preparedness plan effectively. Start by researching local hazards through government resources or community organizations. Take note of historical data regarding past disasters and identify any patterns that may inform your planning. Engaging with neighbors can also provide valuable insights—after all, they’ve experienced similar challenges and can share their own strategies for coping.
*Building Your Emergency Kit: What to Include**
Once you have assessed potential risks, it’s time to gather an emergency kit tailored to those threats. Essential items should include non-perishable food supplies, clean drinking water (at least one gallon per person per day), a flashlight with extra batteries, a first-aid kit, and necessary medications. Don’t forget about sanitation supplies such as moist wipes and garbage bags! Other important inclusions are multi-tools or Swiss Army knives, blankets for warmth, and even cash in small denominations—credit card machines may not work during emergencies. Aim for a kit that can sustain each family member for at least three days while maintaining mobility; consider packing everything into durable backpacks or containers that are easy to carry if evacuation becomes necessary.
*Creating a Family Emergency Plan: Communication and Evacuation Strategies**
An emergency plan is crucial in ensuring that everyone knows what to do when disaster strikes. Gather your family together to discuss potential scenarios and outline communication protocols. Designate an out-of-area contact whom everyone can reach if local phone lines fail; this person will serve as a central point of information during crises. Identify safe meeting spots both near home and further away—think parks or community centers where you could regroup after evacuating.
Additionally, develop clear evacuation routes from home based on various disaster types; practice these routes regularly so everyone feels comfortable navigating them under pressure. Be sure every family member understands their role in the event of an emergency—a well-rehearsed plan minimizes panic when seconds count!
*Staying Informed: The Importance of Emergency Alerts and Resources**
In our digitally connected world, staying informed is easier than ever—but only if you know where to look! Subscribe to local news alerts via apps specific to weather changes or emergencies in your area. Many regions also offer text alert systems that notify residents about impending dangers like severe storms or evacuation orders.
Familiarize yourself with local resources such as shelters or recovery centers; knowing where these are located ahead of time will save precious moments during an actual crisis.
*Practicing Preparedness: Drills and Regular Reviews for Household Readiness**
Finally, regular practice solidifies preparedness efforts within the household. Conduct drills that simulate different disaster scenarios so everyone understands what actions they need to take without second-guessing themselves in real situations.
Equally important is scheduling periodic reviews of your emergency plans and kits; needs change over time! Ensure supplies remain stocked and up-to-date while revisiting communication protocols as children grow older or circumstances shift.
By taking proactive measures today—assessing risks, building kits, creating plans—you’ll be better prepared tomorrow when disaster threatens your peace of mind! Remember: preparedness isn’t just about surviving—it’s about thriving even amid chaos!
In an unpredictable world, emergencies can strike when we least expect them. Whether it’s a natural disaster, health crisis, or any unforeseen event, being prepared can make a significant difference. The importance of emergency preparedness cannot be overstated; it empowers individuals and communities to respond effectively, ensuring safety and minimizing chaos during crises.
To begin your journey towards preparedness, you must assess your risks. Different regions face unique threats—be it hurricanes, earthquakes, floods, or wildfires. Take time to evaluate the specific dangers that loom over your area and consider personal vulnerabilities like health conditions or mobility challenges within your household. Understanding these risks is the first step in tailoring an effective response plan.
Once you’ve identified potential threats, it’s crucial to create a comprehensive emergency plan. This plan should outline essential procedures for various scenarios: how to evacuate safely if needed, where to meet family members during a crisis, and what roles each person will play in an emergency situation. Designate safe zones both inside and outside your home and ensure everyone understands evacuation routes. Moreover, include plans for pets as they are often overlooked in emergencies.
Next on the list is building an emergency supply kit—this could be the lifeline you need when disaster strikes. Your kit should contain vital items such as non-perishable food, water (one gallon per person per day), flashlights with extra batteries, first aid supplies, necessary medications, hygiene products, and important documents stored securely in waterproof bags. Consider adding items like a multi-tool or whistle; small additions can enhance functionality significantly during stressful times.
Effective communication plays a pivotal role during any crisis; establishing a contact network ensures that everyone stays informed and connected when things go awry. Designate one or two individuals outside of your immediate area who can serve as points of contact for family members scattered across different locations. Use text messages rather than calls during emergencies whenever possible; texts can bridge communication gaps that phone lines often experience under stress.
In addition to setting up these frameworks for communication and coordination among loved ones, regularly reviewing and updating your emergency strategies is essential. Emergencies evolve over time—new threats emerge while others may diminish—and so should your preparedness plans. Conduct routine drills that simulate different scenarios so everyone knows their role instinctively when real events unfold. Furthermore, keep track of expiration dates on food and medications in your supply kit and refresh items as necessary.
Ultimately, planning for the unexpected requires foresight and diligence but pays off immensely when faced with uncertainty. By understanding risks specific to your situation, creating tailored action plans, building reliable supply kits while keeping communication channels open among loved ones—and revisiting these strategies regularly—you equip yourself with tools not just for survival but also peace of mind amidst chaos.
Stay informed about local resources available during emergencies—community groups often host workshops on preparation techniques or distribute free materials about local hazards. Remember: Preparedness isn’t solely an individual responsibility; community resilience greatly enhances overall safety! So take action today because tomorrow might surprise us all!
When I’m in the wild, I’ve learned that wounds can vary significantly. You might experience simple cuts or abrasions, and then there are deeper lacerations that require more attention. It’s essential to identify the type of wound you’re dealing with.
Cuts and scrapes, while often unpleasant, can usually be treated with basic supplies. However, a deep laceration might require stitching or a more complex approach. I remember one time I had a buddy who slipped and fell on jagged rocks. Knowing how to classify the wound was crucial to how we treated him.
Moreover, I always consider the possibility of infection or significant blood loss with deeper wounds. Understanding the signs and symptoms can help in early intervention, which can save a lot of trouble later.
Cleaning and Dressing
The next phase is cleaning and dressing the wound. It’s one of those tasks that, believe me, you don’t want to rush through. First, I always try to keep things sterile—clean water, soap, and antiseptics are your best friends here.
Once you’ve cleaned the wound, the way you dress it can make all the difference. I usually opt for sterile bandages but have been known to improvise with what I find lying around when necessary—just ensure it’s clean! Make sure to cover the wound adequately to shield it from dirt and debris.
Don’t forget, observing the wound regularly is something I can’t stress enough. If it’s showing signs of infection or not healing, further action may be necessary.
Treatment of Major Bleeding
In the wilderness, I’m always prepared for the possibility of dealing with major bleeding. It’s critical to act quickly. I learned a long time ago that applying direct pressure is usually the first step you take. I’ll often use my hands—if you’ve got gloves, awesome, but if not, improvise!
If the bleeding doesn’t stop, elevating the injury can help, and if that fails, you may need to apply a tourniquet. One time, I had to apply a tourniquet to my friend’s arm after he got into a nasty scrape with a sharp branch. Fortunately, knowing when and how to do this was a game-changer.
Ultimately, seeking professional medical help is essential, especially after dealing with a severe bleed. Don’t underestimate the importance of getting the right care after you stabilize the situation.
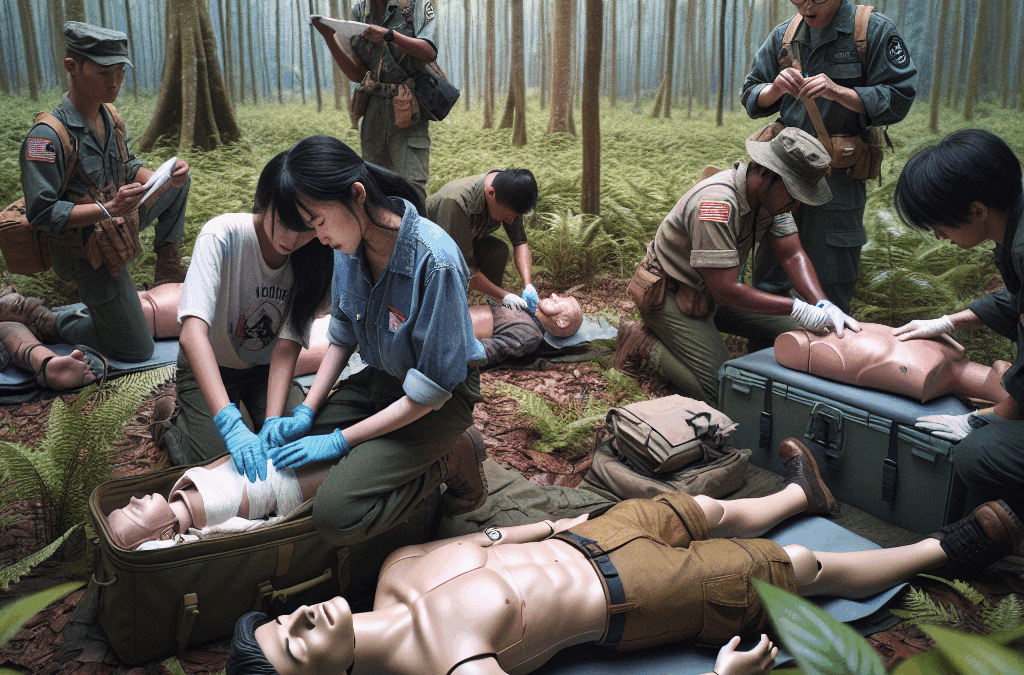
CPR and Basic Life Support
Recognizing Cardiac Arrest
I can’t stress how important it is to recognize the signs of cardiac arrest. During my outdoor adventures, I always remain vigilant. If someone collapses and isn’t responsive, that’s a major red flag.
Look for signs of breathing—if you don’t see any, it’s time to take action. I remember a time when a fellow hiker had a sudden episode; spotting the signs quickly allowed us to act before it was too late.
Also, don’t hesitate to ask others for help as you begin administering aid. It can feel overwhelming, especially in a remote situation, but teamwork makes a significant difference.
Performing CPR
So, let’s talk about the nitty-gritty—doing CPR correctly. First off, remember the cycle: 30 chest compressions followed by two rescue breaths. The compressions should be firm—think of them as pushing down hard enough to ensure blood circulates.
When you’re in the wild, it’s often more challenging than it sounds, especially with the adrenaline pumping. I’ve had a few practice sessions, and those are seriously invaluable. They give you the confidence to perform if you ever need to!
Always keep an eye out for any signs of life after you’ve started—sometimes, people come around after a few cycles, and knowing when to stop CPR is just as critical as knowing when to start.
Using an AED
If you’re lucky enough to have access to an AED (Automated External Defibrillator)—use it! I like to familiarize myself with tools like this before heading into the wild because you never know what can happen. Many public places have them, and it’s good to be aware.
Using an AED is pretty straightforward. Just follow the audio prompts; they guide you through the process. Just remember to stay calm and act quickly; every second counts.
Having this extra tool at your disposal can be a lifesaver. One of my most memorable experiences was being in a group where we had an AED on hand, and we managed to stabilize someone until the professionals arrived. It makes a difference!
Handling Sprains and Fractures
Recognizing the Injury
When it comes to sprains and fractures, my first instinct is often to assess the situation. Check for swelling, pain, and the ability to move the joint. I’ve found that understanding the difference can help in deciding how to proceed.
One of my friends sprained his ankle while hiking, and recognizing those signs right away meant we could take immediate action to minimize the pain. I make a habit of assessing the level of pain and the mechanism of injury when I’m handling these situations.
Knowing whether it’s a sprain or fracture can sometimes be tricky, but if they really can’t move it and you notice deformity, I typically lean toward treating it as a fracture. Better to err on the side of caution!
Immediate First Aid
The first aid for sprains and fractures is rest, ice, compression, and elevation—often shortened to R.I.C.E. I swear by this method. Resting the affected area is crucial; limited movement can help reduce further damage.
Applying ice can significantly reduce swelling and numbs pain. I usually wrap some ice in a cloth and keep it there for 15-20 minutes at a time. Compression with a bandage snugly wrapped around the injury is next, but be careful not to cut off circulation!
Finally, elevating the injury helps further reduce swelling. Prop them up on a backpack or even a fallen log while you manage the other aspects of the situation. Trust me, it helps!
When to Seek Help
Knowing when to seek help is one of the crucial lessons I’ve learned. If someone is experiencing intense pain, unable to move the affected area, or if you see obvious deformities, it might be time to call for assistance.
There’s no shame in seeking professional help. I recall a hiking trip where one of my friends ended up with a suspected fracture. Despite our first aid efforts, it was clear we needed medical assistance to ensure a proper diagnosis.
Always keep a means of communication when you’re out in the wild; you never know when it will come in handy, especially with something as serious as a fracture. It’s better to be safe than sorry!
Dealing with Allergic Reactions
Identifying Allergies
During my adventures in the outdoors, I’ve learned to be observant of symptoms of allergic reactions. You’d be surprised how many people have allergies they either don’t know about or underestimate—things like bee stings or certain plants can trigger a response.
Signs typically include hives, itching, or swelling, and for some, it can escalate to anaphylaxis. One time, my buddy thought he just had a little rash, but it spiraled into something much more serious. It was a wake-up call for me to pay close attention.
Always inquire about allergies before heading out with others—it’s super important to know what you’re working with to act fast if something does happen!
Using Antihistamines
Having antihistamines on hand is something I always advocate for. They can work wonders when it comes to combating mild allergic reactions. When a reaction starts, I usually give an antihistamine as soon as possible.
It’s always good to be aware of the dosing and any precautions—some antihistamines can make you drowsy! I’ve learned this the hard way, going from one adventure to another completely zonked out. Not fun.
If my friend is experiencing a moderate reaction, I usually monitor closely. However, for severe cases where breathing becomes difficult, it’s essential to have an EpiPen or similar device on hand if you know they’re at risk.
Emergency Action Plan
Having an emergency plan is key when you’re dealing with allergies. I’d advise sitting down with your group before any wilderness adventure to discuss what to do in case of an allergic reaction. This is an area where being proactive makes all the difference.
Know where the nearest medical help is, and have a plan for how to get there quickly if someone starts reacting badly. I always familiarize myself with the route to nearby facilities just in case!
If you have anyone in your group with known allergies, make sure they know where their medications are located. It’s all about teamwork and being prepared for any situation that may arise.
Basic Wilderness Survival Skills
Navigation Skills
Being able to navigate is an underrated skill in the wilderness. I’ve had my fair share of moments drifting off the path! Learning to read a map and use a compass can save you from wandering aimlessly.
The essential takeaway for me is that practice makes perfect. Before heading out, I set aside some time to practice my navigation skills, maybe even get lost in the backyard—who knew it could be a training ground?
Always keep a backup plan; if technology fails you, knowing how to read the stars or the lay of the land can help you find your way back.
Making a Shelter
Being able to create a shelter can be a lifesaver if you’re caught in a bind. I always scout for adequate materials nearby—branches, leaves, anything natural. It’s fascinating to see just how quickly you can whip something together when you need to!
Your shelter doesn’t need to be fancy but should provide some protection from the elements. I usually aim for something that can keep me dry and out of the wind. During a particularly rainy trip, I was grateful for my quick shelter-building skills!
Take the time to learn different shelter styles so that you can build appropriately based on the environment you’re in. Each region has its own unique needs!
Finding Food and Water
Finally, survival skills wouldn’t be complete without knowing how to find food and water. I’ve relied on sources like streams and rivers for clean drinking water more times than I can count. Vegetarian options include foraging for edible plants, but I always double-check to make sure they’re safe!
Fishing can also be rewarding and is a skill worth learning. I remember when I successfully caught my first fish during a camping trip; it was both thrilling and resourceful.
It’s essential to understand your surroundings and what resources are available. Knowing how to purify water can prevent issues down the line, and recognizing edible fruits can make your trip enjoyable. Plus, nothing beats the taste of food you’ve sourced yourself!
FAQs about Essential First Aid Skills for the Wilderness
1. What should I pack for first aid in the wilderness?
Always ensure you have basic supplies like adhesive bandages, antiseptic wipes, gauze, and tape. But don’t forget additional items like insect bite cream, antihistamines, or a splint for serious injuries.
2. How do I perform CPR?
CPR involves a cycle of 30 chest compressions followed by two rescue breaths. Ensure the area is clear, and compress the chest firmly at the center, at a rate of about 100-120 compressions per minute.
3. How do I know if a wound requires stitches?
If a wound is deep, gaping, or doesn’t stop bleeding after basic first aid, it likely needs stitches. It’s always better to err on the side of caution—do seek professional help in such cases.
4. What should I do if someone has an allergic reaction?
Identify the allergy and administer antihistamines if available. If breathing becomes impaired, use an EpiPen if the person has one, and seek emergency medical support immediately.
5. How can I prepare for navigation in the wilderness?
Learn to read a map and utilize a compass; practice these skills before your trip. Knowing how to recognize natural landmarks can also help guide you back to your campsite.