by Preparation | Jul 31, 2025 | Preparedness
Hey there! Let’s dive into an important topic that many people might not think about until it’s too late: where to hide during a home invasion. Having a plan can make a world of difference. Based on my experiences and discussions, I’ve pinpointed some essential spots that can really help you stay safe if things ever go sideways. So, let’s break this down into five main areas where you can hide. Trust me, it’s about being as prepared as possible!
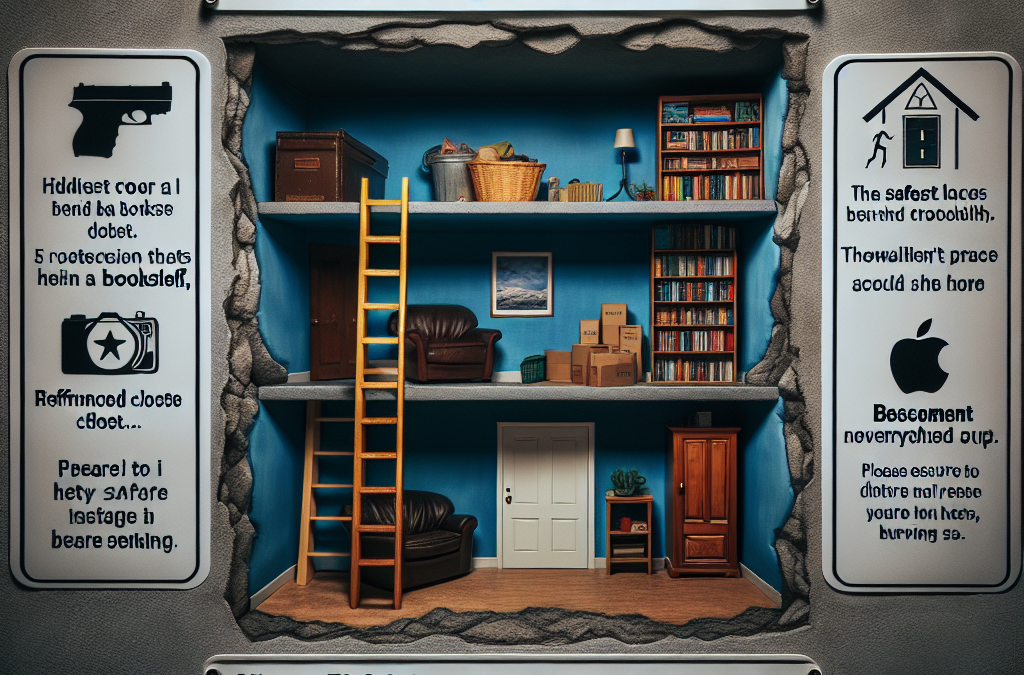
1. Under the Bed
Assessing Space and Accessibility
First things first, not all beds are created equal! If you haven’t checked how much space is under your bed lately, do it now. Some beds have a fair bit of clearance, while others may be too low for comfort. You want to make sure you can squeeze in without feeling like you’re getting stuck in a tight spot.
Also, consider how quickly you can get under there. If you’re in a room and things go wrong, you need to get under fast. Take a moment to test it out! Practice crawling under and see if it feels manageable. Being able to move smoothly is vital when every second counts.
Finally, keep in mind what’s under there. It’s best to clear out any junk that might trip you up. A bit of space can help you breathe easier and not feel cluttered when you suddenly find yourself in the need to hide!
Camouflage Your Presence
Now that you’re under the bed, let’s talk about blending in. If you have bedding that drapes down low enough, it can hide you pretty well! It’s always good to have a cozy blanket or even an extra cushion that you can use to cover yourself up and not attract attention.
Don’t forget about sound! Keeping quiet is key. So, I recommend practicing not making noise while under there – maybe turning on some music and seeing how still you can stay. You want to be a ghost, not a drummer!
And remember, the calmer you are, the better you can think. Focus on your breathing and stay collected. This mental state can really help you as you await any resolution.
Exit Routes
Another key aspect to consider is what your exit routes look like when you’re under the bed. If you’ve got a window nearby, know if it can be an escape route if needed. Sometimes being aware of your surroundings under pressure can be a real game-changer.
Have a plan for when you might come out, and think ahead about which direction to go — whether it’s running to another room or bolting outside. Being under this cover should also help you observe the situation without being seen, so use that knowledge wisely!
Last but not least, always have your phone with you or a way to communicate if the situation allows it. You never know when you might need to call for help – every detail counts!
2. Inside a Closet
Choosing the Right Closet
When it comes to closets, it’s all about the size and the contents. If you’ve got a walk-in closet, that’s usually a sweet spot. You can close the door, and with the right positioning, you can remain hidden quite effectively!
If it’s a smaller closet, look for a corner where you can tuck yourself behind coats or shoes. In this scenario, the more clothes the better! It adds a layer of protection and camouflage. Remember that you don’t want to be in a spot where your presence might stand out.
Also, consider the accessibility of the closet. If there’s clutter or boxes in your way, get that sorted out beforehand. Being able to slip in without a fuss during a scary moment is stinking important!
Noise Management
Just as with being under the bed, noise management is key here. Keep your breathing quiet, and resist the urge to fidget with things – it’s so easy to knock something over and give away your hiding spot! Find a comfy position and stay super still.
Additionally, try to find something soft to sit on if the floor is hard. Think about bringing in a cushion or a rolled-up towel to make it more comfortable. The longer you can stay calm, the better your chances are!
It’s a good idea to mentally prepare what you would say if confronted. If you can keep your cool under pressure, it may help you handle any verbal confrontation far better than if you were freaking out.
Creating a Hiding Barrier
To effectively conceal your presence, think about how you can create barriers in the closet. Hanging clothes can act as a good shield – placing several on hooks can really help obscure you from view.
You can also think about throwing things like bags or shoes around to further disguise your spot. The more natural it looks, the less likely someone will notice anything amiss!
Finally, don’t forget about your phone. If you have a discreet hiding place for it within the closet, that’s your lifeline. Just remember, only try to use it if you feel absolutely safe doing so!
3. Behind a Door
Strategic Placement
Hiding behind a door might seem straightforward, but it’s actually a clever choice if done correctly! When facing an intruder, positioning yourself behind a door can offer a surprising level of protection and concealment.
The key is to choose the right door — preferably one that opens away from you. Trying to hide behind a door that opens in your direction only gives you away! Plus, don’t forget about ensuring the door is sturdy. You want to secure yourself in a safe spot.
When the door opens, staying close to the edge can also help obscure you. Think about how you can make your silhouette less defined; standing or crouching in a way that keeps you hidden is all part of the plan!
Minimizing Movement
Most importantly, stay super still! It’s all instinctive, but moving around unnecessarily can draw attention to yourself. In this spot, silence is truly golden. So, get comfortable in your stance and maintain a strong focus.
Focus on your breathing again. Slow, deep breaths can keep you calmer and help you think clearly. This is the moment to be silent and aware of everything going on around you.
And if by chance you have anything in your hands, get rid of it beforehand. Trust me, having free hands can make a huge difference at a moment like this when your focus needs to stay strong.
Smart Exit Options
Again, having an exit strategy is crucial. If you’re behind the door, think about how you’ll slip out if things go wrong. Visibility on the other side plays a big role. Maybe there’s a window you can access or another room that leads to safety. Mapping this out mentally is key.
Make sure to have an idea of what’s outside and how you can get to safety without being seen. Timing is everything. Watch for distractions or sounds that could help you make a break for it.
Finally, be aware of your surroundings when you’re exiting. Quick glances can help you decide whether to stay put a little longer or make your move!
4. In the Attic
Accessing the Attic
If you’ve got an attic, that could be a game-changer. It’s often not the first place someone would check. First, evaluate how easily you can access it — is there a pull-down ladder, or do you have to climb up through a hatch? Make sure you’re comfortable using it quickly.
Once you’re up there, check the layout. Some attics can be awkward and cramped, full of old boxes and gear. Know how you can navigate in the dark — falling over something can do you way more harm than good during a scary moment!
Creating a safe zone in your attic can also make a big difference. If there’s room, consider keeping a small pile of supplies with a flashlight and your phone. That way, you’re a bit more prepared for anything that comes your way.
Disguising Your Hiding Spot
Attics can be dark, but it’s crucial to disguise yourself well! If there are old boxes, old furniture, or anything that can help conceal your presence, use them to your advantage. Pile items around you, but make sure you still have room to breathe!
Ensure you can remain as unseen as possible. Something as simple as a dusty sheet covering your silhouette can provide the cover you need. Just be careful to not batch yourself in too tightly, as you still want to be able to escape if need be.
Being hidden in a less-than-clean space can make keeping calm harder, so try to find something comfy if you can. The more relaxed you are, the easier it’ll be to maintain your focus!
Exit Strategies from the Attic
When hiding in the attic, always keep a mental checklist of possible escape routes. Often, there’s that hatch where you came from or a rooftop you might be able to access. Know where those options lie, and how quickly you can get to them.
Checking what’s directly below you can also be pivotal. If your exit through the attic hatch leads into a room where someone is lurking, you’ll want to rethink your plan quickly!
Getting out without making noise is key! You don’t want to draw attention to your escape, so practice what that would look like. Planning for a quiet getaway sets you up much better than leaving it all to chance.
5. Behind Large Furniture
Choosing the Right Pieces
Sometimes, the best hiding spots can be right in plain sight! Large pieces of furniture, like a couch or a wardrobe, can be your secret weapon. Look around your home — it could be as simple as pulling a big chair away from the wall and slipping behind.
When you’re scouting for these spots, test how much space you have. A creaky chair can give you away, so moving a little can be a no-go. Ensure your hiding place can support your weight comfortably without noise!
Being behind larger pieces can give you that unexpected cover. Just ensure that it’s sturdy and won’t topple over if you lean against it. Protecting yourself is the main goal!
Staying Calm and Concealed
Once you’re behind the furniture, deep breaths again! Silence rules — staying still is key. If you feel tension rising, focus on outside noises or movement; it’s all about keeping your composure in such heightened moments.
You may not have much room, but make sure you’re comfortable enough to stay still for a while. If needed, find a small cushion to put behind your head to help keep your thoughts clear and your body relaxed.
Always listen carefully to what’s happening around you. If things start getting rowdy, staying concentrated on the sounds can help you gauge the situation without exposing yourself.
Planning Your Next Move
Finally, while hiding behind furniture, always be prepared with a plan. What’s your next step if things go wrong? A hasty retreat from behind the couch could be best to think about, but knowing where you’ll head to is just as important.
Having a clear exit route — even if it means making a run for it once you know you can get away unseen — is vital. If there’s a back door, window, or even an escape route into a neighboring area, make sure it’s fresh in your mind.
And above all, trust your instincts! Sometimes, your gut feeling will lead you to safety better than any strategy drawn up on paper. This readiness will give you the edge you need!
FAQ
- 1. What is the safest place to hide during a home invasion?
- The safest place really depends on your home’s layout and where you feel most secure. Under the bed, in a closet, or behind large furniture are all viable options that can help conceal your presence.
- 2. How can I prepare my home for a potential invasion?
- Preparation involves having a plan, knowing your escape routes, and keeping areas clear of clutter. Creating hiding spots and practicing your responses can make a big difference in high-stress situations.
- 3. Should I try to confront an intruder?
- Generally, it’s best not to confront an intruder. Prioritizing your safety should come first, so hiding and waiting for them to leave or for help to arrive is usually the safest route.
- 4. What should I keep in my hiding spots?
- Having essential items like your phone, a flashlight, or anything you need to stay quiet can be extremely helpful. It’s always good to have a little stash of supplies to make your hiding experience more manageable!
- 5. How can I stay calm during a home invasion?
- Staying calm involves finding ways to center yourself, like focusing on your breathing, staying still, and listening intently to your surroundings. Practicing mindfulness can help maintain your composure during high-pressure situations.


by Preparation | Jul 31, 2025 | Preparedness
Cleansing and Sanitizing Water
Understanding Water Sources
When you’re in a long-term emergency, figuring out where your water’s coming from is a game-changer. I remember scouring my neighborhood for clean water sources after a storm, thinking about the best ways to make sure it was safe to drink. Whether it’s a well, river, or even bottled water, knowing what you’ve got to work with is step one.
It’s essential to understand the potential contaminants in your water. If you’ve got access to tap water, you might want to ask local officials if it’s safe. On the other hand, natural sources can be risky without treatment, so always err on the side of caution.
Once you understand the source, you can start to think about purification methods. Boiling is a classic method that never fails. Just bring it to a rolling boil for at least a minute, and you’re good to go! Don’t forget about water purification tablets if you’re lucky enough to have some on hand.
Effective Filtration Techniques
If you’re in a situation where you need to filter your water, I’ve found a few techniques that come in handy. One method that’s super easy involves using a cloth or a coffee filter; it helps get rid of solid particles. Just pour the water through, and voila, you’ve got cleaner water ready for purification!
If you can get your hands on a portable water filter, definitely use it! Those things are lifesavers. They can bear the brunt of bacteria and are perfect when you’re out camping or if the emergency stretches out longer than expected.
Don’t forget about activated charcoal, either. It’s an affordable option that can be a bit of a DIY filter. Just know how to use it, and you’ll be able to remove many impurities in a pinch!
Regular Hygiene Practices
Even in tough times, keeping yourself clean is vital! I found that simple practices like washing my hands regularly were essential in avoiding any illnesses. It’s so easy to let hygiene slip when you’re stressed, but trust me, your body will thank you.
Using soap is key! If you don’t have any soap, I would grab some natural alternatives like baking soda or vinegar—both can work wonders. Just get creative with what you have available and remember to scrub for at least 20 seconds if you can.
Lastly, if water is scarce, using hand sanitizers with at least 60% alcohol is a great backup plan. It’s handy to have a small bottle nearby, and it really does help alleviate germ boredom!
Waste Disposal Solutions
Understanding the Risks
Let’s be honest, waste disposal is a bit of a touchy subject, but it’s crucial. After an emergency, safe disposal methods are vital for keeping disease at bay. I’ve seen firsthand how improper disposal can lead to serious health risks, so let’s tackle this together.
First, assess what kinds of waste you’re dealing with—everything from food scraps to bathroom waste. Depending on what you’ve got, the disposal methods will differ. Keeping a clean environment is the key to staying healthy!
You don’t want pathogens to spread, so setup a special disposal area away from where you live and cook. It can be as simple as a hole dug in the ground or a designated container that you can seal until you find a better option.
Establishing a Waste Disposal System
Setting up a waste disposal system definitely sounds more complicated than it is! A quick tip is to have separate bins for different types of waste—everything from organic to recyclables. Having a little organization goes a long way during stressful situations.
Make sure that everyone in your group knows where to put what. I would often assign family members specific tasks, which helps keep responsibility shared. When everyone has a part in the system, it becomes second nature! It’s also fun to challenge each other to keep your area clean!
Regularly check on your waste disposal setup. Trust me; it’s best to stay on top of things and prevent any unpleasant surprises, especially when temperatures rise and things start to smell funky!
Methods of Waste Minimization
Getting creative about waste minimization is crucial during emergencies. Ever heard of composting? It’s a great way to handle food scraps while giving back to the earth. We’ve done this before, and it not only reduces waste but nourishes the soil as well.
Another trick is to repurpose what you can. Old containers can make nifty storage for things like first aid supplies or gear. Always think twice before tossing something out—it could have a new life in your emergency setup!
Lastly, keeping your meals simple can help cut down on waste. I’ve learned that prepping easy meals saves time and ensures you’re not producing excess food scraps. Plus, less cooking means less cleanup—win-win!
Personal Hygiene Maintenance
Daily Bathing Techniques
Even if you’re living through an emergency, it’s important to find ways to maintain your personal hygiene. I can’t stress enough how refreshing a simple sponge bath can be! Using a damp cloth or even those waterless body wipes can help when water is limited.
I remember when we had limited access to showers after a natural disaster; a basin of water near the camp meant freshening up daily was still possible. Just make sure to clean your face, armpits, and feet! It feels fantastic to know you can still maintain some level of cleanliness.
And if you happen to have some travel-size body wash or shampoo, don’t hesitate to use it! These small conveniences are worth their weight in gold when you’re trying to feel somewhat normal amidst chaos.
Oral Hygiene Practices
Don’t overlook your oral hygiene—it’s super important! I always make sure to keep a stash of toothbrushes and toothpaste in my emergency kit. It’s one of those little luxuries that keep you feeling fresh!
If toothpaste is out of reach, don’t fret! I’ve sometimes used a baking soda paste or even just plain water to brush my teeth. It’s amazing how something so simple can make a big different. Just remember to rinse well!
Also, flossing counts! I know it’s easy to forget, but keeping your gums healthy is just as important. Grab some string or thin strips of fabric if you need to improvise. Just do what you gotta do!
Managing Skin Care
Your skin will thank you for taking care of it during tough times! Dryness and irritation can be a real problem, especially if you’re outside or in harsh conditions. A basic lotion or even some olive oil can work wonders.
Be conscious of the climate, too! If it’s hot, keeping your skin protected from sunburn is essential. I’ve often packed some sunscreen in my emergency kit—and it’s beyond valuable when you’re spending long days outdoors.
Last but not least, don’t forget the importance of basic first aid—having antiseptic wipes or bandages can save you from infections arising from scrapes or cuts. Trust me, it’s worth being prepared!
Nutrition and Hydration Choices
Staying Hydrated
Let’s get real—staying hydrated during a long-term emergency is non-negotiable! Water is life, and I’ve always made sure that I’m drinking enough. But how do you manage that when things are chaotic?
Always have a backup plan for water storage. I’ve filled containers and even used cleaning bottles to save every drop. It’s a little extra work in the beginning, but you’ll thank yourself later, especially when you’ve got a thirst that won’t quit!
Also, listen to your body! Sometimes it means drinking more when it’s hot or if you’re feeling extra tired. Dehydration sneaks up on you, and just a few sips here and there can make a huge difference in how you feel.
Choosing Nutritious Foods
When a long-term emergency hits, keeping your nutrition on point can feel like a mountain to climb. I always focus on non-perishable items that pack a decent nutritional punch. Think canned beans, nuts, and dried fruits.
As much as you can, try to balance your meals. I would mix some protein, carbs, and healthy fats. If you can access fresh fruits or veggies, even better! But if not, just make the best of what you have.
Stay away from empty calories; they might feel good temporarily, but they won’t do your body any favors. Even chocolate can give you a quick boost when morale is low—so don’t skimp on a few treats now and then!
Meal Preparation Strategies
Meal prepping is my secret weapon when dealing with food during disasters. Having a stockpile of easy meals ready to go can be life-saving when you’re too tired to cook. Plus, it keeps your energy levels steady throughout the day.
Consider prepping one-pot meals that can last a few days. Soup is a fantastic option; you can throw in whatever you have and create something nutritious without too much hassle. It’s like cooking your own little survival magic!
Lastly, if you can, include a few comfort foods to elevate the spirits! Eating isn’t just about survival; it’s about enjoying the flavors of life as well. Find ways to sprinkle in those joyous bites whenever possible!
FAQ
1. What should I do about water cleanliness during an emergency?
It’s crucial to understand your water source and purify it. Boiling is an effective method, but you can also use filtration systems or purification tablets if necessary.
2. How can I manage waste disposal practically?
Set up a designated area for waste disposal away from living spaces. Sorting waste and keeping systems in place helps us manage it effectively.
3. What are some personal hygiene tips in tough situations?
Use cloths for sponge baths if water is limited, keep oral hygiene supplies handy, and prioritize skin care to protect against irritation.
4. How do I stay hydrated in emergencies?
Store water strategically, drink consistently based on your activity, and always have extra containers ready for unexpected situations.
5. What types of food should I stock up on?
Focus on nutritious, non-perishable items such as canned goods, legumes, nuts, and dried fruits. Balance your meals as best as you can to maintain energy levels.

by Preparation | Jul 31, 2025 | Preparedness
Preparation and Planning
Understanding the Risks
First and foremost, it’s crucial to understand what nuclear fallout is and what risks it carries. Living in a world where geopolitical tensions can escalate rapidly means that preparation is key. I’ve spent a fair bit of time researching nuclear fallout—because you never know when you’ll need that knowledge! Understanding the fallout zones and how radiation behaves is essential. You see, nuclear explosions create a significant number of radioactive particles, which can linger in the atmosphere for quite some time.
Knowing the wind patterns in your area can also be a game-changer. For instance, when a blast occurs, the fallout will likely spread in the direction of the wind. If you live near potential targets, you need to stay informed about local emergency management plans and the proximity of fallout shelters.
Additionally, understanding the differences between sheltering in place versus evacuation is important. Sometimes, staying put, especially in a well-prepared home, can be safer than hitting the road when everyone else is trying to evacuate. Create a plan that considers all potential scenarios, so you’re not left scrambling if an emergency arises.
Building a Comprehensive Emergency Kit
When the talk turns to emergencies, I can’t stress enough the importance of having an emergency kit. You never know when you’ll need that stash of supplies! Your kit should include basics like bottled water, non-perishable food, a flashlight, extra batteries, and of course, a first-aid kit. I’ve found it helpful to have portable chargers and radio devices to stay connected during a crisis.
Moreover, consider adding specific items for radiation exposure. Potassium iodide (KI) tablets can help protect your thyroid from radiation, so it’s worth looking into. Of course, while having these supplies is great, make sure to check their expiration dates periodically—nothing worse than discovering your emergency stash has expired!
Last but not least, don’t forget to include items that suit your family’s specific needs. If you have pets, think about their food and any necessary medications. That’s right, your pets are part of your family too! Tailoring your emergency kit to your unique situation can make a huge difference when the chips are down.
Regular Drills and Training
Preparation isn’t just about having stuff; it’s also about practice. Trust me, scheduling regular drills with your family is super important! When I first started, we practiced evacuating the house and moving to our designated safety area. It felt a little silly at first, but when you’re actually facing a real emergency, you’ll be glad you practiced!
Incorporating basic first aid and survival training can also empower you and your loved ones. Local organizations often offer courses, and there are tons of online resources available too. Being knowledgeable about what to do in an emergency will make you feel more at ease—and that’s priceless. Plus, it’s kind of fun to learn those skills together as a family or with friends!
Finally, don’t forget to include any elderly or differently-abled family members in your drills. It’s crucial that everyone knows the plan and feels capable of following it, no matter their age or ability. The last thing you want is anyone feeling lost or confused when the time to act comes.
Understanding Fallout Shelter Options
Building or Finding a Shelter
So, here’s where it gets a bit more detailed: if you’re serious about preparing for nuclear fallout, consider a shelter. There are multiple options, whether you’re building one from scratch or finding a pre-made one. Building your own fallout shelter can be quite a project—if that’s something you’re into! I watched a bunch of YouTube videos and checked out numerous guides before diving in myself.
For those not quite ready to build, there are various existing structures that can serve as effective shelters, like basements or even community shelters. Familiarize yourself with your local offerings, as they might surprise you. There’s comfort in knowing that a proper shelter can shield you effectively from radiation.
Whatever route you choose, it’s essential to stock the shelter appropriately. I ensured mine was stocked not only with food and water but also with entertainment options! Trust me, you don’t want to go stir crazy in there. So, think books, games, maybe even a portable movie player—whatever keeps the morale up!
Maintaining Your Shelter
Now here’s a crucial point: once you have your shelter set up, maintaining it is key! Over the years, I’ve learned that regular checks are vital to keep your supplies fresh. I like to set a reminder on my phone to do a comprehensive check every few months. That way, I’m always ready for anything.
Ensure that the ventilation system is functional, and that your shelter has no leaks that could allow dangerous particles inside. It’s not just about stockpiling supplies; keeping everything in good order means you won’t face nasty surprises later.
Don’t forget about updating your plans and supplies, too. Your needs may change over time, as your family grows or circumstances shift. Keeping everything up-to-date will save you a whole lot of trouble when that day arrives.
Accessibility and Comfort
Let’s talk about comfort—because let’s face it, if you’re stuck in a shelter for an extended period, you want it to be as cozy as possible. You might want to consider how accessible your shelter is for every family member. Accessibility is essential, particularly for the elderly or those with mobility issues.
Consider adding things like seating, blankets, and even board games or art supplies. When I added a few personal touches to my shelter, it turned it into a space that felt less like a bunker and more like a home. That psychological aspect can really help ease stress in times of uncertainty.
Ultimately, remember that in any emergency, your state of mind matters. Creating a warm and inviting atmosphere can make a world of difference when you’re hunkering down for safety. I like to think of my shelter as our little sanctuary during uncertain times.
Post-Fallout Procedures
Safety First: When to Emerge
After a nuclear event, patience is critical. Knowing when it’s safe to leave your shelter is as important as knowing how to get in it! I’ve often thought about how crucial it is to stay updated with reliable news sources. Most people will be eager to dash outside and assess the situation, but caution is essential!
Listen for announcements regarding radiation levels and when it’s deemed safe by officials to emerge. I advise against sticking your head out when you think it’s clear; that’s where mistakes can happen. Keeping a radio and batteries in your shelter can keep you informed without risking exposure.
In addition, always use protective gear once you do decide to leave your shelter. This is not the time for casual attire; think masks and coveralls to prevent exposure to any lingering particles. Preparation will serve you well, and when you’re prepared, you’ll feel more confident in your decisions!
Assessing the Area
Once you’re outside, you’ll want to survey the area before fully exiting your shelter. Start by checking the condition of your home and surrounding areas, watching out for damaged infrastructure or radiation hotspots. I’ve learned to keep a pair of binoculars handy for this reason; they can really help you safely assess things from a distance.
Look for signs of danger and listen for instructions from emergency personnel. Approaching the situation carefully and making sure to gather reliable information will be your best friend at this stage. This part can get overwhelming, but remember to breathe and take it step by step.
If you plan to return to your home, have a plan for decontamination. This might involve changing clothes, washing up, or even sealing your home if necessary. It might seem overwhelming, but just take it in stride; you’ve prepped for this moment!
Long-term Recovery and Adaptation
Lastly, let’s discuss long-term recovery. After the initial chaos, going back to a sense of normalcy might take time. I’ve found that maintaining a community spirit can be incredibly helpful. Check up on your neighbors, share resources when you can, and help each other adapt during the recovery process.
Your mental health is equally important during this time. It’s natural to feel anxiety about the fallout and what it means for your future. Engaging with family and friends, sharing experiences, and connecting can be a lifeline for anyone feeling isolated.
Lastly, keep an eye on the news for updates or guidance from authorities. Adapting to a new way of life can be challenging, but remember, you’re not alone—many are on this path with you! Tackle it together and rebuild your community with resilience.
Frequently Asked Questions
What should I include in my emergency kit?
Your emergency kit should contain essential items like water, non-perishable food, a flashlight, batteries, a first-aid kit, and, ideally, potassium iodide tablets. Always customize your kit to include items suited for your family and lifestyle.
How do I determine if my shelter is safe?
Listening to information from local authorities will guide you on safety levels. Additionally, checking for radiation levels with a Geiger counter, if available, can help assess your shelter’s conditions.
How can I make my shelter more comfortable?
Adding personal touches like blankets, seating, and entertainment options can make a big difference. You want to create an environment where you feel safe and relaxed during your time inside.
What if I have mobility issues with respect to my shelter?
Make sure your shelter is accessible to all family members. Plan for any special needs based on their abilities and consider investing in items that ease mobility, like ramps or seating options.
How long should I stay in my shelter after the fallout?
The guidance from emergency services is critical here. Stay informed and heed their instructions, as they will provide updates on when it’s safe to emerge.


