Select Page
Stay Ahead of the Storm: A Comprehensive Approach to Disaster Readiness

Stay Ahead of the Storm: A Comprehensive Approach to Disaster Readiness

When it comes to disaster preparedness, knowledge is power. Understanding the risks that loom over your area can make all the difference in safeguarding yourself and your loved ones. Different regions are prone to various types of disasters—hurricanes, earthquakes, floods, wildfires—you name it. Begin by researching historical data and current trends relevant to your location. Local government websites often provide valuable insights into potential hazards. This awareness will help you anticipate challenges and take proactive steps.

Once you’ve identified the risks, it’s time to build an emergency kit. Every household should have a well-stocked supply cache for those unexpected moments when you might need to shelter in place or evacuate quickly. Essential items include non-perishable food items like canned goods and energy bars, plenty of water (a gallon per person per day is a good rule), first-aid supplies, flashlights with extra batteries, and important documents stored safely in a waterproof container. Don’t forget about medications and pet supplies if applicable! Customize your kit based on your family’s specific needs; this preparation could be a lifesaver when time is of the essence.

Creating a family emergency plan is equally crucial. Discussing how you will communicate during a disaster can alleviate confusion and anxiety when chaos strikes. Designate meeting points both near home and further away in case evacuation becomes necessary. Ensure every family member understands their role—who grabs what, who calls whom—and practice these scenarios regularly so everyone feels comfortable with the plan. Don’t overlook the importance of keeping contacts updated; sometimes cell networks fail during emergencies, so having alternate communication methods can prove invaluable.

Staying informed is another pillar of disaster readiness that shouldn’t be ignored. Technology today offers numerous ways to receive timely updates on weather conditions and alerts about impending disasters. Apps for smartphone devices can provide real-time information tailored specifically for your area; consider downloading them ahead of time! Additionally, local news outlets often report on severe weather events as they unfold—tuning into these channels can keep you one step ahead of danger.

Community preparedness plays an essential role in ensuring collective safety during crises as well. Engaging with your neighbors fosters a sense of camaraderie while also building a support network that can prove vital in times of need. Organize community meetings or workshops focused on disaster preparedness where you share resources and experiences or even conduct drills together! When neighbors look out for one another, it strengthens resilience against any challenges that may arise.

JM Industrial dsc 4801 1 scaled

In conclusion, being prepared for disasters requires more than just individual efforts—it’s about understanding risks, having essential supplies on hand, creating robust plans for communication and evacuation while staying informed through alerts and local resources—all while building connections within your community. With a comprehensive approach to disaster readiness not only do we protect ourselves but also create safer environments for everyone around us! So take action now—don’t wait until it’s too late!

Packing Smart for Sudden Disasters

Packing Smart for Sudden Disasters

Assessing Your Needs

Understanding Your Environment

First things first, you have to know your environment. I remember when a major storm hit my area; I immediately regretted not assessing how vulnerable my place was. Flood risks? Tornado shelters? It all matters. If you live in a hurricane area, gear up; if snowstorms are your jam, prep for that. Always know what you’re facing!

Take the time to sit down and think about potential disasters in your region. Jot down the history of natural events that have impacted your community. Having this context can help you provide adequate supplies and support.

And don’t forget about local advice. Check in with emergency services or neighborhood groups; they’ve got the insider scoops on what really goes down during disasters. They’re living and breathing this stuff every day!

Identifying Essential Supplies

Once you’ve assessed your needs, the next step is figuring out what supplies you really need. I’ve found it super helpful to create a list! You can mix must-have items like first aid kits and non-perishable food, along with personal essentials like medications and important documents.

Look, it’s easy to go overboard and pack everything you think you might need. But trust me, focus on essentials. A backpack filled with snacks, water, a flashlight, and a battery charger can save your life. Think practicality – what could you realistically carry if you had to evacuate?

Lastly, remember to personalize your supplies. For instance, if you’ve got pets, don’t forget their food and gear. They’re family too! Tailoring your packing list ensures you’re not just packing the basics but everything necessary for everyone in your household.

Creating a Packing Checklist

Oh, man, packing can be a mess if you don’t have a checklist! From my own experience, having a visual guide helps keep me on track. I love checking items off as I go! Start with the basics – water, food, shelter, and safety items. Don’t skip cleaning supplies either because, surprise! You might need to tidy up even in chaos.

When I created mine, I organized items into categories, making it easier to see what I had and what I needed. I’d have sections for food and water, medical supplies, clothing, and documents. This way I wasn’t scrambling around at the last minute looking for things.

Make sure to keep the checklist in a place where you can easily grab it, like on your fridge or pinned to a bulletin board. And don’t forget to update it regularly. Life changes with moving, new pets, or even allergies – keep your list current!

Storing & Organizing Your Gear

Choosing the Right Containers

Let’s talk about storage! Choosing the right containers is crucial to keeping your packing organized and effective. I’ve gone through a range of storage options – bins, backpacks, even duffel bags. The goal is to have something that’s both durable and easy to carry.

The size of your containers matters too. If you can fit your gear in one bag or bin, that’s the way to go. I love using clear storage bins because you can see what you have without digging through everything. Plus, labeling them makes it so much simpler!

Additionally, consider waterproof options. Whether it’s rain, flooding, or another unexpected mishap, keeping your supplies dry should be a top priority. You don’t want to arrive at safety only to find all your supplies are soaked and unusable!

Establishing a Packing Routine

Setting up a packing routine has been a game-changer for me. I don’t wait until disaster is looming before I start throwing things together. Instead, I’ve made it a habit to review my supplies quarterly or with every season change. This way, I’m not left scrambling when something unexpected happens.

Copy of PREPARE Mag ad 970 x 250

With my packing routine, I go through items, check expiry dates on food and medicine, and refresh anything that needs to be swapped out, like seasonal clothing. Plus, it keeps me connected to my gear, so I know exactly where to find everything when I need it!

And don’t forget to involve your family in this routine! Turn it into a family event; it can be educational for kids and they’ll better understand why being prepared is important.

Practicing Emergency Plans

Simulating Evacuation Drills

If you think having a plan is enough, think again! I swear that practicing evacuation drills has saved my family and me in real emergencies. By simulating what you’d do if you needed to leave quickly, you get a feel for how everything works, and it helps calm the nerves when the situation arises.

It’s really about finding a good flow. Map out your escape routes ahead of time. Know where you’ll go, how you’ll get there, and who’ll meet up where. Having a plan gives you a sense of security even amidst panic!

After practicing, sit down as a family and discuss what went well and what could be improved. Feedback is golden! Each drill can make you that much more prepared when disaster actually strikes.

Communicating with Family and Friends

Finally, let’s chat about communication. In an emergency, it’s crucial to have a solid line of communication set up with your family and friends. This can mean everything from discussing your plans to having a group chat set up on your phones; don’t leave it to chance!

When I was preparing for the last big storm, we set up a family group chat and agreed on specific codes for different situations. It sounds silly, but when things are chaotic, simple messages can make communication clearer.

Also, think about how you’d update close family or friends if you were separated during an emergency. Share your plans with them, and maybe even establish a check-in buddy or two. This way, you all stay in the loop regardless of what happens.

FAQs

1. What are the essential items I should include in my disaster pack?

Your disaster pack should include water, non-perishable food, a first aid kit, flashlights, batteries, a multi-tool, personal documents, and any medications necessary to maintain your health.

2. How often should I review and update my disaster supplies?

I recommend reviewing your disaster supplies at least once every few months. Make adjustments based on seasons, new needs, or changes in your family dynamic.

3. Should I have emergency plans for my pets as well?

Absolutely! Your pets are family too. Make sure to include food, water, and any necessary supplies for them in your disaster kit, and include them in your evacuation plans.

4. What are some common mistakes people make when packing for emergencies?

One common mistake is underestimating the importance of organization. People often throw things together without thinking what they might need. Another mistake is not customizing supplies for their unique needs, like personal medications or comfort items.

5. How can I prepare my children for emergencies?

Involve them in the process! Kids should know the plan, what’s in the disaster bag, and why it’s essential. Making it a fun learning experience will help them feel empowered and ready to handle situations effectively.

Copy of PREPARE Mag ad 970 x 250

How to Recharge Devices Without Electricity

How to Recharge Devices Without Electricity

Living in a world that’s always connected, we often forget just how dependent we are on electricity.
Whether it’s smartphones, tablets, or portable speakers, sometimes we find ourselves in situations where there’s simply no plug to be found.
Having faced such moments myself, I learned a thing or two about keeping my devices charged even when the power is out.
Let’s dive into some creative ways to recharge your devices without relying on the grid!

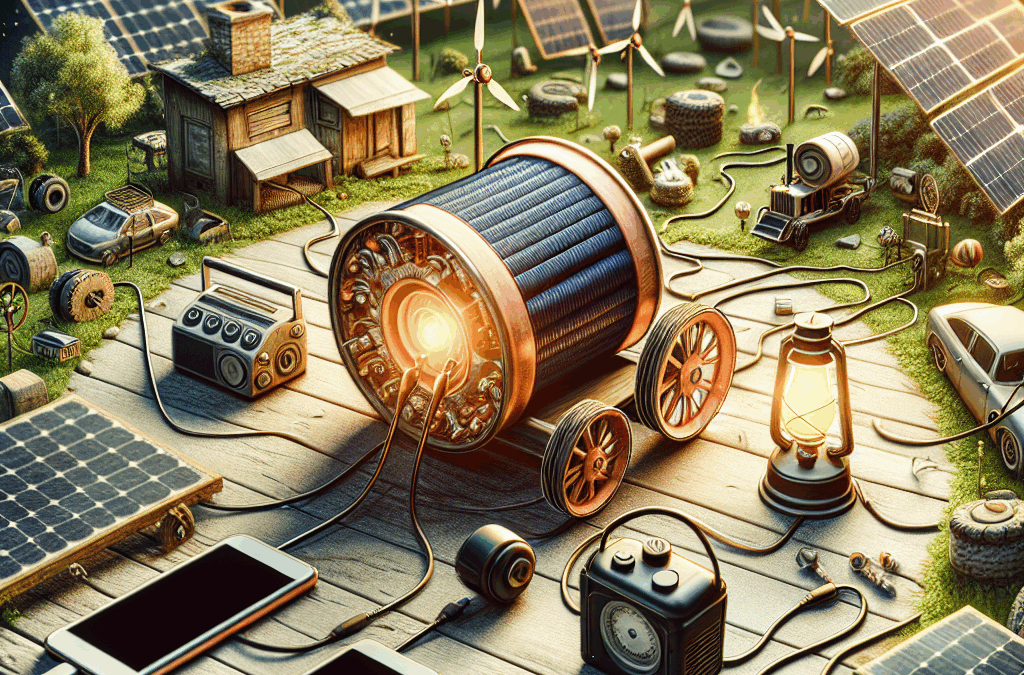
Utilizing Solar Power

Understanding Solar Chargers

One of the best ways I’ve found to charge my devices without electricity is through solar chargers.
These nifty gadgets convert sunlight into energy, allowing you to charge your devices on-the-go.
Purchasing a solar charger might feel like splurging, but I promise it’s a game changer, especially for outdoor enthusiasts like myself.

When choosing a solar charger, look for one that matches your device’s needs.
Some chargers are designed specifically for phones, while others can handle laptops.
The key is to ensure the output voltage is compatible to avoid any tech hiccups.

It’s also good practice to check reviews and compare brands.
Some solar chargers come with additional features like built-in batteries to store energy for when the sun isn’t shining.
Plus, they’re often portable, making them an easy travel buddy.

Positioning for Optimal Sunlight

Once you’ve got your solar charger, positioning it correctly is crucial.
Trust me, I’ve made the rookie mistake of leaving it in the shade, thinking it would still work.
The best place is to lay it directly under sunlight, preferably angled toward the sun for maximum exposure.

It’s also best to avoid using it on cloudy days, as the efficiency can significantly drop.
If you live in a sunny area, try to get a feel for which spots in your yard or on your balcony generate the most sunlight throughout the day.

While you’re waiting for it to charge, you can engage in other activities, be it hiking or simply enjoying nature.
The beauty of solar charging is that it’s great for both your devices and the planet!

Using Solar Panels for Larger Devices

For those bigger gadgets, I’ve ventured into using portable solar panels.
These are a step up from handheld solar chargers, and can power larger devices that require more juice, like laptops and drones.

Setting up these panels can take a bit more effort, but it definitely pays off in terms of versatility.
Usually, they come with a variety of connectors to accommodate multiple device types, which is super handy.

Just make sure to understand how to connect and configure the setup safely.
It’s a bit of a learning curve, but once you’ve got it down, you can literally charge amid nature—and believe me, it feels pretty rewarding.

Hand-Crank Generators

Choosing the Right Generator

If the sun isn’t cooperating, hand-crank generators can be a lifeline.
These generators allow you to generate power manually through physical effort, and while it might be a workout, it’s a reliable backup.

When I first got my hand-crank generator, it was more of an experiment than anything else.
I had to learn which devices it could effectively charge, as not all can handle the output from these generators.

Always read the specs and follow the guidelines.
Getting an incompatible device can do more harm than good, and I learned that the hard way!

How to Use a Hand-Crank Generator

The operation is pretty straightforward.
Just connect your device to the generator using the appropriate cable and begin cranking.
It sounds simple, but you’ll quickly realize that it requires some stamina!

I recommend checking the output voltage frequently while cranking.
It’s also a good idea to have a clear plan on how long you need to crank to get a desired amount of charge.
Each minute usually gives you enough energy for a few minutes of device use.

Finding a rhythm helps too.
I often listen to music or podcasts while cranking—it definitely makes the workout a bit more enjoyable!

Benefits of Hand-Crank Generators

The best part about hand-crank generators is their independence from weather conditions.
No sun, no problem!
This method can also be more sustainable over the long run, which is something I’m always on the lookout for.

Plus, it’s a great conversation starter.
Nothing sparks interest quite like telling someone you powered your phone by cranking a generator!

They can also serve as a fun family activity.
Toss in a little competition, and see who can produce the most charge in a minute.
It’s a workout and a bonding experience rolled into one!

Using Rechargeable Battery Packs

Choosing Quality Battery Packs

One of my go-to methods for emergencies is having a good quality rechargeable battery pack on hand.
These battery packs can hold a charge for months and are ready to go whenever you need them.

When selecting a battery pack, make sure it has adequate capacity for your devices.
Some batteries may not be up to snuff for larger devices, so check their specifications before buying one.

Copy of PREPARE Mag ad 970 x 250

I’ve found that brands vary widely in terms of reliability.
Reading user reviews is essential, and sometimes it’s worth spending a little extra for a trusted brand that you know will get the job done.

Proper Charging Techniques

Once you’ve got your battery pack, it’s important to understand how to charge it properly.
Overcharging can be detrimental, so always follow the manufacturer’s guidelines.
Many packs come with indicators, making it easier to know when to unplug.

Additionally, store them properly when not in use.
Keeping them at room temperature and avoiding extreme heat or cold extends their lifespan significantly.

Also, make a habit of recharging them periodically.
I learned early on that leaving them untouched for too long can lead to diminished capacity, which is no bueno when you really need them!

Using Battery Packs Efficiently

To maximize the utility of your battery pack, be strategic about what devices you charge.
I often opt to charge essentials first, like my phone or GPS for hiking, then move onto non-essentials once I know I have enough power to spare.

Many packs come with multiple outputs, allowing you to charge several devices at once.
Just be cautious not to overload them, as it may slow down charging speed or diminish the lifespan of your battery pack.

Lastly, plan to use your battery pack when you really need it.
It can be tempting to charge a device just for fun, but being selective about usage will ensure you’re never caught off-guard when you need power most.

Finding Alternative Energy Sources

Exploring Alternative Energy Options

In case you’ve exhausted the mentioned methods, there are other alternative energy sources to consider.
Hand-crank generators and solar chargers are just the tip of the iceberg!

For instance, certain wind-powered systems are available that can generate power using breezes.
I’m planning to explore these myself soon, especially for my camping trips.
I imagine it’d be great to harness the wind’s energy to keep my devices alive.

Additionally, bioenergy or even mechanical energy can be options if you’re willing to do a bit of research.
These unconventional sources of energy are fascinating and can often be very effective in the right conditions.

Creating Your Own Energy Solutions

Have you ever thought about building your own energy source?
It’s like a school science project but way more useful!
From basic DIY solar panels using old coffee cans to wind turbines made from PVC pipes, the possibilities are endless.

There are countless resources and communities online ready to share previous projects and tips.
The journey of creating your own devices can be just as rewarding as using them once they’re fully operational!

I love the idea of combining creativity with energy solutions.
Not only do you save money, but you also get that sweet satisfaction of knowing you made it yourself.

Networking for Access to Shared Resources

Lastly, don’t forget about the power of community!
Networking can lead to partnerships and group investments in power solutions.
I’ve met folks who collaborate on buying large solar panels or wind turbines together to share the energy produced.

Local community centers, schools, or even online forums can be fantastic places to discover like-minded individuals who are also keen on sustainable practices.
More hands make light work, right?

So, build those connections!
You never know when you’ll need to share or barter for energy, especially during rough times.

Frequently Asked Questions

1. Can I really charge devices without electricity?

Absolutely! There are multiple methods to charge your devices, including solar power, hand-crank generators, battery packs, and alternative energy sources.

2. How long does it take to charge a device using solar power?

The time to charge depends on the solar charger’s power output and the sunlight conditions. On a bright day, smaller devices can take a few hours, while larger ones might need more time.

3. Are hand-crank generators practical for everyday use?

While they aren’t ideal for frequent use, they can be great backup options for emergencies or outdoor adventures.

4. Can I create my own renewable energy system?

Definitely! There are many DIY resources available to help you create your own solar panels or wind turbines, often using materials you already have.

5. Do I need special cables to charge my devices with battery packs?

Most battery packs come with various connectors or USB outputs, but it’s always a good idea to check compatibility with your devices to avoid any issues.

Copy of PREPARE Mag ad 970 x 250