
by Preparation | Jul 30, 2025 | Preparedness
Understanding the Risks of Cooking During Outages
The Dangers of Carbon Monoxide
So, let’s be real, when the lights go out, it can feel like a scene out of a survival movie. I’ve been there, rummaging through the pantry and itching to get something cooked. But here’s the catch—using generators or charcoal indoors is just reckless. Carbon monoxide is a real silent killer, and you don’t want to be the star of a horror story.
It’s essential to stay informed about this risk. Even if it feels like a safe haven, cooking indoors with any sort of fuel that emits fumes could lead to serious health issues, or worse. I learned this the hard way—after a minor incident during a storm, I’ve since become a stickler about outdoor cooking.
Keep in mind that if you can’t be outside, it’s worth considering no cooking at all. Sometimes a simple meal that doesn’t require heat is your best bet. Trust me, your lungs will thank you!
Planning Your Food Supplies
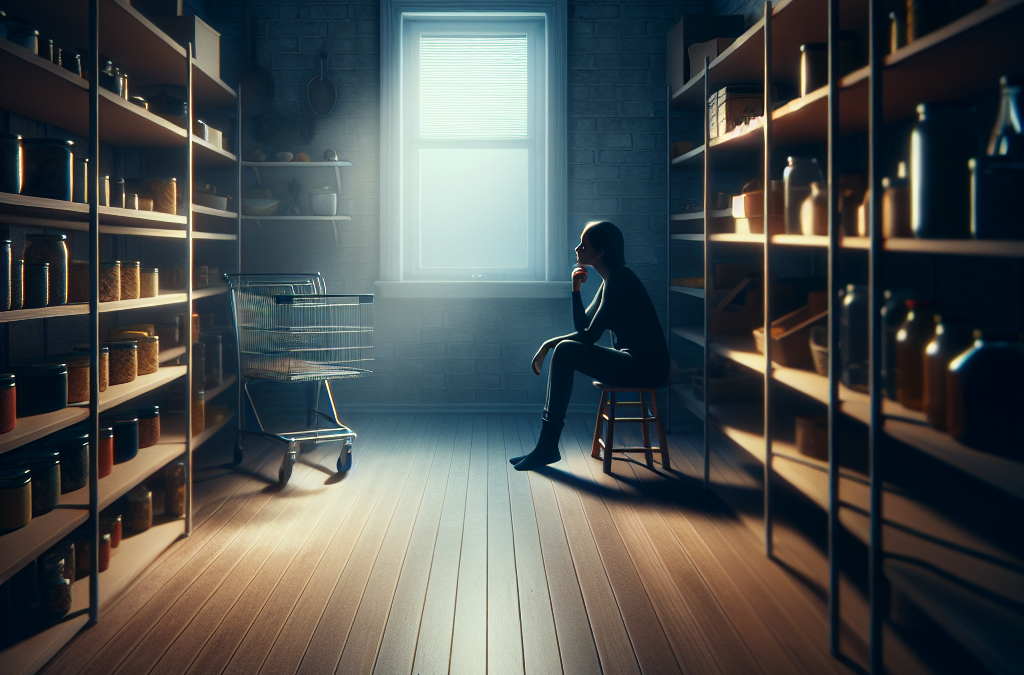
Keep a Well-Stocked Pantry
One of the biggest mistakes I’ve made during outages is not having my food game plan sorted. I swear by keeping a collection of non-perishable foods on hand. Canned goods, dried fruits, and nut butters have saved me more than once!
Make sure to check the expiration dates regularly. You don’t want to find yourself hoarding a can of something that’s been sitting around too long. I’ve got a checklist and every month I check what needs to be rotated out—think of it as a mini inventory.
Also, don’t underestimate the power of snacks! It’s easy to overlook, but when the power’s out, having something quick to grab can keep the morale up. Whether it’s granola bars or trail mix, stocking up can make all the difference.
Utilizing Alternative Cooking Methods
Grilling and Outdoor Cooking
Ah, the grill! It’s not just for backyard barbecues. For me, it’s my go-to during power outages. Grilling outdoors can be a lifesaver. It’s easy, quick, and gives everything a magical smoky flavor.
However, it’s not just about tossing some burgers on there. You can whip up veggies, seafood, and even fruits! Yes, that’s right—grilled peaches anyone? Just remember, always use your grill outside and never in a garage or enclosed space.
And don’t forget to prep! The last thing you want is to be fumbling around in the dark trying to get everything ready. Cook and cut things before the outage hits if you can. It’s just a smoother process when you have everything set up.
Keeping Food Safe
Understanding Food Temperatures
Now, let’s chat about food safety. It’s all good and fun until you get sick from spoiling food. I’ll keep it simple: your refrigerator will keep food safe for about four hours if it remains closed. Keep an eye on that clock!
When it comes to leftovers, after a power outage, if in doubt, throw it out. I’d rather toss out a bit of food than deal with a stomach bug that could last for days. Better safe than sorry, right?
Another handy tip? Use ice packs and coolers for any perishable items if you’re braving the outage for a while. It’s amazing how a little preparation can extend the life of your food supplies.
Engaging the Community
Sharing Resources and Support
Sometimes, the best thing you can do during a power outage is to reach out to neighbors. I’ve found that communities come together, and if you have extra supplies or skills, share them! You’ll never know who might need a helping hand.
Organizing potlucks can also be a fun way to utilize food before it spoils. I’ve attended gatherings where everyone contributed what they could, and together we whipped up a feast. It’s not only practical but creates a sense of camaraderie.
Don’t forget to stay connected! Social media or community apps can help coordinate food sharing or resources. Sometimes, someone nearby might have a generator or a camp stove they are willing to share. Just put the call out there!
Frequently Asked Questions
1. What should I do if the power goes out?
First, stay calm! Keep your refrigerator and freezer closed. Use your alternative cooking methods if you can, and make a plan for your food supply.
2. How long can food last without power?
Typically, food in your fridge will stay safe for about four hours if you keep the door closed. Your freezer can maintain its temperature for about 48 hours if full.
3. Is it safe to cook indoors during a power outage?
No! Cooking indoors using grills or generators can lead to carbon monoxide poisoning. Always cook outside to ensure safety.
4. What types of food should I keep on hand for emergencies?
Focus on non-perishables like canned goods, dried fruits, snacks, and any easy-to-cook items. Make sure to rotate your supplies regularly!
5. How can I engage my neighbors during a power outage?
Reach out to those around you! Organize a community gathering to share resources or food. It’s a great way to bond and ensure everyone is safe and fed!
by Preparation | Jul 30, 2025 | Preparedness
Evaluate the Situation First
Assess the Damage
Before I ever set foot back in my home after a disaster, I always take a moment to stand back and really look at the property. It’s crucial to recognize potential hazards like downed power lines, damaged structures, or broken glass. Going in without checking might seem tempting, but trust me, you don’t want to get caught off guard.
I’ve learned to have a little checklist in my head: look up for anything that might fall, check the ground before I step, and most importantly, listen for anything unusual. If it feels unsafe, I’ll wait for professionals to give the all-clear.
Remember that sometimes the biggest danger isn’t always visible. Mold can set in almost instantly in a water-damaged home, and inhaling those spores isn’t something anyone wants to deal with. If there’s flooding, better to err on the side of caution!
Check for Utility Safety
Once I’m certain it’s somewhat safe outside, I pay close attention to my utilities. I walk to the main gas line and look for any leaks – a whiff of gas is a red flag. If I smell anything weird or I’m unsure, I don’t take any chances; I turn off the main valve and leave the area.
Next, I check the electricity. If I see any sparking or damaged wires, I know it’s best to keep a distance until an expert comes over. Sometimes, I’ll try to look at my circuit breaker too, but I always keep my safety gear handy just in case.
Water supply is another thing I check. If the water system is compromised, I make sure to rely on bottled water until I know it’s safe to use again. I’ve made the mistake of thinking tap water was okay before, and let’s just say it didn’t end well!
Listen to Local Authorities
After assessing my own property, I tune in to what local authorities are saying. This is a biggie! I always monitor news reports and social media updates to get the latest news about evacuation areas or safety notices. Sometimes, the information they provide can save me a lot of headaches.
It’s also good practice to keep my phone charged – it’s amazing how often I need it for alerts. If disaster strikes, things can change on a dime, and having the latest info is key. It’s best to follow the guidelines they provide, even if it throws a wrench in my plans.
Community meetings can be really helpful too. If they’re held in my area, I take time to attend. They often give out useful advice about recovery services, shelters, and cleanup efforts. Connecting with neighbors also brings a sense of community that can be so comforting during tough times.
Document Everything
Take Photos for Insurance
One of the first things I do when I think it’s somewhat safe is to grab my phone and start snapping pics. It’s wild how much damage can be inflicted, and having a visual record for my insurance company is a lifesaver. I make sure to photograph everything – the exterior, interior, damage up close, you name it.
If my home insurance process has taught me anything, it’s that proof is everything. The more detailed my documentation, the better chance I get a fair settlement when the dust settles. I also make sure to take pictures of what I’m salvaging, like furniture or other items, just to keep track.
Loyal to my organizational habits, I sometimes even jot down notes on each item – when it was purchased, estimated value, and condition. Yes, I know it sounds tedious, but trust me, it pays off!
Keep Records of All Communications
I’ve learned the hard way that keeping a record of conversations with my insurance agent, contractors, and even city officials is really important. I always use a notebook or my computer to log who I talked to, what they said, and when we spoke. Seriously, details can get fuzzy when stress is high.
When I reach out to my insurance company, I document every interaction. I note down claim numbers and the names of the people helping me. Having that information organized and accessible can make follow-ups way less daunting. I’m basically creating a mini-history of my recovery!
This documentation helps in case disputes arise later about coverage or payment. I never want to be in a situation where someone says they didn’t say something – it’s like he-said-she-said, but with a lot more at stake.
File a Claim as Soon as Possible
Timing is everything when it comes to filing insurance claims post-disaster. I learned to jump on it as soon as I feel safe enough to start the process. My mindset is: the quicker I file, the quicker I can start the recovery process!
Every insurance policy has time limits. I keep a close eye on those dates to ensure nothing slips through the cracks. If I miss a deadline, I might as well be throwing my money out the window.
Getting all my documented details together for the claim is super important. I organize photographs, bills, and repair estimates to present a solid case. When I make the effort to compile everything ahead of time, it makes the submission process a lot smoother.
Stay Connected and Informed
Establish a Communication Plan
Finding a way to check in with loved ones is crucial for my peace of mind. I usually make a plan beforehand or at least write down a method for reaching my family and friends. It can be challenging, especially if cell services are down, but I’ve found that social media or messaging apps can do wonders.
Regular status updates can help keep everyone calm and ensure no one is worrying unnecessarily. Plus, when things settle down, I always have a game plan for deciding where to meet up if we can’t get home.
Establishing a communication plan is also a good way to connect with neighbors. I’ve found that fostering relationships can lead to all sorts of support during tough times, whether it’s sharing resources or emotional support.
Utilize Community Resources
Once I return home and things seem in order, I don’t shy away from reaching out to local community resources. I always check in with local governments and organizations for any available assistance programs aimed at disaster recovery. They often have a wealth of information that can help!
In my experience, it’s been great to tap into local resources for food, clothing, or housing assistance. There’s often a community spirit that blossoms after a disaster, so getting involved can help a lot – I’ve met some incredible people through these programs!
So, don’t hesitate to ask for help! Sometimes, just knowing there’s a network out there can make a massive difference in my recovery process. Plus, you never know – you might end up forging lasting relationships while you’re at it.
Keep Updated on Recovery Efforts
Staying informed about ongoing recovery efforts is essential. I usually follow local news channels and government websites fr updates related to rebuilding phases, road closures, and safety warnings. Being in the loop keeps me aware of potential dangers.
I also appreciate any information on local help centers and recovery-oriented community meetings. They usually provide updates on resources and aid being offered, which assists during my cleanup efforts.
Joining local online groups can be a real game changer, too. They often share firsthand experiences about dealing with insurance or recovery, and offer comforting advice during times when I might feel alone in my struggle.
Rest and Recover
Take Care of Your Mental Health
Returning home can take a toll on anyone’s mental well-being. I always remind myself that it’s okay to feel overwhelmed during this process. I make a conscious effort to give myself permission to take breaks and just breathe. Sometimes, just stepping outside for some fresh air can do wonders!
Talking about my feelings with friends or a therapist can help me process all that’s happened. It’s important to vent, even if it involves crying over coffee with a friend while reminiscing about happier times.
If I notice lingering stress or anxiety that won’t go away, I don’t hesitate to reach out for professional help. Mental health is just as crucial as physical health, and taking care of myself sets the stage for a successful recovery.
Find Support Systems
I’ve come to learn that leaning on friends, family, or support groups during this period is vital. Surrounding myself with supportive people not only helps me feel balanced but also keeps my spirits lifted.
Finding local support groups can be an excellent way to connect with others who are going through similar experiences. I’ve found group settings transform sharing struggles into learning moments; hearing how others cope can offer fresh perspectives!
Also, sometimes just knowing that I’m not alone in this journey can be comforting. Check-ins from loved ones, even in simple forms like a text or call, remind me that my world is still filled with caring connections.
Establish a Routine
Finally, creating a routine helps me regain a sense of normalcy after a disaster. I’ve been amazed at how having a daily schedule—even if it’s simple—helps shift my mindset. It’s about getting back to doing things that bring me joy, whether cooking a meal or taking a walk.
Additionally, checking items off my to-do list can provide little victories throughout the day. Slowly but surely tackling cleanup or recovery tasks brings a sense of accomplishment, which is so motivated during recovery.
Even if my routine isn’t perfect, it serves as a mental anchor, allowing me to feel a bit more in control. I’ve realized that recovery is a journey, and taking small steps is totally okay!
FAQ
Q1: What should I do first when I return home after a disaster?
A1: The first step is to evaluate the situation to assess any damage and ensure it’s safe to enter your home. Look for hazards like broken glass, downed power lines, or any smells that could indicate gas leaks.
Q2: Why is documenting damage important?
A2: Documenting damage with photos helps provide evidence for insurance claims and ensures you’re assessing the true extent of the damage. The more detail you have, the better your chances of getting a fair settlement.
Q3: How do I choose the right community resources for recovery?
A3: Check with local government sites, disaster relief organizations, or community centers. They often have a list of resources tailored to those affected by the disaster.
Q4: What should I prioritize during the mental recovery phase?
A4: Take care of your mental health by seeking support from friends, family, or professional help. Make space for your feelings and don’t hesitate to lean on your support system.
Q5: How can I establish a routine during recovery?
A5: Start small by setting up a daily schedule that incorporates tasks that bring you joy or a sense of accomplishment. Creating little victories in your day can help restore a sense of normalcy.

by Preparation | Jul 30, 2025 | Preparedness
Understanding the Environment
Assessing Climate Types
When I first started preparing for different environments, I quickly realized not every climate is the same. There are tropical climates which can be hot and humid, polar climates that are frigid and unforgiving, and temperate climates that have a mix of both. Each of these settings demands its own unique set of survival gear. It’s all about understanding where you’re going and what conditions you’ll face.
With this in mind, you’ll want to know about seasonal variations too. For instance, a temperate zone can experience frigid winters and scorching summers. Pack accordingly! It’s not just about the current season; a good survivalist thinks ahead to what they might face next.
Finally, consider specific regional features. If you’re heading into a mountainous region, you need to gear up for altitude changes and harsh weather. Meanwhile, coastal areas may have their own challenges, like salty air and humidity. The more you know, the better prepared you will be
by Preparation | Jul 30, 2025 | Preparedness
Assessing Your Situation
Understanding Your Immediate Needs
First and foremost, when my emergency supplies run low, I take a moment to really understand what I need versus what I want. There’s so much noise around panic buying and stockpiling, but in a real emergency, it’s crucial to focus on what’s essential. Ask yourself: What do I need right now to survive? Water and food are obviously at the top of the list, but don’t forget about warmth, medical supplies, and basic hygiene items.
Something I’ve learned through experience is that staying calm helps in assessing the immediate needs. Take a deep breath, evaluate your situation, and make a list. Having a written-down priority list can actually make a difference. It’s like my own personal emergency playbook!
I also try to keep my mindset positive when I’m in a crunch. I remind myself that solutions are often within reach, and sometimes, it’s about being creative with what I already have at hand. It’s about assessment and action!
Surveying Your Current Supplies
The next step I take is to thoroughly check what I have left. This means looking through my supplies, food stock, and any other essentials. I might think I’ve run out of something when I actually have a back-up stash hidden in the kitchen or garage. It’s like a mini scavenger hunt!
While I’m going through everything, I pay close attention to expiration dates. There’s no point in holding onto supplies that won’t be usable when an emergency hits. If I find food or medications about to expire, I use that as a reason to think outside the box and maybe prepare something a little different to prevent waste.
I also look for communal areas or shared supplies if I am not alone. Sometimes neighbors or friends might have what I’m missing, and working together can be a reassuring way to bolster our supplies. Plus, it helps build a sense of community, which is invaluable during tough times!
Prioritizing Resource Allocation
With a solid understanding of what I have, the next step is prioritizing how to use those resources. This is especially important with limited supplies. It may seem tempting to go all out on a big meal, but I often find it better to ration food wisely and spread it out. Think of it like budgeting my grocery trips but with a heavier focus on survival.
I like to think of it as a game plan. I’ll set daily or weekly meals, depending on how much I have left. This helps reduce waste and ensures I can stretch my supplies for as long as I can. It’s really about planning my meals and keeping everything fresh for as long as possible.
Moreover, when it comes to water, I make sure to prioritize hydration while considering ways to conserve. If I absolutely need to boil water for purification, I strategize to do that in batches rather than one-off boilings. This way, I’ll have more clarified water ready to go without unnecessarily warming the stove all day.
Getting Creative with Alternatives
Finding Substitute Ingredients
If I run out of a critical ingredient, whether it’s for cooking or something essential, I don’t just throw in the towel. Instead, I think through what I could substitute! When I ran out of eggs once, I remembered that applesauce can work wonders in baking.
There’s a ton of information available online about food substitutions. I’ve even kept a few quick charts saved on my phone for reference. The creative process can be kind of exciting, and, who knows, I might end up inventing a new favorite recipe!
Being resourceful might mean using ingredients in ways I wouldn’t have thought of otherwise. For example, if I have excess canned veggies, they’ll definitely make a stellar soup if paired with the right spices and broth. It’s a chance to be inventive in the kitchen.
Improvising Without Conventional Supplies
Sometimes I run out of supplies that I consider essential, like hand sanitizer or soap. At those moments, improvising becomes my best friend. I’ve learned that simple things like vinegar and baking soda can help in cleaning situations. Who knew household items could turn into a clean-up army?
When it comes to cooking tools, I’ve made do with things around the house. A sturdy pot can double as a steamer if needed, or a baking sheet can serve as a makeshift cutting board. I think back to the Boy Scout motto, “Be prepared!” and apply that to everything in my life.
And let’s not forget about entertainment when things get tough. Board games or card decks can replace digital distractions when devices need power. I gather friends and family around to share some laughter and creativity during downtime. It’s restoring to connect without screens anyway!
Reaching Out for Help
If my supplies are running critically low, I won’t hesitate to reach out to friends, family, or even community resources. Oftentimes, I find that others may have just what I need or can help directly. There’s no need to suffer in silence!
Community organizations often have sharing programs, especially during crises. They might offer food banks or supply drives, and I lean on that help when I can. It’s always amazing to see how neighbors come together to rally support, especially in trying times.
Also, social media can be beneficial here. Posting about my situation respectfully might connect me with local groups where others can come to the rescue as well. The power of community is incredible, and it feels great to know I’m not alone in this!
Preparing for Future Emergencies
Restocking Wisely
Once the current emergency has passed, my next thought is how to restock in a more balanced way. I’ve come to realize that I don’t need to hoard supplies, but I do need to think strategically about what’s essential for my family’s lifestyle.
Taking inventory of what I used up during the emergency helps me understand what I might need more of in the future. I jot this down as I restock, and I make a conscious effort to get items that I actually find myself reaching for. It helps avoid future panic, and when I get a chance to prepare, I’ll be ready.
Also, I think it’s important to educate myself regarding expiration dates and proper storage methods. This way, I won’t be in a bind because I forgot about something in the back of the pantry.
Creating a Comprehensive Emergency Plan
Every time I go through an emergency, I take notes on how to build a better emergency plan for the future. This includes guidelines on how to create supply lists, where to store items, and setting reminders to rotate supplies out as they age. Making a comprehensive plan means I’m less likely to forget essentials.
I also involve my family in the planning process. It’s a comforting activity that allows us to have open discussions about our needs, concerns, and ideas. When everyone knows what to do, it empowers us to navigate difficulties together.
A plan isn’t just about supplies; it also includes contact numbers for local shelters, health facilities, and resources we can lean on in times of need. Having a centralized plan gets rid of the last-minute panic of not knowing what to do when the going gets tough!
Educating Yourself and Others
Last but not least, I firmly believe that knowledge is power. I make it a priority to educate myself continually on preparedness and emergency protocols. Whether it’s taking a first aid class or reading up on survival skills, every bit helps when the time comes.
I also enjoy sharing this information with friends and family. Everyone benefits from knowing basic skills and actions during an emergency, creating a chain of preparedness that helps us all. Workshops, local classes, or community groups can provide great platforms for learning together.
Additionally, I often encourage conversations about preparedness without fear or panic. If we embrace these discussions casually, it lifts the burden and can even foster a positive atmosphere where everyone feels ready to take on whatever comes our way.
FAQs
- What should I do first if my emergency supplies run out?
- Start by assessing your current situation and identifying your immediate needs. Make a list to prioritize what’s essential.
- How can I find alternatives for missing supplies?
- Get creative! Investigate what you can substitute in cooking or for other essential items. Check online resources for ideas.
- What if I need help during an emergency?
- Don’t hesitate to reach out to neighbors, friends, or community organizations for assistance. You’d be surprised at how many people are willing to help!
- How can I prepare better for future emergencies?
- After an emergency, assess what you used and restock wisely. Creating a comprehensive emergency plan can help in future situations.
- Why is educating myself about emergency preparedness important?
- Knowledge equips you with the tools and strategies to react effectively during emergencies, ensuring safety for you and those around you.
by Preparation | Jul 30, 2025 | Preparedness
Plan Ahead: Stocking Up on Non-Perishables
Understanding Non-Perishables
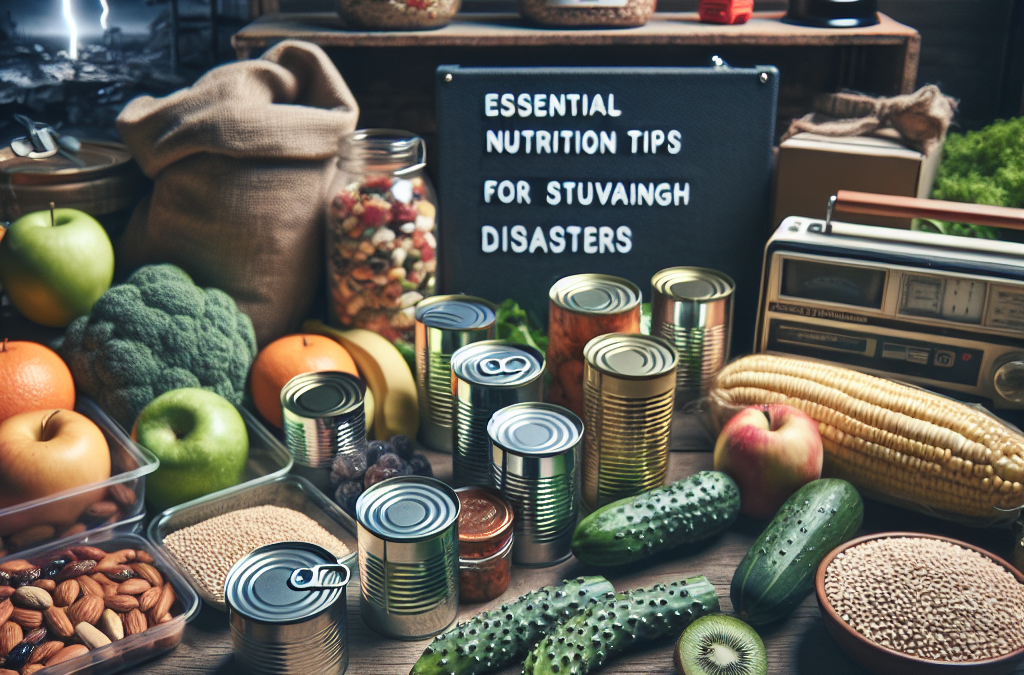
When preparing for potential disasters, the first step is understanding what non-perishables are. These are foods that don’t spoil easily, including canned goods, dried pasta, and rice. They form the core of any emergency supply plan because they can last for months or even years. Believe me, you don’t want to be scrambling to think of meals when the skies are dark.
One thing I always do is check the labels for expiration dates. It’s easy to think that food will last forever, but trust me, even canned beans have a shelf life. I recommend stocking items that have a long shelf life and can be used in multiple recipes. It’s essential to think about versatility here. You want to have meals that can be easily prepared with just a few key items.
Lastly, don’t forget to include some simple snacks. Granola bars, nuts, and trail mixes can help keep spirits high during frustrating times. Remember, food is not just about sustenance; it also serves an emotional purpose. Feeling a little treat can do wonders for morale!
Diversify Your Supplies: Nutrient-Rich Options
Why Nutrient Variety is Important
One of the biggest mistakes people make when preparing for disasters is focusing too heavily on caloric intake and neglecting nutrition. Just because you’ve stocked up on pasta and rice doesn’t mean you’re covered. Variety in your diet leads to a robust immune system, which is vital when things get tough. I learned this the hard way when I had only carbs to live on for weeks; let me tell you, I felt sluggish and out of sorts.
Consider adding canned vegetables, fruits, and legumes to your collection. Not only do these foods provide essential vitamins and minerals, but they also bring some color to your meals, making them more appealing during a time of crisis. I’ve found that even being able to throw some peas into my rice creates a sense of normalcy, which I desperately crave during turbulent times.
Don’t forget about proteins either! Canned meats, beans, and nuts are must-haves. Protein keeps you feeling full for longer, and it’s essential for maintaining energy levels when you’re juggling unexpected events. So mix it up and keep it interesting, even in a disaster situation!
Stay Hydrated: The Importance of Water
Water Storage Basics
It might sound basic, but having enough water is crucial and often overlooked. I can tell you from personal experience that I’ve been caught without sufficient water, and trust me, it’s no fun. A good rule of thumb is to have at least one gallon per person per day for at least three days. That said, you might want to stock even more if space allows. You’d be surprised how quickly it disappears, especially if you’re cooking food!
Besides just drinking water, think about how much you’ll need for cooking and hygiene. I always set aside a few extra gallons to make sure I’m covered on all fronts. Water filtration systems or purification tablets can come in handy too. In emergencies, having the ability to make water safe for drinking can be a game-changer.
Lastly, don’t forget to have a plan for water wastage. It’s easy to go through your supply faster than anticipated. You should always be conscious of how you’re using it and be mindful of conserving as much as possible. Each drop counts in critical times!
Food Safety Measures: Preventing Spoilage
Avoiding Spoiled Goods
Even in disasters, you have to think about food safety. I can’t tell you how many times I’ve thrown out food simply because it wasn’t stored properly. First off, make sure that you’re keeping your non-perishables in dry, cool areas. Heat and moisture can turn even the best canned goods into a nasty surprise.
Rotating your food supplies regularly is also essential. I try to use the first-in, first-out method, which means using older products before newer ones. It not only saves you from waste but also ensures everything you consume is fresh and safe.
Additionally, know how to check for spoilage. Cans with bulging tops, or any packets that feel off, should NOT be consumed. Safety first, always! Emergency times can be stressful enough; the last thing you want is to get sick from bad food.
Emergency Meal Prep: Easy Recipes on the Fly
Quick Cooking Ideas
Okay, so let’s talk about actually making meals when the time comes. I like to have a few go-to recipes in my back pocket that only require minimal ingredients. Think of meals that can be thrown together quickly without losing flavor. A personal favorite of mine is a simple one-pot chili made with canned beans, tomatoes, and some spices. It fills you up and tastes great!
Also, don’t ignore the power of simple stir-fry. Toss a can of mixed vegetables, some protein, and soy sauce together, and you’ve got yourself a meal! You can cook it over whatever heat source you have available. These meals are comforting, familiar, and help to ground you when everything else feels a bit chaotic.
And here’s a little secret—don’t be afraid to get creative! Sometimes, it can be a good stress reliever to play master chef with whatever you have. Look at it as an opportunity to experiment with different combinations; who knows, you might discover a new favorite meal in the process!
FAQs
What should I prioritize when stocking up for a disaster?
Focus on non-perishable foods that have a long shelf life, and make sure to include a variety of nutrients—think protein, vitamins, and healthy fats.
How can I ensure my water supply lasts?
Store at least one gallon per person per day, and consider having a water filtration system or purification tablets to make your water last longer.
How do I know if my food is still safe to eat?
Always check for any signs of spoilage. Cans with bulging tops or dents shouldn’t be consumed, and always trust your senses—if it smells off, toss it!
Can I still prepare tasty meals with limited supplies?
Absolutely! Keep a few simple, versatile recipes in mind, and don’t hesitate to get creative with what you have. It’s all about improvisation!
What can I do to keep my spirits up during tough times?
Maintaining a positive outlook, experimenting with cooking, and enjoying some comfort foods can help keep morale high during stressful situations. Remember, it’s not just about the food—it’s the experience!

by Preparation | Jul 30, 2025 | Preparedness
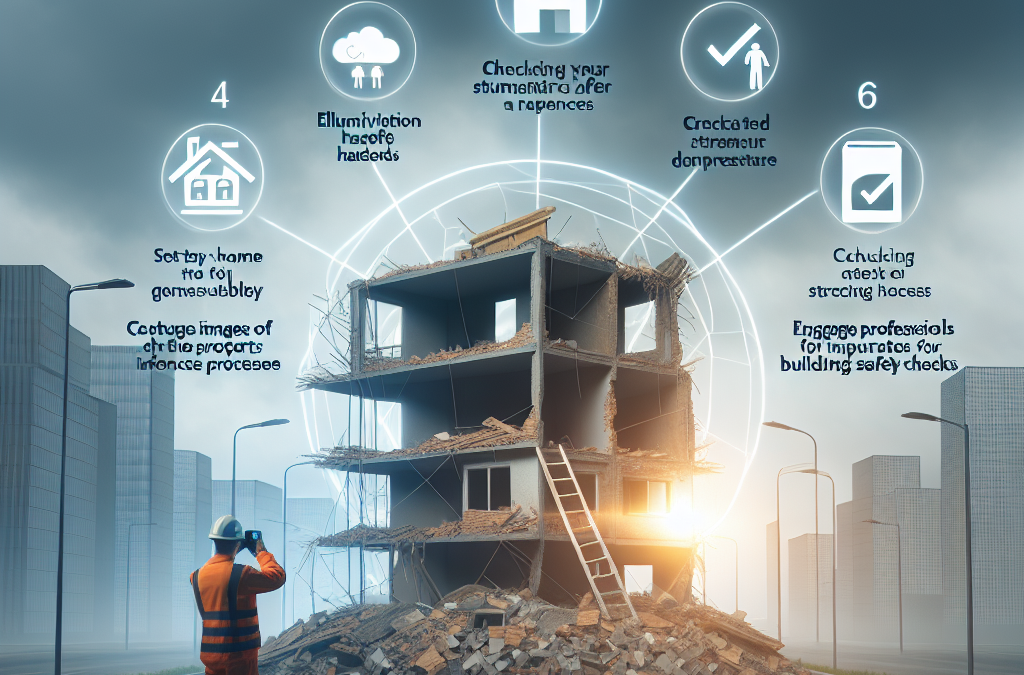
1. Assessing Your Home’s Vulnerabilities
Understanding Common Weak Points
When I first started thinking about storm protection, I quickly realized that my home wasn’t impervious to nature’s fury. Common weak points often include roofs, windows, and doors. These areas are usually the first to show signs of wear and can be severely affected during severe weather.
Furthermore, the materials used in construction can influence how resilient your home is to storms. For example, older homes with traditional single-pane windows are much less effective at resisting high winds and debris than modern double-glazed windows.
Taking the time to assess these vulnerabilities not only prepares you for the worst but also gives you peace of mind knowing that you’ve identified where your home needs help.
Conducting a Structural Inspection
My structural inspection kicked off with a thorough walk-around of my property. I looked closely at gutters, downspouts, and the overall exterior. Loose shingles? A cracked window? These details matter! I recommend making a checklist to ensure you don’t miss anything important.
If you’re not sure what to look for, you might want to consult a professional. Having someone trained in storm readiness can help pinpoint weaknesses that I might overlook while doing a simple check-up.
Once you have that list, you can prioritize repairs and upgrades. It’s like a map showing the way to a safer, storm-proof home!
Reviewing Local Weather Patterns
Knowing your enemy is half the battle, right? That’s why I took some time to dive into my area’s weather patterns. Does your region get heavy snow or intense hurricanes? Each storm has different implications for your house.
I started by checking historical weather data and trends; local weather stations often provide insights on the frequency and severity of storms. This information is crucial since it guides the preparation efforts you need to undertake.
Understanding what kinds of storms are most likely helps me decide where to invest more energy and resources in my home’s protection strategy. Ideally, learning about these patterns early can save you time and money later!
2. Strengthening Structural Elements
Reinforcing the Roof
Your roof is your first line of defense against storm damage. After my initial assessment, I realized that my shingles were aging quickly. Investing in a new roof or upgrading to impact-resistant materials can literally save your home from being exposed during storms.
Make sure to check not only the shingles but the underside too. Water damage can often hide under rotting boards. While doing my inspection, I found a few issues that needed immediate attention and prevented them from snowballing into bigger problems.
The great thing about a robust roof is that it enhances your home’s value while offering security. It’s a win-win situation!
Reinforcing Windows and Doors
Next up were my windows and doors. I didn’t realize how much they could be a vulnerability until I learned about storm shutters. Installation was surprisingly straightforward, and they can withstand high winds and debris.
If shutters aren’t in your budget, even applying a film to your windows can help them resist shattering. I felt much more secure knowing I had taken some practical measures to protect those glass panels!
As for doors, check your frames! Reinforcing door frames makes them much less susceptible to being kicked in by storm winds. It might seem trivial, but every little bit helps!
Strengthening the Foundation
Now, let’s not forget about the foundation! I realized that a solid foundation prevents flood damage, which is super important. A thorough inspection revealed some cracks and gaps that could let water seep in during storms.
To seal these gaps, I used specific waterproof compounds that have worked wonders for me. Keeping your foundation in tip-top shape ensures that water has nowhere to go but away from your home.
Moreover, grading the landscape around your property can help minimize flood risks. Ensuring the ground slopes away from your house has been one of my best decisions!
3. Outdoor Preparations
Landscaping and Trees
A tidy yard doesn’t just look good; it also keeps your home protected! I took a good look at my landscape and realized that some tree branches were closer to my roof than I’d like. Trimming back those branches protects against falling limbs during heavy winds.
Additionally, opting for wind-resistant plants and shrubs helps to create a natural barrier against strong gusts. I’ve read that dense foliage can act as a shield for your home!
Cleaning up any debris and securing patio furniture can also prevent wind from tossing them around, potentially causing damage. Preparation goes a long way here—don’t wait for the storm to get ready!
Drainage Systems
Good drainage is key to avoiding water damage during storms. I had to install downspouts that directed water away from my foundation. Make sure your gutters are clean and functioning. Clogged gutters can lead to valleys of water collecting around your home!
French drains are another great tool to consider. They help channel water away from your yard and can help prevent basement flooding, which I found invaluable during intense storms last year.
Also, consider the grading of your lot. Ensuring proper slope can help minimize pooling and prevent damage down the line. I’ve found that maintaining proper drainage offers peace of mind in storm season!
Preparing an Emergency Kit
One of the things I learned is that being ready for a storm goes beyond physical home protection; it also involves preparing an emergency kit. I made sure to stock up on essentials like bottled water, non-perishable food, batteries, and a first-aid kit.
Having these items available can make a huge difference if you’re stuck at home or lose power. I even made sure to include copies of important documents like insurance papers. It’s better to be safe than sorry!
Lastly, don’t forget about communication. I ensured my phone was charged, and I had a portable charger on hand. Communications are vital during a storm, and I know how isolating it can feel without them.
4. Insurance Coverage Review
Understanding Your Policy
This is super important! I went through my homeowner’s insurance policy with a magnifying glass. I needed to understand what exactly was covered in case of storm damage. Some policies may not cover certain types of water damage, so double-checking is key.
I found that discussing my coverage with my insurance agent revealed some potential gaps. They also helped clarify any uncertainties I had about deductibles or coverage limits.
Making sure my policy was up to date gave me this shield of comfort knowing that I’m doing my due diligence!
Documenting Your Home’s Condition
To solidify my insurance claims process if the worst should happen, I took a video tour of my home. As weird as it feels, having an inventory of my possessions, along with their condition, creates seamless documentation should I need to file a claim.
Let me tell you, it saved me a ton of hassle when I had to use it following a particularly intense storm. Recording additional images of costly items gives me peace of mind!
Plus, if you ever make renovations, capturing those updates makes everything easier and quicker for your insurer later on.
Reviewing Flood Coverage
In my home insurance analysis, flood coverage caught my eye. Most standard homeowner’s insurance doesn’t cover flood damage, which is a serious issue if you live in a susceptible area.
After a conversation with my agent, I decided to invest in additional flood insurance. It’s good to remember that even if you’re not in a flood zone, you can still be affected. Being proactive in this way has provided incredible peace of mind!
If you’re in a similar situation, don’t think twice about giving your insurer a call for guidance. A little knowledge can go a long way!
5. Building a Community Plan
Connecting with Neighbors
No man (or woman) is an island, right? When I prepared for storm season, I found that building connections with my neighbors makes a world of difference. We established a small neighborhood group that shares information on storm prep, which I’ve found immensely helpful!
Having a buddy system for check-ins during storms can alleviate some fear. Just knowing someone will look after each other makes facing dire weather much less daunting. It’s about building a support network!
We’ve even had meetings to discuss sharing resources, which is a great way to exchange supplies and knowledge. Collaboration can make all the difference during storm season!
Developing an Evacuation Plan
Part of being prepared is planning an escape route when things get dicey. I talked with my neighbors about potential evacuation routes and gathering points in case we need to leave quickly. Knowing where the nearest shelters are was also a vital piece of the puzzle.
Having a plan ensures that chaos doesn’t reign when a storm arrives. We even discussed how we would communicate in case of evacuations, whether it’s using social apps or group texts. It made me feel so much better just having a safety net!
Make sure to involve everyone, including kids—having a well-thought-out plan gives all involved, young and old alike, confidence during emergencies.
Sharing Information and Resources
Lastly, we agreed to keep each other posted about storm forecasts and help one another with preparation tasks. For example, if someone struggles to secure their patio furniture, they know they can call for help.
We also decided to share our emergency kits. If someone has an extra flashlight or batteries they can lend out, it can elevate others’ preparedness levels significantly!
Being united as a community not only strengthens individual readiness but also creates that comforting feeling of safety and support. It’s amazing what collective effort can accomplish!
FAQ
1. What should I particularly look for when assessing vulnerabilities in my home?
Look for loose shingles, cracked windows, and old doors, as these are often the most susceptible to storm damage. Checking these areas can help you make necessary improvements before a storm hits.
2. Do I really need to reinforce my windows and doors?
Yes! Reinforcing windows and doors can prevent shattering during high winds. Installing storm shutters or applying protective film can also add an extra layer of safety.
3. How can I ensure my home’s drainage system is effective?
Make sure gutters are clean and working well. Installing downspouts that direct water away from your home and considering French drains can significantly improve your drainage system.
4. Is flood insurance necessary even if I don’t live in a flood zone?
Yes! Many areas not considered flood zones can still experience flooding. It’s a good idea to discuss flood insurance with your agent to make sure you’re covered.
5. Why is it beneficial to create a community plan for storms?
Building a community plan enhances support among neighbors, making it easier to share resources, check on each other during storms, and develop evacuation strategies together.


