by Preparation | Jul 30, 2025 | Preparedness
Understanding Water Contamination
Types of Contaminants
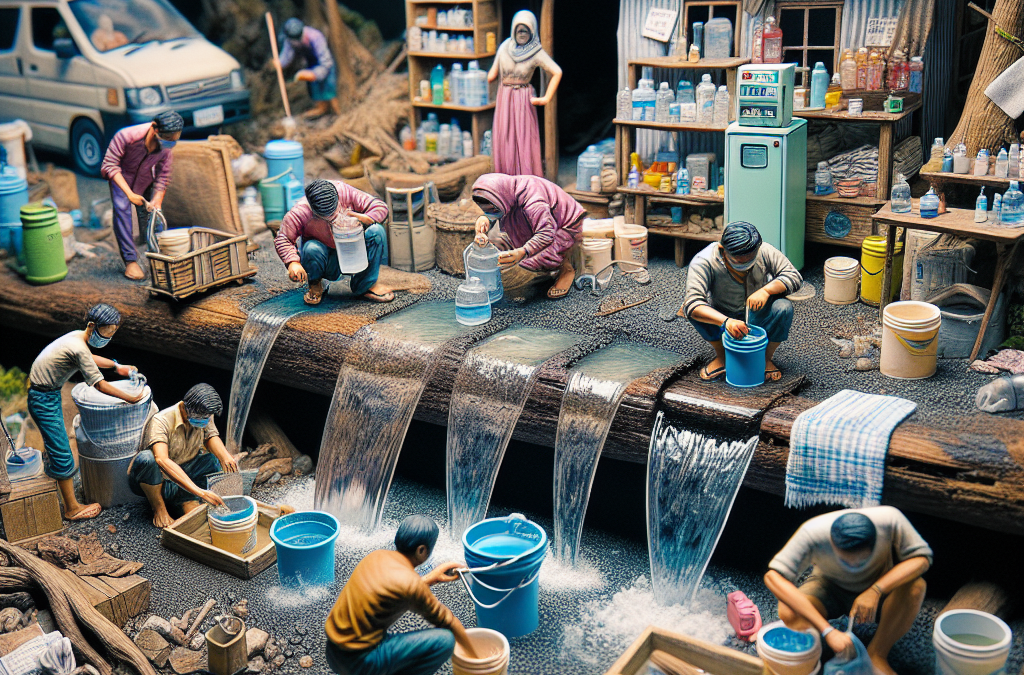
When it comes to water contamination, knowledge is power. There are various types of contaminants that can affect water sources, such as microbes, chemicals, and heavy metals. Microbes like bacteria and viruses are often the biggest concern during emergencies, especially in natural disasters where the infrastructure might be compromised.
Chemical pollutants can also find their way into our water supply due to agricultural runoff or industrial processes. Heavy metals, such as lead and arsenic, may leach into water supplies from corroded pipes or contaminated soil. Understanding these types of contaminants helps us prioritize our water purification methods effectively.
Always remember: if your water looks or smells odd, it’s a red flag. Filter your water as best as you can until you can confirm it’s safe for consumption.
Why Purification is Essential
During emergencies, safe drinking water is not a luxury; it’s a necessity. Contaminated water can lead to serious health risks, including gastrointestinal illnesses and other diseases that can severely impact recovery efforts. You want to ensure that you and your loved ones stay healthy and safe.
There are countless stories of folks who underestimated the importance of clean water. I remember a particularly harrowing experience during a storm when we lost power. We relied on a makeshift filtration system that had a lasting impact on our health and well-being. It was a wake-up call for me to take water purification seriously.
So, when faced with an emergency situation, never overlook the importance of purifying your water. Trust me; your body will thank you later!
Assessing Water Sources
First off, you need to figure out where your water is coming from. If it’s from a municipal supply, clarity on the situation can often be confirmed online, especially if there’s a water crisis. If you’re using a natural source, like a river or a lake, exercise caution. They can be beautiful but deceptive in their purity!
Next, it’s crucial to evaluate the surrounding environment. If the water source is near industrial areas or has visible debris floating around, it’s likely contaminated. If it’s possible, always go for moving water over stagnant water, as running water is usually less likely to harbor dangerous pathogens.
Ultimately, gathering information about your water source will inform your purification strategy. Knowing what you have to deal with is half the battle, right?
Water Purification Methods
Boiling
Boiling water might sound old-school, but believe me, it’s one of the most effective methods out there. Bringing water to a rolling boil for at least one minute (or three minutes at higher elevations) kills off most pathogens that might be lurking in there.
Honestly, it’s simple. Just pour some water into a pot, heat it up, and wait! One little tip I learned the hard way: always let it cool down before trying to drink. Trust me; you don’t want to scald your tongue!
Additionally, I like to store some boiled water in a clean container for later use. Just make sure that it’s covered and kept cool. It feels good knowing I have some safe drinking water ready to go when emergencies strike!
Filtration
Water filters come in all sizes and shapes, and picking the right one can make a huge difference. Whether it’s a personal filter straw or a larger family-sized system, these gadgets are designed to physically remove contaminants through various types of filters. I always keep a portable filter handy in my emergency kit—just in case.
However, don’t be fooled into thinking all filters are created equal. Some might only filter out big particles but let through smaller, nasty germs. Remember to check the specs before relying on a filter. You want something that can handle bacteria, protozoa, and other annoying pathogens.
Choosing the right filter takes some research, but it pays off in peace of mind. I can’t tell you how reassuring it is to pull out my filter knowing I can drink crisp, clean water during an emergency.
Chemical Treatment
If you’re in a pinch and boiling or filtering isn’t an option, chemical treatments can be lifesavers. There are various tablets or drops that can disinfect water by killing pathogens. I always keep a stash of water purification tablets in my kit for those unexpected situations.
While it’s effective, you’ve got to follow the instructions to a T—how long to let it sit, how many to use per liter, etc. If you rush this step, the water might still be contaminated. It’s like following a recipe: if you skip steps just because you’re in a hurry, you might ruin the outcome!
However, be mindful that chemical treatments may leave an aftertaste. If you’re not used to it, this can be a little off-putting. Just chug it down; your health is worth the momentary discomfort!
Storing Purified Water
Choosing the Right Containers
When storing purified water, using the right containers plays a massive role in maintaining its safety. Always use clean, food-grade containers. I’ve made the mistake of using something that wasn’t fully clean, and let’s just say it ruined the batch!
I prefer using BPA-free plastic or glass containers. Glass, in particular, keeps water tasting fresh, while certain plastics can sometimes leach chemicals back into the water. Just keep a close eye on what you’re reusing for storage!
Also, don’t forget to label your containers and rotate them. It’s easy to forget when you store water for emergencies, but keeping an inventory helps ensure nothing expires without you knowing!
Location Matters
When it comes to storing your water, find a cool, dark place that’s away from direct sunlight. Heat and light can break down the quality of your water over time. I once thought I could just stash some bottles on a sunny shelf and forgot about them. Spoiler alert: they didn’t taste too pleasant after a few months!
A good spot, like a basement or cupboard, can be ideal. It’s also vital to avoid areas likely to experience flooding or contamination during crises. Trust me; having your water ruined just when you need it most is a massive bummer!
Also, think about the accessibility of your water stores during an emergency. If it’s not easily reachable, you might find yourself scrambling when time is of the essence. Keep it close, folks!
Regular Maintenance
Storing water isn’t a “set it and forget it” task. Regularly checking on your containers and replacing older water is key. I make it a habit to do this every six months or so, making sure everyone in my household is aware of this routine.
If you notice any strange odors or discoloration, it’s best not to take any chances. Always err on the side of caution and throw it out. Your health isn’t worth a few bucks!
Maintenance can also include cleaning your containers every couple of months. I usually run mine through the dishwasher or rinse them with a mixture of vinegar and water. Keeping things clean and safe is always a priority!
Preparing for Emergencies
Emergency Kits
Every household should have an emergency kit ready to go, and water purification supplies are essential. Pack essentials like filters, purification tablets, or even a small stove for boiling water.
When I first started prepping, I didn’t think much about water. But after a couple of close calls with storms, I realized it was crucial. Luckily, I’m now much better prepared to handle unexpected situations!
Regularly check your kit and ensure all items, especially anything with expiration dates (like tablets), are still good to go. I like to keep a checklist of everything I need to stock up on so that I’m always ready.
Staying Informed
Keeping yourself updated on local emergency protocols and water advisories is just as important as having supplies. This can help you react promptly when disaster strikes. Community alert systems are excellent resources for receiving notifications about water safety.
Social media can also be a helpful tool during emergencies. Following local news channels allows you to get real-time updates, especially if there’s a risk of contamination from natural disasters or industrial accidents.
Staying informed not only helps you react better but can provide peace of mind during chaotic times! I often share tips with friends and family on where to find reliable information in emergencies.
Community Preparedness
Encouraging community preparedness can make a significant difference during emergencies. Organize neighborhood meetings to discuss water safety and purification methods. Sharing what we know can empower everyone!
We’ve even put together a community kit that includes purification supplies we can all access. This collaboration ensures that no one in the area is left without access to safe drinking water in a crisis.
Building strong community bonds through preparedness activities makes a whole world of difference. Isn’t it lovely to know we can count on each other when life gets tough?
Conclusion
Water purification in emergency situations is a skill set that everyone needs to familiarize themselves with. Understanding what contaminants are in your water, the best purification methods, how to store your clean water, and being prepared for emergencies can help significantly during tough times. Remember, your health and safety are the top priorities!
FAQ
1. What are the most common water contaminants in emergencies?
The most common water contaminants include bacteria, viruses, chemicals, and heavy metals. Always source your water carefully and be mindful of your surroundings.
2. How long should I boil water for purification?
You should boil water for at least one minute, or three minutes if you are at high elevations to ensure that it is safe to drink.
3. Can I use my tap water during an emergency?
It depends on the situation. Always check your local advisories about water contamination. If there’s any doubt, consider filtering or boiling your tap water before consumption.
4. How can I store purified water safely?
Use clean, food-grade containers, store them in a cool and dark place, and regularly check and rotate the water to ensure it remains safe to drink.
5. What should I include in an emergency water kit?
Your emergency water kit should include purification tablets, portable filters, a small stove or boiling pot, and clean containers for storing water.
by Preparation | Jul 30, 2025 | Preparedness
Understanding the Nature of Long-Term Crises
What Constitutes a Long-Term Crisis?
Long-term crises can come in various forms. They might be environmental disasters, economic recessions, or even societal upheavals. Recognizing what defines a long-term crisis is the first step toward effective preparation. In my experience, understanding the scope and scale of these crises helps in assessing their potential impact on my life and community.
One thing I’ve learned is that these crises aren’t just isolated events; they often have cascading effects. For instance, an economic downturn can lead to job losses and increased poverty, which can, in turn, lead to social instability. That’s why it’s so crucial to think about the long-term implications of any crisis.
Moreover, long-term crises often require sustained responses, whether it’s stocking up on supplies, building strong community ties, or continuing to educate oneself and others. It’s not just a one-time effort; it’s an ongoing commitment to being prepared for whatever might come our way.
Historical Examples of Long-Term Impact
History is filled with examples of crises leading to long-standing changes in society. The Great Depression is a classic case — it not only affected the economy for years but also changed how people viewed financial security and government support. Learning from these events can be incredibly insightful.
I remember reading about how communities banded together during the tough times of the Depression. They created their own support networks, which is something we should consider today. History teaches us that resilience can emerge from crisis; it begins with preparation.
Understanding these historical contexts helps us frame our preparations today. It’s not just about stockpiling supplies; it’s about building a mindset of community resilience and emphasizing sustainability for the future.
Crisis Prediction and Early Warning Signs
Being able to predict a crisis is tricky, but there are warning signs we can watch for. Environmental changes, economic indicators, and political unrest can signal that something bigger is brewing. I’ve spent a fair amount of time looking at trends and trying to make sense of them.
It’s essential to stay informed — read reputable news sources, follow scientific studies, and get involved in community discussions. This knowledge will not only help in preparing for a crisis but also in potentially mitigating its impact through early action.
So, becoming proactive rather than reactive is key. By recognizing these signs early on, I can take meaningful steps before a crisis engulfs us, whether it’s storing supplies or advocating for community preparedness initiatives.
Building a Personal Crisis Plan
Identifying Your Needs and Resources
When I first started creating my personal crisis plan, I realized that the first step was to assess my individual needs. What do I have at my disposal? What would I need in case of an extended disruption? This was a real eye-opener for me.
To effectively prepare, it’s crucial to take stock of your resources — that means food, water, medical supplies, and even emotional support networks. Understanding what you have and what you might need can help narrow down your preparation efforts significantly.
From my own experience, I’ve also found that reaching out and discussing these things with friends and family can provide more insight. They may think of needs I hadn’t considered, and together we can come up with a comprehensive plan that covers a wider range of scenarios.
Creating a Sustainable Supply Cache
Once I’ve assessed what I might need, the next step is to create a sustainable supply cache. This part can be a bit daunting at first — where do I even start? I’ve learned that starting small is key. I began with non-perishables, like canned goods and dry grains, and steadily built from there.
Sustainability is also about choosing items that I can incorporate into my daily life. This way, I can avoid waste. For example, purchasing extra of the things I regularly eat means I can rotate through supplies while ensuring I have extras when needed.
Ultimately, having a well-thought-out supply cache not only gives me peace of mind but also prepares me for various long-term crises without having to scramble at the last minute.
Practicing and Updating Your Plan
Once I have my plan and supplies sorted, practice is essential. Just like a fire drill, I need to go through my plan and ensure that I know what to do in different scenarios. Regularly revisiting this plan helps me feel more confident and allows me to make any necessary updates.
In some instances, I’ve found that equipment I had set aside for emergencies can become out of date or impractical. By practicing, I ensure that I have what I need and that it’s still effective. Plus, it gives me a chance to get creative and think about new strategies that could work.
Also, inviting friends or family to join practice scenarios creates a sense of community, making preparations feel less daunting and more collaborative. After all, we’ve got each other’s backs during a crisis.
Connecting with Your Community
The Importance of Building Community Resilience
Your personal plan is a great start, but it’s vital to think about the larger community as well. From my experience, community resilience can make or break our ability to withstand a long-term crisis. I make it a priority to engage and encourage dialogue within my neighborhood or social circles.
Participating in or organizing community preparedness meetings can foster relationships and awareness. When we know our neighbors, we not only have a support network in place but we can also quickly mobilize resources and assistance during emergencies.
Building that community connection ensures a more significant support system, which increases our collective resilience against crises. No one should face a long-term crisis alone if we can help it.
Establishing Local Support Networks
Strong local networks are essential. I believe in the power of grassroots support groups and organizations that help facilitate resources and information in times of need. Finding or creating these networks allows for better preparedness and response during a crisis.
During my journey, I’ve found that local food co-ops, community gardens, and skill-sharing events have not only improved my network but have also created stronger ties within the community. The interactions I’ve had have been invaluable, as we can learn from each other’s experiences and expertise.
Having a local support system means timely assistance and resources as well. In the event of a crisis, knowing where to turn can be invaluable. Plus, those connections make us more adaptable to the changes a crisis may bring.
Emergency Communication Plans
Establishing effective communication during a crisis can be a game-changer. As part of my community efforts, I’ve worked on creating emergency communication plans so that everyone knows how to reach each other before, during, and after a crisis.
Whether that’s setting up group chats, creating a community bulletin board, or having a designated meeting point, clear communication is crucial. It makes sure we can coordinate responses, share resources, and check on each other’s well-being in times when information can be scarce.
Ultimately, the idea is to ensure everyone is on the same page so nobody feels isolated during tough times. We might not be able to predict every crisis, but we can certainly prepare to face them together.
Maintaining Adaptability and Continuous Learning
Staying Informed and Updated
In a world that’s constantly changing, adaptability is survival. Staying informed about new trends, potential crises, and innovative solutions can significantly enhance my preparedness. I regularly read about new research and listen to podcasts on emergency preparedness, which keeps my knowledge fresh.
Adapting to changing situations also means learning from past experiences. Reflecting on what went well and what didn’t during previous crises helps me fine-tune my approach continually. No two crises are identical, but there’s always something to be learned from each experience.
Moreover, connecting with experts in various fields allows me to gather diverse perspectives and strategies, leading to a more robust preparedness plan. Whether it’s through workshops or online webinars, continuous learning is essential.
Encouraging Flexibility in Plans
I’ve come to realize that no plan survives contact with the real world unchanged. It’s essential to keep my crisis preparedness plan flexible. If the situation changes, my strategy might need to shift as well. Being too rigid can lead to missed opportunities to adapt and respond effectively.
For example, if I originally plan to stock up on one type of food supply but later find a better option, I should be open to changing my strategy. The best plans aren’t set in stone; they evolve with our understanding and circumstances.
Creating a culture of flexibility within my community has also proven beneficial. When everyone is willing to adapt and adjust, we can respond to crises more effectively together, reinforcing our resilience.
Fostering a Culture of Preparedness
Lastly, fostering a culture of preparedness within my community is crucial. This means encouraging others to consider their plans, share ideas, and participate in preparedness activities. By collectively prioritizing disaster readiness, we can create a strong foundation for resilience.
I often organize workshops and discussions that raise awareness and share knowledge, making it a community effort. The more we talk about these topics, the less stigma there is around them, and the more normal it becomes to be prepared.
Ultimately, creating a culture of preparedness means that we take care of each other and are proactive about minimizing the impact of long-term crises. Together, we can build an unshakeable network of readiness!
FAQ
1. What is a long-term crisis?
A long-term crisis is an extended period of instability or hardship that impacts individuals and communities. This can include economic downturns, natural disasters, or significant societal changes.
2. Why is it important to prepare for long-term crises?
Preparing for long-term crises is essential because it helps individuals and communities to respond effectively to challenges, ensuring safety, security, and resilience during difficult times.
3. How can I start building a personal crisis plan?
Start by assessing your needs and resources. Identify what supplies you might need and begin creating a sustainable cache. Don’t forget to practice and update your plan regularly!
4. How can community connections aid in crisis preparedness?
Community connections provide support, resources, and shared knowledge during crises. Being part of a network can improve overall preparedness and response, making everyone feel less alone.
5. What role does adaptability play in crisis management?
Adaptability is crucial in crisis management as it allows for responding to changing circumstances and unexpected challenges. Keeping plans flexible and staying informed are key factors for success.
by Preparation | Jul 30, 2025 | Preparedness
Understanding the Risks
Identifying Potential Hazards
When I think about disaster scenarios, the first step always seems to be figuring out what kind of trouble I could be facing. I mean, there are a million things that can go wrong, right? Natural disasters, man-made situations, or even personal emergencies—each one can throw a wrench into our plans. The trick here is to take some time, sit down, and really consider what hazards exist in my area or even within my life.
To get a clearer picture, I often like to make a list. It helps me visualize the risks better. Whether it’s earthquakes, floods, or even the potential for a power outage, it’s important to have a comprehensive list that covers all possible hazards. You can never be too prepared!
Remember, understanding the risks isn’t just about knowing what might happen; it’s also about recognizing how these risks can affect me. Each hazard has its unique set of consequences, and being aware of them will help me formulate my response strategy in a more efficient way.
Assessing Vulnerabilities
After I’ve got my risks down, the next step is looking at my vulnerabilities. What areas in my life or community might be more at risk? This might mean evaluating my home for how well it can withstand a storm or considering how I would manage without electricity for an extended period of time. By honestly analyzing my vulnerabilities, I can prioritize where to focus my efforts.
For instance, if I live in a hurricane zone but don’t have storm shutters, that’s definitely something I’d want to address. The goal here is to create a real safety net so that when disaster strikes, I’m not left scrambling for cover.
It’s also important to involve others in this assessment—family members, friends, or neighbors. People can offer different perspectives and point out vulnerabilities I might have completely overlooked!
Creating a Disaster Plan
With risks and vulnerabilities in mind, it’s time to craft a solid disaster plan. I like to think of this as my safety blueprint. This should include everything from evacuation routes and emergency contacts to a stash of essential supplies. Putting this plan in writing is crucial; after all, when chaos ensues, you want a clear path to follow!
I usually gather everyone who’ll be affected by this plan—family, roommates, even pets—and go over everything together. It’s super important that everyone knows their role and understands the plan. Coordination is key, and everyone should feel included.
During this planning phase, I also consider digital tools. There are apps that can help with this, ensuring everyone stays connected and informed. Having a backup plan in today’s tech-driven world is just as important as the physical aspects of a disaster plan.
Building Community Resilience
Engaging Neighbors
Community resilience is something I’ve come to truly appreciate. Disasters can feel isolating, but sharing the load with neighbors makes things so much more manageable. I’ve found that simply talking to neighbors about our own disaster plans can pave the way for collaborative efforts. Who knows? Maybe they have resources or ideas that I haven’t thought of!
Setting up a neighborhood group focused on emergency preparedness can be a game-changer, too. From organizing drills to pooling resources—like sharing generators or extra supplies—there’s power in community. I try to host get-togethers where preparedness is a topic. This helps to build those connections early, meaning we can rely on each other when push comes to shove.
And let’s be real, it can be comforting to know you’re not in this alone. When disaster strikes, a supportive community can make the difference between chaos and calm.
Coordinating with Local Resources
Knowing what resources are available in my local area has been a lifesaver. I always make time to learn about local emergency services, shelters, and community organizations that provide support during disasters. This way, I’m not just dependent on my own efforts. If things get rough, I know where to turn for help.
It’s also a good idea to check for any community emergency response programs. Some towns have training sessions for residents on how to respond to disasters. I recently took a first aid course through my local fire department, and it was both informative and empowering!
Additionally, keeping contact information for local agencies and shelters is invaluable. In the frantic moments after a disaster hits, trying to search for help can be overwhelming, so having that info handy makes things smoother.
Conducting Regular Community Drills
Once I’ve got my plan and community support in place, it’s important not to let that effort fall flat. Regular community drills are crucial—they help keep everyone sharp and aware of the emergency strategies we’ve established. I like to think of it as “practice makes perfect.” The more prepared we are, the more confident we’ll feel when an emergency actually occurs.
During these drills, everyone can practice their roles, refine the plan, and identify any gaps we might need to fill. It also allows for real-world feedback that can improve our strategies. Maybe someone realizes they can’t reach the designated meeting point quickly; that’s valuable info that can be adjusted beforehand.
Lastly, these drills can also be a fun bonding experience. Making it a community event can bring everyone closer and reduce that feeling of isolation that disasters can create. Plus, it’s a step towards creating a resilient neighborhood.
Collecting Essential Supplies
Preparing an Emergency Kit
Having a well-stocked emergency kit has been a game-changer for me. I’ve learned what essentials are crucial to have on hand, especially during unexpected challenges. My emergency kit includes basic things like water, non-perishable food, first aid supplies, and extra batteries. Honestly, it feels good to know that I have what I need if things go sideways.
It’s important to personalize your kit, too. For example, I include items like my medications, pet food for my furry friends, and even a few comfort items like a favorite book. It’s about making sure I’m covered not just practically, but emotionally too.
Regularly checking and updating this kit is also key. I’ve learned that supplies can expire, and what I needed last year might not be the same as what I need this year. Making it a habit helps keep the kit fresh and ready to go.
Stockpiling Non-Perishables
Beyond just the basics, stockpiling some non-perishable items has really helped me feel secure. When I hear that a storm is heading our way, I feel much more at ease knowing I have extra canned goods and dry foods tucked away. It’s like having my very own safety net!
Not only is it smart to have food on hand, but I like to have cleaning supplies and hygiene items too. Disasters can sometimes disrupt services, and having those items adds an extra layer of comfort when I’m holed up at home. Plus, it’s a good chance to stock up on some of my favorite snacks and treats.
I aim to strike a balance between practical supplies and stuff that brings a bit of joy in stressful times. This way, a disaster can feel less daunting when I have both essential supplies and comforts available.
Creating a Communication Plan
Lastly, I can’t stress enough how important it is to have a communication plan in place. When disaster strikes, reaching loved ones becomes my number-one priority. I make sure everyone has essential contact details—both for me and for each other. Setting up group texts or social media groups helps us stay connected when phone lines go down.
In addition, I try to establish a meeting point in case we’re separated. It gives me a sense of peace knowing we have a designated spot to gather. Sharing this information with my friends and family is crucial—the more people who know about it, the better chance we all have of staying connected during chaos.
Making regular updates to this plan is also essential. Life changes, and so do our contact details. By keeping everything current, I reduce the risk of miscommunication when it matters most.
Reviewing and Improving Your Plans
Regularly Evaluating Preparedness
Life is always throwing curveballs, so regularly evaluating my preparedness is crucial. I’ve made it a habit to sit down every few months and reflect on my disaster planning efforts. What worked? What didn’t? This kind of check-in keeps my plans relevant and useful, rather than collecting dust on a shelf.
During these evaluations, I ask myself if my risks have changed. Maybe I’ve moved, new hazards have emerged in my area, or my family situation has changed. Flexibility is vital in this process; being adaptable means you can pivot and overhaul your planning as needed.
Feedback from my family and community also plays a big role in this evaluation. Keeping the lines of communication open after every drill or real-life incident allows us to refine our strategies continually.
Learning from Past Experiences
Every disaster scenario offers a lesson if we’re willing to learn from it. I’ve made it a point to reflect on previous emergencies—whether personal or community-wide—to better inform my future planning. Each experience provides wisdom that can enhance my readiness and resilience.
By analyzing what went right and what went wrong during past events, I can identify patterns that might help me in the future. This kind of reflection is powerful; it turns past challenges into future strengths.
It’s also important to share those lessons learned with the community. Hosting discussions about previous experiences can spark ideas for improvement and promote even stronger preparedness among neighbors.
Staying Informed and Updated
Finally, I make it a point to stay informed about emergency management updates and resources in my area. Being aware of local initiatives and changes in policies ensures that my plans remain aligned with any new approaches that may be adopted.
Following local news sources or joining community alert programs can offer crucial real-time updates and information, which is invaluable during emergencies. I learned that timely information can make all the difference when something unexpected happens.
Continued education about disaster preparedness is also beneficial. Whether it’s attending workshops or reading literature, there’s always more to know. Embracing a mindset of lifelong learning reinforces my commitment to being prepared for anything that comes my way.
FAQ
1. What should I include in my emergency kit?
Your emergency kit should include essentials like water, non-perishable food, a flashlight with extra batteries, a first aid kit, and personal medications. Additionally, consider including comfort items, hygiene products, and any necessary supplies for pets.
2. How often should I review my disaster plan?
It’s a great idea to review your disaster plan every few months. This ensures that your plan remains relevant and that you’re up-to-date on any changes in your circumstances or local hazards.
3. How can I engage my community in disaster preparedness?
Start by having casual conversations with neighbors about their preparedness. You can organize community meetings, share resources, and even practice drills together. Building those connections makes everyone feel more empowered and ready.
4. What vulnerabilities should I look for in my home?
Examine your home’s structural integrity, especially regarding local hazards. Check if your windows and doors are secure, assess your roof for storm readiness, and consider your access to emergency exits. Identify and fix any weak points!
5. What digital tools can assist in emergency preparedness?
There are many apps available that can help with emergency preparedness. Look for tools that facilitate communication, provide emergency information, or help in creating and maintaining your disaster plans. This tech can be a lifeline during emergencies.

by Preparation | Jul 30, 2025 | Preparedness
Evaluate Your Current Digital Security
Understanding Your Digital Footprint
First things first, let’s talk about our digital footprints. It’s amazing how many details about us are floating around online. From social media profiles to old apps, it’s crucial to take a hard look at what’s out there. I always start by searching my name to see what pops up. Trust me, it can be eye-opening!
Once you’ve identified your presence, take stock of what you want to keep and what you need to clean up. Unused accounts? Old posts? This step is more like a digital decluttering session, and it feels great to get rid of what no longer serves you.
Keeping an eye on your digital footprint helps you understand your vulnerabilities. The less information you have floating around, the better your chances are of keeping it out of the wrong hands during a crisis.
Assessing Your Current Passwords
Next up, let’s talk passwords. Oh boy, who hasn’t been guilty of using “123456” or “password” at some point, right? It’s time to face the music. I recommend using a password manager to generate and store complex passwords that would make a hacker weep. This way, you’re not just relying on memory!
Changing your passwords frequently can feel tedious, but it’s really important especially during a crisis. Think of it like changing the locks on your doors after a break-in. You wouldn’t want to leave your digital doors wide open, would you?
And, please, activate two-factor authentication whenever you can. It’s just an extra layer of security that makes a world of difference, especially for your most important accounts where sensitive information lives.
Review Privacy Settings
Another thing I can’t stress enough is checking your privacy settings. Whether it’s Facebook, Instagram, or even those less-known apps, make sure you’re comfortable with how much information you’re sharing. I once had my location settings open and didn’t even realize it until a friend pointed it out!
Taking the time to narrow down who can see your posts or access your information can be one of the simplest steps in strengthening your digital security. Remember, not everyone needs to know what you had for breakfast!
Finally, consider reviewing app permissions on your devices. Some apps don’t need access to your camera or microphone, so take the time to revoke those permissions to minimize your risk further.
Update Your Software Regularly
The Importance of Software Updates
I’ll admit, I used to be that person who would ignore my software updates. But, I learned the hard way that these updates are critical to keeping your devices and data safe. They fix bugs and patch vulnerabilities that could be exploited by hackers, so don’t skip over them!
Setting your devices to update automatically can save you the extra step and keeps you secure without even thinking about it. It’s a small change that can have huge impacts on your overall digital safety.
Furthermore, take some time to check the apps you use frequently. Are they up to date? If not, go ahead and update those too. You’ll be glad you did when the next crisis hits!
Evaluate Your Device Security
Let’s chat about device security for a sec. Do you have those nifty security features turned on? Things like biometric logins, PIN codes, and tracking services should be enabled. I can’t tell you how much peace of mind it gives me to know that if I lose my phone, I can track it down!
Also, consider using encryption for sensitive files, especially if you store some personal information on your devices. It works like a locked box where only you have the key—very handy during crises.
Finally, have a back-up plan for your data. Whether it’s through cloud services or external hard drives, backing up your important files ensures you don’t lose everything if something goes wrong. Trust me; you’ll be thankful later!
Get Familiar with Recovery Options
Familiarizing yourself with your recovery options is crucial. It can be a real lifesaver if you ever find yourself locked out of an account or if your device gets lost. Every platform has its methods for recovery, and knowing them can save you a world of frustration.
I make it a point to write these recovery options down in a secure location. Things like backup emails or phone numbers can be super helpful to regain access if needed.
Also, never hesitate to contact customer support for additional help. They’re there for a reason, and they might have solutions up their sleeves that you haven’t even considered.
Be Aware of Phishing Scams
Identifying Phishing Attempts
Now, let’s talk about phishing scams. These sneaky attempts to steal your information are everywhere, and they’re getting more sophisticated. I make it a habit to slow down and scrutinize emails and texts. If it feels fishy, it probably is!
Look for signs like strange email addresses, poor grammar, or requests for sensitive information. If something doesn’t seem right, it’s better to err on the side of caution.
In my experience, staying informed about common phishing tactics can help you stay one step ahead. Trust me, knowledge is power in this case!
Practicing Safe Browsing Habits
When I’m online, I stay vigilant about what sites I visit. Making sure a website is secure (you know, looking for HTTPS instead of just HTTP) is a must. It’s a simple step that offers an extra layer of protection to your data.
Using a virtual private network (VPN) is another best practice. It protects your internet connection, especially if you find yourself using public Wi-Fi—we all love a good coffee shop, right?
So, be aware of shady links and avoid clicking on anything that looks reminiscent of a sketchy email. If in doubt, don’t interact!
Reporting Suspicious Activity
If you see something fishy, don’t just ignore it! Report phishing attempts to the respective platforms and your email provider. Sharing this info helps improve security and keeps the community safer.
I always suggest sharing your experiences with friends and family. Informing others about phishing scams can help them protect themselves too. It’s a little community shield against these cyber threats!
And remember, staying proactive about security can save you a ton of hassle in the long run. The more eyes that are watching for scams, the harder they’ll be to pull off!
Stay Informed and Adaptable
Keeping Up with Digital Trends
Digital trends move super fast, and keeping up can be exhausting. But being in the loop about current threats and best practices is key! I follow blogs, podcasts, and even social media accounts dedicated to cybersecurity to stay educated.
Every couple of months, I dedicate time to read up on new guidelines or tools that can help secure my digital life. Trust me, an informed user is a safer user!
Being adaptable in your security practices ensures you’re ready for anything. This means not only keeping security software and devices updated but also being open to changing habits as needed.
Utilizing Security Tools
I can’t emphasize enough how handy security tools can be. From antivirus software to firewall applications, these tools work tirelessly to protect us in the background. I have systems in place that run scans and alert me to any suspicious activity.
Ensure you pick the right tools for your needs. Read reviews, and don’t shy away from asking others for recommendations—you’ll find some reliable options!
Using security tools should be a complement to good habits. They provide that extra layer of security, but they can’t replace our active involvement in keeping our digital lives secure.
Engaging in Online Communities
One of my favorite ways to stay informed is by engaging in online communities. Whether it’s forums, social media groups, or workshops, there’s a wealth of knowledge to tap into. Sharing experiences and learning from others can be invaluable.
These communities often discuss new threats and the latest security measures, giving you insight that you can use to bolster your digital defenses. It feels more like a supportive network than just a group of users, which is incredibly refreshing!
Don’t be afraid to ask questions or share your own experiences. Let’s face it—no one is perfect, and everyone can learn from each other in this ever-evolving digital landscape.
Frequently Asked Questions
1. What should I do if I suspect my account has been hacked?
First, change your password immediately. Then, enable two-factor authentication. After that, check for any unauthorized activity and report it to the platform’s support.
2. How can I secure my Wi-Fi network?
Make sure your router has a strong password, enable WPA3 encryption, and regularly update the router’s firmware. It’s also a good idea to hide your network name.
3. What steps should I take if I receive a suspicious email?
Do not click on any links or download attachments. Verify the sender’s email address, and if you suspect phishing, report it to your email provider.
4. Can using public Wi-Fi really put my data at risk?
Yes! Public Wi-Fi networks are often not secure, making it easier for hackers to intercept your data. Using a VPN can offer protection in these situations.
5. Should I use the same password for multiple accounts?
No, using the same password increases your risk if just one of those accounts is compromised. Always use unique passwords for different accounts.
by Preparation | Jul 30, 2025 | Preparedness
Assessing the Water Quality
Understanding Possible Contaminants
When floodwaters creep into a home, it’s easy to get lost in the chaos. The first thing you’ve got to realize is just how contaminated that water can be. It can carry chemicals from nearby factories, bacteria from sewage, and even heavy metals. Knowing what’s out there can help you take necessary precautions.
This kind of water isn’t just dirty; it can make you seriously sick. Pathogens like hepatitis A and E. coli thrive in these conditions. So, before you start splashing around in it, you’ve got to think about what’s lurking beneath the surface.
Always keep personal safety front of mind. If you suspect contaminants, either from industrial areas or agricultural runoff, don’t take chances. It might be time to call in some professionals to help with testing.
Testing Your Water
Once the flood has receded, get a grip on the water quality through testing. Local health departments often provide testing kits. This isn’t just a convenience; it’s essential for your health. You don’t want to find out the hard way that your water source is unsafe.
You can do simple tests for pH levels or bacteria levels at home, but don’t try to be a hero where it counts. Sometimes it’s best to reach out to a lab that specializes in water testing. They’ll give you a clearer picture of what you’re dealing with.
Another tip I learned? Don’t rely on looks alone. Clear water was not always safe during my experiences. Sometimes, it’s murky water that can be surprisingly less harmful than seemingly clean water!
Evaluating Your Water Source
It’s also crucial to examine the source of your water supply. If you’re on a municipal system, reach out to your local water authority for boil-water advisories or other safety measures that might be in place. For well water users, it’s best to be extra cautious as wells can be particularly susceptible to contamination.
If your well has been flooded, it’s highly probable that the integrity was compromised. Once you’ve done your testing, don’t hesitate to disinfect your well – it’s kind of a must-do!
Remember, some contaminants require specialized treatments to bring your water back to a safe standard. Don’t just think you can fix this with a Brita filter; that’s not going to cut it in many cases.
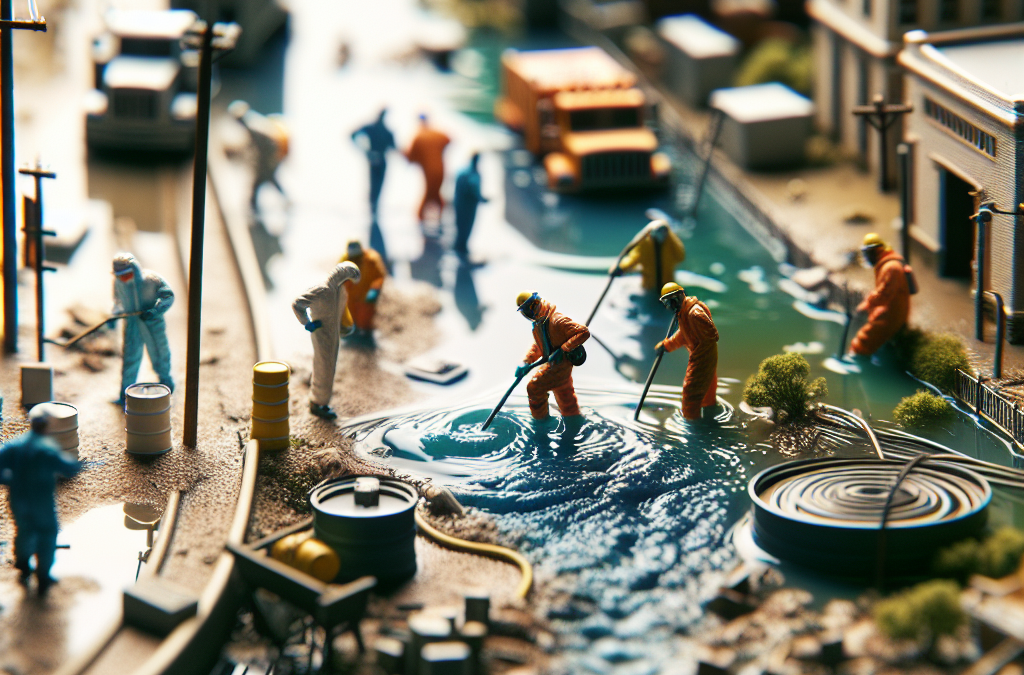
Cleaning Up After the Flood
Prioritizing Safety
Before diving into the cleanup process, let’s talk about safety gear. Equip yourself with gloves, masks, and waterproof boots. I can’t stress this enough – your health is your wealth!
As you sift through the soggy remnants of your home, be aware of potential dangers like sharp objects or hazardous materials. You might unearth items you didn’t expect, and some of them can be more dangerous than they look.
Trust me, the last thing you want is to put your hands in contaminated water without proper protection. Gloves are not just a suggestion; they’re your first line of defense!
Removing Contaminated Materials
Start by identifying the materials that can’t be salvaged. If your carpets or furniture have been soaked for too long, they might need to be tossed out. The bacteria can set in quickly, leading to more severe contamination later.
Take the time to document what you’re disposing of for insurance purposes. Pictures can be worth a thousand words in a claim process. You’d hate to find out a year later that your insurance didn’t cover a lost item because you didn’t keep a record!
While it’s tough to throw away precious items, your health comes first. Encourage friends or family to help; it’ll make the process smoother, and you can share stories about the stuff you’re discarding!
Disinfecting Your Space
Once everything that needs to go has been taken out, it’s time to roll your sleeves up and start disinfecting. Use a mix of bleach and water (about one cup of bleach per gallon of water) to wipe down all surfaces.
Don’t forget to ventilate the area—open windows and doors to let fresh air circulate. The smell can be overpowering, and you want to keep the environment nice and fresh.
Taking time to disinfect thoroughly will reduce your risk of lingering contamination. Mold loves damp spaces; don’t give it a chance to call your place home!
Restoring Your Water Supply
Contacting Water Authorities
If you’re lucky enough to be connected to a public water system, don’t hesitate to reach out to them. They will have the protocols in place to test and treat any potential issues with contamination.
They often provide updates about the safety of the water, and you may even find they can help with community resources for cleanup and recovery. It’s worth tapping into these local networks!
In many instances, there are financial aid programs available to assist you. Knowledge is power, so ask questions to get the best information for your particular situation.
Cleaning Your Water System
If you depend on well water, after a flood, you’ll need to disinfect your well. This usually involves shocking your well with a bleach solution and then testing it. I’ve learned from experience that regular well maintenance is essential, particularly after major weather events.
The disinfection process isn’t just a one-time deal either. You need to test your water quality again a couple of days after disinfecting and to ensure the contaminants are gone. Patience is key here.
If you don’t feel comfortable doing this by yourself, don’t hesitate to call in an expert. It’s totally worth it to get some peace of mind that your water is back to being safe.
Monitoring Ongoing Water Safety
Even after cleaning up, you shouldn’t let your guard down. Regular water testing will help you catch any lingering issues before they become bigger problems. Many health departments offer ongoing monitoring, and it’s a good idea to keep this on your radar.
Stay informed about local weather forecasts. Heavy rains can lead to more floods, and being on guard is vital for keeping your water supply safe.
Make it a point to establish a water safety plan with your family so everyone is on the same page. You’ll all feel better prepared knowing that you know what to do in unexpected situations!
Preventing Future Contamination
Improving Your Home’s Resilience
After going through the flood experience, it’s time to think about bolstering your home against future disasters. This can be as simple as ensuring proper drainage around your property or even investing in flood barriers. Every little bit can help.
Also, consider elevating anything that could be damaged just a little too easy if another flood hits. Elevating appliances or putting essential documents in waterproof containers can save some serious heartache.
Talk to neighbors who have faced similar challenges. Sometimes wisdom from others can spark ideas on how to prevent future hassles!
Educating Yourself and Others
The more I’ve learned about flooding and its repercussions, the more I’ve felt empowered not just for myself but for my entire community. Local workshops on flood preparedness can make a huge difference.
Joining community groups focused on climate resilience can help you share resources and tips with each other. The more knowledge circulating, the better equipped everyone will be when disaster strikes.
Sometimes it feels a bit overwhelming, but each conversation about safety makes a potentially dangerous situation a little less scary. We’ve got to stick together on this!
Regular Maintenance and Upgrades
Make sure to regularly check your plumbing and drainage systems. Regular maintenance can keep your home safe from unwanted water issues. By staying on top of it, you can catch early problems before they erupt into big ones.
If your budget allows, consider investing in flood-proof fixtures or landscape improvements that direct water away from your property. Small upgrades can have a big impact on your home’s resilience!
Building a relationship with a local contractor or plumber can pay off when you need quick assistance. They’ll remember all the little things about your home and can give you tailored advice on how to maintain it better moving forward.
Frequently Asked Questions
1. What types of contaminants are common after a flood?
Common contaminants can include bacteria, viruses, chemicals from nearby leaks, and heavy metals. It’s vital to test your water to understand what you’re dealing with before any use.
2. How can I test the water quality after a flood?
You can obtain testing kits from local health departments or professional labs. They can test for things like bacteria and chemical pollutants effectively.
3. What should I do if my well is flooded?
If your well has been flooded, it’s crucial to stop using the water and disinfect your well with a bleach solution, followed by thorough testing.
4. How can I prevent future water contamination from floods?
Improving drainage around your home, regularly maintaining plumbing, and investing in flood barriers are effective ways to prevent future issues.
5. Should I contact professionals for cleanup and testing?
Yes, if you feel overwhelmed or uncertain, it’s often a good idea to reach out to professionals who specialize in water contamination and restoration. They can ensure everything is safe and up to standards.
by Preparation | Jul 30, 2025 | Preparedness
Understanding Your Community’s Needs
Assessing Vulnerabilities
Alright, let’s dive into the heart of the matter. Before you get all gung-ho about forming a community disaster response team, you really need to take a good look around your neighborhood. What are the biggest risks you face? Floods, earthquakes, maybe wildfires? Get the scoop on what your community’s actually dealing with so you can tailor your plan to meet those specific needs.
Talking to locals is a great way to gain insight. Organizing informal meetings can help you identify concerns that may not be on your radar. Plus, you get to bond over your shared experiences and maybe even a few laughs—because, let’s face it, a little humor goes a long way in addressing serious topics.
Once you’ve gathered all this info, create a comprehensive list of vulnerabilities. This will be your starting point. It’s like having a map before embarking on a great adventure. You need to know where you’re headed and what you might encounter along the way.
Recruiting the Right Volunteers
Identifying Skills and Roles
Alright, so now that you know what you’re up against, it’s time to rally the troops! You’ll want to enlist a diverse group of people because different skills will be crucial during a disaster. Think about doctors, nurses, firefighters, teachers—each bringing something unique to the table.
Once you’ve got your crew interested, it’s worthwhile to identify who can take on what roles. Maybe one person can handle communications while another oversees supplies. Just imagine the chaos if no one knows who’s doing what! Establishing roles helps create a sense of order and accountability within your team.
Don’t forget to keep the atmosphere upbeat as you recruit. A little enthusiasm goes a long way, and if people feel like they’re part of an exciting mission, they’re likely to stick around. So, throw in some fun team-building activities while you’re at it!
Training and Drills are Key
Setting Up Training Sessions
Let’s get real—having a plan means nothing if no one knows how to execute it. That’s why setting up consistent training sessions is essential. Grab some experts in the field who can guide your team through necessary skills like first aid, emergency response protocols, and even how to manage stress during crises.
Mix it up! I’ve found that a combination of theory and practical exercises makes for learning that really sticks. Get everyone involved, role-playing different disaster scenarios to encourage quick thinking and decisive action. The more hands-on, the better! Plus, you’ll get to see who naturally steps up in tense situations.
Don’t underestimate the power of reflection either. After each training, gather your team to reflect on what went well and what could be better. It not only reinforces learning but also fosters communication and trust within the group—critical components when the going gets tough.
Establishing Communication Protocols
Creating a Communication Plan
So, one of the biggest challenges during a disaster is keeping everyone in the loop. That’s why it’s super important to create a solid communication plan ahead of time. Think of it as your team’s lifeline during a crisis. You’ll want to cover everything from how information is shared to who communicates with whom.
Consider using various platforms for communication. Maybe some folks are best reached via text, while others prefer social media or even old-school phone calls. It’s all about ensuring no one gets left in the dark when things go crazy!
Another tip? Set up a run-through before disaster strikes. Simulating a serious scenario will help everyone practice using the communication plan and allow for adjustment where needed. You’ll be so grateful you took the time when the adrenaline is pumping for real!
Building Partnerships with Local Organizations
Teamwork Makes the Dream Work
Finally, let’s talk about building connections with local organizations. No one goes it alone in emergencies, especially not in our awesome communities. Seek out partnerships with local fire departments, hospitals, and non-profits. They can provide the expertise and support that will enhance your team’s capabilities.
It’s also wise to build connections with neighboring communities. Sharing resources and experiences can be incredibly beneficial. Plus, you create a larger safety net for everyone involved! If disaster strikes in one area, collaboration can dramatically improve response efforts in others.
Regularly meeting with these partners can help forge strong relationships and ensure that everyone is on the same page regarding roles and responsibilities in times of crisis. Let’s be honest—knowing who’s got your back makes all the difference when push comes to shove.
FAQs
1. Why should we assess community needs before forming a response team?
Understanding community needs ensures your team is properly equipped to handle the specific types of disasters that could impact your area. It tailors your training and preparation efforts to make the team as effective as possible.
2. How can we effectively recruit volunteers for the team?
Start by communicating the importance of the team to your community. Organize interest meetings, share your vision on social media, and even host fun events to get people excited about joining the effort.
3. What types of training should our team undergo?
Your team should focus on essential skills like first aid, emergency response protocols, crisis management, and even soft skills like communication. The more well-rounded your training, the better prepared you will be!
4. What tools can we use for communication during a disaster?
Utilize a mix of tools like group texts, social media updates, and possibly even walkie-talkies for real-time communication. This ensures everyone can stay connected, no matter what happens.
5. How can partnerships with local organizations enhance our response efforts?
These partnerships can provide additional resources, expertise, and support. Collaboration strengthens your emergency response, ensuring a more comprehensive approach to handling disasters when they occur.


