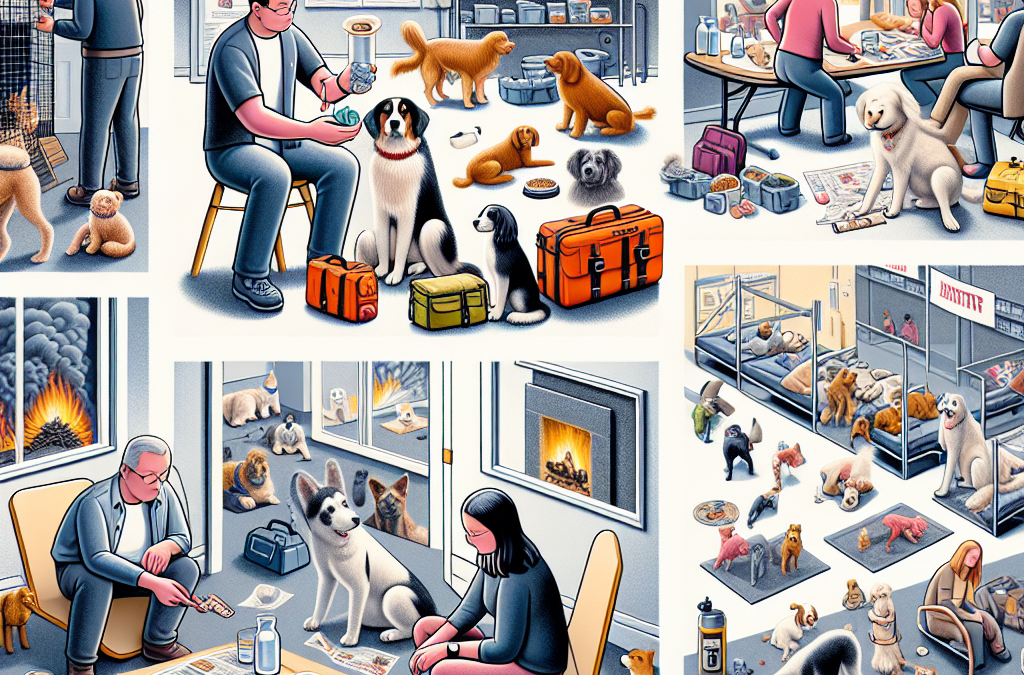
When I think about disasters, I often first picture natural ones—hurricanes, earthquakes, floods. But what I’ve learned is that our furry friends are just as vulnerable during these events. Each type of disaster can bring its unique challenges. For example, during a flood, homes can become unlivable, which can lead to panic and confusion for our pets.
Even smaller, everyday disasters—like house fires or sudden evacuations—require preparedness. It’s easy to forget how dramatic these moments can be for pets, since they’re not aware of the reasoning behind all the commotion. Understanding the variety of disasters that can occur is crucial for effective planning.
Ultimately, being aware of potential risks is the first step in keeping our beloved pets safe. You never know what might happen, and it’s always better to be over-prepared than under-prepared!
Assessing Your Pet’s Unique Needs
Each pet has their own personality and needs, which can influence how they react during a disaster. For example, my dog Bruno gets super anxious with loud noises, which means that during a thunderstorm or something equally chaotic, he needs a little extra comfort. This is something you should consider when you’re preparing your disaster plan.
Additionally, factors like age, breed, and health all play a significant role. Senior pets might not handle stress as well as younger ones. On the flip side, some breeds are more resilient than others! It’s important to tailor your plan to fit your pet’s individual behavior and health conditions.
Keep a close watch on your pet’s comfort levels and address their needs in your preparation. A little thoughtfulness about their unique qualities can go a long way in an emergency situation!
Creating Your Emergency Plan
Once I learned about the risks, I knew I had to make a clear emergency plan for my pets. It’s important to remember that this plan should include details like safe spaces in the house where your pet feels secure. Having a designated area can really help them feel more safe when events spiral out of control.
Also, what happens if you have to evacuate? Make sure your pets are microchipped and that they have up-to-date identification with your contact information. I always have a few carriers on hand so we can quickly grab our pets when it’s time to leave.
Finally, don’t forget to include your pet’s regular essentials—food, medicine, any special toys they adore. Making a checklist can be a huge help to ensure you don’t forget anything when the moment arises!
Building an Emergency Kit for Your Pets
Essential Supplies to Include
This is where things get practical! An emergency kit is crucial for ensuring your pet has what they need during a disaster. When I put mine together, I included basic items like food and water, but there are so many additional supplies that can make a big difference.
Consider including medications if your pet has any health issues. Don’t forget a first-aid kit specifically for pets! You can often find ready-made ones online, but customizing it with items specific to your pet’s health needs is wise.
Lastly, think about comfort items. Familiar blankets or toys can be invaluable when your pet is feeling scared. Trust me, a little love goes a long way when everything else seems chaotic!
Storing Your Kit Safely
Okay, so you’ve got the supplies, but where do you keep all of this? I made sure to hide my emergency pet kit in an easily accessible place but also somewhere it won’t get damaged. You don’t want to realize you have a broken can of food when you really need it!
Also, make sure the kit is clearly labeled so anyone in your household can grab it quickly if needed. You might even consider having a duplicate kit in your car depending on where you live, just in case. It’s all about being prepared for any situation!
Regularly check your emergency kit to refresh supplies, especially food and medications. Just like humans, pets need fresh supplies, and you don’t want anything expired when the time comes to use it!
Involving the Whole Family
It’s essential to get everyone on board when creating a pet disaster preparedness plan. My family sat down together to talk through what we’d do in different scenarios. I can tell you, it’s a relief to know everyone’s aware of the plan and knows their roles, especially in high-stress times.
Involving kids is especially important. Teaching them how to gently handle a scared pet and what to do during an emergency can make a world of difference. They can help with prepping supplies, which can also give them an added sense of security about what to do.
Communication is key! Regularly review your plans and modify them as needed. As your pets grow or change, so will their needs!
Post-Disaster Recovery for Pets
Assessing Your Pet’s Wellness
Once a disaster has passed, I always check in on my pets. Stress can have heavy consequences. Look for signs of anxiety, illness, or changes in behavior. If you notice anything unusual, do not hesitate to consult your vet.
Sometimes, the after-effects of a disaster can show up later, and being vigilant can help you spot these early on. Just like I check on my family, I do the same for my furry friends!
Additionally, keep an eye on their eating and sleeping habits. Sometimes they need a little extra love and reassurance to get back to their normal selves.
Re-establishing Routines
Pets thrive on routine, and after a disaster, it’s crucial to help them regain some normalcy. I try to maintain feeding schedules, playtimes, and walks—basically, anything that can bring back a sense of normalcy.
Even though my pets might be a little shaken up during those first few days, establishing a routine helps provide comfort. I often set specific times for play sessions, meals, and rest to help them feel safe again.
This structure can ease their anxiety and help them bounce back quicker. Adjusting slowly over time can also help them adjust better to their new reality, especially if your environment has changed due to the disaster.
Providing Emotional Support
Emotional support for your pets can come from both you and other activities. After a disaster, I’ve found that spending extra quiet time with my pets can be soothing. Simple things like cuddling on the couch or brushing their fur can really help.
Consider engaging them in gentle play or taking them for short walks to help distract them from the chaos. Familiar sights, sounds, and smells can help ground them and boost their emotional health.
You might also explore products designed to reduce anxiety in pets, like calming treats or pheromone diffusers. It’s all about finding what works best for your pet, and sometimes it might take a little experimenting to find the perfect fit!
FAQ
1. Why is it important to have a disaster plan for pets?
Having a disaster plan for pets ensures their safety and well-being during emergencies. Pets often react unpredictably in stressful situations, so having a plan helps mitigate risks.
2. What essentials should I include in an emergency kit for my pet?
Your emergency kit should include food, water, medications, a first-aid kit, comfort items like blankets or toys, and identification documents. Having these on hand can be a lifesaver.
3. How can I help my pet cope after a disaster?
To help your pet cope, maintain consistent routines, provide lots of emotional support, and keep a close watch on their behavior. Regular check-ins can help identify any stress or health issues early on.
4. Should my entire family be involved in the disaster preparedness planning?
Absolutely! Involving the whole family ensures that everyone knows their role during an emergency, which can greatly reduce stress and confusion when the time comes.
5. What are some signs that my pet is stressed after a disaster?
Signs of stress in pets can include excessive barking or meowing, hiding, changes in appetite, and unusual aggression or anxiety. Any changes in behavior should be taken seriously, and it might be time for a vet visit if they persist.
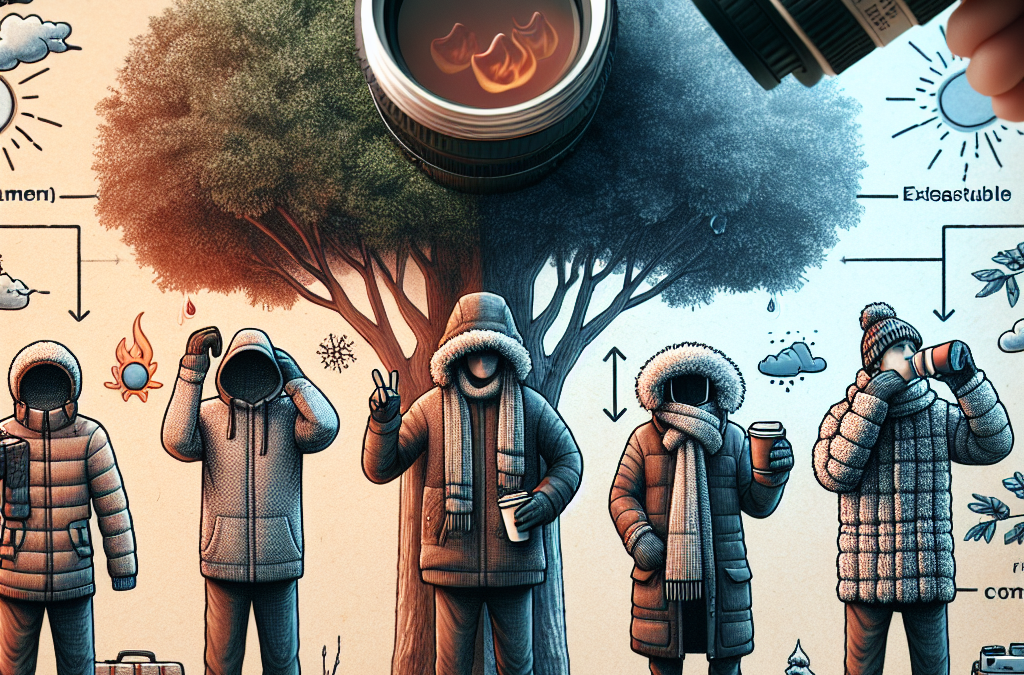
You know, our bodies are amazing machines, but they need the right fuel to function correctly. When it’s sweltering outside or frigidly cold, hydration becomes key. In the heat, I personally drink lots of water, and I don’t just wait until I’m thirsty. Being proactive about hydration helps to keep my energy up and fight off fatigue.
During winter, the dry air can be deceptive. Even if it’s cold, you can still get dehydrated. For me, I make it a point to sip herbal teas or even warm water. It’s comforting and good for my system.
Don’t forget about electrolyte drinks, especially if you’re sweating a lot in the heat. These help replace lost salts. Trust me; I’ve felt the difference when I choose a sports drink over plain water on those hot summer days. It’s a game-changer!
Wear Appropriate Clothing
Light Fabrics for Heat
When the sun is blazing, I notice that wearing light-colored, breathable fabrics makes a world of difference. Cotton is my go-to. It’s comfy, and it absorbs sweat better than synthetic fibers. Once, I made the mistake of wearing dark colors in the summer—big no-no!
If you’re heading out in the heat for a while, don’t skip the hat or sunglasses, either. A wide-brimmed hat not only protects my face from sunburn but also keeps me cooler. And let’s not forget about the sunscreen!
In winter, layers are my best friends. I tend to wear thermal tops and bottom layers under my regular clothes. It helps trap warmth while also allowing for airflow. Plus, if I get too warm, I can adjust layers easily—I love that flexibility!
Adjust Indoor Environments
Temperature Control
When it’s scorching hot or freezing cold, my indoor environment needs to be just right. I often crank the air conditioning on those hot summer days. It’s crucial to find that sweet spot where it’s cool enough, but not freezing. I’ve learned to set the thermostat a few degrees higher to save on energy bills.
In the winter, keeping the heat steady is important. I always make sure to close curtains to keep warmth in. It’s all about creating that snug atmosphere. I’ve also invested in a space heater for areas where it’s drafty in my home.
During both extremes, I use fans to circulate air. A good ceiling fan can actually make you feel cooler in the heat and help distribute warmth in the cold—multi-functional magic right there!
Limit Outdoor Activities
Timing is Everything
One lesson I’ve learned through trial and error is that timing outdoor activities during extreme weather is crucial. In the summer, I try to exercise early in the morning or later in the evening when it’s cooler. It’s amazing how a little planning can keep you from overheating.
When winter strikes, I keep an eye on weather alerts. If there’s a severe cold warning, I skip any unnecessary outings. Short errands can turn into a long cold battle if I’m not careful!
I also keep a close watch on my pets. Hot pavement can hurt their paws in summer, and they need breaks, just like I do when it’s scorching. On chilly days, I make sure they wear their little sweaters—because who wouldn’t want to be warm and cozy?
Monitor Health Closely
Watch for Symptoms
Keeping an eye on my body’s responses to extreme temperatures has been a game changer. Signs of heat exhaustion, like dizziness or excessive sweating, should never be ignored. I’ve learned to listen to my body—if something feels off, I pay attention. I’ve even had friends who ignored their symptoms and regretted it later.
In the cold, symptoms like shivering and breathlessness can sneak up on you. I make sure to dress warmly enough and not stay out too long. Frostbite is no joke; it can happen quicker than you think.
Finally, I recommend checking in on elderly family members or neighbors. They can be more susceptible to temperature extremes, and a friendly check-in can ensure they’re staying safe and healthy.
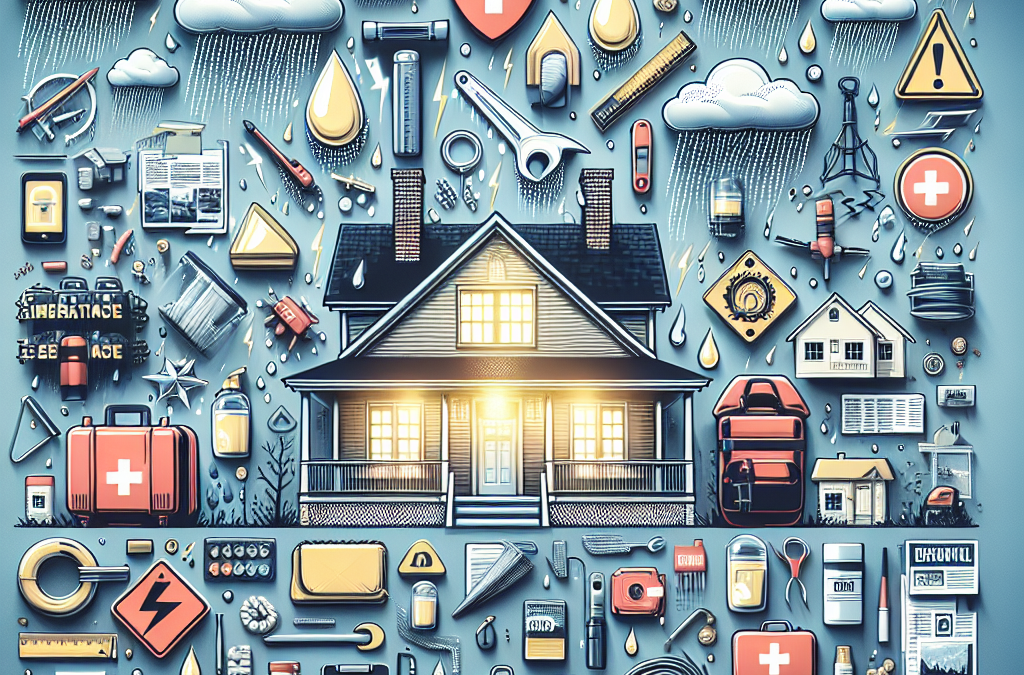
One of the first steps in preparing for unexpected weather disasters is to take a good, hard look at your home. Seriously, walk around both inside and outside, checking for weak spots. Areas like old roofing, unsecured windows, and unprotected doors are a big deal. If a storm hits, they could be your home’s Achilles’ heel!
From my experience, I’ve found that even small gaps can lead to big problems. Water can sneak into places you wouldn’t even think about! I had a spot in my basement that seemed harmless until a heavy rain turned it into a small lake. Lesson learned!
Finally, don’t forget to check the landscape around your home too. Trees that are too close or unstable landscaping can become dangerous during severe winds or storms. If you see anything that looks dodgy, it’s time to act before it’s too late.
Secure Important Documents
Gather Your Essentials
Next up, make sure all your important documents are in one place. This means birth certificates, insurance policies, and any other critical papers. I know it seems tedious, but trust me, in the chaos of a disaster, you’ll want everything handy.
The ideal spot? A fireproof and waterproof safe. When I set mine up, I felt so much more at ease knowing my essentials were protected. Find a safe spot that’s accessible but also secure from potential water damage.
And hey, if you don’t have a safe, at least consider digitally backing everything up. Take clear photos and keep them in a cloud storage service. That way, even if all your physical copies are lost, you have a backup that’s just a click away!
Stock Up On Supplies
Create an Emergency Kit
One of the most crucial steps I can personally recommend is to create an emergency kit. Don’t wait until a disaster is looming over your head to realize you’re missing basic supplies. I mean, who ever wants to run out for batteries in the middle of a storm?
What should you include in your kit? Think water, non-perishable food, first aid supplies, flashlights, and hygiene products. Some people even add a comforting item, like a favorite book or game. Personally, I’ve learned that a little comfort goes a long way when you’re in a stressful situation!
And don’t forget to check your emergency kit regularly! A couple of years back, I opened mine only to find expired snacks and dead batteries. It’s a little embarrassing, but it’s definitely something I’ve fixed. Now, it’s on my checklist every six months to refresh the supplies.
Establish a Communication Plan
Stay Connected with Family
In times of crisis, staying connected is vital. It’s easy to think that we’d just figure everything out on the fly, but trust me, planned communication works wonders. I remember one time during a storm, our power went out, and it took hours to confirm where everyone was!
Make sure everyone in your household knows about your communication plan. This could mean setting up a specific rendezvous point or deciding who to contact in case of an emergency. I often carry a list of important phone numbers in my wallet for quick access.
If you have kids, sit down with them and explain why this is important. Involving them not only teaches them responsibility but also gives them peace of mind. It has worked well for us, and it’s reassuring to know my family is on the same page.
Evaluate Your Insurance Coverage
Understand Your Policy
Lastly, take a deep dive into your insurance coverage. Knowing what’s covered during a disaster is crucial! I’ve been there and found out too late that my policy had gaps. It’s no fun when you’re left hanging without the coverage you thought you had!
Contact your insurance agent and go over your policy together. Ask questions, and be sure you understand things like deductibles and coverage limits. When I did this, it really opened my eyes to what was at stake. Plus, your agent can often help you navigate your options for additional coverage if needed.
Keep a copy of your insurance policy in your emergency kit or a secure place where everyone can access it if needed. It’s one of those things that will make all the difference if disaster does strike.
FAQs
What should I do first to prepare my home for disasters?
Start by assessing your home for vulnerabilities, such as weak spots in roofing and windows. It’s all about making sure your home can withstand harsh weather.
How can I secure my important documents?
Gather your essential papers and place them in a fireproof and waterproof safe. Additionally, consider backing them up digitally in the cloud.
What supplies should be in my emergency kit?
Your emergency kit should include water, non-perishable food, first aid supplies, flashlights, batteries, and hygiene products. Regularly check to ensure everything is fresh and up to date!
How can I establish a communication plan for my family?
Decide on a rendezvous point and make sure everyone knows who to contact if separated. Discuss this plan with your family regularly to make sure everyone understands it.
Why is it important to evaluate my insurance coverage?
Knowing what your insurance covers can save you a lot of trouble after a disaster. Make sure to understand your policy and ask questions so you’re fully informed.
First things first, you gotta know your health needs. This means understanding what specific chronic conditions you have and how they affect you daily. Do you have diabetes, heart issues, or maybe chronic respiratory problems? Each of these conditions comes with its own set of required care and management. The better you understand your needs, the more prepared you’ll be in a disaster situation.
For example, if you have diabetes, you need to have a clear picture of your medication schedule, blood sugar monitoring needs, and dietary restrictions. Having a list of these essential factors makes it easier when you’re in a high-pressure situation where quick decisions are necessary.
Make sure to communicate your condition to your loved ones, too. They should know how to help in case you need assistance—this helps alleviate panic when things go south.
Know Your Medications
Alright, let’s talk meds. Having a grasp on what medications you’re on is super crucial during disasters. This means knowing not just the names of your meds but also their dosages and timing. Trust me, when things heat up, it’s easy to forget details like this.
One helpful tip? Keep a current list of your medications handy, ideally in your emergency kit. This list should include the names (both generic and brand, if applicable), dosages, and any potential side effects or interactions that might crop up during a crisis.
Also, if you’re reliant on specific medications, it’s a good idea to have a backup supply. During disasters, access to pharmacies might be limited, and running out of essential meds can turn a bad situation into a dire one.
Regular Health Assessments
Regular check-ups can’t be overstated. I’m a firm believer in proactive health management. If you’re routinely seeing your doctor for assessments, you’ll be in a better state to handle unexpected situations. Those visits can uncover potential complications before they blow up into major issues, especially during a disaster.
Keep detailed records of your health history and any recent lab results. This info can be invaluable if you need to seek help from a new doctor or clinic during a crisis. Knowing your baseline health can also assist healthcare providers in making quick decisions about your care.
Don’t forget, keep your vaccinations up to date, too! In times of crisis, we often see a spike in disease outbreaks, and being protected can help alleviate extra stress on your system.
Creating an Emergency Action Plan
Develop Your Plan
When it comes to real-life emergencies, having a solid game plan is all you need. I can’t stress this enough! Get together with your family or caregivers to create an emergency action plan. This plan should outline what to do in different scenarios, including natural disasters or health crises.
Don’t just talk about it; write it down! List out each member’s responsibilities, and be sure to include your health requirements. If you know how to get to safety, it’ll lessen the panic when the situation hits the fan. Plus, everyone feels more secure knowing their role during this chaotic time.
Keep this plan somewhere accessible—like on the fridge or saved on your phone. Trust me, this could save you a ton of stress later on.
Identify Safe Locations
Next, think about where you can go during a disaster. You wanna identify safe locations ahead of time. This might mean local shelters, friend’s houses, or even hospitals. Having a few options locks in that extra layer of peace when you know where to go.
Discuss these locations with your family or caregivers and ensure you’re all on the same page. Make sure they’re aware of your specific needs and how they can best support you in those places. It’s all about teamwork.
Make a map of your area marking these locations, and place it along with your emergency kit. It’s one less thing to think about when you’re in a pinch.
Communicate Your Plan
Once you’ve got a plan, communication is key. Make sure that your healthcare providers, family, and close friends are all aware of your plan for emergencies. Explain your chronic condition specifics and what they need to know about your care during these situations.
Consider putting together a contact list that’s easy to access. This list should have important phone numbers, medical information, and any other resources you might need in a disaster. Keeping this on your phone and printed out in your emergency kit can help everyone stay informed.
Practice makes perfect—go over your plan with everyone, and consider doing a trial run if you can. This helps everyone feel more comfortable and confident in an emergency.
Assembling an Emergency Kit
Gather Essential Supplies
Okay, this is where it gets practical: an emergency kit. You absolutely need to build one that caters to your specific health needs. Start by gathering essential supplies like medications, first-aid needs, and items to manage your chronic condition effectively.
Don’t forget things like extra batteries for medical devices, water, and nutritious snacks that align with your dietary needs. Seriously, it’s a simple way to keep yourself healthy even when the whole world seems chaotic.
Organize everything in a kit or bag that you can easily grab on your way out. That way, you aren’t scrambling last minute to gather supplies when every second counts.
Include Important Documents
Now, let’s talk about documents. In a disaster, you might need to prove your identity and health condition quickly. So, make copies of important paperwork like insurance info, medical records, prescriptions, and even identification. I suggest putting these in a waterproof container in your kit.
Keeping everything in one place helps streamline the process if you need emergency care. Plus, it saves you from the headache of trying to remember what you had to bring after the fact.
Don’t forget about including your emergency contact list with all necessary phone numbers and addresses. It may seem unnecessary, but trust me, it’s a lifesaver in crisis situations.
Regularly Update Your Kit
Your needs can change, and so can your medication prescriptions, so regularly updating your emergency kit is a must. I recommend checking your kit every few months to make sure everything is current and in good condition.
Also, watch for expiration dates on medications and snacks. If any items are nearing their expiration, replace them! This little routine will keep your kit in tip-top shape and ready for action when you need it.
Engaging your family in this process helps make it a collective responsibility, ensuring that everyone in the household is prepared and can contribute to keeping the kit updated.
Staying Informed
Know the Risks in Your Area
It’s super important to know the types of disasters that commonly occur in your area. Is it hurricanes, floods, wildfires, or something else? Understanding these risks will help you prepare more effectively.
I suggest signing up for local alerts and notifications. Local agencies often provide real-time updates on weather crises and disaster management. Staying informed can make a world of difference in how you handle unexpected situations.
Having a good grasp of these risks also allows you to devise specific strategies to cope and adapt based on what you might face. This level of understanding gives you confidence and encourages better preparedness.
Follow Trusted Sources
In today’s world, information is everywhere, but you need to filter it and follow trusted sources. Look at your local government’s official channels, health department updates, and high-quality news outlets for accurate information.
Having reliable information can influence your decisions during a crisis. It helps you discern what’s urgent and what can wait. And let’s be real, it saves you from the stress of misinformation that’s rampant during emergencies.
Share this reliable information with friends and family. Having clear and trustworthy knowledge helps keep everyone safe and informed, making for a smoother approach when facing a disaster.
Stay Connected with Your Healthcare Provider
Last but not least, stay connected with your healthcare provider. In times of crisis, don’t hesitate to reach out for guidance and support. Many healthcare facilities offer telehealth services, which can be a lifesaver when in-person visits may be risky or infeasible.
Engaging with your provider not only keeps your health on track but also gives you access to potentially life-saving advice tailored to your specific needs during emergencies.
In addition, be proactive with any follow-up appointments you might have. Keeping lines of communication open can be the key to effectively managing your chronic condition, even amid disasters.
Frequently Asked Questions (FAQ)
What should be included in an emergency kit for chronic health conditions?
Your emergency kit should include medications, medical devices, a first-aid kit, and any specific items required for your condition. Don’t forget important documents and a contact list.
How can I communicate my medical needs during a disaster?
Prepare a concise summary of your medical needs and include it in your emergency kit. Share this information with family members, friends, and caregivers to ensure they’re well-informed during a crisis.
Why is it important to have a backup supply of medications?
A backup supply ensures you don’t run out of essential medications during a disaster when access to pharmacies may be limited. It provides peace of mind knowing you can maintain your health when situations become unpredictable.
What can I do if I can’t reach my doctor during an emergency?
If you can’t reach your doctor, look for alternative healthcare services, like urgent care or telehealth, to receive guidance. Ensure you have a list of your medications and health history handy for any healthcare provider you consult.
How often should I update my emergency kit?
It’s wise to review and update your emergency kit every three to six months. Regular checks ensure that medications are not expired and that supplies are still relevant to your current health needs.
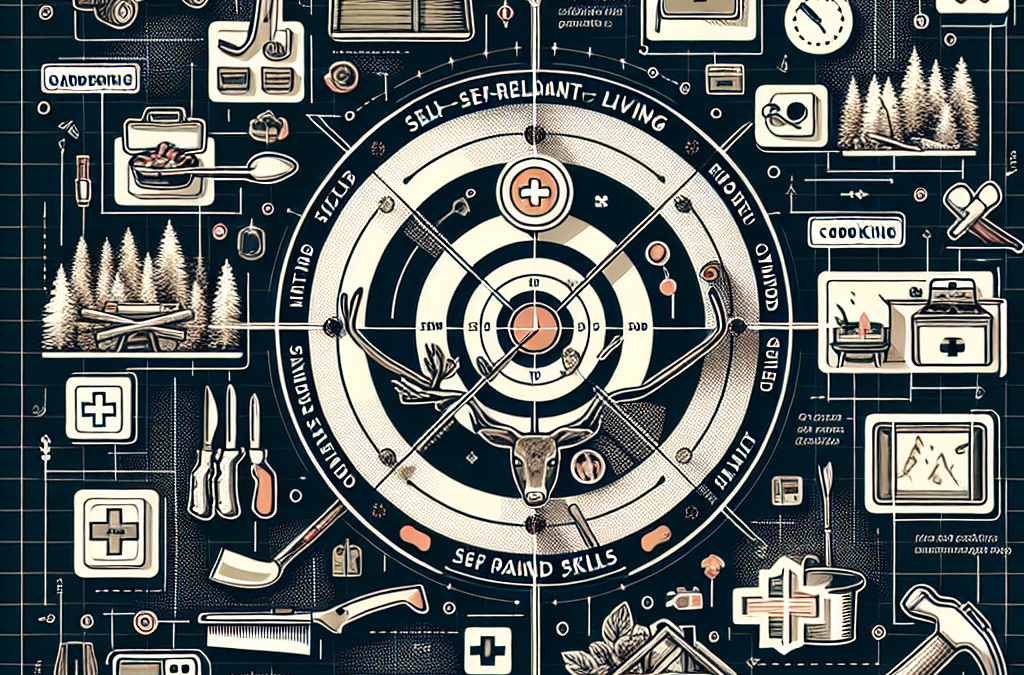
When starting any community, it’s crucial to nail down what you mean by self-reliance. For me, it’s about more than just independence; it’s about empowering each other to thrive without being overly dependent on external systems. Take some time to reflect on your own beliefs and principles that resonate with self-reliance. Write them down. This will serve as your foundation.
Ask yourself questions like, “What does being self-reliant look like in everyday life?” or “How does this impact my relationship with others?” You might find that self-reliance can manifest in diverse ways—be it through sustainable living practices, DIY skills, or financial independence. Get clear on this; it’ll guide your community’s purpose.
Once you’ve got your understanding, it’s essential to communicate this clearly. Share your thoughts on social media or blog posts, and invite feedback. The more you articulate your vision, the easier it becomes for others who share those values to understand where they fit in.
Creating a Mission Statement
A mission statement is like a compass for your community. It outlines your goals and values succinctly. I remember spending an afternoon brainstorming with a few friends over coffee, and we came up with a simple yet powerful statement that captured our vision. Having this is invaluable because it acts as a rallying point for interest and engagement.
When crafting your mission, think about what makes your community unique. Is there a specific aspect of self-reliance that you’re particularly passionate about? By adding a twist to your mission statement, you can make it more relatable and exciting for potential members.
Once finalized, plaster that mission statement everywhere—your website, social media, newsletters. This will not only attract like-minded individuals but also keep your community focused on what truly matters.
Engaging Members in the Purpose
Now that the foundation is set, it’s about involving people. Regularly engage with your community members to remind them of the shared purpose. Host discussions around the values you’ve set out, and create activities that echo those ideals. I’ve found that when people feel like they are playing a role in shaping the community, their investment increases significantly.
Encourage members to share their ideas and contributions. For instance, if someone has a cool self-reliant project they’re working on, spotlight it! Allowing people to take the lead in certain projects fosters a sense of ownership, and that’s what builds a thriving community.
Remember, it’s not solely about your vibe; it’s about everyone’s vibe. Listen to feedback regularly. Adapt your initiatives to keep the community tied to its purpose. That way, everyone feels included and valued.
Design Your Community Space
Choosing Your Platform
Now let’s talk about where this community will live. The platform you choose can make all the difference. Social media groups, dedicated websites, or even local meet-ups all have their perks. Personally, I love the personal touch of in-person gatherings. There’s something special about connecting face-to-face over a shared cup of coffee.
If you’re leaning toward an online platform, consider using tools like Discord or Slack. These platforms allow for engaging conversations, and you can set different channels for various topics related to self-reliance, be it gardening tips, budgeting, or crafting. The easier you make it for members to engage, the more they will!
Whichever path you choose, make sure it feels welcoming. This is a space for people to grow, share, and learn without judgment. All voices should feel valued, and this will set the tone for everything moving forward.
Creating Physical Spaces for Connection
If you’re thinking about hosting physical meet-ups, think about accessibility and convenience. I’ve attended many amazing workshops and community events held in community centers or even local parks. These spaces often attract people who are curious and eager to learn.
Consider what activities work best in these physical spaces—could it be workshops like sustainable living classes or maybe just casual meet-ups? Whatever it is, the main goal should be to foster connection. Use these spaces to share knowledge and skills as well; this directly aligns with the principles of self-reliance.
Also, don’t forget about aesthetics! A warm, inviting environment encourages more participation. Small touches, like comfortable seating arrangements or fun decor that represents your mission, can make a world of difference.
Encouraging Collaboration and Team Efforts
Once your community is up and running, it’s essential to get your members collaborating. Create small groups that can work together on projects or challenges related to self-reliance. Personally, my favorite events have been collaborative gardening projects where we learn from each other while planting.
Encouragement comes into play here big time! Recognize the efforts of these collaboration teams, whether through shout-outs in online meetings or fun rewards. Make it a habit to celebrate small wins; this helps foster a culture of support and camaraderie.
You might even want to host hackathons or skill-sharing events where members can take turns teaching something they’re good at. This isn’t just fun; it’s also a solid way to build relationships and elevate everyone’s self-reliance skills in the process.
Foster an Inclusive and Supportive Environment
Open Lines of Communication
For any community to thrive, communication is key! Encourage an environment where members feel safe sharing their thoughts and ideas. This can be done through regular check-ins, feedback channels, or anonymous suggestion boxes. I once set up a monthly feedback form, and it was eye-opening to realize how many great ideas were being tossed around in private.
Make it clear that everyone’s opinions matter. Recognize contributions, and don’t hesitate to address conflicts directly. You’ll find that open communication not only strengthens relationships but also allows the community to grow in a healthy way.
Another great tool is creating a newsletter or regular updates. Keeping everyone in the loop fosters a sense of belonging, making them feel like they are a part of something bigger.
Encouraging Diversity and Respect
Diversity is a beautiful aspect of any community! Aim to include individuals from different backgrounds and experiences. This not only enriches the space but also brings in fresh perspectives. Foster an atmosphere where mutual respect reigns supreme. I’ve loved how discussions often become more insightful when they’re stirred with various viewpoints.
Consider hosting events that spotlight different cultural practices related to self-reliance. This not only educates members but also celebrates the rich tapestry of human experiences. Remember, every voice contributes to the community’s heartbeat.
Always be open to learning from one another. Create spaces where members can ask questions without fear. This builds trust and an overall spirit of cooperation.
Provide Resources and Support
Lastly, be the go-to resource finder. Curate materials, articles, and tools that can help members in their self-reliance journey. I’ve created communal libraries filled with books and resources so members can borrow and learn together. Having these resources helps people feel equipped and supported.
Also, consider holding expert talks and workshops where knowledgeable individuals can share their insights. This not only provides education but also strengthens bonds through shared learning experiences.
Being a supportive community means ensuring your members know they are never alone in their journey. Encouragement, motivation, and support make all the difference when someone is trying to navigate their path to self-reliance.
FAQ
1. What is the first step in building a community of self-reliant individuals?
The first step is to define your core values and purpose. Understanding what self-reliance means to you will help you attract like-minded people who resonate with your vision.
2. How can I engage members in the community?
You can engage members by hosting discussions around your values and allowing them to lead projects. Encouraging their contributions fosters a sense of ownership and investment in the community.
3. What platform should I choose for my community?
Your choice of platform should fit the needs of your community. Consider using social media groups for online interaction or meeting in person to build deeper connections.
4. How can I create a supportive environment?
Open lines of communication and encourage feedback to create a supportive environment. Recognizing contributions and addressing conflicts will help maintain that support.
5. What resources can help members of the community?
Curate a list of materials, articles, and tools that can aid in self-reliance efforts. Consider providing workshops or hosting expert discussions to further enrich their learning experiences.
Fire is one of the most essential elements for survival. I remember my first time trying to start a fire. It felt daunting. I learned that knowing how to make a flame can keep you warm, cook food, and even purify water. Fire requires the right materials like tinder, kindling, and logs.
There’s something incredibly satisfying about gathering your own materials, creating a nice little teepee structure with sticks, and watching it catch. I’ve found that practice makes perfect. Try different methods—like the bow drill or flint and steel—until you find what works best for you.
Don’t forget safety! Always have a water source nearby and know how to control your fire. It’s not just for you; it’s about being responsible in nature.
Finding and Purifying Water
Water is crucial, and the ability to locate and purify it has saved me more times than I can count. I started by learning how to identify potential water sources like streams and lakes. Even rainwater can be a lifeline if you catch it in a clean container.
But, here’s the kicker—natural water often comes with unwelcome guests like bacteria or parasites. I learned various methods for purification, from boiling to using cotton bandanas in a makeshift filter. Investing in a portable water filter is a game-changer too.
Make it a habit to practice these techniques. Even if you just set up some outdoor experiments in your backyard, every little effort counts in building your confidence and skills.
Building Shelter
When the elements are against you, a solid shelter can be your best friend. My first experience building a shelter was rough—literally! I quickly realized that I needed to find a balance between stability and insulation. Learning to use materials like branches, leaves, and even tarps can save your skin when it’s chilly out.
There are various styles of shelters depending on the environment, and it can be fun to challenge yourself with different designs. I once tried the A-frame style, and I loved how secure it felt once completed. Get creative; you might discover techniques that suit your own style.
Practice makes perfect. Don’t hesitate to experiment in your backyard. Building a shelter is not just a skill; it’s an opportunity for you to connect with nature and foster your survival instincts.
Food Preservation Techniques
Canning and Jarring
Canning wasn’t something that interested me until I tried it one summer. After harvesting fruits and veggies from my garden, I realized they wouldn’t last long if I didn’t do something about it. Canning became a fun and rewarding hobby. Plus, I get to enjoy the taste of summer all year long!
The process involves sterilizing jars, cooking your produce, and sealing them properly. It’s surprisingly easy! And the satisfaction of cracking open a homemade jar of pickles in winter is nothing short of bliss.
Getting into the groove of canning not only helps you save food but also saves money in grocery bills. I can’t recommend it enough—give it a whirl!
Dehydrating Foods
Next on my food preservation journey was dehydrating. I started with apples, simply slicing them thinly and using a dehydrator. The first time I tasted my homemade dried apples, I was hooked. It’s a fantastic way to concentrate flavors and nutrients while extending shelf life!
You can dehydrate a variety of foods, and it’s an incredible way to manage your garden’s bounty. Fruits, vegetables, even herbs—everything can be transformed into long-lasting snacks or meal ingredients.
Plus, I love making trail mixes for hiking! Knowing I made it myself amps up the adventure. Dehydrating is an art form and a practical skill—you’re going to love trying this out!
Learning to Forage
Ah, foraging! This skill brought me closer to nature and taught me a thing or two about wild edibles. It’s like a treasure hunt, but with a tasty reward. I began by joining local groups or classes to learn about safe plants to identify in my area.
Wild garlic, berries, and even dandelion greens have made their way into my meals. But be careful! Always ensure you have proper identification. It’s a risk without knowledge.
Get familiar with your local ecosystem. The more you forage, the more confident you’ll become. It’s not just about survival; it’s a lifestyle that connects you with the earth!
Homesteading Basics
Gardening Skills
I won’t lie—my gardening journey started off rocky. The first seeds I planted didn’t quite make it, but with some persistence, I began to understand the basics of soil, sunlight, and water. Learning which plants thrive together turned my little plot into a budding oasis.
Start with easy crops, like tomatoes or herbs, and build from there. There’s something magical about watching seedlings sprout, and it can boost your confidence beyond measure. Hands in the dirt, friends!
Gardening isn’t just about food; it’s also about rhythm with nature. I can’t stress how much it can calm your mind while giving you tangible benefits. Give it a shot—you might just find a passion!
Animal Husbandry
I decided to delve into raising chickens because, let’s face it, fresh eggs sound pretty darn appealing. Initially, it seemed a bit intimidating, but soon, I realized it brought new rewards and challenges. Learning about nutrition, housing, and health has become a fulfilling part of self-reliant living.
Caring for animals isn’t just a chore; it teaches responsibility and compassion. Each morning feels like a joyous reunion with my feathery friends. Plus, it’s a sustainable and rewarding investment for your food source.
Start small, perhaps with a few hens or other small animals that fit your lifestyle. The learning curve is steep, but the rewards? Totally worth it!
Homemade Products
When I realized I could create my own soaps, candles, or even cleaning products, it blew my mind! Not only did I reduce waste, but I also saved money. Start with simple recipes, and before you know it, you’ll have a whole arsenal of handmade goodness that’s better for you and the environment.
Experimenting with scents and ingredients gives your home a personal touch. Plus, you can control what goes into these products—no funky chemicals here! You’ll feel a sense of pride every time you use something you made.
Homemade products are not only practical; they can also make thoughtful gifts! Sharing your creations is a way to spread the self-reliant spirit with others. Trust me; you’ll love this skill!
Resourcefulness and Problem Solving
Creative Thinking
One of the biggest lessons I’ve learned about self-reliance is that creativity goes hand-in-hand with resourcefulness. There have been countless times when I faced a setback, and instead of sulking, I had to think on my feet. I quickly discovered that everything can be repurposed and reused in innovative ways.
It’s about looking at a problem from different angles. For example, I once had a leaky bucket; instead of throwing it away, I turned it into a cute planter! Learning to think creatively has opened so many doors. Apply this philosophy to every aspect of your self-reliant journey.
Don’t be afraid of making mistakes—that’s where the best lessons come from. Embrace your challenges and cultivate your creative thinking!
Networking with Others
Self-reliance can feel like a solo mission sometimes, but building a community is invaluable. Sharing experiences, knowledge, and resources with like-minded folks has enriched my journey. Seek out local groups with similar interests—trust me, it’s totally worth it!
You can find mentors, exchange skills, or even barter! I’ve learned so much from others that I wouldn’t have discovered on my own. Learning from various perspectives helps you grow and adapt faster than you can imagine.
Don’t be shy; reach out and connect with your community. Sharing that knowledge enriches not just you but everyone involved!
Learning from Mistakes
Failure doesn’t mean the end of the road—it’s just part of the process. Throughout my self-reliant living experience, I’ve faced my fair share of blunders. However, I’ve learned to embrace these moments and treat them as valuable lessons.
When I tried growing a new vegetable variety that flopped, I took notes on what went wrong. Reflection is a powerful tool! It’s essential to analyze and adapt your methods to improve future outcomes.
Keep your chin up! Learning from mistakes leads to growth and success. Embrace those hiccups as stepping stones on your journey to becoming fully self-reliant.
Conclusion
Embracing self-reliance is all about building confidence and skills that serve you and your community. From basic survival skills to homesteading and problem-solving, each area enriches your life and connects you with nature and those around you.
So go out there, try new things, make mistakes, and learn from them! Just remember that self-reliance is a journey filled with endless possibilities, waiting for you to explore them.
FAQs
1. What are the most important skills for self-reliant living?
Some key skills include basic survival techniques, food preservation, homesteading basics, and resourcefulness. Each skill helps you become more independent and capable in various situations.
2. How can I start learning basic survival skills?
You can start by reading books, watching instructional videos, or participating in local workshops. Practical experience, like camping and practicing fire-making, helps build confidence.
3. Is gardening necessary for self-reliance?
While it’s not strictly necessary, gardening significantly aids self-reliance by providing a sustainable food source. Plus, it’s therapeutic and fun!
4. What are some easy foods to preserve at home?
Fruits like peaches, tomatoes, and cucumbers are great for beginners. You can try canning, drying, or fermenting to preserve them, depending on your preference.
5. How can I connect with others interested in self-reliance?
Look for local gardening clubs, survival training groups, or online communities. Joining these groups can help you learn, share experiences, and make valuable connections!