by Preparation | Jul 31, 2025 | Preparedness
Stay Calm and Assess the Situation
Understand Your Environment
First things first, when it comes to handling a hostage situation, it’s essential to stay calm. I’ve personally been in tough spots where panic sets in, but taking a deep breath can make all the difference. Look around and get a sense of your surroundings. What does the room look like? Are there exits? Are there hostiles nearby? Understanding your environment can help guide your next steps.
By taking the time to assess the situation, you can identify potential escape routes or safe spots. Remember, in a crisis, your instincts will be your best friend. Pay attention to sounds, movements, and any other clues that could inform your decision-making.
After evaluating your surroundings, check who is in the room with you. Are there other hostages? What about the captors? The dynamics between them can give you insights into what actions may be effective or harmful. Awareness is key!
Control Your Breathing
I have found that one of the best tricks in high-stress scenarios is to control my breathing. When we’re scared, our heart races, and our minds start to race along with it. Focusing on taking slow, deep breaths helps me think more clearly. This isn’t just about calming nerves; it’s about staying alert and making rational decisions.
You can practice this by inhaling deeply for a count of four, holding for four, and exhaling for four. This technique has helped ground me and keep my mind from spiraling out of control. In situations where every second counts, clarity can be a game changer.
Moreover, controlling your breathing effects the way others perceive your reaction. When others see you manage your anxiety, it helps reduce the tension in the space. That’s a small but impactful way to assert a sense of calm in a chaotic environment.
Think Before You Act
Trust me on this one—immediate reaction is often a recipe for disaster. In hostage situations, impulse can lead to very risky choices. I learned that taking a moment to think can save lives, including your own. Consider the consequences of every action you might want to take.
For example, if you’re thinking about trying to escape, you need to weigh the risks. Is it worth it? Could it put you or others in more danger? Having a strategic mindset during these moments is incredibly vital. It’s about seeing the bigger picture while being aware of your immediate situation.
That’s why I remind myself continuously to think critically during crises. It’s a skills approach that I’ve honed over time, and it can keep you safer than you might think! Processing your thoughts can lead to smarter survival choices.
Communicate Effectively
Establish Rapport with Captors
Now, this might sound counterintuitive, but if you’re ever in a hostage situation, forming a connection with your captor can be a helpful maneuver. When I found myself in such a scenario, I focused on getting them to see me as a person rather than just a pawn in their game. Sometimes a simple conversation can humanize the situation.
Start by addressing the captors calmly. Asking them about their needs or concerns can open up a dialogue. I know it’s hard to see them as individuals when they’re holding you against your will, but they may just be feeling as lost as you are. Finding common ground can create a more positive interaction.
Generally, people are more likely to make better decisions when they feel heard. Establishing rapport might help de-escalate tension and buy you some valuable time, which is crucial in these situations.
Use Non-Verbal Communication
Non-verbal cues can be a powerful weapon in tense situations! I’ve realized that my body language speaks volumes. If you’re looking calm, collected, and submissive, it can significantly affect how the captors treat you. Be aware of your posture, facial expressions, and gestures.
Mimicking calm behavior, even if you’re shaking on the inside, can project an aura of peace. I sometimes practiced this subtly during anxiety-inducing moments, and it worked wonders. Remember, a small smile or nod can convey your willingness to cooperate and reduce the intensity of the situation.
Additionally, maintain eye contact when it’s safe to do so. It shows confidence and can create trust—an important factor in persuading someone to reconsider their actions.
Clearly State Your Needs
Crisis or not, our basic human needs remain. If you find yourself in a hostage situation, it’s important to communicate your needs clearly and respectfully. This is something I learned during my training in handling emergencies. If you’re thirsty, hungry, or like you need medical attention, say so in a calm voice. But ensure you’re doing this when it’s safe.
Being clear means using straightforward language. Get to the point without overwhelming them with details. You want to let them know your needs without escalating the situation further, so keep your tone firm but respectful.
Don’t forget to gauge the captor’s mood when you bring up your needs. If they seem agitated, it may be wiser to wait for a better moment. Timing can be everything in these situations!
Identify Escape Opportunities
Watch for Distractions
In every crisis I’ve been through, I learned that distractions happen. Whether it’s another situation unfolding close by or even a lapse in the captor’s focus, distractions can work in your favor if you’re paying attention. I often found that looking for opportunities without panic allows for better outcomes.
When you notice a distraction, evaluate quickly. Is it a moment where an exit is viable? If so, weigh the risks—will you get caught, or is it worth it? Watching for the right moment requires patience, but it can be life-saving.
In a few cases I’ve seen, distractions were caused by unexpected stimuli, like noise from outside or a phone ringing. These moments can shift attention, and knowing how to spot them can open doors you didn’t think were possible.
Plan Your Exit Route
Before actually attempting to escape, it’s critical to have an exit strategy in mind. It’s sort of like preparing a roadmap before a lengthy road trip; you want to know where you’re headed! When possible, outline your route in your mind and be ready to change it as needed, depending on the circumstances.
Think about potential obstacles you may face while making your escape. Are there security systems or guards? What’s the best time to leave? Planning helps create a mental picture of how you will execute your escape if the moment arises.
Don’t rush your decision to leave. When everything aligns, then go for it! A good plan can be what stands between freedom and disaster.
Stay Low and Move Quietly
When escape becomes an option, remember, stealth is crucial! I’ve learned that moving quietly and remaining low to the ground can make a significant difference. It’s all about being unnoticed during those fleeting moments. Keeping yourself below the sightline of potential threats is a smart tactic!
Prioritize your positions as you move—stay low, crawl if necessary, and avoid unnecessary noise. It’s like playing a game of hide-and-seek where you hold all the cards. Once you’re out of sight, you’ll have the lead on potential threats and avoid alerting the captors.
Also, whispering if you need to communicate with fellow hostages can ensure that you’re not drawing unwanted attention. Teamwork is vital if you’re lucky enough to have allies nearby, so make those quiet communications as effective as possible.
Protect Yourself and Others
Prioritize Your Safety
Last but definitely not least, when I find myself in these potentially dangerous situations, prioritizing safety is the key takeaway. It’s great to be brave, but you also need to be clever about self-preservation. If something feels off, trust that gut feeling—listen to that inner voice.
Being aware of where you place your trust is also important. Not every offered deal may be in your favor. If you think a deal might put you or others at risk, it’s usually better to shy away. Safety involves a gut check and then some—it often means assessing all points of view before making a decision.
Additionally, sometimes the best way to protect yourself is by keeping a low profile. Blend into the background, be observant, and don’t draw attention—sometimes being unnoticed can save your life.
Support Fellow Hostages
If you’re in a situation with other hostages, solidarity can be your secret weapon. Making eye contact or sharing a knowing nod can help remind everyone that they’re not alone. Somehow, it lightens the load. When we’re all in the same boat, a little human connection goes a long way.
Furthermore, team up when possible. Choose safe moments to develop plans together. The support of fellow hostages can create a better morale, even amidst adversity. Empower each other through encouragement and shared strategies.
This usually manifests in little gestures or quiet words of assurance. Every small interaction builds a stronger group, making the situation feel slightly less daunting.
Prepare for Medical Needs
Just as we prioritize our safety, it’s vital to stay aware of any medical needs that could arise. This includes having a plan for first aid if anyone is hurt. If medical attention becomes necessary, calmly request help without escalating the situation further.
Thinking through medical issues also means being aware of your wellness. If you’re feeling faint or ill, let others know. Often, other hostages can provide assistance, whether that’s finding food or ensuring everyone remains hydrated. It’s all about sharing burdens in moments of crisis.
Ultimately, even in a hostage situation, we are human beings with needs. Remembering that can make navigating such adversity a little bit easier to handle.
FAQs
- What should I do first if I find myself in a hostage situation? Stay calm and assess your environment. Being aware of your surroundings can help you make informed decisions moving forward.
- How can I communicate with my captors without escalating the situation? Establishing rapport by speaking calmly and understanding their concerns can help create a less tense interaction.
- What if escape opportunities don’t present themselves? Look for distractions and potential escape routes. Even observing the captors’ behavior can highlight moments to act.
- How do I prioritize my safety while also considering other hostages? Trust your instincts about safety and work collaboratively with fellow hostages to support one another.
- Are there any specific techniques for managing panic? Focus on controlled breathing techniques. This can help ground you in the moment and mitigate anxiety.

by Preparation | Jul 31, 2025 | Preparedness
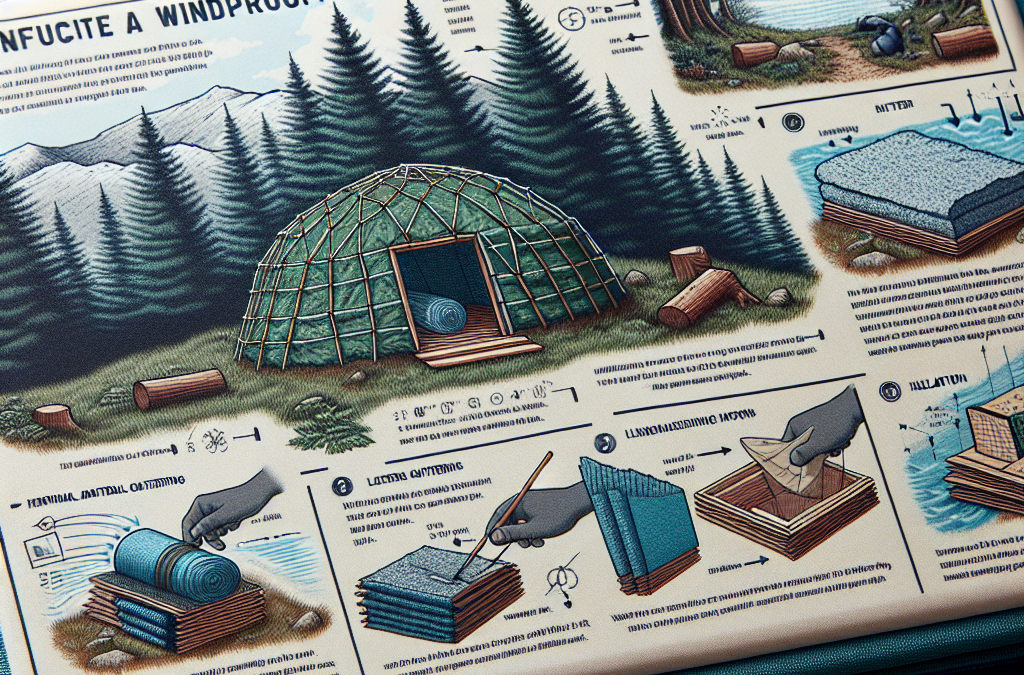
Selecting the Right Location
Assess Your Surroundings
Choosing the perfect spot for your windproof shelter is a critical first step. I always make it a point to check my surroundings thoroughly before I start building. Look for natural windbreaks like trees, hills, or even boulders. These features can significantly reduce the impact of strong winds on your structure.
Another thing I like to do is consider the terrain. Avoid low-lying areas where wind can swirl and pick up speed. Instead, I prefer locations that offer a bit of elevation without being too exposed. A spot that’s sheltered but still accessible is key to a successful build.
Finally, think about how close you are to water or resources. You want a place that’s convenient for you but also offers some form of natural protection. Balancing shelter and accessibility is essential for a windproof shelter that stands the test of time.
Mind the Wind Direction
Understanding the prevailing wind direction is fundamental in shelter design. You wouldn’t want to put your front door in the face of the wind, right? I typically check local forecasts or talk to locals to gather insights about which way the wind generally blows.
Once I know the wind patterns, I place the entrance of my shelter opposite to the wind direction. This simple adjustment makes a world of difference and keeps the inside of the shelter much more comfortable during storms.
It’s also smart to consider seasonal changes in wind direction. Make sure to plan ahead so that your shelter remains effective throughout the year, regardless of shifting weather patterns.
Consider Natural Wind Barriers
Building your shelter with existing wind barriers can greatly enhance its wind resistance. I often look for things like thick bushes or trees that can act as shields. If they’re already in place, I simply adapt my design to leverage them.
Sometimes, we can get a bit creative with our windbreaks. If there aren’t any solid features nearby, I might consider building a small fence or stacking some rocks. Techniques like these can create a buffer that significantly improves the windproof quality of my shelter.
Remember, nature can be your best ally. Incorporating the landscape into your design is a big win that pays off when the winds start howling.
Choosing Suitable Materials
Opt for Durable Options
The materials I choose for building my windproof shelter can make all the difference. Whenever possible, I go for sturdy options like logs, thick canvas, or reinforced tarps. The durability of these materials can withstand not only wind but also rain and snow.
I’ve found that selecting materials with some weight helps too. Heavier solutions tend to stay put during fierce gusts, while lighter materials may end up being tossed around like a feather. Choosing the right stuff from the get-go prevents a lot of headaches later on.
Also, think about weatherproofing. I often treat materials with a protective sealant or a weather-resistant coating. This additional step may seem small, but it can significantly extend the life of your shelter.
Use Wind-Resistant Designs
The design of your shelter plays a massive role in how well it stands up to the wind. I’ve learned that sloped or rounded roofs can help redirect wind away rather than letting it hit flat surfaces directly. It’s all about minimizing resistance.
You’ll also want to steer clear of sharp edges. The more streamlined your design, the better it can handle high winds. I tend to focus on creating rounded shapes that can disperse airflow rather than let it build up pressure against the structure.
Finally, I sometimes add additional stakes or ties to secure my shelter even further. This extra measure does wonders, especially when I expect challenging conditions.
Test Your Shelter’s Wind Resistance
Once my shelter is up, I always put it through a little test. I recommend standing inside during moderate winds and just feel how it holds up. Listen to the structure and see if there are any areas that creak or shake. It’s a good indicator of where improvements may be needed.
If possible, I like asking friends or family for help. Having a few people examine the structure and applying pressure in different areas can reveal weakness points I may have missed on my own.
Don’t be afraid to make adjustments. After an initial test, I sometimes tweak positions or add reinforcements where necessary. It’s all part of the building process, and every bit you do helps make your shelter even stronger.
Securing the Shelter Properly
Anchor It Down
No matter how great your design or materials are, it’s all useless if your shelter isn’t anchored properly. I always make sure to stake down the corners and use heavy rocks on top of any loose materials. This prevents the wind from lifting and shifting things around.
For extra security, I’ll sometimes use guy lines that extend outwards, creating a triangle of stability. It sounds technical, but it’s a straightforward method that pays off when the storms roll in.
Make it a habit to check your anchors regularly. Winds can change after a storm, and you want to ensure your shelter is still secure. Being proactive here saves you from disaster later on.
Inspect for Weak Points
Regular inspection is another golden rule I follow. After the initial build and after a storm, I like to comb through my shelter looking for any weak points. This could mean checking seams, hinges, or the integrity of the frame.
Maintaining your shelter isn’t just about looking for strong winds; it’s also about keeping up with wear and tear. I often find small repairs now can save me big-time headaches later.
If I do find damage, I address it immediately. A small tear can turn into a big problem if not handled right away. Being diligent means I can enjoy my time outdoors without worrying about where the next gust of wind will blow my shelter.
Prepare for Emergencies
It’s essential to have a plan in place should the winds get too high. I always make sure to have an emergency kit handy, with essentials like food, water, and first aid supplies. Knowing I’m prepared gives me peace of mind when the weather gets rough.
I also like to keep communication devices reset and tested, so I can reach out if things go sideways. There’s nothing worse than being caught off guard during harsh winds. Having reliable means of contact is key.
Lastly, I keep an eye on any weather updates and forecasts. Being informed lets me make proactive decisions about my shelter and whether I need to seek out shelter elsewhere if conditions worsen.
Choosing the Right Shelter Design
Understand Different Shelter Types
When I was starting out, I had no idea that the type of shelter could impact wind resistance. It’s crucial to know what your options are! For instance, a dome-shaped structure is naturally aerodynamic and can shed wind rather effectively.
I’ve also tried building A-frame designs, and they hold up pretty well against harsh winds. The key is to pick a design that complements your location and the materials you have at hand.
Researching different types gives you a broader perspective on what may work best for you. The great thing is, you can always combine elements of different designs to create something unique that fits your needs.
Adapt Your Shelter for Weather Conditions
You’ve got to be flexible! The most successful shelters I’ve built were ones that I could easily adapt based on the weather. For instance, adding extra walls on the windward side or a second layer for insulation makes a world of difference.
I often look for modular solutions. Building features that can be added or removed helps me stay prepared for any change in condition. If the wind picks up, I’m ready; if it calms down, I can simplify my setup.
Think about ventilation too! A well-ventilated shelter can limit wind effects while keeping you warm inside. Balancing these factors is all part of mastering the art of building a windproof shelter.
Experiment with Your Design
Building a windproof shelter is a learning process, and I really enjoy experimenting with different designs. Don’t be afraid to try something new! Each experience will teach you something valuable.
What I do is sketch out different concepts and then try them out. Some ideas work brilliantly, while others flop. But that’s okay—I consider each failure a step towards mastering my technique.
Engaging in building workshops or communities can be an excellent avenue for ideas. Sharing experiences, I find, can inspire innovative designs that can improve your windproof capabilities.
Frequently Asked Questions
1. What are the best materials to use for a windproof shelter?
The best materials include durable options like logs, thick canvas, or reinforced tarps. Always aim for something sturdy that can withstand not just wind but rain and snow too.
2. How can I tell if my shelter is anchored securely?
Check the stakes and ensure they’re driven deep into the ground. If the corners feel loose or can be easily shifted, it’s time to reinforce them. A good anchor keeps your shelter in place, even during strong gusts.
3. Should I worry about ventilation in a windproof shelter?
Absolutely! Proper ventilation helps prevent moisture buildup and keeps the interior comfortable. Make sure your design includes openings for air circulation without sacrificing the shelter’s wind resistance.
4. Can I build my shelter in a very windy area?
Sure! It just requires a bit more planning. Make sure to select a location that offers some protection, like trees or hills, and design your shelter keeping wind direction in mind.
5. What is the easiest design for beginners?
A simple A-frame or dome shape is great for beginners. These designs are relatively easy to construct and offer good wind resistance. Experimenting with these can help you build confidence in your skills.

by Preparation | Jul 31, 2025 | Preparedness
Assessing Your Environment
Looking for Resources
When the situation gets tough, the first thing I do is take a real good look around me. Finding resources in your environment is key to building a solid shelter. I’d recommend checking out the area for any fallen branches, leaves, or even rocks that can help support your structure.
Don’t just scan the surface; dig a little deeper. Look under bushes or trees to see if you can find more usable items. Sometimes, it’s the stuff you wouldn’t normally consider that ends up being gold when you’re building an emergency shelter.
Get creative! If you’re stuck in a more urban environment, materials like cardboard and plastic sheeting could be a lifesaver. Try to think outside the box and use what you’ve got at hand.
Evaluating Shelter Locations
Now that we’ve scoured the environment for materials, let’s find the best spot for our shelter. Honestly, I learned the hard way that not every spot is created equal. Look for level ground—nobody wants to be sleeping on a slope, trust me!
Avoid areas near water sources to keep yourself safe from flooding. Instead, look for natural barriers like hills and rocks which can protect from the wind. This gives you a better chance of staying cozy, especially during colder nights.
Also, consider sunlight exposure. You don’t want to bake in the day nor freeze at night, so finding a balance is crucial. A shaded area is great during the day, but make sure it’s not too far from sunlight come morning!
Safety First
The last major factor when assessing your environment is safety. Always assess any potential hazards; is there a risk of falling branches or wild animals? I like to take a step back and really pay attention to the surroundings.
Make sure your chosen site is away from any unstable grounds, steep cliffs, or flood zones. Keep an eye and ear out for critters too. Sometimes, just a bit of awareness can save you from a wild encounter.
If you’re in an urban area, you’ll want to choose a less trafficked space where your presence won’t attract unwanted attention. Safety in solitude is key here!
Creating Your Shelter Frame
Choosing the Right Materials
The frame is the backbone of your shelter, and honestly, it’s the part that needs the most thought. When I build, I usually look for sturdy branches that can hold up the weight and provide stability. Think of things like fallen trees or strong boughs that can form the structure.
Use thinner branches for cross beams and thicker ones for the main supports. This combination helps ensure that your shelter stands firm against anything the elements might throw at it.
And hey, don’t hesitate to use what you have on hand! If you’re feeling really inventive, even duct tape or rope can come in handy for securing parts together, so keep that in mind if you’re lucky enough to have those tools at your disposal.
Building the Frame
Once you’ve gathered your materials, it’s time to get that frame up! I prefer making a simple lean-to for quick setups. Lean one of your sturdy branches against a tree or a wall if you’re in an urban area; this saves a lot of hassle.
Next, make sure that your frame is stable. You can do this by wedging smaller branches at the base to give it extra support. It’s all about making sure whatever you build can withstand a bit of wind or rain.
For more elaborate shelters, you could form an A-frame using two larger sticks for the sides and cross beams to connect. Just remember: the simpler your design, the easier it’ll be to build with minimal tools.
Securing the Structure
Securing your structure is vital for its longevity. I like to use branches tied at critical junctions for extra strength. If you don’t have rope, some tightly woven vines or even long grass can help secure everything together.
Check your frame’s stability by giving it a bit of a shake. If it feels flimsy, it probably is. You might need to reinforce your points with extra twigs or stones until you’re comfortable.
The goal is to have a solid shelter that can withstand varying weather situations. Don’t skimp on this part—it’s way better to put in the effort now than to deal with a collapsing shelter later!
Building the Roof
Choosing the Right Type of Roof
The roof is your first defense against rain and snow, so picking the right materials is super important. I often use larger leaves, grasses, or even bark to create a makeshift roof that shelters me from the elements.
If you’ve got access to branches or a tarp, those can work wonders, too. Just remember, the goal here is to create a tight, water-resistant surface to keep you dry.
Don’t be afraid to layer your roofing materials. It’s similar to putting a heavy jacket on to stay warm. The more layers you have, the better protection you will get. Just make sure they’re well secured on top!
How to Install the Roof
When I lay out my roof, I always start from the top of the frame and work my way down. This helps ensure that rainwater rolls off instead of pooling on top. Use any spare branches to piece it all together and hold everything in place.
Consider the wind direction too! I once made the mistake of building my roof against the wind. Let’s just say it didn’t hold up well. Make sure your roof is slanted away from where the wind hits the most.
Once your roof structure is up, give it a good shake to see how secure everything feels. Add more materials if it doesn’t feel stable. You want to feel confident as you slip inside your new shelter.
Creating Insulation
Now that your roof is up, let’s talk insulation. Insulating your shelter is crucial for maintaining warmth, especially if you’re stuck out in colder conditions. I like to stuff leaves, moss, or any other natural materials I can find into the roof structure.
Pro Tip: The more stuff you pack in, the better! Start filling in gaps and spaces you find; you’ll be surprised how a little insulation can make a massive difference in comfort.
You can also add some insulation to your walls. If you have any extra foliage around, try to keep that breeze from creeping in by layering it around the edges. Every little bit helps when Mother Nature can be so unpredictable.
Final Touches
Making it Comfortable
Now it’s time to think about comfort! Building a shelter isn’t just about keeping dry; it’s also about making your temporary home feel cozy. I’ll often scavenge around for leaves to create a soft bedding layer—now, that beats lying on the ground any day!
Bring in some extra foliage to help you stay off the ground. Lying on a bed of leaves can help insulate your body from the cold earth, which is a game-changer on chilly nights.
And hey, don’t forget about personal touches! If you’ve got any trinkets or little comforts that can fit in there, throw them in. It’s your space, after all. Make it feel like home!
Setting Up a Fire
If it’s safe to do so, setting up a small fire nearby can really improve your shelter experience. A bit of warmth goes a long way in keeping spirits high, especially when times are tough. Just make sure it’s at a safe distance from your shelter. You don’t want any unnecessary fires going on!
I usually keep some stones around to act as a fire pit and to help shield the fire from the wind. Plus, it helps contain the flames and keep everything safe. Always keep water nearby just in case!
Believe me, a small fire is incredible for cooking or just warming up your cold hands after a long day of building—it’s a literal lifesaver.
Creating an Exit Strategy
Finally, always have an exit plan. This is something I stress every time I build a shelter. If you ever find yourself in an emergency, knowing how to get out quickly can be the difference between a rough night and a safe retreat.
Make sure your shelter entry or exit point is clear and easy to access. I often position my entry away from the prevailing winds and against any threats from wild animals.
Check your surroundings again to ensure your escape routes are safe. Whenever you’re unsure, plan a quick exit strategy that you can remember easily, as it gives you peace of mind.
FAQs
What materials are best for building an emergency shelter?
Look for branches, leaves, rocks, and anything that can provide structure and insulation. Even cardboard works in urban settings!
How long does it take to build a basic shelter?
Depending on your skills and conditions, a basic shelter can take anywhere from a few minutes to a couple of hours. Stay focused!
Is it safe to build a shelter in urban areas?
Yes, just make sure to avoid high-traffic areas and be aware of your surroundings to stay safe and undisturbed.
How can I insulate my shelter effectively?
Pile up leaves, moss, and any natural materials to fill gaps in your shelter. The more layers, the better insulation you’ll have!
What should I do if my shelter collapses?
Stay calm and build a new one if possible. Look for a safer location and gather materials to-construct a sturdier shelter!
by Preparation | Jul 31, 2025 | Preparedness
Understand What Carbon Monoxide Is
What You Need to Know
Let’s start with the basics. Carbon monoxide (CO) is a colorless, odorless gas that can be super dangerous. I remember the first time I learned about it; I was shocked to find out how easily it could be produced by everyday appliances like gas stoves or heaters. You can’t see it, you can’t smell it, and yet it can sneak up on you. It’s essential to be aware of its nature so that you can take the right steps to protect your family.
This gas comes from burning fossil fuels. Think about your car, your furnace, or even your fireplace. If these appliances aren’t working right, they can release CO into your home. That’s why it’s not just important to know what it is, but to be proactive in understanding where it might come from.
Moreover, symptoms of CO poisoning – headaches, dizziness, and confusion – can often be mistaken for something else, which makes it even more dangerous. Staying educated is really the first step in keeping your family safe.
Install Carbon Monoxide Detectors
Choosing the Right Detectors
One of the best pieces of advice I can offer from my own experience is to invest in good carbon monoxide detectors. When I first moved into my house, I realized I didn’t have one. That made me really nervous, so I did some research. The newer models are pretty affordable and come packed with features, like smart technology that sends alerts to your phone.
Installing these detectors in key areas of your home is crucial. I’ve learned the hard way that kitchens and bedrooms should definitely be top priority. When I added a detector outside my son’s bedroom, I felt a weight lift off my shoulders. It’s a simple step, but it makes a world of difference.
Don’t forget to check the batteries regularly too. Set a reminder in your phone every six months; it’s easy to forget otherwise! Trust me, spending a few minutes checking your detectors is worth it for peace of mind.
Maintain Your Appliances
The Importance of Regular Check-Ups
Let’s talk about maintenance. I can’t stress enough how critical it is to keep your fuel-burning appliances in good shape. When I first bought my furnace, I was tempted to skip the yearly check-up, thinking it would be fine. Well, I quickly learned that neglecting maintenance can lead to some serious issues.
Regular inspections can ensure everything is working properly and dramatically reduce the risk of CO leaks. In fact, most service professionals recommend at least once a year to prevent any hazards. Having a checklist helps too, so you don’t miss anything important.
Plus, I’ve found that keeping my appliances clean and well-ventilated not only helps in avoiding dangerous gases but also boosts their efficiency! Efficient appliances save money and contribute to our family’s safety. It’s a win-win.
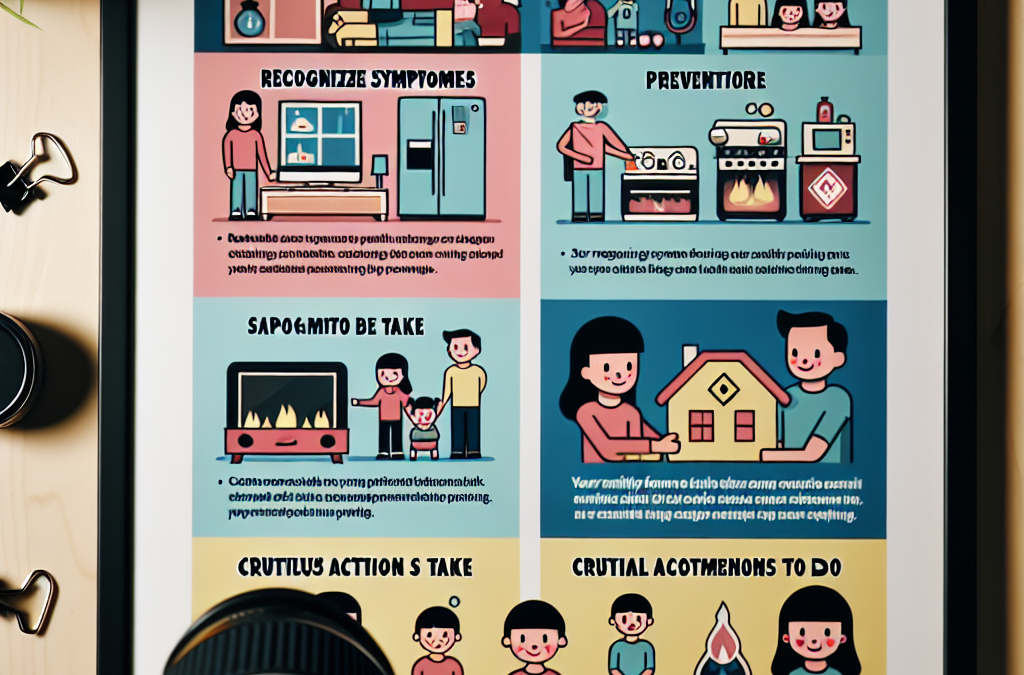
Know the Symptoms of CO Poisoning
Be Aware and Educate Your Family
It’s essential to be aware of the signs of carbon monoxide poisoning. I remember when my cousin came to visit, he mentioned he had a headache, and I kicked into high alert mode. It’s so important to know the symptoms like headaches, dizziness, confusion, and even nausea. The more we talked about it, the more my family felt prepared.
Make it a family discussion! Teaching my kids about the symptoms has given them the ability to speak up if something feels off. I put together a little info sheet for my fridge, and it’s been a handy reference. When children understand, it empowers them to take action!
Staying informed helps everyone in the household recognize potential hazards and react more quickly. After all, acting fast is key – it can literally save lives!
Make an Emergency Plan
Preparing for the Worst
Having a plan in place is like having a safety net. My family and I sat down one rainy Sunday to talk through our emergency response plan. It might sound a bit dramatic, but knowing what to do in case of a CO alarm going off brings a lot of peace of mind.
We decided on a meeting spot outside, in case we ever need to evacuate. Everyone should know how to leave the house quickly and safely. We even practiced the drill a few times – it was fun and got everyone involved. It made me feel like I was doing something proactive, which is always nice!
Don’t forget to keep a battery-powered radio nearby for updates if the power goes out. I found one at a yard sale, and it’s a good reminder that you can often find practical solutions without breaking the bank. Stay prepared, and you’ll feel more secure.
FAQs
What are common sources of carbon monoxide in homes?
Common sources include gas furnaces, water heaters, car exhaust from attached garages, fireplaces, and gas stoves. Always ensure these appliances are well-maintained!
How often should I test or replace my carbon monoxide detector?
Test your detectors monthly and replace the batteries at least once a year. Also, replace the entire unit every 5 to 7 years depending on the manufacturer’s recommendation.
What should I do if my carbon monoxide alarm goes off?
If your alarm sounds, immediately evacuate your home and call emergency services. Do not ignore the alarm or try to find the source. Safety first!
Can carbon monoxide poisoning happen in the summer?
Yes, it can! Many people think CO poisoning only occurs in winter, but it can happen anytime there are working appliances that produce exhaust gases.
Is there a safe level of carbon monoxide exposure?
No, there is no safe level of exposure. Even low levels can cause health issues, so it’s best to invest in safety measures to prevent exposure entirely.

by Preparation | Jul 31, 2025 | Preparedness
Embracing a Positive Mindset
Why Optimism Matters
When I was navigating tough times, I quickly realized that a positive mindset is like armor against life’s challenges. It’s not just about wishing for good things; it’s a proactive approach to dealing with obstacles. When I embraced optimism, I started noticing how much more resilient I became. It’s like flipping a switch in your brain—suddenly, setbacks feel less daunting and more manageable.
By choosing to see the glass half full, I discovered that my problem-solving skills sharpened. Instead of dwelling on what could go wrong, I focused on potential solutions. This shift changed my life. Positivity isn’t unrealistic; it’s a tool that can help us tackle problems from a different angle.
Moreover, optimism helps us connect better with others. I found that when I radiate positivity, it not only lifts my spirits but also lifts those around me. This creates a supportive atmosphere where solutions can flourish. In tough times, it truly pays off to look at the brighter side.
Setting Realistic Goals
Define Your Objectives
One thing I’ve learned about positivity is that action must follow intention. Setting realistic goals is crucial. If you aim for the stars but neglect the groundwork, you might end up feeling overwhelmed. I like to break my grand ambitions into bite-sized tasks. This way, each small victory fuels my optimism, pushing me along the journey.
It’s also important to write these goals down. When I have my objectives laid out, I can visualize them better. This not only keeps me focused but also serves as a reminder of why I initiated this journey. When I achieve a small goal, I celebrate it. This can really rev up your motivation levels!
Lastly, I think it’s important to keep adjusting your goals. Life is dynamic, and so are our dreams. Whenever I feel the need to pivot, I evaluate my goals and make sure they’re still aligned with my vision. Flexibility alongside optimism is key to success.
Building a Supportive Network
Surround Yourself with Positivity
I’ve always believed in the saying, “You are the average of the five people you spend the most time with.” Over the years, I have learned how powerful a supportive network can be. When I surround myself with positive, uplifting people, their energy rubs off on me. This community becomes a bedrock of strength during difficult times.
Engaging with others who share your optimistic outlook can lead to inspiring discussions. Lately, I’ve joined a local group focusing on personal development. The conversations we have and the encouragement we exchange are invaluable. It’s like this collective optimism pushes us all further, and we hold each other accountable to our goals.
Together, we celebrate successes—big and small. It’s essential to have that cheering squad, especially when the road gets rocky. I always feel more empowered knowing I have people in my corner, ready to lend their support and share their insights.
Practicing Gratitude
Daily Reflections
This one’s a game changer! I started keeping a gratitude journal, and it’s made all the difference in my outlook on life. Reflecting on the good things that happen every day, no matter how small, keeps negativity at bay. It reminds me to appreciate the little wins, and boy, does that boost my optimism!
At the end of each day, I jot down at least three things I’m grateful for. This practice has allowed me to shift my focus from what’s lacking to what I have. It’s amazing how changing your mindset can change your life! Some days I cheer for something as simple as a sunny morning or a good cup of coffee, and you know what? It works wonders.
By routinely practicing gratitude, I’ve become much more resilient. No matter how tough my day is, I can always find something to be thankful for. And that, in itself, is a huge win. This focus on gratitude reinforces my optimism, setting me up for future successes.
Taking Action Towards Change
Start Small and Build Momentum
For a long time, I took a backseat in my own life, waiting for changes to happen rather than making them. Taking action is crucial if you want to harness optimism into something tangible. I started with small steps. When I wanted to get fit, for instance, I didn’t pressure myself to run a marathon. Instead, I committed to walking for 20 minutes a day.
As I gained confidence, I naturally pushed my limits further. The best part? Every small step reinforced my belief that I could create change. It was this build-up of little victories that propelled me forward. Instead of fear holding me back, my optimism became the driving force behind my actions.
I always remind myself that even the mightiest oak was once just a tiny acorn. It might take time, but each step counts. By embracing action and optimism, I feel more in control of my life and my future.
Frequently Asked Questions
1. What is positive preparedness?
Positive preparedness is a mindset that combines optimism with practical action steps to deal with challenges. It’s about being ready for whatever life throws at you while maintaining a positive outlook.
2. Can optimism really affect my problem-solving skills?
Absolutely! When you approach problems with an optimistic mindset, you’re more likely to think creatively and find solutions, rather than getting stuck in negative thoughts.
3. How do I start practicing gratitude?
Start by keeping a daily gratitude journal. Write down a few things you’re thankful for each day. Over time, this practice will help retrain your mind to focus on the positives.
4. What if I don’t have a supportive network?
If your immediate circle isn’t supportive, try joining groups or communities that share your interests. Surrounding yourself with positive people can transform your outlook on life.
5. Can optimism help in overcoming anxiety?
Yes! Cultivating an optimistic mindset can help reduce anxiety levels. By focusing on solutions and maintaining a positive outlook, you can better manage anxious thoughts and feelings.

by Preparation | Jul 31, 2025 | Preparedness
Assessing Your Home’s Vulnerabilities
Identifying Weak Points
First things first, I found that it’s crucial to take a good, hard look at your home. Consider which areas might be easier for an intruder to access. Start outside. Are your doors and windows in good shape? I remember when I realized my back door could be opened with just a credit card! Seriously, it wasn’t even locked properly!
Next, move on to your yard. Is it well-lit? Thickets or bushes can provide cover for unwanted visitors. I had to trim back some of my shrubs because they were way too tall. It was like I was offering a welcome mat for anyone trying to sneak in under the cover of night.
Finally, think about the interior. Don’t just focus on doors and windows. A sturdy door frame is essential, and I recommend striking plates that can withstand forceful entry. After all, you want to keep what’s important to you safe!
Investing in Quality Security Systems
Choosing the Right Technology
When I decided it was time to upgrade my home security, I dove into the options available. Now, there’s a lot out there—from basic alarm systems to sophisticated smart home networks. I always suggest starting with a system that complements your needs. If you’re away a lot, a smart system that you can manage remotely is a life-saver.
Then there’s the issue of cameras. I’ve got a few around my house, and trust me, they’re worth the investment. You can never be too careful! Look for models with good night vision and those that integrate seamlessly with your phone. You’ll feel empowered knowing you can always check in, even when you’re not at home.
Don’t forget about getting professional installation if you’re not super tech-savvy! It might cost a little extra, but having everything set up correctly is well worth it for your peace of mind. Plus, the tech gurus can usually provide advice on the best spots to mount your equipment.
Developing a Neighborhood Watch Program
Fostering Community Connections
One of the biggest takeaways for me has been the power of community. I started chatting with my neighbors more and found out a few of them felt the same way about security. When you know your neighbors, you naturally look out for one another. It’s like building a mini-guard brigade!
Organizing meetings can be a great way to discuss the concerns we all have. A simple coffee gathering is enough to share ideas on security measures. I was amazed at how many suggestions popped up—everything from better lighting to shared security cameras!
Lastly, don’t forget to establish a means to communicate quickly about any suspicious activity. Whether it’s a group chat or a shared app, having a way to alert your neighbors can make a huge difference. Trust me, when someone’s keeping an eye out, you feel a lot safer!
Practicing Safety Protocols
Daily Routines That Enhance Security
Once I had my systems in place and community connections made, the next step was to adopt some everyday safety habits. One thing I started doing was double-checking that my doors were locked. It sounds silly, but you’d be surprised how many times I’ve left my front door unlocked!
Another thing I practice is keeping my blinds partially closed during the night. It feels cozy and homey, but it also means that nosy passersby can’t see all my belongings just sitting there. Out of sight, out of mind—I live by that motto!
Additionally, I suggest creating a small emergency plan for you and your family. Go over what to do in case of a break-in or any other emergency situations. It’s all about being proactive rather than reactive and can really help ease anxiety.
Ensuring Visibility and Lighting
Implementing Effective Lighting Solutions
One thing I learned about making my home secure is the power of good lighting. Dark areas are the perfect spots for troublemakers to hide. I made sure to install motion-activated lights in my front and back yards. They give a welcoming feel but also deter any unwanted visitors!
Consider the corners of your house and any entry points. I felt a significant difference once I added some solar-powered lights. They’re great because you don’t have to worry about wiring and they charge up during the day. Plus, when they pop on at night, they look super nice!
Lastly, think about the visibility of your home from the street. Trim any tall bushes and consider planting lower shrubs. Not only does it make your home look well-kept, but it keeps those dark corners at bay. No hiding spots means less temptation for anyone looking to break in!
FAQ
1. What are some simple ways to improve home security?
Start by checking for vulnerabilities like weak points in doors and windows, investing in a good security system, and fostering connections with your neighbors. Small changes can make a big difference!
2. How can I involve my neighbors in improving security?
You can start by organizing neighborhood meetings or even just casual gatherings. Sharing concerns and solutions is key to fostering a safer community together.
3. Why is outdoor lighting important for home security?
Good lighting deters intruders by eliminating dark spots where they can hide. Motion-activated lights are a great addition that can increase visibility and safety.
4. How do I choose the right security system?
Consider your specific needs. Find a system that works with technology you’re comfortable with, and opt for cameras and features that provide remote access for peace of mind.
5. What daily practices should I adopt for better home security?
Create a routine of locking doors, securing windows, and reviewing your emergency plan with your family. Consistency is key in practice!


