Survival cooking might sound daunting, but when I first got into it, I realized it’s all about adaptability. It’s using what you have at your disposal and transforming it into not just edible, but delicious meals. Whether you’re out camping or facing unexpected challenges at home, the principles remain the same—resourcefulness and creativity are your best allies.
You’ll often hear about different techniques and tools specific to survival situations, but at its core, survival cooking is about keeping it simple. You don’t need fancy gadgets or gourmet ingredients—just some basics and the will to cook, even in less-than-ideal circumstances. Think of it like being a culinary MacGyver!
I’ve learned that focusing on techniques like foraging and preserving can really expand your options. It’s amazing what you can whip up with just a few foraged greens or fish you’ve caught. Trust me, embracing this mindset opens a whole new world of culinary opportunities.
2. Essential Tools and Gear
Must-Have Cooking Equipment
When I first embarked on my survival cooking journey, I quickly realized the importance of having the right tools. A sturdy knife is really a cook’s best friend. From peeling potatoes to slicing meats, it’s essential for nearly every task you’ll face. I always recommend choosing quality over quantity—don’t skimp on your knife.
Another essential is a portable stove or cooking pot. Whether it’s a camp stove, a Dutch oven, or even a foil packet, you need a reliable way to cook your food. I’ve experimented with various types, and they each have their pros and cons depending on your situation. Remember, you can always cook over an open fire if needed, but safety and control are key!
Then there’s the storage side of things. Containers that can handle a bit of heat and make transporting easy are vital. I swear by my resealable bags and reusable food containers! They keep everything fresh while being super lightweight, which is crucial when you’re not lugging around a full kitchen.
3. Food Selection and Preparation
Choosing the Right Ingredients
Now that you’ve got your gear sorted, let’s talk food! The ingredients you choose will make or break your survival meals. You need to think about things that are not only nutritious but also versatile. For me, grains and legumes have been lifesavers. They’re filling, packed with energy, and can be used in countless recipes.
Don’t overlook foraging! Wild greens, berries, and edible plants can complement your meals nicely. I remember my first forage, the thrill of picking my food straight from nature was unforgettable! Just make sure to double-check that what you’re picking is safe to eat; it’s better to be safe than sorry, right?
Protein is also non-negotiable. Fishing, hunting, or trapping can provide essential nutrients. I always advise packing some dried meats or jerky for emergencies. It’s lightweight, lasts long, and is packed with energy. Relying on what’s readily available, combined with what you have stored, is the ultimate survival cooking strategy.
4. Cooking Techniques for Survival
Adapting Methods for Your Situation
Cooking when the situation isn’t ideal can be tricky, but I’ve found that adaptability is my hidden superpower! One of my go-to techniques is ‘hot rock cooking.’ Essentially, you heat rocks in a fire and use them to cook your food. It’s ancient but effective! I’ve made everything from eggs to fish this way, and it’s kind of an adventure in itself.
Simmering in a pot over an open flame is another method I frequently use. Just keep an eye on the temperature and don’t let it boil over. I’ve had plenty of experiences where I learned to use the thermal properties of different cookware. It’s all about experimenting and finding what works best in your environment.
Don’t forget about baking! You can bake bread in a makeshift oven by covering a pot, or try a Dutch oven if you’ve got one available. It’s amazing how flexible cooking techniques can be when you’ve got a little creativity in your back pocket!
5. Creative Recipes for Survival Situations
Simple, Nutritious Meals
Creating meals under survival conditions doesn’t have to lack flavor or creativity. One of my favorites is a one-pot stew packed with whatever veggies and protein I have on hand. Toss everything in, let it simmer, and you’ve got a hearty meal to warm you up. Plus, it’s a fantastic way to use up forage finds, too!
Another tasty option is trail wraps. I often use flatbreads or even large leaves if I’m out in the woods. Stuff them with cooked meat, greens, and a bit of seasoning, and boom—you’ve got a portable meal that’s perfect for on-the-go.
For a sweet treat after your survival meals, I love whipping up berry compote over some warmed oats. Simple but satisfying, and it perks up morale a bit! There’s something special about filling your belly with good food when times are tough, and these recipes prove just that.
Frequently Asked Questions
What are the basics of survival cooking?
The basics of survival cooking include understanding what ingredients you have available, mastering essential cooking techniques, and being adaptable. It’s all about using what you can find and making the most of it!
What tools do I need for survival cooking?
Essential tools include a good knife, a portable cooking method (like a camp stove), and storage containers. These will help you prepare and store food safely in any situation.
How can I select the right ingredients for survival cooking?
Focus on nutritious ingredients that are versatile, such as grains, legumes, and proteins. Also, consider foraging for wild edibles that can complement your meals but always ensure they are safe to eat.
What cooking techniques should I learn for survival situations?
Learn to adapt your cooking methods. This might include hot rock cooking, simmering in a pot over a flame, and baking in a Dutch oven. Flexibility is key to successful survival cooking.
Can you suggest a simple recipe for survival cooking?
A simple recipe is a one-pot stew. Just gather your available veggies and protein, toss them in a pot with some water and spices, and let it simmer until cooked through. It’s easy and can be customized with whatever you have!
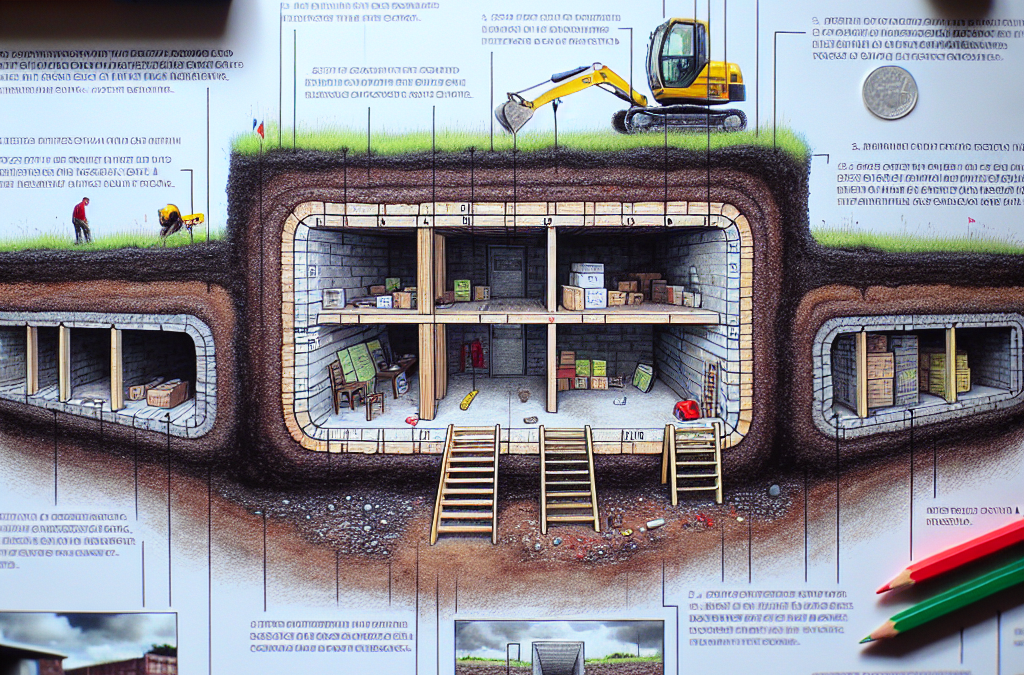
When I first decided to dig in for a survival bunker, the location was everything. You want a spot that’s not only discreet but also safe from natural disasters. Look for flat land away from tall trees and potential flood zones. Trust me, you don’t want to end up with a lake in your bunker after heavy rain!
Consider access points as well. Is it easy to get to without attracting attention? If you have nosy neighbors, you might want to think about burying your bunker a bit deeper or hiding it with some landscaping. Make sure you can access it quickly when needed—your safety will depend on it!
Lastly, think about how you’ll be using this space. Is it going to be primarily for storage, or do you envision it as a living space? This will affect not only how you build it but also where you decide to place it.
Environmental Factors
Once I had a few locations in mind, I paid close attention to the environmental factors. Soil type is crucial; the last thing you want is a bunker that sinks into the ground! Clay soil might not be ideal as it retains water. Look for sandy or loamy soil for easier excavation.
Also, pay attention to local wildlife. It’s no good digging your bunker if critters are going to take over. Make sure your site doesn’t disturb any habitats. If you’re going to be spending time down there, I think you’d want to do it without the surprise of a raccoon visiting.
Weather is another important consideration. Make sure your site has natural barriers against the wind, like trees or hills, so it won’t be exposed to harsh weather. This will help retain warmth in the cooler months and keep it cooler in summer.
Legal Considerations
Before you break ground, you need to check the local regulations regarding underground structures. The last thing you want is to build a bunker only to be told to tear it down by the authorities. It pays to do a bit of digging (pun intended) into the local building codes.
You might need permits depending on what you plan to dig. Some areas have strict rules about underground spaces, so it’s wise to visit the local zoning office. They’ll help you figure out what you can and can’t do.
If it helps, have a conversation with a building contractor. They can offer insights into what’s possible and remind you of any additional regulations that might be necessary for your area.
Plan and Design Your Bunker
Space Allocation
Now that I’ve nailed down a location, it’s time to figure out how much space I’ll need. I always suggest starting with a floor plan, even if it’s rough. Think through how many people will be using it, what supplies need to be stored, and any additional features like sleeping quarters or a small work area.
Don’t forget about the essentials. You’ll need room for food storage, water supply, and possibly some kind of ventilation system. Also, consider extras that could make life more comfortable during a long stay, such as seating or a small table.
Consider making your bunker modular. This way, you can expand later without needing to entirely rebuild. Having designated areas can be very helpful in maintaining organization and access to essentials.
Material Selection
With the design settled, it’s time to talk materials. I took a lot of time considering what would work best for my budget while still being effective. Concrete blocks are a popular choice for bunkers because of their durability and strength. They might be a bit pricey if you’re working with a tight budget, though.
If you’re looking for a more affordable material, consider using reinforced wood or metal. Just remember that ventilation is key, and you might have to factor in some cash for metal vent pipes or whatever kind of system you decide to use.
Don’t overlook insulation either! You’ll want to make sure your bunker can maintain a livable temperature. Foam board insulation is a budget-friendly option that works wonders. It might sound like a minor detail now, but on a cold night, you’ll be grateful for that extra warmth.
Emergency Features
When planning your bunker, you have to think about emergencies. This isn’t just a man cave; it’s a survival shelter! Make sure to include essential supplies like first aid kits, a means for food preservation, and water purification options.
I recommend thinking about energy sources too. Solar panels are a great investment, but if that’s too pricey, a good old-fashioned hand-crank generator can work temporarily to keep some lights on or to charge your devices.
Don’t forget to include some entertainment options. Nothing dreadful than getting stuck down there with nothing to do. Board games, books, and maybe even some tools to keep you busy will go a long way toward keeping everyone sane in a crisis!
Excavate and Build Your Bunker
Excavating the Site
Alright, time to put all that planning into action! When I first started digging, I quickly realized it’s more than just shoveling dirt. You’ve got to plan for how deep and wide your bunker needs to be. Using a shovel might work for small digs, but renting a mini-excavator is usually the way to go.
Make sure to account for drainage too! Nobody wants a flooded bunker. Dig trenches to direct rainwater away, or set up a sump pump in case things go awry. I can’t stress this enough—watch your surroundings too! Look out for power lines and underground utilities before you dig.
Once you’ve dug your space, it’s time to lay a solid foundation. This will help prevent any settling or shifting that could compromise your bunker’s structure. If you’re not sure about the structural integrity of your site, consider consulting a professional.
Building the Walls
With the excavation done, it’s time to build those walls! Whether you’ve opted for concrete or wood, each choice has its pros and cons. I went for concrete blocks simply because they can withstand more extreme conditions.
Start from one corner and lay the blocks out according to your plan. You’ll need to make sure they’re level and stable. If you’re using wood, be sure to seal it with a water-resistant barrier to prolong its life against moisture.
Ventilation is crucial, so I made sure to leave space for vents during the wall construction. Having fresh air down there is a must. Also, remember to reinforce the walls with insulation to make your bunker cozy.
Finishing Touches
Now that the main structure is up, it’s time for those all-important finishing touches. You want to make your bunker livable, right? Start with interior partitions to create separate areas according to your plan—bedrooms, storage rooms, and so forth.
Then, consider lighting. Whether it’s battery-operated lights or solar options, having light in your bunker will make all the difference. I also suggest incorporating some kinds of emergency lighting in case the power goes out.
Lastly, don’t forget about decorations! It might sound frivolous, but adding a personal touch can make your bunker feel more comfortable and inviting. Posters or simple decor can lift spirits when you’re facing tough times.
Stock Your Bunker Wisely
Food Storage Strategies
You can have the best bunker in the world, but it’s no good if it isn’t stocked up with essentials! I started by creating a list of non-perishable foods that I knew my family would eat. Consider canned goods, freeze-dried meals, or even bulk foods like rice and beans that can last for ages.
Don’t forget to think about how you’ll store everything. Shelving units can maximize space, and vacuum-sealed bags can help keep food fresher longer. I highly recommend rotating your supplies to keep old stock from going bad—a little food management goes a long way!
Consider the types of meals you’ll want and make sure to stock up on enough variety so you don’t end up with a pantry full of bland food. It’s about survival, but a little joy in the taste department doesn’t hurt!
Water Supply Management
Next up is the vital issue of water supply. In survival situations, having access to fresh water is non-negotiable. I invested in a large water storage tank, which is essential for any bunker. Just ensure you keep it sealed and clean!
Filtering systems are also something I would recommend looking into. From activated charcoal filters to gravity-fed systems, having something in place can make a huge difference. You might even want to consider setting up a rain catchment system if you can!
And don’t overlook hydration—keeping a stockpile of bottled water is a good backup plan. Always store these properly to prevent contamination. I like to keep a rotation schedule for my water stock as well!
Emergency Supplies and Gear
When I finally stocked my bunk, I made sure to include emergency supplies, and boy did it pay off! A robust first-aid kit should be the backbone of your supplies. Consider including items like bandages, antiseptics, and any necessary medications. Having a well-stocked kit can be a lifesaver.
I also encourage you to gather gear that can help during a crisis. Flashlights, batteries, fire-starting kits, and multi-tools are going to be your best friends. You never know when you might need them, so I recommend stashing them in easy-to-reach places.
Don’t forget some basic tools for repairs and maintenance as well. Things like duct tape, hammers, and screwdrivers can save your day, and keeping a stock of spare parts can be incredibly handy down the line.
Maintain Your Bunker
Routine Inspections
Building your bunker is just the start! Setting a routine inspection schedule is essential to keep everything in top condition. I personally mark it on my calendar to check the structural integrity of the walls and ensure there’s no moisture buildup.
It’s also important to check your supplies regularly. I mean, who wants to dive into a stockpile of expired food or empty water containers? Check expiration dates and rotate through your supplies regularly—this not only keeps things fresh but also helps you stay organized.
Maintaining your ventilation system is equally vital. Make sure nothing is blocking the vents and that they’re working smoothly to keep air flowing. Run tests every so often just to be sure everything’s functioning!
Update Supplies Regularly
Beyond routine checks, updating supplies is crucial. I’ve found that taking stock at the changing of the seasons helps ensure that I’m stocked up on necessities—and ready for any surprises. This also gives me an opportunity to replace any outdated items.
If you’ve tried out some new recipes, make sure to incorporate new foods into your supplies. Diversity in your food stock can make a challenging situation feel less daunting!
I personally enjoy trying different brands or types of food as well. This way, I’m never stuck with items I don’t like in a pinch! Keeping things fresh boosts morale and keeps the bunker from becoming a drab environment.
Regular Clean-Up
Regular clean-up is not just for aesthetics; it’s essential for maintaining a functional space. Mold and dust can build up quickly in a confined area, and if you’re not careful, you might end up with more problems than you bargained for!
I recommend creating a cleaning schedule just like your inspection schedule. Dusting shelves, checking for leaks, and clearing out expired food can help keep your bunker in great shape!
And remember, when you’ve done the initial clean-up, it’s easy to keep things tidy. Just make it a habit when you’re restocking or spending time in the bunker. A clean space keeps spirits high, and you’ll always be ready for anything!
FAQ
1. How much does it cost to build a survival bunker on a budget?
The cost can vary greatly depending on materials and design, but you can start with a few thousand dollars for a basic bunker. It’s all about how much you’re willing to do yourself versus hiring help.
2. What are the best materials to use for a budget bunker?
Concrete is ideal for strength, but if you’re looking to save, consider reinforced wood or even shipping containers. Just make sure you’re mindful of insulation!
3. How do I ensure my bunker is safe from flooding?
Choose a location on higher ground, and incorporate proper drainage and water barriers. Regular inspections can also catch problems before they escalate.
4. What should I stock in my bunker besides food and water?
Don’t forget essentials like first-aid kits, tools, batteries, and entertainment items like books or games—these will make your time in the bunker more pleasant!
5. How often should I check and maintain my bunker?
Set inspection check-ups every few months, but also be spontaneous! If there’s a heavy storm or other events in your area, I’d check it more frequently just to be safe.
When it comes to storing fuel for emergency use, it’s crucial to know what type you’re dealing with. Gasoline, diesel, propane – each has its unique properties and storage requirements. From my own experience, picking the right fuel type can make all the difference during a crisis.
For instance, gasoline is readily available, but it has a short shelf life. If you’re planning to store it for emergencies, you might want to invest in some fuel stabilizers; they really help extend its usability. Diesel on the other hand lasts longer and can be a better option if you have the means to store it correctly.
Don’t ignore propane! It’s efficient and has an indefinite shelf life. Plus, if you have a grill or a generator that runs on propane, you’ll want to stock up. Understanding these types helps you make informed decisions that are specific to your needs.
Evaluate Your Energy Needs
Before diving into storage, take a moment to assess your actual energy needs. For instance, consider how often you rely on fuel-guzzling machinery. In my case, I realized my demands fluctuated based on seasons, especially in winter when I needed more heating supplies.
By mapping out my expected fuel consumption, I could determine how much fuel I needed to keep on hand to last during a power outage or emergency situation. This also allowed me to plan for the long term, ensuring I wasn’t left high and dry when the unexpected happened.
Taking stock of your energy needs prevents over-purchasing, which, let me tell you, can be overwhelming and costly. Plus, it’s easier to find a proper storage solution when you have a clear idea of what you’re working with.
Research Local Regulations
This might seem like a hassle, but trust me, it’s worth your time! Different regions have different rules for storing fuel. I’ve bumped heads with legalities before, but now I make it a priority to check local laws before I store any substantial amount of fuel.
For example, certain areas may have restrictions on the amount of gasoline you can maintain at home. Knowing these regulations upfront means you avoid the stress of potentially facing penalties later. I often visit my local fire department’s website, which provides a load of helpful guidelines!
Understanding these regulations can also guide your choice of storage containers and safety measures. It keeps your operation above board while ensuring your family’s safety.
Proper Storage Techniques
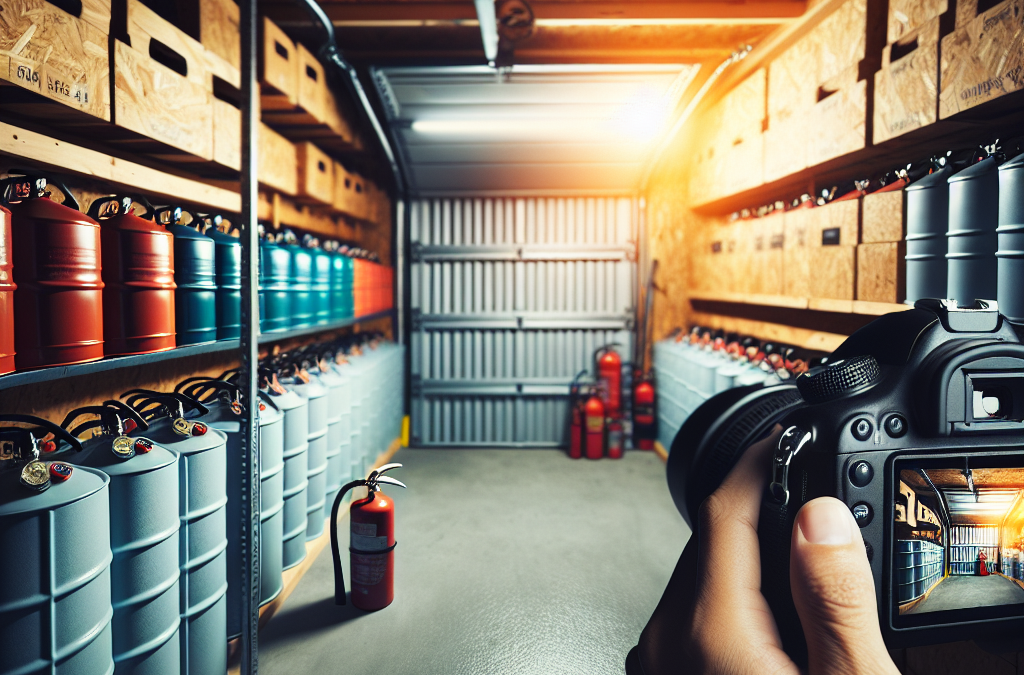
Select the Right Containers
In my experience, the type of container can make or break your fuel storage efforts. When I started, I learned the hard way that cheap plastic containers were not a great idea for storing gasoline. Instead, investing in high-quality, approved fuel containers makes a world of difference.
You want durable materials that can withstand temperature fluctuations and other outside elements. My go-to now is using metal containers designed specifically for fuel storage – they’re sturdy, and I feel that they provide safety against leaks.
Just remember, always check for labels that indicate the container is “approved for fuel storage.” It’s a simple check that can save you loads of headaches down the line.
Optimize Your Location
Have you ever thought about where you store your fuel? I initially had my storage container over by the garage, but shifting it to a well-ventilated area far from sources of ignition made me breathe a little easier. Choosing the location is critical to ensure safety!
Look for a cool, shaded area away from direct sunlight and heat sources. I’ve found that keeping it in an enclosed shed is great because it adds an extra layer of protection – just remember to ventilate it! It’s such a simple step, but it really helps maintain safe conditions.
Always ensure that there are no flammable materials nearby. I learned this after an accidental small fire on my patio – let’s just say it was quite the learning experience. Putting a safe distance between your fuel and other potential hazards is super important.
Maintain Regular Checks
Yes, regular maintenance checks should become part of your routine! I know it sounds a bit tedious, but inspecting your stored fuel can prevent many problems down the line. For instance, keeping an eye on the container’s integrity ensures there are no leaks or deformities.
One of my favorite tips is to rotate my fuel every season. This way, I ensure nothing is sitting around longer than it should, while also allowing me to restock with fresh supplies. You wouldn’t believe how quickly I learned this is a great way to maximize storage efficiency.
Additionally, do not forget to clean your storage areas. Dust and debris can be a fire hazard, so routinely ensure that everything stays tidy and in its proper place. Creating a maintenance schedule helps ensure I don’t overlook these important checks.
Safety Measures to Consider
Invest in Protective Gear
Now, I know this sounds excessive, but having protective gear is a must when handling fuel. I was once careless and ended up with some nasty splashes that could have been easily avoided. Simple items like gloves and goggles go a long way in ensuring safety.
Think about having a fire extinguisher nearby, specifically one that’s rated for flammable liquids. It’s an investment that brings peace of mind! I make it a point to check its expiry date regularly to avoid any surprises in case of an emergency.
Another piece of gear that’s saved me many headaches is having a simple first aid kit nearby. Accidents happen, so being prepared is always a smart idea. You’ll thank yourself later!
Develop an Emergency Plan
Okay, this one is a total game changer! Having a fuel storage plan is excellent, but what if something goes wrong? My family and I have sat down a few times to create an emergency plan in case we need to evacuate or there’s a serious fuel-related incident. That’s right; I believe in a proactive approach!
Include routes, procedures, and essential contacts in your emergency plan. Trust me, panic can lead to poor decisions! Also, practicing the plan helps everyone understand what to do when the real deal hits. I’ve practiced evacuation routes with my kids, and it’s actually become a fun family activity.
Don’t forget to keep a copy of your emergency plan accessible. I’ve put mine on the fridge and in a digital folder. People might think I’m a bit paranoid, but I believe that preparation is key!
Stay Educated
Knowledge is power, right? Staying informed about the best practices for fuel storage keeps me on my toes! Whenever I handle fuel, I make sure to read up on safety, new technologies, and regulations. This has helped me adapt my strategies over time.
There are plenty of online resources and courses that provide valuable information! I’ve signed up for a few webinars, and honestly, they were eye-opening. I love sharing what I learn with family and friends – knowledge really is better when it’s shared!
Also, don’t underestimate the value of community experience. Chatting with local experts and neighbors about their fuel storage practices has given me new insights. They’ve shared their stories and lessons learned, and that real-life insight is priceless.
Frequently Asked Questions
1. What is the best fuel for emergency storage?
The most common fuels are gasoline, diesel, and propane. Gasoline is easy to access but may require stabilizers due to its shorter shelf life. Diesel lasts longer, making it a solid choice, while propane is very versatile and has an indefinite shelf life.
2. How often should I check my stored fuel?
I recommend routine checks every season. This means inspecting containers for leaks or damage and ensuring everything is cleaned up and in order.
3. Where is the safest place to store fuel?
The best location for fuel storage is in a cool, well-ventilated area, away from any heat sources or flammable materials. A sturdy shed can often be a great choice!
4. Should I rotate my fuel stocks?
Absolutely! Rotating your fuel every season helps ensure you use the oldest fuel first, allowing you to maintain freshness while avoiding potential spoilage.
5. Why is it important to have protective gear when handling fuel?
Protective gear, like gloves and goggles, can prevent accidents and injuries. Fuel is hazardous, and it’s better to be safe than sorry. Plus, having gear nearby adds an extra layer of safety for those unforeseen moments.
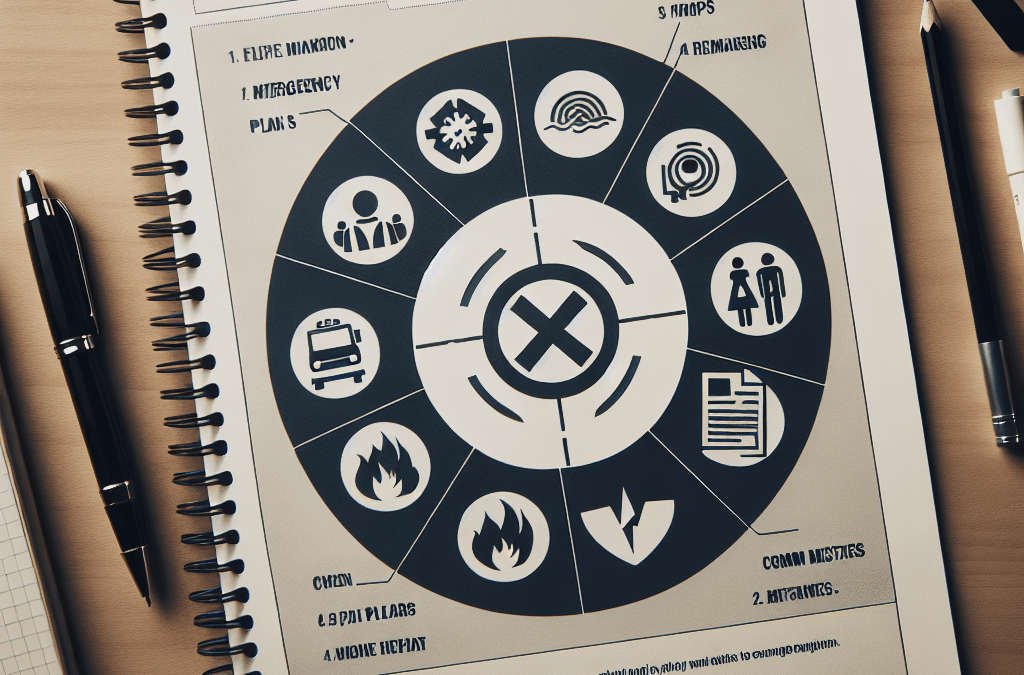
In a world filled with unexpected twists and turns, the importance of emergency preparedness cannot be overstated. Natural disasters, health crises, or unforeseen accidents can strike without warning. By taking proactive measures now, you ensure the safety of yourself and your loved ones when it matters most. Here’s how to master emergency preparedness in ten essential steps.
*1. Understanding the Importance of Emergency Preparedness**
Emergency preparedness is not merely a precaution; it’s a commitment to safeguarding your life and those around you. When disaster strikes, having a plan can mean the difference between chaos and control. It allows you to respond swiftly rather than react impulsively, ensuring that everyone knows their role in an emergency situation.
*2. Assessing Your Risks: Know Your Threats**
Every region has its unique set of potential threats – from hurricanes and earthquakes to wildfires and floods. Begin by evaluating the risks specific to your area. Consult local emergency management agencies for insights on prevalent hazards, which will help you tailor your plans effectively.
*3. Creating a Comprehensive Emergency Plan**
An effective emergency plan outlines clear steps for various scenarios—what actions to take during an evacuation or how to shelter in place during severe storms. Include details on escape routes, designated meeting spots, and critical information such as medical needs or pet care instructions.
*4. Building Your Emergency Supply Kit**
Your emergency supply kit is your lifeline when disaster looms. Aim for at least 72 hours’ worth of essentials: water (one gallon per person per day), non-perishable food items, flashlights, batteries, first aid supplies, medications, and important documents. Don’t forget personal hygiene items and comfort items like blankets—these could make all the difference in stressful times.
*5. Establishing Communication Strategies**
In emergencies, communication can break down rapidly due to power outages or network failures. Designate a family contact outside your immediate area who can relay messages if local communications fail. Ensure everyone knows how to reach this person and share other vital contact information.
*6. Training and Drills: Practice Makes Perfect**
Once you’ve developed your plan, practice it! Regular drills reinforce procedures so that everyone knows what to do under pressure—whether it’s evacuating quickly or adhering to safety protocols at home or school.
*7. Incorporating Technology in Preparedness**
Leverage technology for enhanced preparedness! Download weather apps for real-time alerts about approaching storms or emergencies in your vicinity. Familiarize yourself with social media platforms where local authorities share updates rapidly during crises.
*8. Staying Informed: Weather Alerts and Emergency Updates**
Staying informed is crucial before and during an emergency situation. Sign up for community alert systems that provide timely notifications regarding severe weather warnings or public safety announcements—knowledge is power!
*9. Community Resources and Support Networks**
Engaging with community resources strengthens collective resilience against disasters.
Connect with local organizations focused on disaster response; they often offer training workshops or distribute resources that bolster individual preparedness efforts.
*10. Regularly Reviewing and Updating Your Emergency Plan**
Lastly—and perhaps most importantly—your emergency plan should evolve as circumstances change over time (new family members, changes in residence). Set reminders to review your plan annually; this ensures that it remains relevant and effective.
By embracing these ten essential steps toward mastering emergency preparedness, you’re not just preparing for potential disasters—you’re creating peace of mind amidst uncertainty! Stay safe out there!
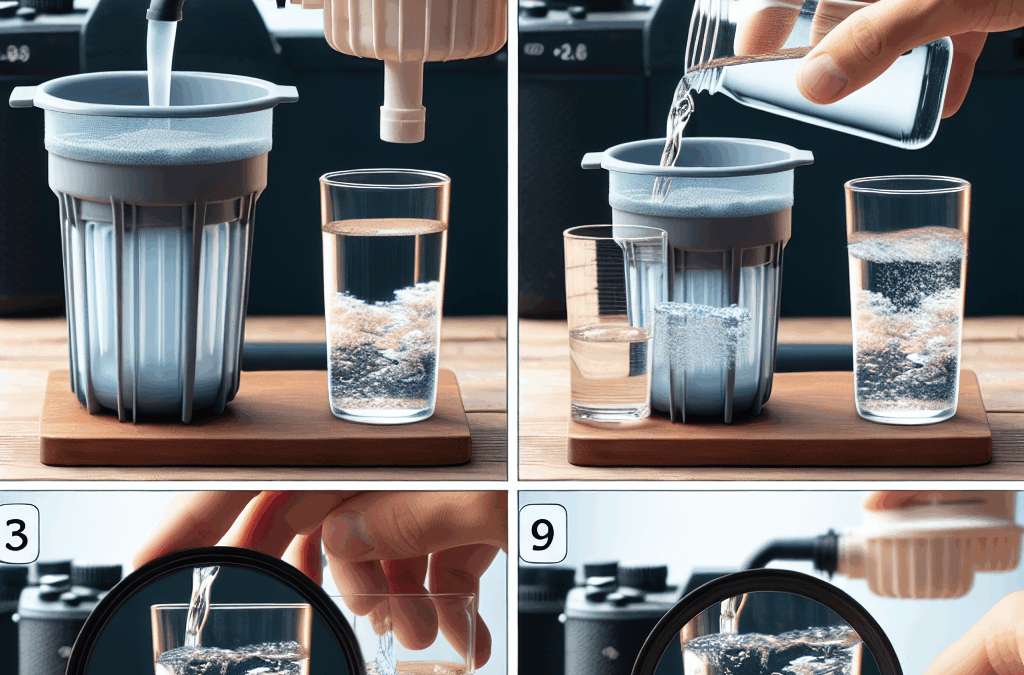
Let me tell you, filtering water isn’t just about making it look clear. I’ve learned that unfiltered water can carry tons of contaminants that can seriously mess with your health. Whether it’s nasty bacteria, harmful chemicals, or obvious debris, you really don’t want any of that in your system. I’ve experienced firsthand what can happen when I’ve neglected to filter my water properly, and trust me, it’s not pretty!
The thing is, our water supply can sometimes be compromised. If you live in a city, the water treatment processes aren’t 100% foolproof. I like to think of filtering water as insurance for my health. It offers peace of mind knowing that I’m drinking clean water that’s free from those hidden dangers.
Honestly, any time I go camping or when there are severe weather warnings, I always bring my portable water filter. I’ve come to appreciate how crucial it is to filter water, no matter where you are. Clean water is life, and I don’t take that lightly!
Choosing the Right Water Filter
Types of Water Filters
Now, when it comes to picking out a water filter, things can get a bit overwhelming. You’ve got your activated carbon filters, reverse osmosis systems, and UV purifiers, just to name a few. Each has its pros and cons, and selecting the right one all boils down to your specific needs. I’ve tried a bunch, but I settled on a carbon filter for everyday use because it’s effective and easy to maintain.
For those camping trips, I’m a big fan of portable filters. They’re lightweight and get the job done without needing electricity or extra tools. Plus, who doesn’t love convenience while enjoying nature? Trust me, having that clean sip of water after a long hike is everything!
Before you settle on a filter, check out reviews and product comparisons. Don’t just pick the first one you see. I’ve learned that sometimes it’s worth paying a bit more for a reliable brand that delivers consistent results. Do your homework, and you’ll be set!
Preparing the Water Storage Containers
Choosing the Right Containers
Alright, so now that you’ve filtered your water, it’s time to store it. Picking the right containers is essential. I’ve found that food-grade plastic or glass containers work best. Make sure they’re BPA-free because yikes, nobody wants chemicals leaching into their water!
When I first started storing water, I used soda bottles. Big mistake! Those suckers can break down over time and let nastiness get in. So, learn from my mistakes and invest in proper containers. Buckets with tight seals work great for short-term storage, while larger tanks can store tons for when you’re in sticker shock during a natural disaster.
Before using any container, I always rinse it out with vinegar or a solution of mild soap. After all, you want to start on the right foot, right? And remember, every time you refill, give those containers a good wash to prevent any bacteria buildup.
Storing Your Filtered Water
Optimal Storage Conditions
Storing your water isn’t just plopping the containers anywhere and calling it a day. I’ve learned that keeping my water in a cool, dark place makes a huge difference. Avoid sunlight and heat, which can cause algae growth or even a funky taste over time. You want your water to taste fresh and clean!
Another key thing to remember is to fill your containers to the brim. Air can promote bacteria growth, and like I mentioned before, that’s a no-go for me. I ensure there’s minimal air space by filling them up completely, sealing tightly afterward to keep it all safe from any contaminants.
If you’re storing for the long haul, make a note of when you filled each container. I’ve started labeling mine with dates, so every six months, I refresh the contents. Keeping everything organized helps when I need to quickly grab water and ensures I’m always drinking the freshest stuff!
Regular Maintenance and Testing
The Importance of Water Testing
After you’ve gone through all that trouble to filter and store your water, it’s essential to keep an eye on it. Water doesn’t just stay clean on its own. I found out the hard way—nothing like opening a container to find murky water! So, make it a habit to test your stored water regularly for taste, odor, and any visible impurities.
There are affordable home testing kits that I always keep on hand. It’s super easy to use, and I can’t stress enough how much peace of mind it brings. If the water ever seems off, I don’t hesitate to dump it and start fresh.
Also, if you live in an area where water quality changes frequently, keep up with local water advisories. Knowing what’s happening with the broader water supply can help adjust how I filter and install new practices to keep my water pristine.
FAQ
1. Why should I filter my water?
Filtering your water removes harmful contaminants, ensuring your drinking water is safe and healthy. This is crucial for preventing illnesses caused by bacteria, chemicals, and other undesirable elements.
2. What types of filters are best for home use?
Some of the best filters for home use include activated carbon filters, reverse osmosis systems, and UV purifiers. The right one depends on your specific needs and the contaminants in your water supply.
3. How do I know if my storage containers are safe?
Use food-grade containers made from BPA-free plastic or glass. Always clean them thoroughly before filling them with water to prevent any contamination.
4. How often should I replace my stored water?
It’s good practice to refresh your stored water every six months. Using dates to label your containers can help keep track of when to replace them.
5. How can I test my stored water for quality?
You can use simple home testing kits available at most stores. These kits can check for contaminants, pH levels, and other factors that indicate the quality of your water.
When it comes to emergency preparedness, many individuals and families often fall into common traps that can jeopardize their safety during a crisis. While the idea of having an emergency plan may sound simple, the execution requires careful thought and attention. Here are some misconceptions and mistakes you should avoid to ensure your family remains safe when disaster strikes.
One of the first missteps is ignoring the importance of a communication plan. In times of chaos, especially during natural disasters, maintaining contact with loved ones becomes crucial. Yet, many people assume that everyone will simply know where to go or what to do without clear instructions. This isn’t the case! Establishing a designated meeting place, sharing emergency contacts, and utilizing multiple forms of communication—like text messages or social media—can make all the difference if traditional phone lines are down. Be proactive: discuss your plan with family members regularly.
Another prevalent error is neglecting to update your emergency kit. It’s easy to throw together supplies and forget about them until an actual emergency arises. However, this complacency could be detrimental. Over time, food items can expire, batteries lose their charge, and medical supplies may need refreshing. Aim for a seasonal check-in on your kit; include essentials like non-perishable food, water (one gallon per person per day), first-aid materials, flashlights, and necessary medications. Keeping everything fresh not only ensures you have what you need but also fosters peace of mind.
Underestimating the risks associated with natural disasters is another dangerous pitfall. Whether it’s hurricanes in coastal regions or earthquakes in fault-prone areas, each locale has its own unique risks that should not be overlooked. Ignorance can lead to a lack of preparation; therefore, staying informed about potential threats in your area is paramount. Research historical data on local disasters and identify warning signs associated with them—this knowledge will empower you to react quickly when faced with uncertainty.
Equally important is involving all family members in planning discussions and preparations. When only one person takes charge of creating an emergency plan or kit, others may feel uninformed or unprepared when disaster strikes. Encourage open dialogue by holding regular family meetings focused on safety planning; involve children by assigning them small roles such as gathering supplies or practicing evacuation routes together. By fostering teamwork within your household regarding emergencies, you’ll create unity and confidence among all members.
Lastly, don’t overlook local resources and community support systems available during emergencies! Many towns provide helpful services like shelters or local response teams ready to assist residents in crisis situations. Familiarize yourself with these resources ahead of time so that you can take advantage when needed most confidently. Connecting with neighbors through community programs can also foster mutual assistance; after all, it’s easier to weather storms together than alone.
In conclusion, effective emergency preparedness goes beyond just having a plan—it demands constant evaluation and involvement from everyone involved while recognizing external resources available for support during crises. By avoiding these common mistakes outlined above and embracing proactive strategies instead, you will enhance your family’s ability to stay safe no matter what life throws at you!