
by Preparation | Aug 4, 2025 | Preparedness
Water Sources
Identifying Water Sources
Finding water in the wild is crucial, and I’ve learned from experience that not all water sources are safe to drink. Look for streams, rivers, and lakes as they usually provide fresh water. However, don’t just dive in and drink; always check for signs of contamination.
A good rule of thumb is to avoid water that’s murky or has an unusual color. Also, keep in mind that animals tend to hang out near water sources, which can be both a sign of proximity to fresh water and a point of danger. Always take precautions before drinking.
Sometimes, you can also collect rainwater. Setting up a tarp or any flat surface that can catch rain can be an effective way to gather water. This method has saved my skin a couple of times when I’ve been out in the wild for extended periods.
Purifying Water
Once I’ve found a source of water, my next step is always purifying it. Boiling is by far my favorite method; it’s simple and highly effective. Just bring the water to a rolling boil for at least one minute, and you’re safe to drink. If I have the luxury of time, I’ll let it cool before consuming.
In some situations, I even carry water purification tablets. They’re lightweight and can eliminate bacteria and viruses that pose health risks. It’s like having peace of mind packed in my backpack. When I’m in a survival situation, that’s priceless!
Another method I’ve picked up is using charcoal. A quick DIY filter can be made with sand and gravel if I’m in a bind. It filters out sediments, giving me a clearer water source to work with before I purify it further.
Storing Water
Don’t forget about storage! Keeping clean drinking water in the wild can be a challenge. If I find myself in need of a vessel, I’ve used any waterproof material I can find – plastic bags, containers, anything I can seal. I make sure to keep them away from dirt and debris.
Another cool storage trick I learned is to create a rudimentary water bag from animal skins if the situation calls for it. It sounds a bit gross, but it’s surprisingly effective! Just remember to clean it out thoroughly before reusing it.
Keeping my water supply organized is essential. I often label or mark my containers to avoid confusion, especially when water is scarce. That way, I know exactly what I have and can prioritize my needs accordingly.
Food Sources
Identifying Edible Plants
Now, let’s dive into food sources! There’s nothing quite like foraging for edibles when survival calls. I’ve eaten my fair share of wild plants, and I can tell you – knowing your greens is essential. Look for familiar plants like dandelions or clover as they often provide good nutrition and are easy to identify.
Pay attention to the season and the region; what’s edible in one area might not be safe in another. I keep a field guide or an app handy for reference just in case. It’s better to be safe than sorry when it comes to wild food!
Also, don’t forget about mushrooms! While some are delicious, others can be deadly. I’ve made it a point to memorize the safe ones and to avoid mushrooms that I cannot identify with certainty. Always err on the side of caution.
Hunting for Protein
While plants are great, I can’t overlook the importance of protein. In a survival situation, hunting or trapping can provide a great food source. I’ve had success with small game like rabbits and squirrels. It takes patience, but it’s incredibly rewarding to catch your own food.
I often use simple traps I’ve crafted on the spot – nothing fancy, just enough to outsmart a critter. My go-to is a snare trap; it’s effective with very little resource. Just be sure to check your traps regularly so you don’t leave a suffering animal for too long.
Of course, I’m not an expert marksman, so sometimes I rely on fishing. If I stumble upon a water source, I’ve often fished for trout or catfish. A little line and hook can go a long way when it comes to putting food on the table.
Preserving Food
Once I’ve secured food, preserving it becomes my next goal. I’m not always equipped for refrigeration, but my go-to method is drying. I dehydrate meats by cutting them thin and hanging them out to air dry. It’s surprisingly effective and gives me good jerky for later days.
If I manage to find fruits, I dry them out too. Sun-dried fruit can be a great source of energy during long hikes. Plus, it’s a tasty snack to lift your spirits in tough times!
Another method I’ve tried is smoking meat over a small fire. This keeps it edible for longer and adds a delicious flavor. Just a little effort goes a long way when it comes to making food last in the wild.
Building Shelter
Finding a Suitable Location
Next up, let’s talk about building shelters. If you don’t have a safe place to sleep, the wilderness can be a scary place. I always look for natural shelters first, like caves or rock overhangs. They offer great protection from the elements and can even keep pests at bay.
If nothing’s available, I might set up in a tree. Tree shelters can work wonders for staying out of the path of animals and keeping my site hidden. Just make sure it’s a sturdy tree with a low-hanging branch for my resting spot.
Another trick I’ve learned is staying clear of water sources. While they’re essential for survival, I prefer to pitch my shelter uphill from them to avoid flooding and insects that are often drawn to moisture.
Materials for Building
When it comes to materials for my shelter, I like using what’s around me. Fallen branches, leaves, and mud all work in close harmony to create an effective barrier against wind and rain. A bit of creativity goes a long way in fashioning a durable frame.
For the roof, I typically use leaves and other foliage; they provide great insulation and help blend my shelter into the surroundings. I can’t stress enough how important camouflage can be for safety in the wild!
Lastly, I think about insulation. I use straw or dry leaves collected from the area to keep warm during chilly nights. I learned the hard way not to underestimate the cold. A well-insulated shelter can make a world of difference.
Maintaining Your Shelter
Once my shelter is up, keeping it in shape is key. I check it regularly for wear and tear, especially after storms. Making quick repairs has saved me a lot of discomfort. If I see a leak forming, I’ll cover it with more foliage or branches to keep water at bay.

Another thing I keep an eye on is the entrance. Adding a barrier like a curtain of branches can help keep critters out and provide an extra layer of protection from wind. I’ve learned that a well-maintained shelter can feel like home in the wild.
Ultimately, making my living space comfortable and efficient allows me to focus on survival rather than just survival itself. It’s easy to fall into a rhythm and get the hang of things when my space feels secure.
Fire Making
Gathering Materials
Oh, fire – the ultimate survival necessity! It brings warmth, cooking capability, and a sense of safety. I know from experience that gathering fuel is the first step. Dry twigs, bark, and leaves can provide an excellent base for any fire. I always scout for what’s available.
Finding tender materials, such as dry grass or moss, has been a game changer for me. I’ve had success with these materials, especially in damp conditions. Kindling is crucial for starting that first spark—don’t overlook it!
While I prefer natural materials, I’ve also learned to keep an eye out for man-made items that can help. For example, I’ve found bits of cardboard or paper that make excellent fire starters when the conditions are damp.
Starting a Fire
Now, getting that fire started is where it can get tricky. I usually practice the bow drill technique. It works wonders if you have patience and persistence. It’s like making my own tiny piece of magic! Once I get some ash and heat, I can pop in my tender material, and the show begins.
Another technique I’ve used is the flint-and-steel method; it’s straightforward when I have everything I need in hand. I find that just a few sparks are all that’s needed if I’ve prepared my materials properly.
Sometimes I need a quick win—when I feel like I just can’t get it going, I’ll light a handful of dry leaves and carefully build from there. YouTube has tons of tutorials, but nothing beats the real experience!
Maintaining Fire
Once I have my fire crackling, I focus on maintenance. I always add wood gradually to avoid large flames that are hard to control. A steady supply of kindling provides more heat and keeps the fire manageable.
On cold nights, I tend to keep the fire burning longer, making sure I gather extra logs in advance. It sounds simple, but planning is everything in survival situations.
I’ve also found value in fire pits. Creating a stone perimeter around my campfire prevents spreading and helps me regulate the fire’s intensity. Plus, it looks pretty cozy too!
Using Natural Resources for Navigation
Reading Nature
Finally, let’s chat about navigating with what’s around you. I’ve discovered that nature often provides some incredible navigation tips. When I’m lost, I tend to look for landmarks—unusual trees, hills, or rock formations that can guide me on my way.
Additionally, the position of the sun can serve as an excellent guide. In the Northern Hemisphere, the sun moves from east to west, allowing me to estimate direction based on time of day. As the sun lowers in the evening, I can get a general idea of where I need to head.
Observing wildlife is another quirky trick I’ve picked up. Animals often have routes they follow. By paying attention, I can glean some insight into where food and water might be, indirectly giving me leads on how to navigate through an area.
Using Tools for Navigation
While it’s essential to understand nature, using tools can make navigation easier. I often keep a lightweight compass or a map handy. Knowing how to read a map is invaluable. I sometimes combine map reading with the sun’s position to ensure that I’m heading in the right direction.
When the weather is overcast, GPS applications on my phone have been lifesavers. However, you must always have a backup in case technology fails. I also jot down notable waypoints to remind myself where I’ve been.
Notebook and pen are my trusty sidekicks! I can mark important spots or routes I’ve taken, which helps retrace my steps if needed. Keeping a journal acts as a fantastic backtrack tool.
Practicing Situational Awareness
Lastly, practicing situational awareness is crucial for safe navigation. Always paying attention to my surroundings has saved me time and again. Risks can arise swiftly, so I need to be mindful of the weather, terrain, and any signs of nearby wildlife.
Having mental notes of my path keeps me from getting lost again. I’ve found using natural landmarks to create a mental map helps significantly. Just yesterday, I was able to find my way back to camp using a quirky tree I’d seen along the way!
Ultimately, the more I put myself out there and practice these skills, the more instinctively they come. It’s about marrying book smarts with practical experience, and trust me, they complement each other beautifully!
Frequently Asked Questions
1. What is the most important natural resource to focus on first for survival?
Water is undoubtedly the most critical natural resource. It’s essential for hydration and survival, so I recommend locating a clean water source as soon as possible.
2. How can I identify edible plants safely?
Get a good field guide or use an app to familiarize yourself with local edibles. Avoid any plants you can’t identify, and always look for known survivors, like dandelions or clover.
3. What should I do if I can’t build a shelter?
If you can’t build a shelter, look for natural formations like caves or overhangs. Stay close to trees where you can find some cover from the elements.
4. What are some effective methods for starting a fire without matches?
The bow drill method is popular, along with flint-and-steel techniques. Both require some practice, but they’re very effective when done correctly!
5. How do I navigate in the wild if I don’t have a compass?
Use the sun’s position as a guide or look for natural landmarks to help you navigate. Observing animal movement patterns can also give you clues about your surroundings.
by Preparation | Aug 4, 2025 | Preparedness
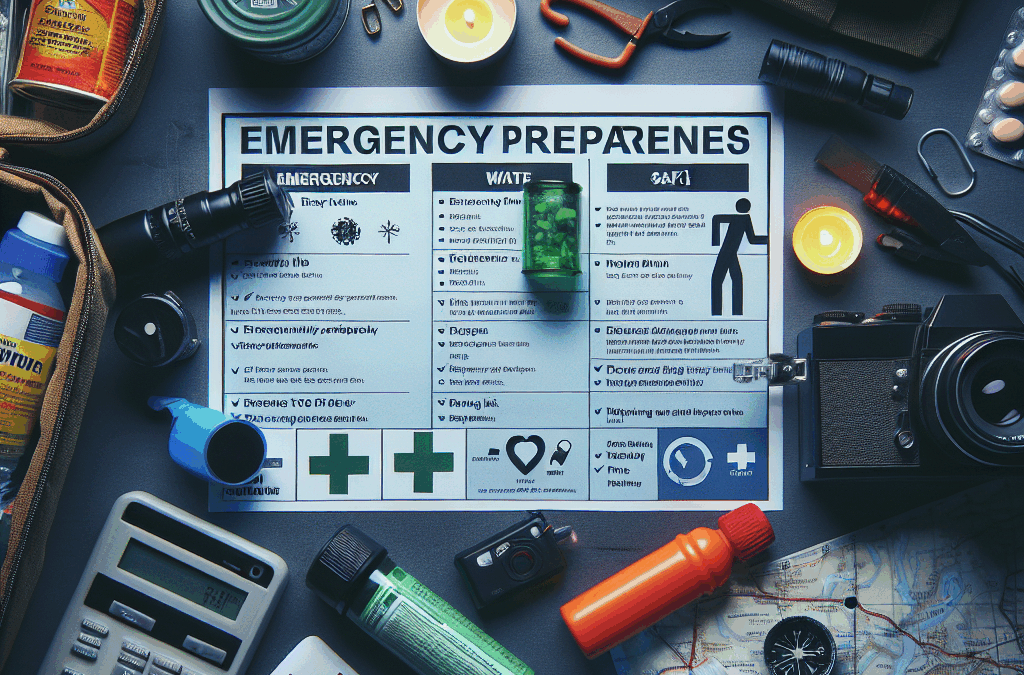
In an unpredictable world, being prepared for emergencies is not just a wise choice; it’s a necessity. Whether it’s natural disasters, health crises, or other unexpected events, having a solid plan can make all the difference. Here’s how you can ensure you and your loved ones are ready for anything.
*Understanding the Risks: Assessing Your Vulnerabilities**
The first step in effective emergency preparedness is to understand what risks loom over your household. This means taking a good look at your surroundings—are you in an area prone to floods, wildfires, or earthquakes? Consider also personal vulnerabilities such as medical conditions or mobility issues that could affect how you respond during crises. Take time to research local hazards and consult with community resources to gain insights into potential threats. By identifying these vulnerabilities upfront, you’re already ahead of the game.
*Building Your Emergency Kit: Essentials for Every Household**
Next on the list is assembling an emergency kit—a crucial component of any preparedness plan. Ideally, this kit should be easily accessible and stocked with essentials that will sustain your family for at least 72 hours. Start with water—one gallon per person per day is recommended—alongside non-perishable food items like granola bars and canned goods. Don’t forget first aid supplies, flashlights with extra batteries, personal hygiene products, and important documents stored in waterproof bags.
Moreover, consider including specific items tailored to your family’s needs such as medications or baby supplies. Regularly check and refresh your kit every six months to ensure everything remains usable.
*Crafting a Family Emergency Plan: Communication and Safety Strategies**
Once your kit is ready, it’s time to develop a family emergency plan that encompasses communication strategies and safety protocols. Hold a family meeting where everyone can contribute their ideas—this ensures that each member feels involved and empowered.
Decide on safe meeting points both near home and farther away in case evacuation becomes necessary. Establish clear communication lines; designate one out-of-town contact who can coordinate information if local networks fail. It’s also vital to educate all members about evacuation routes and procedures so everyone knows what to do when panic sets in.
*Staying Informed: Utilizing Technology and Resources**
In today’s digital age, technology plays an essential role in staying informed during emergencies. Download apps specifically designed for disaster alerts from trusted organizations like the Red Cross or FEMA which provide real-time updates tailored to your location.
Social media platforms can also serve as useful tools for gathering information quickly—however, always verify details before acting on them due to potential misinformation circulating online. Additionally, consider investing in weather radios that keep you updated on severe weather warnings even when power fails.
*Training and Drills: Practicing Your Preparedness for Real-Life Scenarios**
Finally, preparation isn’t complete without practice! Conduct regular drills simulating different emergency scenarios—from earthquake drop-cover-hold drills to fire evacuations—to help instill confidence among family members regarding their roles during actual events.
Engage everyone by assigning specific tasks based on individual strengths; children especially benefit from knowing how they can contribute during crises. The more familiar everyone becomes with procedures through training sessions, the better equipped they will be when real situations arise.
In summary, effective emergency preparedness requires understanding risks unique to your environment while building robust plans tailored specifically for your household needs. By following these essential steps—assessing vulnerabilities, building kits, crafting plans, utilizing technology effectively, and engaging in drills—you’ll foster resilience within yourself and those around you against whatever challenges may come your way!
by Preparation | Aug 4, 2025 | Preparedness
Assessing Your Cooking Needs
Understanding Your Situation
When I first started thinking about an emergency cooking station, I realized I needed to assess my own needs. Are you in a storm-prone area? Maybe a wildfire season comes around often? Knowing your risks can help tailor your emergency cooking setup.
For instance, if you live in a place where hurricanes hit, I found that having a portable cooking source can make a world of difference. You want to think about what situations you’re most likely to face because that will guide your decisions going forward.
Spend some time envisioning potential crises. This isn’t just about the types of disasters but also about how many people you’ll need to feed in any given scenario. Understanding what your cooking needs are is an essential first step.
Choosing the Right Equipment
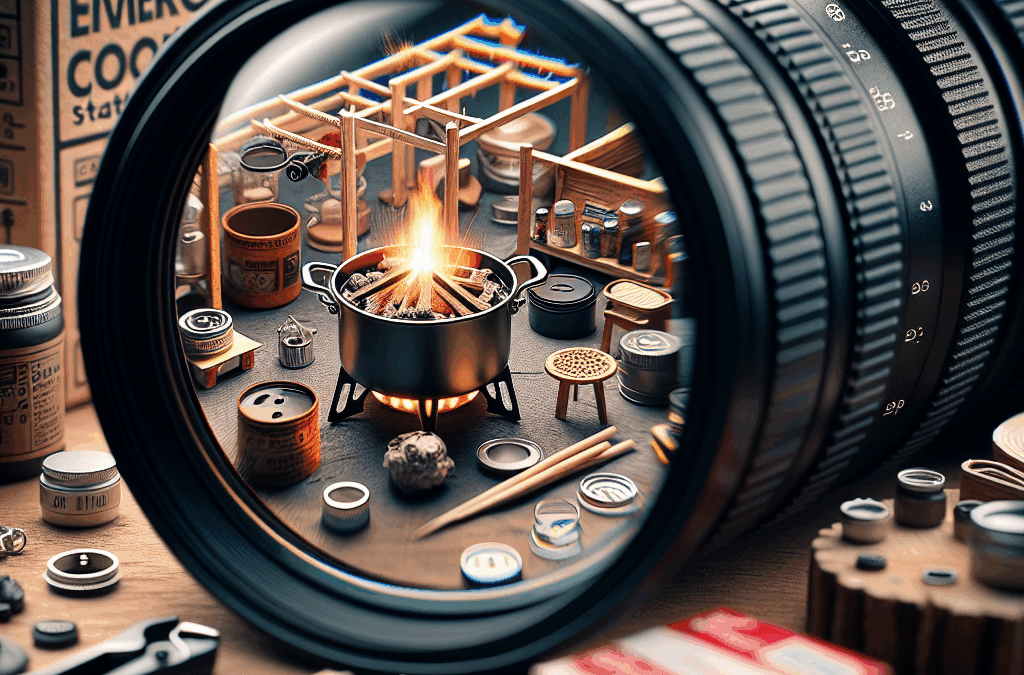
Once I’ve figured out what situations I might face, it’s time to select the right equipment. I always recommend starting with a portable stove or grill; something easy to use and pack away when not in use is key.
Consider the fuel type too! Propane stoves are super popular because they’re efficient and relatively easy to find. However, I also have a trusty campfire setup that I love to use on occasion—it’s reliable and almost feels rustic when you’re cooking over an open flame.
Don’t forget about utensils and pots—having these readily available can make cooking in an emergency a lot easier. I created a checklist for myself, ensuring I have a sturdy pot that can withstand high temperatures, spatulas, and maybe even a few plates.
Food Considerations
Choosing the right food for my emergency cooking station was another crucial step. I like to think about items that are non-perishable and easy to prepare. Canned goods are a must, but I also consider dry foods like pasta or rice.
Additionally, I try to include a mix of proteins, carbohydrates, and even some fun treats. Let’s face it, when you’re in a tough spot, a little comfort food can work wonders for the morale! I often add instant soups or freeze-dried meals that just need hot water.
Lastly, think about any dietary restrictions that exist in your household. Being prepared means considering those needs when stocking your emergency food supplies.
Creating a Safe Cooking Environment
Finding the Right Location
Safety first, right? When setting up my emergency cooking station, I always seek a safe and accessible place. This often means choosing an outdoor space away from flammable materials.
If you’re inside during an emergency, consider ventilation. Using a stove indoors without adequate airflow can be dangerous. I set up my emergency station in my backyard whenever possible, where I can keep an eye on things.
Having a dedicated location also means it’s easier to keep all supplies organized and in one spot. I’ve created a little corner in my garage that’s solely dedicated to my emergency cooking needs—you’d be surprised how it simplifies everything!
Fire Safety
One thing I’ve learned is that fire safety is vital. Always have a fire extinguisher on hand when cooking, especially with open flames. I like to keep one nearby, just in case things get out of hand.
Additionally, know how to use it! Practice using your fire extinguisher—it’s surprising how many folks don’t really know how. I gave myself a little refresher by watching tutorials online; better safe than sorry!
Lastly, put out any flames completely when you’re done. This is a small but significant step that can be easily overlooked during chaotic times. I always make it a habit to double-check everything before leaving my cooking site.
Staying Organized in Chaos
In an emergency, keeping things organized helps tons. I’ve learned to have my ingredients, utensils, and equipment laid out neatly. It reduces stress when I’m trying to cook while the world is falling apart around me.
To achieve this, I often use bins or caddies to keep everything sorted. For example, I have a box specifically for condiments—having spice packets or seasoning in one place makes cooking that much easier.
Creating a system that works for me is key. Whether you’re preparing meals for yourself or a family, your station should be set up in a way that feels intuitive and simple.
Practicing Your Skills
Trial Runs
What’s that saying? Practice makes perfect! I’ve found that doing trial runs is invaluable. I regularly set up my emergency cooking station to test how efficiently everything works together.
During these practice sessions, I’ll try out different recipes with the supplies I’d use in an actual emergency. It’s a great opportunity to see where I might need to tweak things or even add items to my kit.
Plus, having the fam involved is also a blast! Fun family activities turn into useful practice, and it’s an excellent bonding time, all while preparing for the unexpected.
Building Confidence
Each time I practice cooking, I become more confident in my abilities. I remember the first time I attempted to make something on my portable stove—it was a little rocky! But as I practiced, those little errors became less frequent.
The more comfortable I am with my setup, the easier it feels to tackle whatever may come my way. I always remind myself it’s about developing skills and feeling good about what I can accomplish under pressure.
Confidence is key, not just for me but for anyone who might look to me for direction during a crisis. If I feel capable, I can help guide others, whether that’s through cooking or just lending an ear during stressful times.
Adapting to Different Scenarios
Emergencies are never one-size-fits-all, which means I must remain adaptable. There have been moments when I had to think on my feet—like when I run out of a particular ingredient, for example. Learning to adjust recipes with what’s available is a valuable skill.
This flexibility applies to cooking as well. I practice varying my techniques, like being able to grill or boil water with alternative methods if my primary cooking tools fail. It’s all about being resourceful!
Remember, the goal of my emergency cooking station is to maintain nourishment, morale, and even joy during hard times. So whatever works best in that moment is what I will aim to make happen.
Storing and Maintaining Your Station
Regular Inventory Check
Having supplies is great, but keeping track of them is essential too. I make it a habit to do regular inventory checks to see what’s running low or about to expire. Inventory checks should become routine, about every three months works for me!
The last thing I want is to go to grab something and find it’s outdated or missing entirely. I keep a little checklist on my fridge where I note what I have—and I find it’s a super helpful visual reminder.
Also, it helps me keep an eye on my non-food supplies, like propane tanks or other fuel sources. Making sure I’m prepared can be a lifesaver when an emergency strikes.
Proper Cleaning and Storage
I’ve learned that cleanliness is next to preparedness! After each practice session, I give my station a thorough wipe down. This includes washing any pots, utensils, and surfaces I used. I don’t want unwanted bacteria or germs lurking for my next meal prep.
As I store my equipment, I wrap them carefully and ensure everything is labeled. I can’t tell you how many times I’ve dug through bins looking for stuff! Labeling puts everything within reach, and my cooking experience runs smoother.
Additionally, I think about protecting my supplies from pests—keeping everything sealed can save me a huge headache later on. This little diligence goes a long way in maintaining my edible inventory.
Updating Your Supplies
Over time, my tastes change, and so do family preferences. What seemed like a “must-have” supply a year ago might not hold the same value now. I’ve started thinking about updating my emergency supplies every once in a while—favoring fresher ingredients and new recipes.
Also, I incorporate seasonal items that might not be readily available during a crisis. For example, in summer, I might grab more fruits or veggies that can last a while if stored correctly. Experimenting can help keep things exciting!
In my experience, it’s all about creating an emergency cooking station that feels right for me and my family. Flexibility and periodic adjustments set me up for success when that uncertain time comes.
FAQs about Building Your Own Emergency Cooking Station
What equipment is essential for my emergency cooking station?
Some must-haves include a portable stove or grill, cooking pots, utensils, and a reliable fuel source. Don’t forget essentials like a fire extinguisher for safety!
How do I choose the right food for my emergency supplies?
Go for non-perishable items that are easy to prepare. Canned goods, dried pasta, and instant meals are great options. Also, keep dietary needs in mind.
How can I ensure my cooking station is safe?
Choose an outdoor location when possible and keep flammable materials far away. Keeping a fire extinguisher close by is also a sensible safety measure.
How often should I practice using my emergency cooking station?
Aiming for at least once every few months is a good benchmark. The more practice you get, the better prepared you’ll be in actual emergencies!
What should I do if my supplies run low or expire?
Do regular inventory checks every few months, and keep a checklist of items. Make sure to replace and refresh supplies that are getting low or near their expiration dates.
by Preparation | Aug 4, 2025 | Preparedness
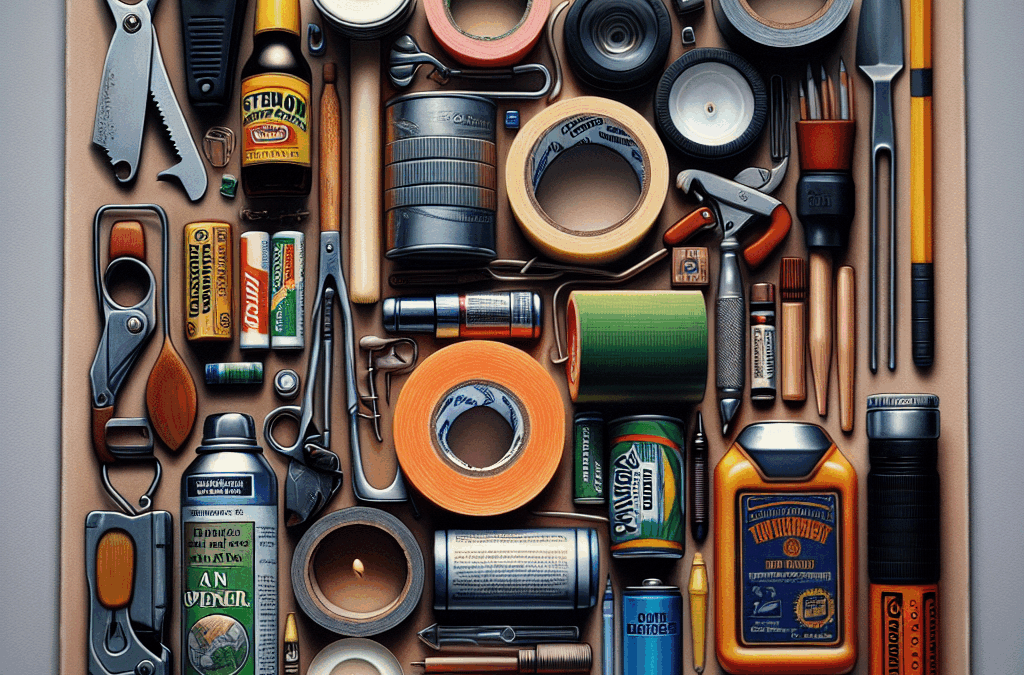
Everyday Items for First Aid Applications
Bandaids and Tape
When it comes to cuts and scrapes, I can’t tell you how many times I’ve reached for a simple bandaid or some medical tape. These little gems aren’t just for kids who get scraped up on the playground; they’re crucial in keeping dirt and germs out of wounds. When you’re out and about and someone gets a minor injury, a bandaid can mean the difference between a clean recovery and an infection.
Here’s the trick: if bandaids are getting soggy or lose their stickiness, they won’t do the job right. I always stock up on waterproof bandaids that can withstand a bit of water. Trust me, they’re lifesavers during outdoor adventures or accidents in the kitchen!
And, don’t forget that good ol’ medical tape! It can secure gauze on a bigger wound much better than a bandaid would. A little bit of tape, combined with some gauze and a dash of knowledge on how to dress a wound, can go a long way.
Scissors
Oddly enough, scissors have a multitude of emergency applications, way beyond just cutting paper. Imagine you needed to cut gauze or even tape – those little guys become your best friend. I’ve used scissors to fashion a makeshift tourniquet or to cut away clothing that’s sticking to a wound.
Having a sharp pair of scissors around can also help in various other emergencies – think trimming pieces of clothing or fabric to perfectly size your bandages. Plus, you never know when you need to quickly snip a stubborn knot or string!
But remember, scissors should be sharp and easily accessible. I keep a pair in my emergency kit and another in the bathroom cabinet – just in case. The easier you make it to grab what you need, the less stressed you’ll be in emergencies.
Alcohol Swabs
Alcohol swabs are like tiny little sanitizing heroes! They’re brilliant for cleaning wounds and preventing infections. I never leave my house without a few of these in my first aid kit. They’re so versatile! You can use them on cuts, but they can also be handy to clean the skin before giving yourself or someone a shot.
Just a word of caution: for bigger wounds, alcohol can sting like crazy! Sometimes, you might want to opt for saline or just plain soap and water. But for smaller cuts, those little swabs pack a punch and get the job done.
They’re even a great solution for cleaning your phone or other small items. When times are tough, a bit of sanitation can ease worries and cut down on infections.
Kitchen Staples with Multiple Uses
Baking Soda
This stuff is so much more than a baking necessity! I genuinely can’t count how many times I’ve turned to baking soda for different uses. A sprinkle can neutralize odors in the fridge or even act as a gentle cleaner!
But in terms of emergencies, it makes a fantastic paste for minor burns. Just mix it with a bit of water till it’s a nice paste, slap it on the burn, and let it heal. It may not always work miracles, but it certainly helps take some of the sting away.
Plus, if there’s an unexpected spill that might be acidic, such as lemon juice or vinegar, baking soda can neutralize that too! Just sprinkle and watch it fizz as it does its thing.
Vinegar
White vinegar is another kitchen staple that serves multiple purposes during emergencies! You can use it to clean, disinfect, and even treat minor burns and insect bites. Just dab a bit on the afflicted area, and it can soothe the pain.
It can also help remove or neutralize odors around the house, especially if you’ve had a little accident with something smelly. A bowl of vinegar left out can work wonders! And when it comes to cleaning surfaces in your home, you can use it to disinfect your kitchen counter safely.
Interestingly, vinegar can also be a natural remedy for a host of ailments, from sore throats to digestive issues. It’s like having a little pharmacy right in your kitchen!
Coconut Oil
I’ve come to love coconut oil, not just for cooking but for its vast array of applications. For one, it’s great for dry skin! My friends have used it on cuts and scrapes too, helping to keep the area moisturized and promote healing.
Coconut oil also shines as a helpful ingredient for removing makeup in a pinch or even as a natural remedy for sunburn. There’s something soothing about slathering it onto burned skin that helps reduce discomfort.
And don’t even get me started on its culinary uses! It’s a fantastic cooking oil and can also be a substitute for butter in many recipes, just take care during those emergency baking moments!
Household Cleaners as Emergency Supplies
Bleach
Okay, bleach is one of those items that should come with a warning label! It can be a bit harsh, but trust me, it’s a godsend during emergencies. For cleaning surfaces that need to be disinfected, a diluted bleach solution is incredible. Just be sure you ventilate the area when you’re using it!
In case of any nasty spills, especially if a pet has had an accident or something has gone awry in the kitchen, bleach can help wipe away bacteria and stains effectively.
I always keep some on hand, but you have to be careful with it around pets and kids. It’s great to have for emergencies, but not something to use carelessly!
All-Purpose Cleaner
An all-purpose cleaner, much like bleach, can be useful when you need to sanitize surfaces quickly. You never know when a mess might strike, right? I keep a bottle under my sink for quick access during any accident.
These cleaners often contain disinfecting properties that can help keep germs at bay, particularly during flu season. I hit those countertops with mine daily. If someone gets sick, that’s the first thing I reach for!
Also, some all-purpose cleaners can double as spot removers for various stains on clothing or upholstery – because, let’s face it, accidents happen, and we all need a little help now and then!
Dish Soap
This classic household item definitely deserves a spot in the emergency kit. Dish soap is great for so much more than washing your dishes! For one, it can effectively clean wounds if you need to use it in an absolute pinch, particularly if there’s nothing else available.
Want to clean stubborn grease or stains? Dish soap has your back. Its ability to cut through tough grime means that it can work as a versatile cleaner during emergencies.
Plus, you can use some mixed with water to create a bubble solution for entertainment in an emergency situation – who doesn’t love a good bubble bath indoors during a storm? Best of both worlds!
Practical Items You Didn’t Know You Needed
Flashlights
A flashlight is often the first thing I grab during a power outage. It’s incredible how one little tool can make you feel so much better during unexpected events! Whether dealing with a storm or a simple blown fuse, a flashlight helps you navigate your way around without panicking in the dark.
I always make sure to keep some spare batteries too. Check those flashlights regularly because, I tell ya, nothing’s worse than grabbing for one and discovering the batteries are dead.
Having a flashlight handy is more than just a comfort; it could guide you in finding emergency supplies in a pinch or alert others to your location during an unexpected situation.
Multitools
How many tools do you really need in your home? If you have a good multitool, then the answer can be just one! I can’t emphasize enough how handy these little beasts are! From tightening screws to opening bottles, there are countless uses that it brings to the table.
During crises, you might need to seal a broken window or fix a door. Having a multitool on hand can save the day! I keep mine on my keychain just so I always have it within arm’s reach.
Don’t underestimate the power of this versatile tool. In emergencies, it can help you rig up solutions that might otherwise seem impossible, making it one of my must-have items!
Phone Chargers
In today’s age, our phones are practically lifelines! When things go south, you’ve got to stay charged and connected. I always keep a portable phone charger in my emergency kit for this very reason!
In the event of an outage or being stranded somewhere with no outlets, having a charged phone can help you reach people if necessary. Be sure to check the battery status before heading out so it’s ready to go when you need it!
Plus, I totally love my solar-powered chargers! They add this extra level of reliability in emergencies when traditional power sources fail. Keeping your phone charged is paramount in emergencies, no doubt!
Personal Items for Comfort and Safety
Blankets
There’s just something about a cozy blanket that makes you feel safe and sound. In emergencies, they can provide warmth when the heat fails, or simply comfort during a stressful time.
Is there anything better than wrapping yourself in a soft blanket while waiting out a storm? I always keep a few extra blankets stored away in case they’re needed.
And don’t forget about the practical uses! Blankets can also be used to keep someone warm after an injury or shock. They serve both comfort and utility, which is why I think everyone should have a few extra laying around!
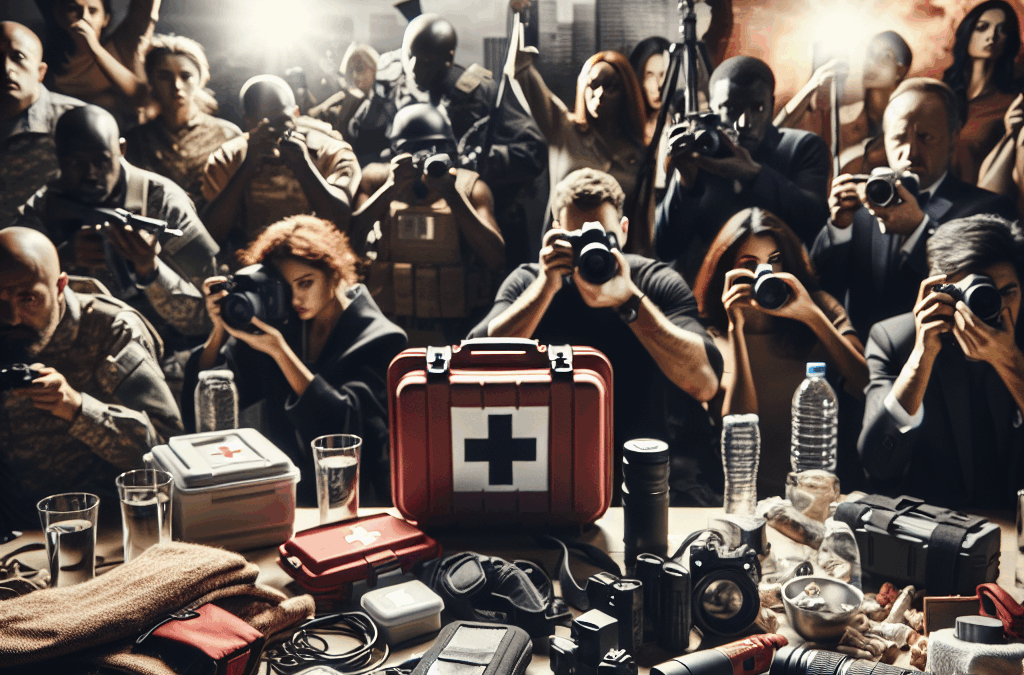
First Aid Kits
You can never be too prepared! It amazes me that not everyone has a first aid kit readily accessible. I make sure to have one in my home, car, and any bags that I might take on trips. It’s like being ready for anything!
A solid first aid kit can cover everything from minor cuts to more entire situations. Ensure it’s stocked with the basics, like antiseptic wipes, bandages, gauze pads, and even a little tape.
Regularly check your kit to restock any items that you might have used recently so that you’re always ready in case something unexpected happens!
Medications
Keeping a stock of important medications is super crucial. It always baffles me when friends run out of medications without getting a refill! Ensure you’ve got a list of any prescriptions along with some basic over-the-counter meds at hand.
It’s also smart to have a small first aid kit of essential medications for occasional headaches, fevers, or allergies. Never underestimate the power of making sure you’re feeling good even during emergencies!
Life is unpredictable, and being able to manage health concerns during tough times is a must. Prep your kit with essentials, and don’t forget to check expiration dates regularly!
FAQs
What are the most essential household items for emergencies?
Some of the must-haves include first aid supplies like bandaids, antiseptic, scissors, and basic kitchen staples like vinegar and baking soda. Flashlights, a reliable multitool, and extra blankets are also incredibly helpful.
How often should I check my emergency supplies?
I recommend checking your emergency supplies every six months. This helps ensure everything is up to date and fully stocked, especially perishables like medications and first aid items.
Can I use regular kitchen cleaner for first aid?
While some kitchen cleaners may be good for sanitizing surfaces, I recommend sticking to specific first aid supplies for actually treating wounds to avoid any harshness that could cause irritation.
Where should I keep my emergency supplies?
It’s best to keep your emergency supplies in a designated area that’s easily accessible. I use a clearly labeled bin in a cool, dry place that everyone in the household knows about.
What if I run out of first aid supplies?
If you run out, don’t panic! You can improvise using household items like clean cloths for dressings and tape for securing them. Just try to replenish your supplies as soon as possible!
by Preparation | Aug 4, 2025 | Preparedness
In a world filled with uncertainties, the adage “better safe than sorry” rings truer than ever. Emergencies can strike without warning, whether they’re natural disasters like hurricanes and earthquakes or man-made incidents such as fires or power outages. So, how prepared are you? Here’s a comprehensive guide to ensure you’re ready for whatever life throws your way.
*Understanding the Types of Emergencies: What You Need to Prepare For**
The first step in emergency preparedness is recognizing the potential threats in your area. Natural disasters vary greatly by region; coastal areas may face hurricanes, while those near fault lines might be more susceptible to earthquakes. Additionally, consider other emergencies like blizzards, floods, or wildfires. Don’t forget about health emergencies or civil unrest either. Understanding these risks allows you to tailor your preparations effectively.
*Building Your Emergency Kit: Essentials for Every Household**
Once you’ve identified possible emergencies, it’s time to assemble your emergency kit. This crucial collection of supplies should be easily accessible and contain enough resources to last at least 72 hours for each family member. Essential items include:
1. Water (one gallon per person per day)
2. Non-perishable food
3. Flashlights with extra batteries
4. A first aid kit
5. Whistle (to signal for help)
6. Dust masks to filter contaminated air
7. Personal sanitation supplies
Don’t overlook important documents! Keep copies of IDs, insurance policies, and medical information in a waterproof container within your kit.
*Creating a Family Emergency Plan: Communication and Evacuation Strategies**
An emergency plan is vital for ensuring safety during chaotic times. Sit down with your family and discuss various scenarios—where will you go if you need to evacuate? Establish designated meeting places both close to home and further afield in case local areas are compromised.
Equally important is communication; ensure every family member knows how to reach one another through various means—cell phones may fail when networks become congested, so consider an old-fashioned landline or even walkie-talkies! Designate an out-of-town contact who can serve as a point of coordination if local communications falter.
*Staying Informed: Utilizing Technology and Resources for Real-Time Updates**
In today’s digital age, staying informed has never been easier—or more essential. Leverage technology by downloading apps from reliable sources that provide real-time updates on weather conditions or emergency alerts specific to your location.
Social media platforms can also be invaluable during crises; follow local news outlets and official agencies on platforms like Twitter or Facebook for timely information straight from the source. Remember that knowledge is power—understanding what’s happening around you can make all the difference in effective decision-making.
*Practicing Preparedness: Drills, Training, and Community Involvement**
Preparation doesn’t stop at assembling kits and drafting plans; practicing those skills is crucial too! Schedule regular drills with your family so everyone knows what actions to take in case of an emergency situation—this familiarity reduces panic during real events.
Consider seeking out community training programs related to CPR or first aid; not only does this empower individuals but fosters collaboration among neighbors which enhances overall community resilience.
In conclusion, being ready for any emergency requires foresight combined with action—from understanding the types of risks you’re facing and building comprehensive kits to creating robust plans involving communication strategies and ongoing education through practice and community engagement. Taking proactive steps today ensures peace of mind tomorrow—because when it comes down to it… you’re either ready or not!
by Preparation | Aug 3, 2025 | Preparedness
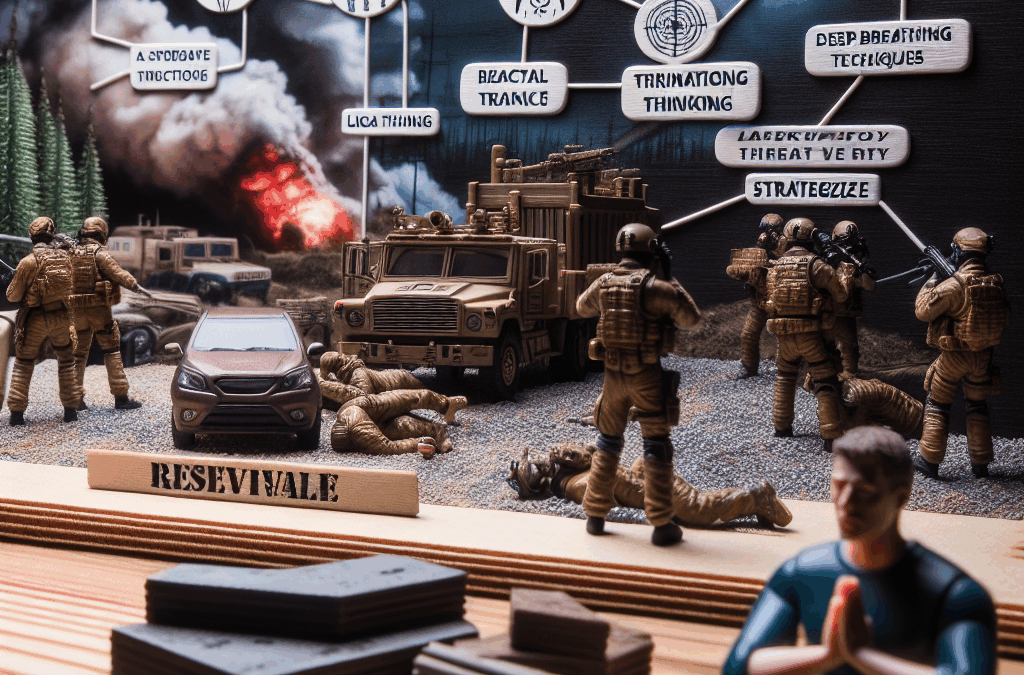
Understanding Your Emotions
Recognize the Signs of Stress
When I’m in a survival situation, stress can manifest in so many ways. It’s easy to become overwhelmed, but the first step is recognizing when stress kicks in. I often pay attention to my body – whether my heart starts racing or if I feel more irritable. Paying attention to these cues helps me to acknowledge that I need to take a step back and breathe.
Next, it’s essential to understand that stress is a natural response. Sometimes I try reminding myself that it’s okay to feel anxious, especially in unfamiliar or dangerous environments. This realization allows me to approach the situation with a clearer head, rather than feeling ashamed or frustrated about my emotions.
Finally, I find it helpful to talk about my feelings, even if it’s just to myself. Verbalizing what I’m experiencing can help me process my emotions better and diffuses a lot of the pressure that builds up inside. It’s also a great way to identify what I can do next to manage the situation at hand.
Establishing a Routine
Creating a Daily Schedule
When the world feels chaotic, I always find comfort in routine. No matter how minimal the circumstances, a routine gives me something to focus on. For instance, when I’m navigating a tough survival scenario, I schedule my day into segments – searching for resources in the morning, building shelter in the afternoon, and gathering around a fire at night.
Sticking to a routine keeps my mind engaged and provides a sense of normalcy. I often zone in on small, achievable goals rather than thinking about the bigger picture. This approach keeps stress at bay and gives me little victories to celebrate throughout the day.
Plus, routines help me maintain physical health, which is crucial in survival situations. I make sure I’m eating regularly, hydrating, and setting aside time for rest. Just like any structure in life, having a good routine can be your best friend when you’re out in the wild.
Mindfulness Techniques
Breathing Exercises
I swear by breathing exercises when the stress starts building up. Simple techniques like the 4-7-8 breathing method have helped me immensely. I inhale for a count of four, hold for seven, and exhale for eight. This method not only calms my mind but also can lower my heart rate, which is priceless in high-pressure scenarios.
Another technique I love is box breathing. I visualize a box while I breathe: inhaling as I count to four, holding at the top for four, exhaling for four, and holding again for another four. It really helps to ground me and pull my focus back into the present moment.
When I found myself stuck in a particularly gnarly situation, I took a moment to just breathe and focus on the sensations around me – the fresh air, the rustling leaves. This grounding practice shifted my mindset from panic to one of gratitude and awareness. Seriously, connect those breaths!
Physical Activity
Incorporating Movement into Your Day
You might not think of exercise as a stress reliever, but let me tell you, it’s huge! Whenever possible, I find ways to move my body. Whether it’s a brisk walk, doing some squats, or even just stretching, physical activity releases endorphins that boost my mood. Plus, when I’m focused on movement, I can’t help but forget my worries for a little while.
I’ve even created mini-challenges for myself, like seeing how many steps I can accumulate in a day or practicing my skills, like climbing trees or building structures. Engaging my body not only helps relieve stress but also sharpens my survival skills.
By incorporating movement into my survival routine, I find that I can tackle challenges more effectively. The mind and body are intertwined, and when I take care of my physical wellness, it truly reflects in my mental state.
Connecting with Nature
The Benefits of Nature
There’s just something about nature that calms my spirit. When I’m out in the wild, I take every chance I can to connect with the surroundings. I take moments to identify the local flora and fauna, or even just listen to the sounds of the environment. Nature has a unique ability to remind us of something bigger than ourselves, which can put our stress in perspective.
I often sit quietly by a stream or under a tree and soak in my surroundings. This practice not only calms my nerves but also reminds me of the beauty and resilience of life. When I immerse myself in nature, it injects a sense of peace that surpasses any survival anxiety.
Additionally, I’ve found that practicing gratitude while in nature can alleviate my stress. I take a moment to appreciate what’s around me – the sun filtering through leaves or the sound of birds chirping – and I can feel a weight lift off my shoulders. It’s a great way to shift into a positive mindset and appreciate what we have, even in tough situations.
Frequently Asked Questions
1. What is the first step I should take in a survival scenario?
The first step I recommend is to pause and assess the situation. This includes recognizing your emotional state and the immediate environment. Take a deep breath and focus on what resources are available to you.
2. Can routines really help in a survival situation?
Absolutely! Having a routine helps provide structure and normalcy. It allows you to focus on tasks that will aid your survival while keeping stress at bay.
3. How can I practice mindfulness without much prior experience?
Start simple with breathing exercises. Start with your breath and practice focusing your mind on the present moment. With practice, you’ll find it becomes easier and more effective.
4. Is physical activity essential in survival?
Yes, physical activity not only maintains your physical fitness but also releases endorphins that can help manage stress. Movement can be as simple as stretching or going for a walk.
5. How does connecting with nature help alleviate stress?
Nature has a calming effect that can ground you and put things into perspective. Taking time to appreciate the environment can shift your mindset positively and reduce anxiety.


