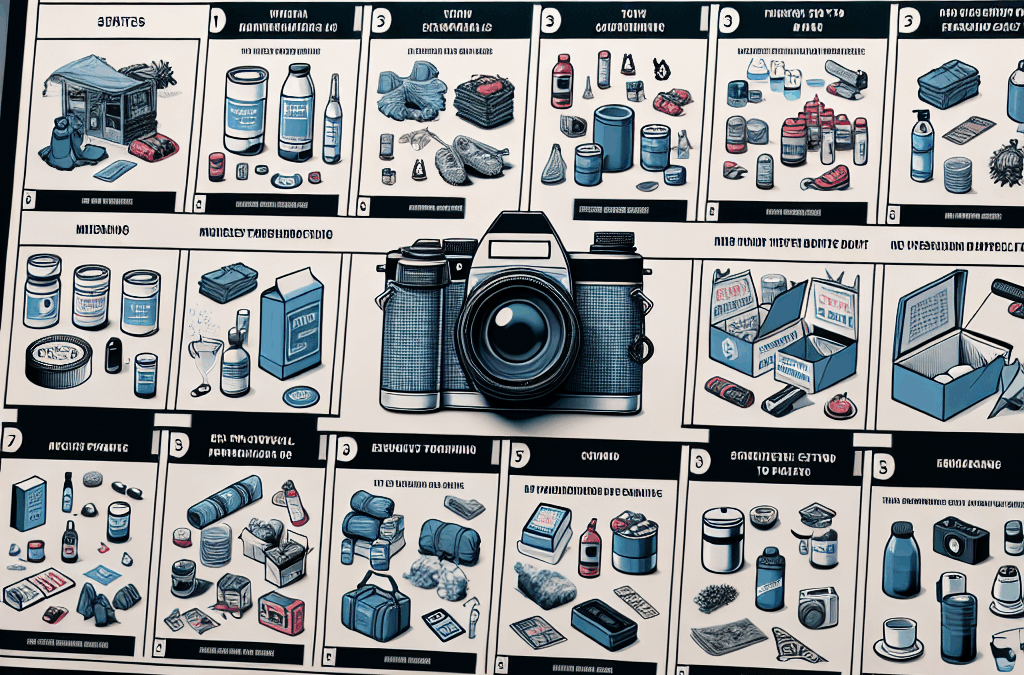
Before assembling a competitive disaster prep kit, itâs crucial to evaluate the specific hazards you may face. Are you located in an earthquake-prone region? Is flooding a common concern? Knowing your risk profile helps you tailor your kit to include essential items for your environment. For example, coastal areas should emphasize storm preparedness, while earthquake zones require sturdy tools and emergency seating.
Additionally, consider the size and composition of your household. Families with young children, elderly members, or pets need specialized supplies. For instance, infants require formula and diapers, while elderly members might need mobility aids or medical equipment. A personalized approach ensures your disaster prep kit caters to everyone’s needs, increasing your chances of safety during an emergency.
Research local emergency plans and common disasters for your area through official agencies like FEMA or local government websites. This insight guides you to prioritize specific supplies and strategies, making your kit more effective. Remember, assessing your needs is the foundational step for building a reliable disaster prep kit in 2025.
2. Choosing the Right Container
Selecting Durable and Portable Storage
Choosing the right container is vital to protect your disaster prep kitâs contents. You need a sturdy, waterproof, and dustproof container that can withstand rough handling and environmental elements. Options include waterproof plastic bins, backpacks, or rolling suitcases depending on your mobility needs.
For example, a high-quality weather-resistant backpack may be ideal for quick evacuations, while larger plastic bins with secure lids work well for home storage. If you live in an area with frequent storms or floods, ensure your container is sealed tightly and stored in a safe, accessible location.
Transportability is also key. Select a container that is easy to carry for all household members, especially if evacuation is necessary. In 2025, technological advancements have introduced lightweight, durable materials that make portability easier without sacrificing protection. Proper container selection ensures your disaster prep kit remains intact and ready to go when seconds count.
3. Essential Food and Water Supplies
Stockpiling Long-Lasting Nourishment
One of the most critical components of any disaster prep kit is a sufficient supply of food and water. In 2025, experts recommend storing at least a three-day supply of non-perishable food for each person, but ideally plan for two weeks or more if possible. Canned goods, freeze-dried meals, and MREs (meals ready-to-eat) are popular options because of their shelf stability.
Water is equally important. Aim for at least one gallon per person per day for drinking and sanitation purposes. Consider water purification methods like portable filters or purification tablets in case your stored water supply runs out or becomes contaminated. Remember, dehydration can set in within 24-48 hours, so having ample water is non-negotiable.
Practical Tips:
Rotate your food stock yearly to ensure freshness.
Label all items with expiration dates for easy tracking.
Include high-calorie, easy-to-prepare snacks for quick energy boosts.
4. First Aid and Medical Supplies
Assembling a Comprehensive First Aid Kit
Your disaster prep kit isnât complete without a robust first aid and medical supplies collection. In emergency situations, immediate medical care can prevent infections and reduce injuriesâ severity. Include bandages, antiseptic wipes, adhesive tape, pain relievers, and specialty items like prescription medications and allergy treatments.
In 2025, innovative first aid kits feature compact, modular components that can be customized based on individual needs. An essential tip is to include a manual first aid guide â many are available digitally and can be stored on your phone or printed out.
Remember to regularly check expiration dates on medications and replace expired items. Training your household on basic first aid techniques ensures everyone can respond effectively during a crisis. Having a first aid kit tailored for your disaster prep kit enhances your overall readiness and resilience.
5. Important Tools and Electronics
Equipping with Reliable Tools for Survival
Tools such as flashlights, multi-tools, batteries, and portable chargers are indispensable in an emergency. In 2025, solar-powered devices and hand-crank flashlights are reshaping preparedness, offering sustainable power sources when conventional electricity fails. Ensure your disaster prep kit includes these eco-friendly options.
Electronics like battery-powered radios with NOAA weather alerts allow you to stay informed even if internet and cell signals are down. Donât forget extra batteries and power banks for your devices. Consider including a whistle for signaling and a small set of hand tools for repairs.
Practical tip: Store electronics in waterproof, shockproof cases to prevent damage. Developing the habit of testing your tools periodically keeps them functional and ready for use on short notice. Effective tools make a significant difference in navigating and surviving a disaster scenario.
6. Personal Comfort and Hygiene Items
Maintaining Hygiene During Crises
While safety is paramount, maintaining personal hygiene and comfort boosts morale and prevents illness. Include soap, hand sanitizer, toothbrushes, toothpaste, moist towelettes, and sanitary supplies. In 2025, compact and multi-purpose hygiene kits are popular for space-saving and convenience.
Consider also packing items like hygiene mats, disinfectants, and menstrual products. Donât overlook eye masks, earplugs, and blankets to improve sleep quality in stressful situations. Cleanliness can decay rapidly during a disaster, so regular sanitization helps prevent disease spread.
Practical advice: Pack hygiene supplies in resealable, waterproof bags and store them in an accessible part of your disaster prep kit. Proper hygiene and comfort help sustain your health and mental well-being during prolonged emergencies.
7. Important Documentation and Cash
Safeguarding Critical Personal Records
In any disaster, having access to essential documents can streamline recovery and prove your identity when services are limited. Collect copies of identification, insurance policies, medical records, and bank information in a waterproof, portable container. Digital backups on encrypted drives or cloud storage are also advisable.
Additionally, carry sufficient cash in small denominations since electronic payment systems might be offline. In 2025, some people prefer prepaid cards or digital wallets as a backup, but physical cash remains critical in many situations.
Pro tip: Regularly review and update your documents, and make sure all household members know where to find them. Proper documentation is a powerful component of your disaster prep kit for smoother recovery efforts.
8. Customizing Your Disaster Prep Kit
Personalizing for Unique Needs
No two households are the same, and your disaster prep kit should reflect your personal circumstances. Add specialized items like pet supplies, baby formula, or medical devices tailored to your family’s requirements. For example, if you have a disabled family member, include mobility aids or extra medications.
In 2025, customization also involves considering climate-specific gear, such as cold-weather clothing or cooling supplies for hot climates. Remember, a well-curated kit isnât just about stockpiling; itâs about thoughtful preparation that aligns with your lifestyle and vulnerabilities.
Tip: Conduct periodic reviews to adapt your kit as needs evolveâadding new medications, replacing worn gear, or updating emergency contact info. Personalization ensures your disaster prep kit remains relevant and effective.
9. Regular Maintenance and Updates
Keeping Your Disaster Prep Kit Ready
A disaster prep kit isnât a “set and forget” project. To remain effective, it requires routine inspections and updates. Set a scheduleâevery 6 to 12 monthsâto check expiration dates, test electronics, and replenish consumables.
In 2025, many preparedness experts stress the importance of annual drills that include using your kit. This practice helps identify gaps and ensures everyone knows where to find essential items quickly. Update your kit based on recent emergencies and changing circumstances.
Tip: Keep a checklist handy and document maintenance activities. Consistent upkeep guarantees your disaster prep kit will perform when you need it most, providing peace of mind and readiness.
10. Practical Training and Preparedness Drills
Building Confidence Through Practice
Having a disaster prep kit is just part of a broader strategy. Practicing real-world drills with your family helps everyone become familiar with using the kit effectively. Conduct fire drills, evacuation rehearsals, and first aid training sessions regularly.
In 2025, virtual simulations and online courses make training more accessible. Participating in community preparedness events can also enhance your skills and connect you with local resources. The goal is to reduce panic, increase confidence, and ensure swift, coordinated responses during actual disasters.
Pro tip: Review your disaster prep kit during each drill to ensure all items are accounted for and functional. Practice transforms static supplies into a reliable safety net when disaster strikes.
Conclusion
Building a comprehensive disaster prep kit in 2025 is a critical step toward safeguarding yourself and your loved ones. From assessing your needs to maintaining your supplies, every strategy contributes to a resilient emergency readiness plan. Remember, an effective disaster prep kit isnât just about the gearâitâs about preparedness, practice, and peace of mind. Take action today to ensure your kit is complete, current, and ready for any crisis that 2025 may bring.
Frequently Asked Questions
What should be included in a disaster prep kit?
An ideal disaster prep kit should contain food and water supplies, first aid essentials, tools and electronics, personal hygiene items, important documentation, cash, and personalized items specific to your needs.
How often should I update my disaster prep kit?
Itâs recommended to review and update your disaster prep kit every 6-12 months. Check expiration dates, replace worn items, and adapt supplies if your circumstances change.
Where is the best place to store my disaster prep kit?
Store your disaster prep kit in an accessible, secure location that is easy to reach during an emergency. Consider a waterproof container and keep it away from potential hazards like flooding or extreme heat.
Why is a disaster prep kit important for 2025?
As disaster risks evolve with climate change and other global factors, a well-prepared disaster prep kit provides critical support, safety, and peace of mind in unpredictable situations in 2025 and beyond.
Prepping for economic collapse in 2025 means ensuring your family won’t go hungry when supply chains falter. Building a robust food storage system is foundational. Focus on non-perishable items like rice, beans, canned vegetables, and freeze-dried foods. These can last years if stored properly, providing vital nourishment during crises.
For example, rotating your stock regularly prevents spoilage, and utilizing airtight containers keeps pests out. Consider storing a minimum of three months’ worth of food for each family member, but planning for a year or more adds extra security.
Additionally, diversifying your stored foods ensures a balanced dietâessential for maintaining health and energy. Incorporate grains, proteins, fats, and vitamins to support your immune system during stressful times.
Practical Tips for Organic Gardening
While building storage is crucial, growing some of your own food enhances self-reliance. Starting a garden with hardy vegetables like potatoes, squash, and legumes can supplement your supplies. In 2025, climate-resilient crops and sustainable gardening techniques will become even more critical as weather patterns become unpredictable.
Invest in composting and rainwater harvesting to optimize your gardenâs productivity. These methods reduce dependence on external supplies and make prepping for economic collapse more sustainable.
Remember, the ability to grow your own food provides not just nourishment, but peace of mind during uncertain times.
2. Develop a Sustainable Water Supply Plan
Securing Drinking Water in Emergencies
Water will be one of your most valuable resources during an economic collapse. Developing a sustainable water supply plan involves storing enough potable water for at least two weeks and knowing how to access alternative sources if supplies are disrupted.
Consider installing rainwater collection systems and filtering methods like charcoal or ceramic filters. These can significantly extend your water independence, ensuring you have clean drinking water without frequent supply runs.
Factoring in water purification tablets and portable filters is essential for on-the-go solutions. Protecting your water sources from contamination ensures safety during times of crisis.
Harvesting and Storing Water Effectively
Effective water storage involves using food-grade containers that prevent algae and bacterial growth. Label and rotate stored water regularly, replacing it every six months. Storing enough for basic hygiene and cooking can support your family through prolonged disruptions.
Practicing water conservation techniques, like reusing greywater from laundry or washing, can also stretch your supplies further. Prepping for economic collapse in 2025 should include plans to manage water scarcity proactively.
3. Stockpile Essential Medical Supplies
Creating a Basic First Aid Kit
In a collapse scenario, access to healthcare may be limited. Building a comprehensive medical kit with bandages, antiseptics, pain relievers, and antibiotics helps manage injuries and illnesses. Learning basic first aid skills is equally important.
Discovering ways to treat common ailments with natural remedies can also be beneficial if pharmaceutical supplies run out. Familiarize yourself with herbal medicines and alternative treatments.
Regularly reviewing and replenishing your supplies ensures readiness at all times. Keep the kit in an easily accessible location known to all family members.
Advanced Medical Preparedness
For extended crises, consider training in more advanced medical procedures like CPR and wilderness medicine. Stock extra supplies such as splints, wound dressings, and emergency medications.
Partnering with a healthcare professional or taking prepping courses adds an extra layer of preparedness. Planning for medical emergencies aligns with prepping for economic collapse by minimizing health risks when resources are scarce.
4. Create Financial Contingency Plans
Preparing Cash and Alternative Payment Methods
Financial stability is unpredictable during an economic collapse, so having contingency plans is vital. Keep a stash of cash in small denominations, as digital banking may become unreliable. Consider investing in precious metals like silver or gold as a hedge against currency devaluation.
Exploring barter items â such as alcohol, tobacco, or batteries â can also serve as alternative payment methods. Keep records of your assets and make a plan for managing finances when banks and ATMs may be inaccessible.
Making digital copies of important financial documents and storing them securely adds an extra layer of preparedness for 2025.
Budgeting and Emergency Funds
Creating a strict budget that reduces unnecessary expenses allows you to save more quickly. Maintain an emergency fund that covers essential living expenses for at least six months. The goal is to minimize financial vulnerabilities during economic downturns.
Review and adjust your financial plans regularly, especially as economic indicators change. The better prepared your finances, the more resilient you’ll be in 2025.
5. Enhance Self-Defense Capabilities
Legal and Effective Self-Defense Strategies
Prepping for economic collapse includes safeguarding your home and loved ones. Investing in self-defense tools such as pepper spray, stun guns, or firearms (where legal) is a common approach. Enroll in self-defense classes to develop confidence and skills.
Understanding local laws and regulations ensures responsible firearm ownership and use. Creating a security plan that includes neighborhood watch programs can also bolster safety.
Remember, non-violent conflict de-escalation techniques are valuable skills that reduce unnecessary risks during chaotic times.
Physical Fitness and Situational Awareness
Maintaining physical fitness enhances your ability to respond effectively in crises. Regular exercise improves strength, endurance, and mental alertness.
Practicing situational awarenessâbeing mindful of your surroundingsâhelps you identify threats early and avoid danger. This proactive approach is crucial in volatile environments.
Preparing for economic collapse isn’t just about weapons; itâs about empowerment and confidence to protect yourself and your family.
6. Establish a Community Network
Building Local Support Systems
Community is a cornerstone of survival. Forming relationships with trusted neighbors and local groups increases collective resilience. Share resources, skills, and information to create a support network.
Organize regular meetings to discuss preparedness strategies and coordinate efforts, such as food sharing or security patrols. Mutual aid significantly improves your chances of enduring hardships.
Joining or forming local barter and trade groups can also help stabilize access to supplies and services during a collapse scenario.
Online Platforms and Local Groups
Use online forums and social media responsibly to connect with like-minded preppers. Many communities have local prepper groups that organize training and resource exchanges.
Maintaining strong local bonds allows for quicker response times and better information flowâa vital component of prepping for economic collapse in 2025.
Always verify the trustworthiness of community members and prioritize safety when joining such groups.
7. Learn Practical Skills for Self-Sufficiency
Skills That Make a Difference
Developing practical skills is one of the most effective prepping for economic collapse moves. Learn how to preserve food through canning and dehydration, repair clothing, and perform basic carpentry.
Gardening, hunting, fishing, and foraging are invaluable skills that can supplement your food stores. Also, gaining proficiency in energy conservation and alternative cooking methods increases your independence.
Consider taking courses or reading authoritative guides now to build confidence and competence before a crisis hits.
Natural and DIY Remedies
Stock up on natural remedies and learn how to make tinctures, salves, and herbal medicines. In 2025, access to pharmaceuticals may be limited, making traditional herbal medicine skills even more critical.
This knowledge not only supports your health but also saves money and resources during a collapse scenario. Practice these skills regularly to ensure proficiency when needed.
Prepping for economic collapse involves investing in your ability to handle everyday emergencies independently.
8. Invest in Alternative Energy Sources
Solar and Wind Power Options
Energy independence is key during an economic collapse. Investing in solar panels, portable solar generators, or small wind turbines ensures a continuous power supply even if conventional grids fail.
In 2025, advances in portable renewable energy units make it easier and more affordable to implement these solutions. Properly sizing your system based on your needs will maximize efficiency.
Installing battery storage and energy management systems allows you to store excess energy and reduce reliance on external sources.
Manual and Low-Tech Alternatives
Complement your renewable energy setup with manual alternatives like hand-crank radios, water pumps, and cooking stoves. These low-tech options provide redundancy and reliability.
Always plan for maintenance and have spare parts or backup systems. In prepping for economic collapse, the goal is to maintain minimal functionality in a long-term blackout or disruption scenario.
Smart investments in alternative energy improve your resilience in 2025 and beyond.
9. Secure Important Documents and Digital Data
Physical and Digital Storage
Protecting vital documentsâlike IDs, insurances, property deeds, and passportsâprevents chaos and theft in collapse situations. Use fireproof and waterproof safes for physical copies.
Digitize copies and store them in encrypted cloud accounts or external drives stored securely off-site. Keeping these records accessible and safe is crucial for identity and asset recovery.
Regularly update your documentation and test your backup systems to ensure they are functional when needed.
Cybersecurity and Data Protection
In 2025, cyber threats remain a concern. Protect your digital assets with strong passwords, two-factor authentication, and secure networks. Back up essential data regularly.
Creating a plan for offline communication methodsâlike satellite phones or ham radiosâadds an extra layer of preparedness for digital failures.
Securing your documents and data is an often overlooked but vital aspect of prepping for economic collapse in 2025.
10. Stay Informed and Maintain Mental Resilience
Monitoring Economic Trends
Staying informed about global and local economic indicators helps you anticipate challenges and adapt your strategies promptly. Read reputable news from multiple sources regularly.
Practice critical thinking and avoid panic to keep a clear head during crises. Having a fail-safe plan and knowing when to execute it is crucial for survival.
Set alert systems and join local preparedness groups to stay connected with real-time information in 2025.
Mental and Emotional Readiness
Developing mental resilienceâthrough mindfulness, stress management, and community connectionsâensures you can handle prolonged adversity. Prepping physically is important, but mental strength sustains you through tough times.
Engage in regular physical activity, maintain social bonds, and keep a positive outlook. These habits foster a mindset geared toward resilience and proactive problem-solving.
Remember, staying calm and adaptable is one of the most effective prepping for economic collapse strategies for 2025.
Frequently Asked Questions
1. What are the best prepping for economic collapse strategies for 2025?
The most effective strategies include building a robust food and water supply, securing medical and financial resources, developing self-defense skills, and establishing community networks. Staying informed and mentally prepared rounds out a comprehensive plan.
2. How much food should I store for prepping for economic collapse?
A good rule of thumb is to store at least three months of supplies per person, but aiming for a full year provides better security. Diversify your stock to ensure nutritional balance and longevity.
3. What are key skills to learn for prepping for economic collapse?
Important skills include basic medical aid, food preservation, gardening and foraging, energy conservation, and self-defense. These practical abilities increase your independence during crises.
4. Why is staying informed important for prepping for economic collapse?
Monitoring economic trends allows you to anticipate shortages and disruptions, enabling timely adjustments to your prepping strategies. Education and awareness are critical for making effective decisions in 2025.
5. How can I ensure my digital data is protected during an economic collapse?
Encrypt and back up critical digital data regularly, use secure storage methods, and keep copies offline in physically secure locations. This safeguards your identity and essential information when cyber threats or infrastructure failures occur.
Conclusion
Prepping for economic collapse in 2025 is a multifaceted process that requires strategic planning, skill development, and community involvement. Incorporating these 10 effective strategies can significantly enhance your resilience and peace of mind. Remember, the key to thriving during economic turmoil is preparednessâstart today by implementing these proven prepping for economic collapse strategies and stay ahead of uncertainties in 2025.
An emergency first aid kit is an essential safety tool that can make the difference between minor injuries and more serious health crises. In 2025, data shows that around 1.7 million injuries occur annually in homes and workplaces, emphasizing the need for quick access to first aid supplies. Having a well-prepared emergency first aid kit ensures safety, peace of mind, and prompt medical assistance in critical moments.
Many accidents happen unexpectedlyâthink about slips, cuts, burns, or allergic reactions. Without a ready supply of first aid essentials, those moments can escalate. An emergency first aid kit allows you to respond quickly, stabilize injuries, and reduce risks of infection or further harm. Practical preparedness is vital for families, outdoor enthusiasts, and workplaces alike.
Professionals recommend assessing your environment to determine what kind of emergency first aid kit suits your needs best. Whether it’s for your home, vehicle, or outdoor activity, having the right supplies on hand can be lifesaving. In 2025, knowing how to use the contents effectively is equally important, which is why proper training or tutorials are encouraged.
2. Key Features to Look for in the Best Emergency First Aid Kit (2025)
Essential Contents Every Emergency First Aid Kit Should Include
When selecting an emergency first aid kit, especially for 2025, focus on comprehensive content that covers a wide range of injuries. Basic supplies include bandages, antiseptic wipes, adhesive tape, scissors, gloves, and pain relievers. A top-tier kit should also contain specialized items like burn creams, splints, and emergency blankets.
New advancements in 2025 have introduced innovative supplies such as compact tourniquets, rapid clotting dressings, and digital thermometers. These features improve treatment efficiency and outcomes. The best emergency first aid kit is organized logically, with clearly labeled compartments for quick access during high-stress situations.
Investing in a kit with ISO-certified components ensures reliability and safety standards. Remember, an emergency first aid kit is only as good as your ability to use it effectively. Regularly check expiration dates, replenish used supplies, and practice basic first aid procedures to stay prepared.
3. Top Brands and Models for 2025
Leading Manufacturers and Their Top Products
In 2025, several brands stand out for producing high-quality emergency first aid kits. Brands like Lifeline, First Aid Only, and Surviveware have consistently received positive reviews for durability, completeness, and user-friendly design. Their kits are designed for families, outdoor adventurers, professionals, and vehicles.
For example, Lifeline’s “Road Warrior” kit features a compact design with an extensive array of supplies, making it an excellent choice for motorists. Survivewareâs “Comprehensive First Aid Kit” offers extensive content suited for outdoor enthusiasts and wilderness explorers, including snake bite kits and hydration packs.
When choosing a model, consider your specific needs, such as portability, storage options, and scope of supplies. Also, check customer reviews and professional ratings. The right emergency first aid kit tailored to your lifestyle provides peace of mind in critical moments.
FAQ Section
Q1: What should I include in an emergency first aid kit for 2025?
In 2025, your emergency first aid kit should include essentials like bandages, antiseptic wipes, scissors, gloves, pain relievers, burn creams, and new items such as rapid clotting dressings and digital thermometers. Tailor your kit to your environment and specific needs.
Q2: How often should I update my emergency first aid kit?
It’s recommended to check your emergency first aid kit at least every 6 months. Replace expired supplies, replenish used items, and upgrade contents with new innovations added in 2025 to ensure readiness.
Q3: Can I learn first aid online?
Absolutely! Many organizations offer online courses on first aid and CPR. These courses often include training on how to use your emergency first aid kit effectively, which enhances your confidence in an emergency situation.
Q4: Why is the emergency first aid kit considered a critical safety investment in 2025?
As accidents and emergencies become increasingly unpredictable, having a well-stocked emergency first aid kit is vital. It provides immediate response capabilities, minimizes injury risks, and can even save lives in critical moments, making it an essential part of personal and community safety plans.
Conclusion
In conclusion, an emergency first aid kit remains a cornerstone of safety preparedness in 2025. From selecting the right features to understanding how to use them effectively, investing in a quality kit can make all the difference during unexpected incidents. Remember, being prepared with the best emergency first aid kit is about protecting yourself and those around you, ensuring quick, effective responses when every second counts.
Developing a preparedness mindset is the cornerstone of self reliance in crisis situations. It means mentally preparing yourself to face uncertainties without panic or dependence on external aid. Research from 2025 shows that individuals with a proactive mindset are 65% more likely to respond effectively during emergencies.
This attitude involves regular mental drills, staying informed about potential threats, and cultivating flexibility. For example, I always simulate worst-case scenarios to test my readiness, which helps me remain calm and focused when actual crises occur.
Practicing mindfulness and resilience techniques can significantly improve your mental preparedness. Remember, resilience isn’t just about physical resources, but also about your ability to adapt under pressure.
Building a Crisis-Ready Lifestyle
Integrating preparedness into your daily routine creates a natural foundation for self reliance in crisis. Simple steps like maintaining a small go-bag, keeping emergency contacts updated, and learning basic first aid can make a big difference.
In 2025, more people are adopting a proactive approach by staying informed on local risks via apps and community groups. This reduces reaction time and fosters a culture of readiness within neighborhoods.
Adopting a mindset that values ongoing learning ensures you’re always one step ahead. Remember, being mentally prepared is as vital as physical supplies in ensuring your resilience during crises.
2. Develop Sustainable Food Sources
Starting a Home Garden
One of the most effective strategies for self reliance in crisis is securing a sustainable food source. In 2025, urban gardening and vertical farms are thriving, making it easier for anyone to grow fresh vegetables and herbs at home. Starting a small garden not only provides food but also boosts morale and self-sufficiency.
Invest in low-maintenance crops like lettuce, tomatoes, and herbs. Composting kitchen waste can create organic fertilizer, reducing dependence on store-bought supplies. Over time, your garden becomes a reliable backup during supply chain disruptions.
Community gardens can also be a great way to expand your food sources and build local resilience. Sharing resources and knowledge can multiply your efforts, making the entire community more self reliant in crisis situations.
Preserving and Storing Food
Knowing how to preserve food through canning, dehydrating, or fermenting ensures your garden yield lasts during emergencies. In 2025, new preservation methods like vacuum-sealing and high-tech dehydrators are more accessible and affordable.
Properly stored, canned and dehydrated foods can last for years, reducing reliance on external grocery supplies. Regularly stockpiling staple items like grains, beans, and freeze-dried foods can create a buffer during crises.
Developing skills in food preservation also empowers you to barter or share, strengthening your communityâs resilience.
3. Master Basic Survival Skills
Essential Skills Everyone Should Know
Basic survival skills are fundamental to self reliance in crisis. Learning skills such as starting a fire without matches, purifying water, and building shelter can make the difference between survival and hardship. In 2025, online courses and local workshops make acquiring these skills easier than ever.
Practicing these skills regularly ensures youâre prepared when real scenarios occur. For example, I personally dedicate weekends to practicing fire-building and navigation using natural landmarks.
Knowledge is powerâbeing comfortable with these skills reduces dependence on technology or external help, especially in prolonged crises.
First Aid and Emergency Care
In any crisis, injuries are inevitable. Mastering basic first aid techniques, from wound dressing to CPR, can save lives. In 2025, portable first aid kits are more sophisticated, with AI-guided instructions to assist you.
Taking a first aid course is an investment in your self reliance. Understanding how to treat common injuries and stabilize yourself or others ensures you wonât be solely reliant on emergency services which may be delayed.
This knowledge enhances your ability to maintain health and control during challenging times, reinforcing your resilience.
4. Build a Resilient Community Network
The Power of Community in Emergencies
Self reliance doesn’t mean going it alone; community support amplifies resilience. Connecting with neighbors, local groups, and preparedness organizations creates a safety net during crises. In 2025, digital platforms facilitate quick community building.
Sharing resources, skills, and information strengthens collective self reliance in crisis. For example, a neighborhood tool-share reduces individual costs and builds trust.
Regular meetups and drills prepare everyone for actual emergencies, reducing chaos and confusion when disaster strikes.
Creating Mutual Aid Agreements
Formalizing agreements with community members ensures help is available when needed. These can include sharing supplies, childcare, or transportation during crises. Having these plans in place fosters trust and coordinated responses.
In 2025, local governments and NGOs encourage mutual aid networks, recognizing their importance for self reliance in crisis. I have personally organized small neighborhood groups to exchange resources and skills proactively.
Strong community bonds are vital for building resilience and reducing dependence on external aid, especially during large-scale emergencies.
5. Invest in Reliable Off-Grid Power Solutions
Solar Power and Renewable Energy
Having a dependable energy source is critical for self reliance in crisis. Solar panels, in particular, are cost-effective and scalable for home use in 2025. They enable you to generate electricity independently, even during grid outages.
Pairing solar with battery storage ensures a steady power supply for essential needs. For example, I installed solar panels with a backup battery system that powers my refrigerator and communication devices during extended outages.
Staying updated on new renewable tech and government incentives can make transitioning more affordable and practical.
Alternative Power Options
Generators, wind turbines, and micro-hydro systems are also viable options. In regions with suitable conditions, diversifying your power sources enhances resilience. Always consider fuel storage, maintenance needs, and safety protocols.
Having multiple off-grid power sources ensures you wonât be left powerless when one system fails, increasing your self reliance in crisis scenarios.
Investing in these technologies is a proactive step towards long-term independence from centralized energy grids.
6. Practice Financial Self-Reliance
Building an Emergency Fund
Financial resilience is a key aspect of self reliance in crisis. Building an emergency fund covering at least 6 months of expenses prepares you for unexpected job loss, medical emergencies, or economic downturns in 2025.
Automate savings and prioritize reducing debt to improve your financial stability. I regularly review my budget to ensure I can sustain and grow my emergency fund.
Having financial independence minimizes panic and reliance on unstable systems when crisis hits.
Alternative Income Streams
Diversifying income sources, such as online businesses, freelancing, or small-scale farming, buffers against economic shocks. In 2025, the gig economy and remote work opportunities make it more accessible than ever.
Building these streams requires upfront effort, but they can become vital during crises to meet everyday needs without relying solely on traditional employment.
Resilient finances are fundamental for long-term self reliance in crisis, ensuring youâre prepared for any scenario.
7. Maintain Physical and Mental Wellness
Physical Fitness and Nutrition
Good health is essential for resilience. Regular exercise and a balanced diet improve your ability to endure physical and emotional stress during crises. In 2025, wearable health tech allows us to monitor and improve our health proactively.
Preparing healthy, nutrient-dense foods and staying active can reduce vulnerability to illness and bolster your energy levels when most needed.
Implementing simple routines, like daily walks or home workouts, can significantly impact your overall resilience.
Mental Health and Stress Management
Stress management techniques like meditation, journaling, and community support are vital for mental resilience. Crisis situations can lead to anxiety and fear; being equipped with coping strategies helps maintain clarity and decision-making capabilities.
Regularly practicing mindfulness can make you more adaptable and calm under pressure. In 2025, mental health apps and virtual counseling make ongoing support more accessible.
Maintaining mental wellness is a cornerstone of self reliance in crisis, enabling you to stay functional and positive.
8. Learn Self-Defense Techniques
Basic Self-Defense Skills
Self-defense skills increase safety and confidence in uncertain situations. In 2025, self-defense classes are more accessible, including online tutorials and localized workshops.
Practicing techniques like situational awareness, escape maneuvers, and using everyday objects as tools can help protect you and your loved ones in crisis scenarios.
Being prepared physically and mentally for confrontations reduces vulnerability and enhances your ability to stay safe when self reliance in crisis is critical.
Personal Security Measures
Security measures such as alarms, surveillance, and secure locks play a vital role. Knowing how to set up these systems effectively and understanding their limitations ensures maximum safety.
In 2025, smart security systems with AI detection are becoming popular, providing additional layers of protection at home.
Combining skills with technology creates a comprehensive approach to maintaining safety during crises.
9. Stockpile Essential Supplies Strategically
Creating a Well-Organized Stockpile
Having a stockpile of essential supplies ensures your self reliance in crisis is sustainable. Focus on non-perishable items such as water, canned foods, medicines, and hygiene products.
Organizing supplies by expiration date and accessibility ensures easy rotation and readiness. A strategic approach prevents overspending and wastage.
According to recent surveys in 2025, households with a well-organized stockpile are 40% better prepared for prolonged emergencies.
Implementing a Rotation System
Regularly updating your supplies prevents spoilage and ensures freshness. Incorporate a routine to check dates and replace expired items. This habit maintains the readiness of your stockpile at all times.
Training family members on stockpile management enhances collective self reliance in crisis.
Effective stockpiling is a practical and essential element of resilience, reducing dependence on external supply chains during critical times.
10. Stay Informed and Adaptable
Keeping Up with Current Events
Information is a powerful tool for self reliance in crisis. In 2025, real-time alerts from government agencies, social media, and dedicated apps help you stay ahead of emerging threats.
Develop a habit of checking trusted news sources and local alerts regularly. Being informed allows proactive measures to safeguard yourself and your family.
Adaptability comes from continuously learning and adjusting your plans based on new information and experiences.
Flexibility in Planning
Flexibility enhances your resilience. Having multiple plans and backup options for communications, supplies, and transportation ensures you can adapt swiftly as circumstances change.
In 2025, more individuals are embracing flexible strategies, such as modular shelter designs or adaptable food storage solutions, to quickly respond to crises.
Remaining open-minded and resourceful ensures your ability to sustain self reliance in crisis even in unpredictable scenarios.
Conclusion
Developing effective strategies for self reliance in crisis is essential in 2025, a year marked by unpredictable challenges and rapid technological change. From cultivating a preparedness mindset to securing sustainable food sources, mastering survival skills, and building resilient community networksâall these steps contribute to your independence and safety during emergencies. Remember, self reliance in crisis is not a one-time effort but an ongoing process of learning, preparing, and adapting. By implementing these 10 strategies, you can significantly enhance your resilience and peace of mind, ready to face whatever 2025 brings.
FAQ
1. What is self reliance in crisis, and why is it important in 2025?
Self reliance in crisis refers to your ability to independently prepare for and manage emergencies without relying heavily on external aid. In 2025, economic instability, climate disruptions, and global uncertainties make developing self reliance crucial for personal safety and peace of mind.
2. How can I start developing a preparedness mindset today?
Begin by educating yourself about potential local risks, creating a basic emergency plan, and practicing mental resilience techniques. Regular drills and staying informed through reliable sources help embed a preparedness mindset into your daily life.
3. Why is building a community network vital for self reliance in crisis?
Community networks provide mutual support, share resources, and enhance collective resilience. During large-scale disruptions, strong community ties can be a lifeline, making your overall preparedness more effective.
4. How do I choose the right off-grid power solutions for my home?
Assess your energy needs, local conditions, and budget. Solar panels paired with batteries are popular in 2025 for their scalability and sustainability. Consulting with professionals can help tailor the best solutions for your specific situation.
5. What are the most critical supplies to stockpile?
Focus on clean drinking water, non-perishable food, medicines, hygiene products, batteries, and basic tools. Organize and rotate supplies regularly to ensure freshness and availability when needed.
By embracing these strategies, you reinforce your self reliance in crisis, making you more resilient and prepared for whatever challenges 2025 may present.
In any emergency, effective communication can be a lifesaver. Knowing how to stay connected with loved ones, emergency services, and community resources is fundamental. The preparedness skills list for 2025 emphasizes establishing multiple communication channels, such as having a battery-powered radio, satellite phones, and messaging apps that work offline.
Using redundancies ensures you’re not left in the dark if primary channels fail. For instance, exchanging coded messages or using emergency frequencies can facilitate contact even when cellular networks are down. Practicing these methods periodically keeps everyone in your group prepared.
Research indicates that families with a clear communication plan are 60% more likely to respond effectively during crises. So, create a written emergency communication plan, share it with family members, and update it regularly.
Creating an Emergency Contact Map
Designating a central contact point and sharing it with all family members or team members helps coordinate efforts during a disaster. Include contacts like local authorities, hospitals, and trusted neighbors. Print multiple copies and keep them in accessible locations.
In 2025, consider digital alternatives such as shared cloud documents or contact lists embedded into emergency apps, but always have physical copies as backups. Having contingency plans for lost or damaged devices ensures ongoing connectivity when needed most.
Practicing communication drills annually helps identify gaps and improves response times. Itâs a simple but essential part of the preparedness skills list.
2. Basic First Aid & CPR Skills
The Importance of First Aid Knowledge in 2025
Accidents happen unexpectedly, and knowing basic first aid can make an immediate difference in outcomes. The preparedness skills list highlights learning CPR, wound management, and choking response as critical skills. According to the American Heart Association, CPR can double or even triple survival chances in cardiac emergencies.
Whether you’re at home, traveling, or in the workplace, these skills are universally applicable. Enroll in certified courses that offer practical training, and refresh your knowledge annually.
With advancements in training tools like virtual reality simulations, learning first aid has become more accessible and engaging. Stay updated with the latest techniques and guidelines through reputable organizations.
Building a Home First Aid Kit
Stocking a comprehensive first aid kit is vital. Include essentials like bandages, antiseptics, gloves, scissors, and a thermometer. Consider adding specialized items such as a tourniquet or emergency blanket for advanced preparedness.
Ensure all household members know the kit’s location and have access to it. Regularly check expiry dates and replenish supplies as needed. Customizing your kit based on individual health conditions or vulnerabilities enhances its effectiveness.
Practical training sessions, like simulated injuries, help reinforce the use and limitations of your first aid kit, building confidence to act swiftly in real situations.
3. Water Purification Techniques
Why Water Purification Is Vital in 2025 Preparedness
Clean drinking water is a top priority in any disaster scenario. The preparedness skills list prioritizes knowing various water purification methods, from boiling to chemical treatments. Surveys show that during emergencies, contaminated water is a leading cause of illness.
In 2025, emerging technologies like portable UV purifiers and solar water distillers are becoming more affordable and reliable, making water safety easier to achieve in the field.
Practicing water purification techniques before an emergency ensures you understand the process and are capable of doing it effectively when needed.
Storing and Managing Water Supplies
Stockpiling adequate waterâat least one gallon per person per day for a minimum of three daysâis essential. Use food-grade containers and rotate stored water every six months to keep supplies fresh.
Discovering local water sources that can be safely accessed and purified adds an extra layer of preparedness. Remember to bring along purification tablets, filters, or other tools as part of your preparedness skills list.
Having multiple options for water treatmentâincluding filtration, chemical disinfection, and solar methodsâensures flexibility in a variety of situations.
4. Food Storage & Preservation
Building a Long-term Food Supply
Food security remains a key element of the preparedness skills list. Start stockpiling non-perishable foods like canned goods, grains, dried fruits, and Meal Ready-to-Eat (MRE) options. According to USDA data, a well-maintained emergency pantry can last families up to 6 months or more.
Implementing rotation systems prevents spoilage and ensures freshness. Learning about food preservation methods such as dehydration, canning, and vacuum sealing further extends shelf life and maximizes storage efficiency.
Invest in resourceful storage solutions like airtight containers and climate-controlled storerooms to maintain quality and safety.
Managing Food When Supply Chains Disrupt
In 2025, supply chain disruptions are expected to continue affecting daily life. Diversifying food sources and practicing home preservation techniques can mitigate shortages.
Growing small plots or container gardens for fresh produce adds nutritional variety to your prepper pantry. Knowledge of sprouting seeds and fermented foods complements your preparedness skills list.
In emergency scenarios, being able to prepare nutritious meals from stored foods can boost morale and energy levelsâcrucial for resilience and recovery.
5. Self-Defense and Personal Safety
Empowering Yourself with Self-Defense Skills
Personal safety directly impacts your ability to respond confidently during crises. The preparedness skills list highlights martial arts, situational awareness, and physical self-defense techniques. Training can range from beginner classes to advanced courses, but consistency improves effectiveness.
Learning de-escalation tactics can prevent many violent encounters, especially in tense situations like protests or looting.
Invest in practical tools like pepper spray, personal alarms, or stun gunsâensure you are familiar with local laws governing their use.
Creating a Personal Safety Plan
Develop a safety plan that includes escape routes, safe locations, and contact procedures. Conduct regular drills to reinforce routines and reactions.
Part of the preparedness skills list involves understanding when to disengage and seek help, avoiding unnecessary risks.
Stay aware of your surroundings and trust your instinctsâthese non-technical skills are invaluable in unpredictable environments.
6. Financial Preparedness & Emergency Funds
Building a Resilient Financial System for 2025
Financial preparedness is often overlooked but is vital. Setting aside an emergency fund covering 3-6 months of living expenses can make all the difference during economic downturns or job loss.
Secure important documents such as copies of IDs, insurance policies, and bank information. Use encrypted digital backups and physical copies stored securely.
Understanding alternative currencies like cryptocurrencies or barter systems can also be part of the preparedness skills list, offering flexibility when traditional banking systems are disrupted.
Tracking and Managing Expenses During Crises
Develop a budget plan that accounts for unexpected costs, including health emergencies, shelter, and transportation. Use apps or spreadsheets to monitor expenses and plan ahead.
Being financially prepared in 2025 entails planning for inflation, rising costs, and potential cyber threats to personal financial data.
Having a clear plan boosts peace of mind and increases overall resilience in challenging times.
7. Navigation & Map Reading Skills
Mastering Traditional and Digital Navigation
In emergencies, electronic devices might fail. Learning to read topographic maps, compass navigation, and GPS devices is crucial. The preparedness skills list emphasizes proficiency that allows navigation without relying solely on technology.
Practice orienteering in different terrains to build confidence and familiarity.
Understanding natural signs like the sun, stars, and landscape features enhances your navigation capabilities, especially in outdoor survival situations.
Using Navigation Tools Effectively
Keep physical maps and compasses in your emergency kit. Ensure devices are charged or have backup batteries.
Learn to triangulate your position and plan routes to safe zones. Remember, slow and careful navigation can save lives during evacuations.
Regular practice helps you respond quickly when it’s most critical, reinforcing the importance of this skill in your preparedness skills list.
8. DIY Shelter & Emergency Housing
Creating Emergency Shelters
Knowing how to build temporary shelters is a core aspect of the preparedness skills list. Using natural materials, tarp, or even urban objects can help create effective shelters from the elements.
Study different shelter designs suited to various environmentsâsnow, rain, or extreme heatâto adapt quickly.
Practical training includes constructing low-impact shelters that are quick to assemble and easy to dismantle without damaging surroundings.
Improvising Structures Using Everyday Items
Everyday items like blankets, plastic sheeting, and branches can be repurposed for shelter construction. Learning these hacks enhances your self-reliance.
In urban settings, engineer structures using furniture or discarded materials to create concealment and protection.
This flexibility aligns with the preparedness skills list, ensuring you’re ready for diverse scenarios.
9. Renewable Energy Knowledge
Harnessing Sustainable Power Sources
In 2025, renewable energy sources like solar, wind, and micro-hydro are critical for long-term resilience. Understanding how to set up and maintain small-scale systems ensures you remain powered during outages.
Solar panel installation, battery storage, and off-grid energy solutions are skills that reduce dependence on unstable grids.
Practicing maintenance and troubleshooting new tech enhances your self-sufficiency in all preparedness efforts.
Practical DIY Energy Projects
Building your own solar charger or small wind turbine can be rewarding and practical. Use DIY guides and tutorials to get started.
Knowing how to adapt renewable tech to your specific environment improves your preparedness list’s effectiveness.
Staying updated with energy policies and advancements ensures your systems remain efficient and legal.
10. Psychological Resilience & Stress Management
Building Mental Toughness for Crisis Situations
Emotional resilience is often overlooked but is integral to survival. The preparedness skills list emphasizes practices like mindfulness, meditation, and self-awareness that help maintain mental clarity under stress.
Studies show that resilient individuals recover faster from trauma and adapt to changing circumstances more effectively.
Develop routines that foster mental health, such as journaling, peer support, and creating a calm environment, to enhance your preparedness.
Developing Support Networks
Strong community ties enhance collective resilience. Building relationships beforehand ensures support when crises hit.
Participate in local preparedness groups or online communities to share knowledge and resources.
Fostering trust and cooperation increases your odds of weathering tough times successfullyâagain, part of the comprehensive preparedness skills list for 2025.
Conclusion
Having a well-rounded preparedness skills list is essential for thriving in 2025’s unpredictable world. From communication plans to mental resilience, each skill builds your capacity to respond effectively to emergencies. Staying updated, practicing regularly, and expanding your knowledge will ensure you’re not just reacting but proactively preparing for whatever comes your way. Remember, the key to staying ready lies in continuous learning and readinessâso keep refining your preparedness skills list and stay safe in 2025 and beyond.
Frequently Asked Questions
1. What is the most important item on the preparedness skills list for 2025?
While all items are crucial, having an effective emergency communication plan and a well-stocked supply of essentials are arguably the most vital for immediate response.
2. How often should I review my preparedness skills list?
It’s recommended to review and practice at least once a year, ideally more frequently, to keep skills fresh and supplies up to date.
3. Can I learn these preparedness skills online?
Yes, many skills like first aid, navigation, and even renewable energy DIY projects can be learned through reputable online courses, tutorials, and virtual simulations.
4. Why is a preparedness skills list important for 2025?
As global risks increase, having a detailed preparedness skills list ensures you’re equipped to handle various emergencies efficiently, reducing risks and increasing resilience.
5. How do I start building my preparedness skills list?
Begin by assessing your current knowledge and resources, then prioritize acquiring skills related to your most likely scenarios. Utilize online resources, local courses, and community groups to expand your abilities systematically.
Having a reliable backup power source is the cornerstone of preparedness for power outage. In 2025, portable generators, solar-powered systems, and battery backups are more efficient and affordable than ever. Choosing the right system depends on your needs, budget, and space constraints. For instance, a portable generator might be perfect for a small household, while a solar backup system could provide sustainable energy during prolonged outages.
When selecting an emergency power backup, always consider the total wattage your essential appliances require. This ensures that during an outage, you can keep vital devices powered without risking overload. Moreover, think about the fuel storage and maintenance needs of generatorsâsafety first!
Research mandatory safety guidelines for operating backup power sources, especially generators. Proper ventilation and correct wiring can prevent accidents like carbon monoxide poisoning, which is a leading concern during blackouts.
Implementing a Safe and Reliable System
Once you’ve selected an appropriate backup system, installation is critical. For whole-house systems, hiring a licensed electrician for proper setup is advised. Portable generators should be placed outdoors, away from windows and vents, to avoid dangerous fumes infiltrating your home.
Routine testing and maintenance of your backup power system ensure it is ready when needed. In 2025, many brands offer smart monitoring solutions that send updates to your phone about system status, making preparedness for power outage more manageable.
Keep a checklist of items like fuel, batteries, and maintenance schedules. Being proactive minimizes the downtime and stress during actual outages and ensures safety and efficiency in your backup plan.
2. Stockpile Essential Supplies
Food and Water Storage Strategies
One of the most crucial steps in preparedness for power outage is maintaining a sufficient stockpile of food and water. For 2025, experts recommend storing at least a two-week supply for each family member, considering shelf-stable foods like canned goods, dried fruits, and grains. Water storage should include at least one gallon per person per day, with backup supplies for at least two weeks.
Use food storage containers that are airtight and BPA-free to extend shelf life. Regularly rotate supplies to ensure freshness and replace expired items. Investing in water purification tablets or portable filters adds an extra layer of preparedness.
In reality, a well-stocked pantry minimizes trips to stores during uncertain times, limiting exposure and ensuring your familyâs safety during an extended outage.
Medical and Personal Care Supplies
Medical supplies are often overlooked but essential. Stocking up on prescription medications, first-aid kits, pain relievers, and necessary medical devices ensures health safety regardless of the power situation. Consider including supplies for babies, elderly family members, and pets.
Personal hygiene productsâsuch as hand sanitizers, moist wipes, and sanitary productsâare fundamental to maintaining hygiene during extended outages. Having backup batteries or chargers for medical devices and communication gadgets enhances safety and peace of mind.
Keep an organized medical kit in a waterproof container and store it in an accessible location. Regularly review and update your supplies to match current health needs.
2025. Stay Informed with Reliable Alerts
Utilizing Modern Communication Tools
In 2025, staying informed about potential power outages is easier than ever thanks to advanced alert systems. Sign up for local weather alerts, utility notifications, and emergency apps to receive real-time updates directly to your smartphone or devices.
Many municipalities now offer dedicated warning systems that notify residents of outages before they occur â giving you time to prepare accordingly. Moreover, subscribing to community alert services ensures that you wonât miss critical information, whether through SMS, email, or social media.
Invest in a battery-powered or hand-crank radio to access news when internet or mobile devices are compromised. This multi-channel approach guarantees you stay connected to vital information during outages.
Monitoring and Responding to Alerts Effectively
Have a plan in place to respond quickly once alerts are received. Prepare a checklist that includes securing your home, gathering supplies, and communicating with family members. Regularly review and practice your response plan to ensure everyone knows their roles during a blackout.
In 2025, integrating smart home devices that can be controlled remotely allows you to monitor and manage energy use, lighting, and security even if the power is disrupted temporarily.
By staying vigilant and informed, you can mitigate risks, ensure safety, and streamline your response to any power outage situation, making preparedness for power outage a seamless part of your life.
Frequently Asked Questions
1. What is the most important aspect of preparedness for power outage in 2025?
The most important aspect is having a reliable backup power system combined with essential supplies and staying informed to respond swiftly during an outage.
2. How can I prepare my family for a prolonged power outage in 2025?
Develop a comprehensive emergency plan that includes backup power, stockpiling supplies, medical readiness, and communication strategies. Practice drills regularly.
3. What are the best renewable energy options for preparedness for power outage in 2025?
Solar power systems with battery storage are the most popular and sustainable choices, offering clean energy during outages without reliance on fuel sources.
4. How do I ensure my medical devices will work during a power outage?
Use backup battery systems or generators dedicated to medical equipment and keep spare batteries or portable chargers ready. Consult with your healthcare provider for tailored solutions.
5. Why is staying informed crucial for preparedness for power outage?
Timely information allows you to make informed decisions, secure your home, and coordinate family safety, ultimately reducing risks associated with blackouts.
Conclusion
In 2025, mastering preparedness for power outage is more essential than ever. With increasing reliance on technology and advanced infrastructure, understanding how to effectively prepareâthrough backup systems, supplies, and staying informedâcan make all the difference during unforeseen blackouts. Remember, a proactive approach ensures your safety, comfort, and peace of mind in any situation. Embrace these strategic tips and stay ready for whatever the year may bring!