by Preparation | Jul 6, 2025 | Preparedness
Assessing Risks and Needs
Understanding Potential Emergencies
When I start thinking about emergency planning, the first thing that comes to mind is understanding what emergencies could happen. There are many types to consider: natural disasters like hurricanes and floods, medical emergencies, and even neighborhood safety issues. It’s crucial to identify what’s most relevant to your area and personal situation.
For instance, if you live in a coastal area, hurricanes might be a significant risk, while those in more temperate regions might need to consider snowstorms and other winter hazards. Take some time to see which scenarios apply most to you.
Once you jot down potential emergencies, weigh their likelihood and potential impact on your daily life. Not every risk is equal, and being honest about what might realistically occur can help in crafting a solid emergency plan.
Evaluating Personal Needs
It’s not just about the emergencies themselves—it’s equally important to think about your own individual needs. Are there medical conditions that require special attention? If so, identifying these needs will shape the rest of your planning process.
For example, if you rely on specific medications or have mobility issues, that’s vital information to factor into your preparations. This way, you’ll know exactly what kind of support or resources you’ll need in a pinch.
I also recommend chatting with friends or family to gather additional insights about what may come up and how you might need help from them. This communal approach can unveil things you might not have considered on your own.
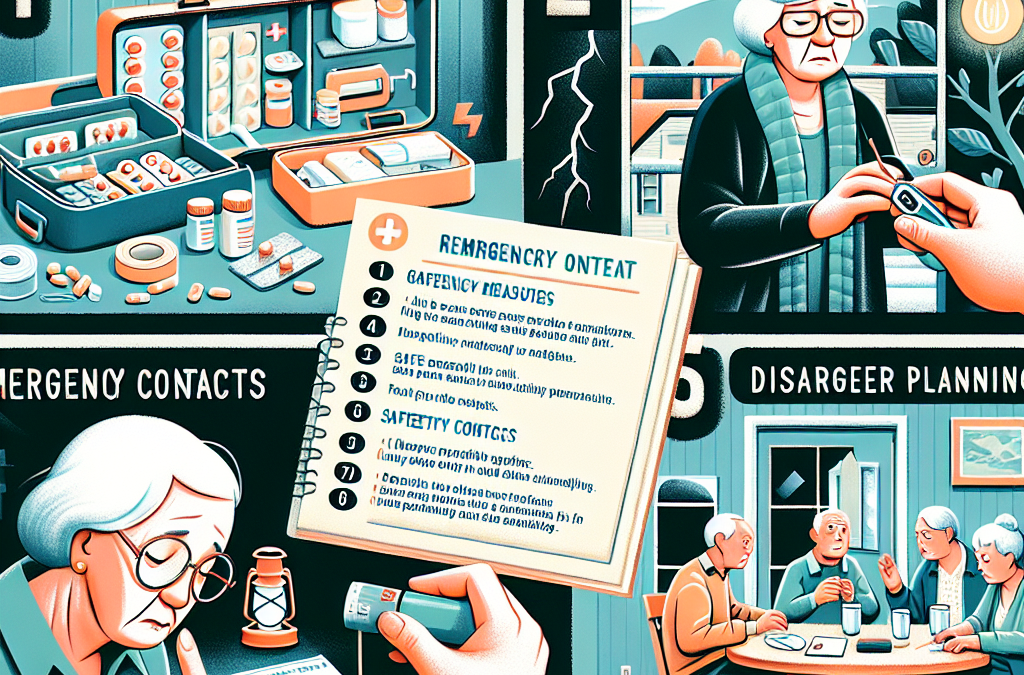
Creating a Personal Emergency Profile
Having a clear picture of your risks and needs usually leads to creating a personal emergency profile. This profile should outline your critical health information, emergency contacts, and any special instructions for caregivers.
Think of it as your one-stop shop for all the essential details anyone would need in an emergency. I like to keep this profile both printed out and saved digitally, just to cover all bases.
Your emergency profile not only helps you feel more secure but also can significantly ease the burden on those helping you in times of crisis. It provides clarity in chaotic moments, which is invaluable.
Building a Support Network
Identifying Key Contacts
No one wants to think about emergencies, but having a solid support network can be a lifesaver. Start by making a list of people you trust—family, friends, neighbors, or even local organizations who may assist you during an emergency.
It’s important to ensure that these folks have your emergency profile. Let them know their roles in your plan, whether it’s picking you up during an evacuation or checking on you during a storm.
I always emphasize the need for these contacts to be reliable. A good mix of local people along with others who can be reachable from afar ensures you’re covered from more angles in a pinch.
Communicating Your Plan
Once your network is identified, it’s time to talk about the plan. Don’t keep it a secret! Gather your network for a casual meeting or even a chat over coffee. Lay out what you’d like them to do during an emergency and how they can assist.
Make sure to address any questions or apprehensions they may have; it’s always easier when everyone is on the same page. Communication clears the air and makes sure everyone feels involved and committed.
Most importantly, practice makes perfect. If possible, walk through scenarios together. It might feel a bit silly at first, but going through a mock situation really can help solidify your support system.
Leveraging Community Resources
Your local community can be a treasure trove of resources during emergencies. Research local organizations, senior centers, or even neighborhood groups that have disaster response plans in place. These resources can provide additional hands and expertise when you need it most.
Stay in touch with community outreach programs, as they often organize drills and meetings to keep everyone prepared for various emergencies. Being proactive and knowing what’s available can help you gain peace of mind.
Finally, tap into local social media groups or forums. They can be a great way to share information and stay updated on local emergency resources as well.
Preparing Essential Supplies
Emergency Kits
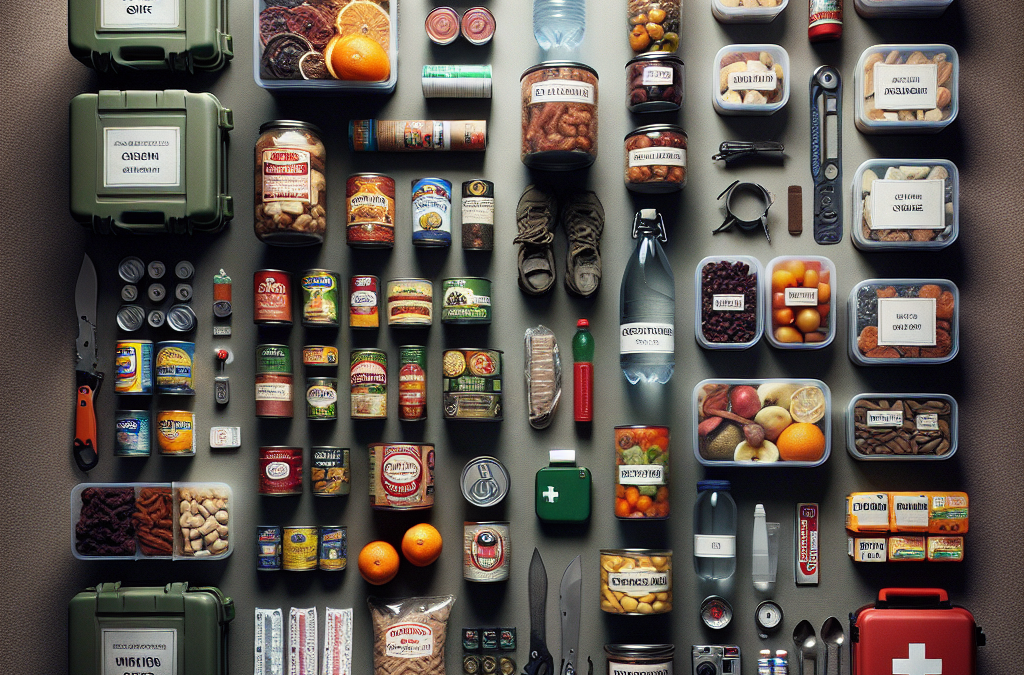
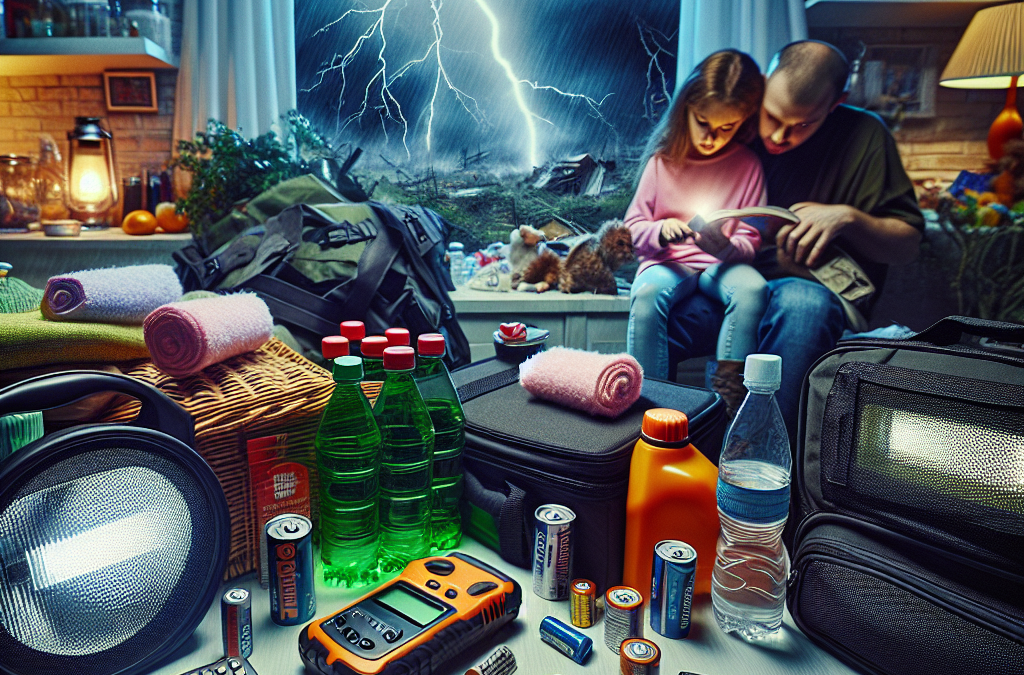
Once your risks are understood and your support network is in place, it’s time to focus on gathering supplies. Start by putting together an emergency kit. A well-stocked kit should include items like water, non-perishable food, first aid supplies, and any necessary medications.
Don’t underestimate the power of personal items; I always add a few comforting items, like a favorite book or photos. You might be surprised how grounding they can be during a stressful time.
Remember: your kit should be easily accessible, and it’s a good idea to check it every six months to replace expired items. Keeping it fresh ensures you won’t be caught off guard in an emergency.
Creating a Communication Plan
Your emergency plan should also include a solid communication strategy. Make sure to identify how you plan to stay in touch with your support network during an emergency, especially if there are power outages or disruptions.
I like to consider how I’ll communicate both locally and long-distance. Having different options—like texting, phone calls, and social media—gives you flexibility. Make sure to discuss these various methods with your contacts.
It can also be useful to choose a designated out-of-area contact. This way, if local lines are jammed, you have someone who can relay messages to and from family members outside the affected area.
Ongoing Training and Updates
Finally, never forget to refresh your skills and knowledge. Taking the time to participate in workshops on first aid, CPR, or emergency response training can make a huge difference when the heat is on.
Revisit your emergency kit and plan regularly to ensure it still meets your needs. Life changes, and so do personal circumstances. So staying current is a must!
I recommend scheduling a biannual review with your support network so everyone can stay engaged and aware of any changes in the plan or each other’s situations.
Practicing Emergency Scenarios
Conducting Drills
Once everything is set up, it’s time to put your plan into practice. I strongly advise conducting drills with your support network. This helps everyone become familiar with their roles, making reactions during real emergencies feel more instinctive.
Start small—perhaps rehearse what you’d do in case of a fire. Everyone should know how to evacuate safely and where to regroup. This practice not only builds confidence but also helps identify any hiccups in the planning.
Rotate roles during drills so that everyone gets a feel for each responsibility. It’s all about teamwork and making sure everyone is prepared for the unexpected!
Reviewing What Works and What Doesn’t
After running drills, take some time to discuss what worked and what didn’t. Everyone might have insights that could improve your plan. I find these debriefs are crucial for continuous improvement; it’s all about refining your plan to make it as useful as possible.
Jot down notes on any challenges that arise and brainstorm solutions together. It might be as simple as adjusting the evacuation route or even enhancing communication methods. Whatever it is, stay open to changes.
The goal is always to improve your plan and increase your confidence in facing emergencies together. This way, you’ll feel more prepared when and if crises arise.
Celebrating Preparedness
Don’t forget to celebrate your preparedness! Whether it’s a small gathering or a simple thank-you to your support team, acknowledging everyone’s efforts goes a long way in building morale.
Being prepared can feel daunting, but taking proactive steps transforms it into something manageable and even a little fun. Share stories and experiences to reflect on everything you’ve learned and how ready you all are.
In my experience, celebrating preparedness creates a sense of community and empowers everyone involved. It’s a reminder that, together, you’ve built something strong to face any emergency.
Staying Informed and Adaptable
Monitoring Local Updates
Keeping an eye on local news is crucial—sign up for alerts and notifications from emergency management offices in your area. They provide real-time updates on emergencies, helping you stay one step ahead.
Use apps and social media to follow credible sources and ensure your information is accurate. I find it also comforting to have weather apps that send alerts straight to my phone. It almost makes me feel like I have my finger on the pulse of everything!
Staying informed gives you time to adapt your plan as circumstances change, so make sure to leverage these available resources. It’s all about being proactive rather than reactive.
Flexibility in Plans
Plans can change at a moment’s notice, so it’s vital to remain open a level of flexibility. Sometimes, plans you believe are rock-solid may need tweaks based on unforeseen events or needs.
I’ve learned that life is unpredictable—having an adaptable mindset can save stress down the line. If something in your planning doesn’t feel right, discuss it with your support network and make adjustments.
Encourage everyone in your circle to voice concerns or suggestions. The more involvement, the smoother the planning process will go!
Reviewing and Updating Plans
As time passes, things may change in your life or in the wider community. Make reviewing your emergency plan a regular habit—this helps keep everything relevant and functional.
I suggest setting specific dates to reassess your risks, needs, and supplies. Doing this with your support network fosters a sense of teamwork and shared responsibility.
And remember, involving family regularly ensures they’re also up-to-date and prepared to help you when the time comes. Continuously adapting offers peace of mind for everyone involved!
Frequently Asked Questions
1. Why is emergency planning important for seniors?
Emergency planning is crucial for seniors as it helps ensure safety, provides clarity during stressful situations, and encourages proactive measures to address risks specific to their needs and environment.
2. What should be included in an emergency kit for seniors?
A well-rounded emergency kit for seniors should include water, non-perishable food, medications, first aid supplies, personal items, and any specific medical equipment needed.
3. How often should I review my emergency plan?
It’s a good practice to review your emergency plan at least twice a year. This helps you identify any changes or updates needed based on evolving personal circumstances or community safety issues.
4. Who should be a part of my support network?
Your support network should include trusted family members, friends, neighbors, and local organizations aware of your needs and capable of providing assistance during an emergency.
5. What are some ways to practice and prepare for emergencies?
You can conduct drills with your support network, review scenarios together, and participate in local community workshops to practice emergency response skills and reinforce your plan.
by Preparation | Jul 6, 2025 | Preparedness
After Significant Life Changes
Understanding Life Changes
Life can throw us a curveball at any moment, right? From moving to a new place to welcoming a new family member, significant changes can really shift our priorities and affect our disaster preparedness. It’s essential to step back and evaluate what these changes mean for our strategy. Did you move to an area prone to flooding? Now’s the time to reassess.
In my experience, every major life change has been a red flag for reevaluation. Take parents, for example; had I known I needed to consider the safety of a newborn earlier, I might have prevented some major panic later on. It’s better to address these shifts proactively instead of scrambling later.
Additionally, consider any physical changes to your home or lifestyle. Do you have pets? Are your kids now old enough to understand safety plans? All of these factors require a fresh look at your disaster preparedness strategy. Don’t overlook the significance of what seems like small changes; they can have a sizable impact.
After Experiencing a Disaster
The Importance of Reflecting
If you’ve ever gone through a disaster, you know it can be a tumultuous experience. Once the storm has passed, it’s crucial to take a moment to reflect. What went wrong? What did you do right? Evaluating your previous strategy can provide clarity and insight that you’ve never considered before.
From my own journey, I vividly remember the chaos during an unexpected flood. While I had a basic plan, it quickly became apparent that I hadn’t accounted for my elderly neighbor and how I could help them. This reflection, in hindsight, showed me how vital it is to think of everyone in our community.
So, when disaster strikes, take some time to jot down what you learned from that experience. What systems failed? What resources were invaluable? This knowledge is gold for crafting a better strategy moving forward.
When New Protocols or Technologies Emerge
Staying Updated
The world is constantly evolving, and so are disaster preparedness protocols and technologies. If your local community introduces new measures or programs, make sure to stay updated. It might seem like a hassle, but putting in the effort now can save you a ton of stress later down the road.
I remember when my area updated its emergency response systems. The integration of a new alert system caught me off guard because I wasn’t on top of the latest information. Trust me, I learned to prioritize staying plugged into local news and updates!
Don’t just stick with the same old plan because it worked before; be adaptable. Embrace the new technology and protocols that are designed to keep you and your loved ones safe. An updated strategy can mean the difference between being prepared and being caught off guard.
Annually As Part of Routine Maintenance
Making It a Habit
When life gets busy, our disaster preparedness strategies can easily fall by the wayside. That’s why I think it’s a great idea to evaluate your readiness and plan as part of an annual routine. Treat it like cleaning out your closet; it can be a bit tedious, but it’s necessary for peace of mind!
I block out time once a year to check my emergency supplies, review my escape routes, and talk with my family about our plans. It becomes a family bonding exercise! Plus, it’s a great way to ensure everyone’s aware of what to do in case of an emergency, helping to build confidence.
Make it enjoyable while you’re at it. Maybe combine your disaster planning with a fun family dinner or outing. You’ll not only be ensuring safety but also fostering a spirit of teamwork within your household!
When You Move to a New Location
Assessing New Risks
As someone who’s moved several times, I can testify that each new location brings its own set of challenges and risks. It’s essential to assess your disaster preparedness strategy every time you make a move. Familiarize yourself with the common disasters that occur in your new area.
For instance, moving from the Midwest to the coast in hurricane season was a real eye-opener for me. In my old town, blizzards were my main concern, but hurricanes required a whole new level of planning. Make sure you know what challenges may arise at your new address.
Additionally, connect with your neighbors or local community groups. They can provide you with insights and advice on what you should prioritize based on their experiences. That local knowledge can be a game changer!
FAQ
What is disaster preparedness?
Disaster preparedness refers to the measures taken to prepare for potential emergencies and ensure a prompt and effective response when a disaster strikes. This typically includes having plans, supplies, and training in place.
Why is it important to evaluate my disaster preparedness strategy?
Evaluating your disaster preparedness strategy is crucial to ensure you’re ready for emergencies. It helps identify possible weaknesses, incorporates new information, and ensures you have the necessary resources in place.
How often should I review my disaster preparedness plan?
While it can vary based on personal circumstances, I recommend reviewing your disaster preparedness plan at least once a year or whenever significant life changes occur.
What should I include in my disaster preparedness plan?
Your disaster preparedness plan should include emergency contacts, evacuation routes, supply lists, medical information, and any specific procedures for your family or household. Consider making it flexible to adapt to different types of disasters.
Can I involve my family in this process?
Absolutely! Involving your family in the planning process not only makes it a collaborative effort but also ensures everyone understands their roles and responsibilities. It can also help alleviate anxiety about disasters when they know what to expect.

by Preparation | Jul 6, 2025 | Preparedness
Evaluate the Situation
Take a Deep Breath
First, let’s be real. When your emergency plan falls apart, it’s easy to feel overwhelmed. I’ve been there, and trust me, panic doesn’t help anyone. The first step I take is to literally pause and breathe. Taking a moment to collect my thoughts helps clear my mind and allows me to assess the situation more calmly.
Breathing exercises can be super helpful here. Try inhaling for four counts, holding for four, and exhaling for four. This little trick can reduce anxiety and refocus your attention. Believe me; a calm mind is key in emergencies.
Once you’ve cooled your jets a bit, you can turn your attention toward analyzing what’s happening. Ask yourself: What’s gone wrong? Why isn’t my plan working? This introspection is crucial for making informed decisions moving forward.
Understand the Resources at Hand
Your emergency plan might have stumbled, but that doesn’t mean you’re out of options. Look around and really consider what you’ve got available. I always ask myself: Do I have access to local support—friends, family, or community services? You’d be surprised how quickly help starts to appear when you reach out.
Also, consider the tools and supplies you’ve prepared. They’re there for a reason. Whether it’s a first aid kit or backup power sources, leveraging those resources can make a massive difference in managing the situation.
Lastly, don’t forget about technology. In today’s world, our smartphones can be lifesavers. Reach out for help via social media, locate emergency services through apps, or even just Google the nearest shelter if you need to get somewhere safe. Knowledge is power!
Assess Your Options
Alright, so now you’ve taken stock of your feelings and your resources; what’s next? It’s time to consider your options. I like to jot down several possible courses of action. It might take some time, but trust me, brainstorming out loud can help: talk to someone else or just think through it.
When evaluating options, be strategic. Weigh the pros and cons of each possibility to make a well-informed decision. Some options may seem appealing but carry risks you haven’t considered yet. It’s vital to factor those into your choice.
Don’t hesitate to revisit your backup plan if you have one. Sometimes, adjusting an existing plan can be just as effective as starting from scratch. Be creative and flexible in your approach!
Communicate Your Needs
Reach Out for Support
Never underestimate the power of communication in a crisis. I’ve learned that sharing my situation with those around me not only helps me feel less alone but also opens up potential support avenues. Whether it’s posting in a neighborhood group or texting a friend, don’t be shy!
Sometimes, just knowing someone else is in your corner can be a huge morale booster. I recall a time I was dealing with a community emergency, and just reaching out to a neighbor led to a small group coming together to find solutions.
Utilizing social media can also yield surprisingly helpful outcomes. Many people in your network might have insights or resources they’re willing to share. It’s all about connecting!
Be Clear About Your Situation
When engaging with others, it’s essential to communicate clearly about what’s going on and what you need. I make it a point to express my needs succinctly and to the point. For example, instead of saying, “I need help,” try something more specific like “I need someone to assist me with transportation.” Clear communication can make all the difference.
Don’t forget to ask questions too! Sometimes the best support comes from asking someone if they’ve experienced something similar or know resources that could be beneficial. I’m always amazed by how many people are willing to share their knowledge and support!
This two-way dialogue can also help you gather information on what others are doing in similar situations. Who knows? There may be a solution out there that you hadn’t even considered!
Utilize Available Communication Tools
These days, we’ve got so many ways to communicate. Apps like WhatsApp or Facebook Messenger allow real-time conversation with multiple people, which can help organize a plan efficiently. Utilize group chats to keep friends and family updated on your situation, and coordinate any potential support.
If things get really hairy, don’t forget about the good old phone calls! Sometimes hearing a friendly voice can provide the reassurance you need that you’re not alone in this. Plus, you can convey your situation much faster than typing it all out.
As a last resort, establish a shout-out network. If you’ve set up a group of contacts, keep them informed, so everyone knows what’s going on and how they can help. Communication is key, folks!
Revise Your Emergency Plan
Learn from Experience
After everything settles down, it’s time for some serious reflection. I always try to figure out what went wrong in my emergency plan and why it failed. What worked? What didn’t? Reflecting on these questions can help you identify the gaps that need to be filled.
Try to remember specific moments during the crisis—did I ignore a critical piece of advice? Was there a resource that could have improved the situation? Learning from past mistakes empowers you to make better decisions in the future.
And remember, this is not about blaming yourself. Mistakes happen, and they are often unavoidable. The goal is to learn and grow from the experience so you can be more prepared next time around!
Update Your Resources
Once you’ve pinpointed what needs fixing, it’s crucial to update your emergency resources. This could mean stocking up on essential supplies, upgrading your first aid kit, or even enrolling in a first aid or CPR course. Don’t we all feel more secure when we know we’re prepared?
I’ve found that creating a checklist of items you need on hand can save you time and effort in the future. Make a habit of reviewing your supplies regularly; after all, it’s easy to overlook items that might fall out of date or go missing over time.
Another idea is to consider developing a more detailed plan. Where will you go if there’s an emergency? What are your specific action steps based on various scenarios? These details will provide a roadmap for handling unexpected situations with a bit more confidence.
Share Your Plan with Others
Now that you’ve revamped your emergency plan, don’t forget to share it! Discussing your updated plan with family, friends, or anyone else involved can make all the difference in a future crisis. Everybody should know what to do in case things go south again.
Do a quick walkthrough of the plan with your loved ones. It helps reinforce the action steps and gives everyone a chance to voice any concerns or suggestions. I’ve found that people often come up with ideas I hadn’t considered!
Letting your network in on the plan ensures that you’re all on the same page and boosts everyone’s confidence in facing emergencies collaboratively. Teamwork makes the dream work, am I right?
Stay Positive and Resilient
Embrace the Learning Curve
Life throws curveballs—it’s a part of being human. I’ve learned to embrace these challenges as opportunities for growth rather than setbacks. Keeping a positive mindset helps me bounce back more quickly and effectively when things don’t go as planned. Celebrate small victories even in tough situations!
Every time my plans fail—and they will—I remind myself that it’s a chance to learn something crucial. It’s not just about surviving; it’s about thriving in the face of adversity. This perspective shift can really help shape your long-term resilience.
Often, people around you might struggle alongside the same issues. So, sharing your experiences can show them they’re not alone, creating a support network that builds resilience for everyone involved.
Practice Self-Care
Your mental and emotional health are super important, especially after a crisis. I make it a priority to practice self-care in the aftermath of a failed emergency plan. Simple things like grabbing a favorite snack, going for a walk, or just taking a relaxing bath help me recharge and refocus.
Don’t hesitate to reach out to a therapist or counselor if needed. Talking with someone who’s trained in resilience building can provide invaluable support and guidance as you process the experience.
Remember, taking care of yourself allows you to be better equipped for the next time life throws a surprise your way. It’s all about finding balance and being kind to yourself in tough times!
Keep a Flexible Mindset
Staying flexible is crucial, both mentally and emotionally, when things don’t go according to plan. I find that having a go-with-the-flow approach helps. While I’ll always aim to be well-prepared for any situation, I also recognize that life is unpredictable, and that’s perfectly okay!
Flexibility allows me to adapt quickly to new situations and keep my wits about me, even when surprises arise. Rather than fixating on a failing plan, I focus on ways to turn the setback into an opportunity for learning and growth.
Who knows what new paths might open up when we let go of trying to control every aspect of a situation? Embracing change can lead to exciting new adventures you never would have anticipated!
Frequently Asked Questions
1. What should I do if my emergency plan fails during a natural disaster?
If your emergency plan fails, first assess the situation calmly. Take stock of your resources, reach out for support, and be flexible with your options. Then, you may need to revise your plan based on what you learn.
2. How do I effectively communicate my needs during an emergency?
Be clear and specific about what you need. Use concise language and don’t hesitate to ask questions. Whether through phone calls, group chats, or face-to-face interactions, clear communication is key to finding help.
3. How can I prepare my emergency kit for future crises?
Regularly check your emergency kit and replenish supplies as needed. Make a tailored checklist of essential items and consider enrolling in relevant courses to enhance your preparation!
4. What are some coping strategies after an emergency plan fails?
Embrace a learning mindset, practice self-care, and maintain flexibility. These strategies will help you manage stress and build resilience for the future.
5. How can I involve my family in emergency preparedness?
Share your updated plans with them and include them in discussions. Practice your emergency plan together, allowing everyone to voice their opinions and suggestions for improvement.
by Preparation | Jul 6, 2025 | Preparedness
The Hidden Secrets to Food Storage for Emergencies
The Hidden Secrets to Food Storage for Emergencies
Here are the top 4 semantic keyword phrases for our topic:
- Emergency food storage tips
- Long-term food preservation methods
- Food storage for natural disasters
- Preparing for food shortages
Emergency Food Storage Tips
Understanding Emergency Food Needs
When I first started thinking about emergency food storage, I didn’t know where to begin. It’s crucial to assess how many people you are storing for – this helps to calculate the right amount of food. Generally, I recommend a minimum of a three-day supply per person, but aiming for a two-week reserve can really give you peace of mind.
Also, consider dietary restrictions. For example, if someone is gluten-free or has allergies, you’ll need to stock up on suitable alternatives. It’s all about personalizing your storage plan – I made the mistake of buying items I never eat!
Finally, it’s about versatility. I always grab items that can be used in different meals. Think canned vegetables, grains, and beans. They’re not only nutritious but can be combined to make multiple dishes!
Choosing the Right Containers
Now let’s chat about containers. You don’t want your food getting stale or, worse, full of bugs! Personally, I use airtight containers whenever possible, and I double-check for any cracks or chips.
Don’t skip the vacuum-sealed bags, especially for items like grains or pasta. They can save a ton of space and keep food fresh much longer. Plus, I love how organized my pantry looks with them!
Labeling is also super important. I’ve been guilty of forgetting when I bought things. Having the date and contents labeled on containers is a lifesaver in ensuring I use older items first.
Keep an Inventory
Okay, so here’s the deal: keeping track of what you have is half the battle. I started using a simple spreadsheet that I update anytime I add or take something away. It helps ensure I rotate my stock and eliminate anything nearing expiration.
Regular checks on your inventory are essential. I make it a habit to do a ‘pantry sweep’ every month. This way, I can see what needs to be used and what I might need to re-stock.
Additionally, think about writing notes on your calendar for when to replace or check specific items. Trust me, it prevents the panic of unexpected food shortages!
Long-Term Food Preservation Methods
Canning Basics
Canning was one of those topics I put off forever, thinking it was too complicated. But once I gave it a shot, I realized it’s actually quite simple! I recommend starting with something like tomatoes or pickles. There are plenty of beginner-friendly recipes around.
The biggest tip I have? Always use the right equipment. A pressure canner is essential for low-acid foods, while a boiling-water canner works well for high-acid items like fruits. Safety first!
And remember to research proper storage for canned goods. They do take up a bit of space, but the joy of seeing jars filled with your own food is absolutely worth it!
<h3-Freezing Your Favorites
Freezing has been a game changer for me. It’s one of the easiest methods to preserve the food I love. I freeze fruits, vegetables, and even some meals. Just make sure to pre-pack meals or portion out foods so they’re ready to go!
Investing in some quality freezer bags or containers is key. Make sure to label everything with the date and contents. I learned the hard way by digging through an ice-cold abyss trying to identify mystery packets!
Also, check the temperature of your freezer regularly. It should ideally be 0°F or lower. If it fluctuates too much, it could affect your food quality. I bought a small thermometer, and it’s been so helpful.
Dehydrating Foods
Dehydrating food is a fantastic way to create space in your pantry and extend shelf life! When I discovered dehydrators, it opened up a whole new world. Fruits, veggies, and even meats can be preserved through this method.
The key is to slice items uniformly, so they dry evenly. I whip up a batch of apple chips or beef jerky all the time now! Plus, they make excellent snacks for road trips or work.
Always research how long to store dehydrated goods, too. They generally last longer than fresh items, but they aren’t invincible. I recommend keeping them in a cool, dark place for the best results!
Food Storage for Natural Disasters
Research Local Needs
It’s essential to understand the specific kinds of disasters that could happen in your area. For example, if you live in a flood-prone area, it might be wise to focus on waterproof storage solutions for your emergency kit.
I took a class on local hazards, and it really opened my eyes to what I should have on-hand. Being proactive can save you so much stress down the line!
Additionally, check with your local emergency management office. They often have lists of recommended items that can help tailor your supplies to your specific situation.
Choosing the Right Emergency Items
When stocking up for natural disasters, it’s not just about food. I suggest incorporating items like water, batteries, and first-aid kits. It can be a little overwhelming figuring out what to prioritize, so I always start small!
Think about how much you really consume. I like to think of what I typically eat in a week and multiply that for supplies. Extra snacks and comfort foods are great too – it helps keep morale up!
Lastly, consider shelf life. Some foods last longer than others. Having a mix of canned goods, freeze-dried items, and some fresh perishables that can last a week can be a safe bet.
Educating Your Family
Communication is key when it comes to emergency preparedness. I made it a family project to discuss our emergency plan. Everyone needs to know what to grab and where to go if something happens.
Doing drills might seem silly, but it helped my kids feel less anxious about the unknown. We’ve even had fun making it a game! It’s amazing how a little preparedness can build confidence.
Make sure everyone is aware of the supplies you have, too. This way, there won’t be any surprises if something does go down. It builds a sense of teamwork!
Preparing for Food Shortages
Understanding Supply Chains
Food shortages can seem daunting, but it’s crucial to understand how supply chains work. Once I got my head around it, I realized how quickly things can change due to weather events or transportation issues. Stay informed; it empowers you to make better choices!
Follow local news or even join community groups focused on sustainability. Sharing resources can save money and stress. I adore my local farmers’ markets – I’ve learned so much there about seasonal produce!
Being adaptable is crucial. If you know something’s in short supply, it helps to be flexible about what you purchase. It also makes planning your meals a bit more creative!
Diversifying Your Supplies
Diversification is the spice of life and also crucial in food storage! I like to keep a variety of grains, proteins, and fruits. Different foods have varying shelf lives, so having an assortment ensures I won’t run out of everything at once.
Experimenting with new recipes can also be fun! I often challenge myself to make meals with what I have on hand. When you’re stocked up, you might discover meals you would’ve never thought to make!
All in all, variety keeps your palate from getting bored. Plus, it’s a great way to help your family embrace new flavors – who doesn’t love a little culinary adventure?
Building Community Resilience
Community is everything. I really believe in supporting local initiatives that focus on food security. It’s not just about your individual supplies; it’s about what you can help others with in times of need.
Consider starting a community garden or even a food swap group. I’ve met some of the most incredible people through these initiatives! It’s uplifting to see how people rally together in tough times.
Education is vital too. Sharing knowledge about food preservation or storage tips can uplift others. Just think of how powerful a bunch of prepared neighbors can be when trouble strikes!
FAQ
What should I prioritize when starting my emergency food storage?
I suggest starting with foods that you and your family regularly eat, then expanding into items that can be used in many recipes. Key items include canned goods, grains, dried beans, and freeze-dried meals.
How long can I store canned foods?
Generally, canned foods can last anywhere from 1 to 5 years if stored properly. Just make sure to check for any bulging or rusting, which can spoil the contents.
Is it difficult to can my own food?
It’s really not as difficult as it sounds! Start with simple recipes and follow guidelines for safe canning. It becomes easier with practice, and you’ll feel accomplished!
What’s the best way to maintain a stockpile?
Regularly check your inventory and rotate your supplies. I recommend doing a monthly inventory check to monitor expiration dates, ensuring that you consistently use older items first.
by Preparation | Jul 6, 2025 | Preparedness
Understand the Risks
Why Tornadoes Happen
Tornadoes are fascinating yet terrifying natural phenomena. From my curiosity about weather patterns, I learned that these swirling columns of air form during severe thunderstorms, particularly when warm, moist air meets cooler, dry air. This collision creates instability in the atmosphere, which can lead to powerful storm systems capable of producing tornadoes.
But understanding the “why” is just the beginning. It’s also crucial to know how often tornadoes occur in your area. Some regions are more prone than others, and knowing this can help you prepare better. Make sure to check your local weather statistics and be aware of the tornado-prone seasons.
Lastly, the unpredictability of tornadoes adds to their danger. They can pop up suddenly, often with little warning. It’s important to keep an eye on the weather reports and understand the different alerts to stay informed.
Have an Emergency Plan
Creating Your Tornado Safety Plan
Having a solid emergency plan in place can make all the difference when a tornado strikes. I remember sitting down with my family to sketch out our plan. We decided on a designated safe area in our home – ideally a basement or a small, windowless room where we could ride out the storm together.
In the event of a tornado warning, practicing your plan is just as important as having one. We conducted regular drills to ensure everyone knew where to go and what to do. This also helped calm some of the nerves that come with the thought of facing a tornado.
Don’t forget to think about your pets! Including your furry friends in your emergency plan is vital. Make sure you have their carriers or leashes ready, so you can bring them to safety with you without any stress.
Prepare an Emergency Kit
What to Include in Your Kit
During my preparations, I found that an emergency kit is an absolute must. My first step was to gather essential supplies that would keep my family safe and comfortable during and after a tornado. Items like water, non-perishable food, flashlights, batteries, and a first aid kit are key components.
But you also want a few personal items. I added things like medications, important documents, and even a small game or book to keep spirits up while we hunkered down. The goal is to make sure everyone has what they need to feel secure.
Also, remember to check your kit regularly. I learned firsthand that being prepared means replacing old food and checking batteries every few months. This ensures that when the time comes, you won’t be scrambling for supplies that may have expired or gone missing.
Stay Informed
Monitoring Weather Updates
Staying informed is a crucial part of tornado preparedness. I can tell you from experience that I now rely on several sources for weather updates. There’s nothing like a solid weather app on your phone paired with a battery-operated weather radio for those times when the power goes out.
Sign up for local weather alerts. Most communities offer services that send out notifications for severe weather. It’s a simple way to stay ahead of tornado threats and get the information you need as soon as possible.
Always have a plan B for communication. When things get hectic, ensure that everyone in your family knows how to reach each other. This includes having backup contact methods, like calling relatives who live further away if cell services are compromised.
Practice and Education
Training and Drills
Lastly, practice makes perfect! One of the most impactful things I did was organize family drills. These practice sessions turned out to be fun and educational. We’d run through our emergency plan and take turns pretending that a tornado warning went off.
Teaching children about tornado safety is just as important. Kids are often curious and can feel scared when they hear about tornadoes. I found incorporating story time, games, and even videos about tornado safety can demystify the situation for them, making them feel more secure and prepared.
Don’t forget to educate yourself continuously. Whether it’s reading books, attending community workshops, or following meteorologists on social media, staying informed about tornado safety practices and news can make a huge difference during the storm season.
Frequently Asked Questions
1. What should I do if a tornado warning is issued?
Head to your designated safe area immediately, such as a basement or small interior room. Keep your emergency kit nearby and stay tuned to weather updates.
2. How can I make my home more tornado-resistant?
Strengthening your home’s foundation, reinforcing the roof, and installing storm shutters can help improve its tornado resistance. Consulting with a professional is always a good idea.
3. How often do tornadoes occur?
The frequency of tornadoes varies by region. Some areas, like the Midwest, experience them more frequently than others. Always check local statistics and stay informed about your area’s risk.
4. Should I evacuate if there’s a tornado warning?
If you are in a mobile home or an area with low safety ratings, it’s best to evacuate to a more secure structure. When in doubt, seeking shelter is always a smart move.
5. How can I help my community prepare for tornadoes?
Getting involved in local preparedness programs, volunteering for community drills, and sharing information with your neighbors can make a big impact. Educating others is crucial!
by Preparation | Jul 6, 2025 | Preparedness
Understanding Tsunami Risks
What Causes a Tsunami?
First off, let’s get into how tsunamis actually happen. Generally, they’re caused by underwater earthquakes or volcanic eruptions. When tectonic plates move suddenly, they displace a massive amount of water, resulting in those giant waves we often see in movies. While this might sound like a scene from a disaster flick, it’s a serious reality in coastal areas!
But it’s not just earthquakes that can trigger them; landslides, both on land and underwater, can also send waves racing toward shores. Understanding these triggers can help us stay alert and prepared during natural disasters.
Knowing the science behind tsunamis is kind of like learning the rules of a game. The better you understand it, the better you can strategize for your safety.
Identifying Your Risk Level
Once you know what causes these massive waves, the next step is to figure out if you live in an area that’s at risk. This can usually be done by looking up local hazard maps provided by government agencies or disaster management organizations.
Don’t just rely on the internet, though. Local authorities often hold community meetings to discuss risks and preparedness strategies. Getting involved can really help you understand what you’re facing.
And hey, if you do find out that your area is at risk, don’t panic! Instead, take it as a cue to start planning and preparing.
Staying Informed
Knowledge is power, right? Staying informed means more than just checking the news now and then. You should subscribe to local alerts and updates. Many places have warning systems that send texts or emails when there’s a tsunami watch or warning.
Social media can also be useful. Following local news outlets can give you real-time updates. Make it a habit to check in, especially if you know a storm is brewing nearby.
In my experience, being part of community groups can be beneficial too. It’s amazing how many people are willing to share tips and advice about staying safe during a tsunami.
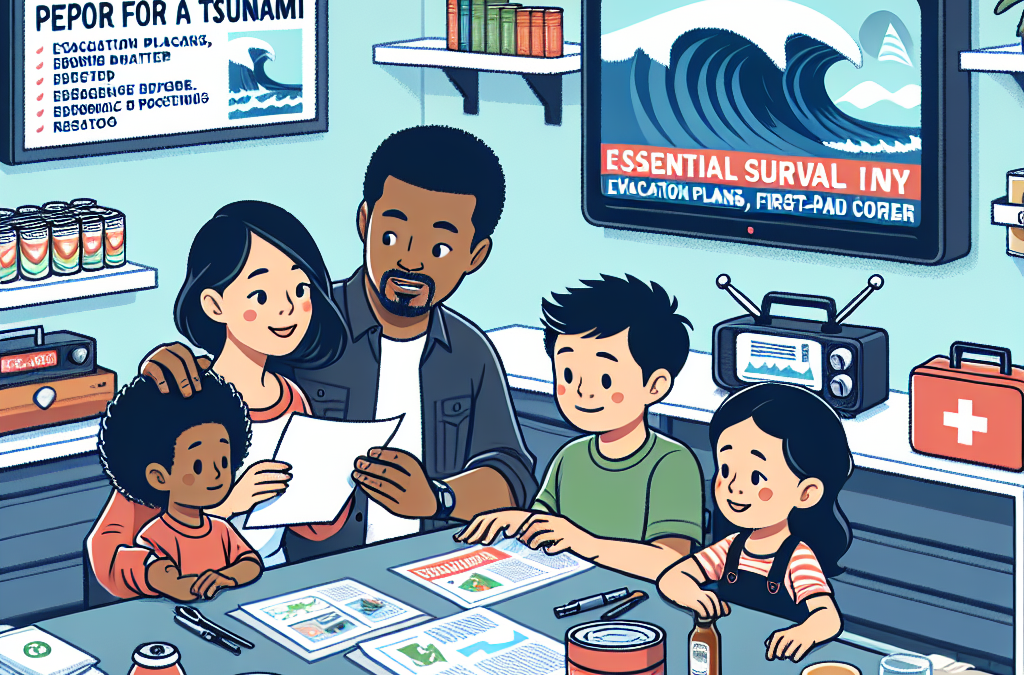
Creating an Emergency Kit
What to Include
Alright, let’s talk about something super important: your emergency kit. This isn’t as complicated as it sounds! Start with the basics like water, food that won’t spoil (think granola bars, packets of nuts, that kind of thing), and a flashlight.
Don’t forget about a first-aid kit! You never know what could happen, so having some medical supplies handy is a must. Also, consider personal essentials like medications or any special items for kids or pets.
In my own kit, I’ve got some extra cash since, during a disaster, ATMs might not work. Having a little cash on hand can be a lifesaver in those moments.
Where to Store Your Kit
Now, you’ve got your kit packed and ready, but where do you put it? It’s best to keep it in a place that you can easily access, like near your front door or in a closet that’s not too cluttered. The last thing you want is to be digging through junk when time is crucial!
I’ve also learned that keeping a smaller version in my car is a good idea. You never know when you might be away from home and find yourself needing supplies in an emergency.
Remember, it’s not just about having the kit; it’s about knowing where it is and being able to grab it quickly!
Regularly Update Your Kit
Don’t just set it and forget it! Regularly check the contents of your kit. Stuff can expire or go bad, and you don’t want to be left without vital supplies. Make it a routine—maybe check it every six months. It can be like a little refresh party!
If you’ve used something from your kit, replace it as soon as you can. It’s even cool to involve kids in this process, so they know what’s in there and why it’s important.
Updating your kit can feel pointless at times, but trust me, when disaster strikes, it’s worth it to have fresh supplies ready to go!
Planning Your Evacuation Route
Know Your Local Evacuation Routes
Evacuating in a calm and collected manner can save lives. So, before a tsunami hits, know your local evacuation routes. Most areas vulnerable to tsunamis will have marked evacuation routes or maps that show the safest exit points. You can usually find these on your local government’s website.
Don’t just read about them—drive these routes a couple of times so you know exactly where to go. This familiarity can make a huge difference during a stressful time.
It’s sort of like learning your way around a new city. The more you know it, the less you’re likely to panic when things go sideways.
Communication Plan
Next is creating a communication plan with your family or housemates. Make sure everyone knows who to contact and where to meet if you get separated. It can be as simple as texting a designated person so you know everyone’s safe.
I always tell my friends to have a backup plan. Cellular services can get jammed during a disaster, so consider alternatives such as walkie-talkies or Wi-Fi calling apps. Hey, whatever works, right?
This kind of planning really takes a weight off your shoulders—just knowing that everyone is on the same page is a huge relief.
Practice Evacuation Drills
Practice makes perfect! Organizing family evacuation drills can be fun and informative. Set a day to run through the entire process: grab the emergency kit, follow the evacuation routes, and get to the meeting point.
It’s great to find out where the hiccups might be. Maybe someone forgot to grab something important or doesn’t know where to go? Address these issues early so you’re not scrambling when the time comes.
Plus, it’s a nice bonding activity. It can even turn into a small family adventure; just keep it light-hearted!
Educating Yourself and Your Community
Stay Informed About Tsunami Preparedness
Education is key! I can’t stress this enough. The more people know about tsunamis, the less chaos there will be during an emergency. Participate in local workshops or seminars that focus on tsunami preparedness. It’s a great way to learn new tips and strategies.
One of my favorite ways to learn is by attending local community events where experts share their knowledge. You get to meet people who are equally passionate about safety, and you might pick up a few new tricks too!
Just imagine being part of a community where everyone’s prepared; it feels empowering and more secure.
Sharing What You’ve Learned
Once you’ve got cool info, why not share it? Teach your friends, family, and neighbors about what you’ve learned regarding tsunami preparedness. It creates a sense of unity and collective awareness.
You could even start a small community group or social media page to discuss preparedness tips. Trust me, it can be a great way to build connections and spread valuable information!
And when more people are educated, your whole community gains strength and confidence. Win-win!
Encouraging Community Drills
Encourage your local community to host tsunami drills. It might seem like a chore at first, but believe me, the practice can really save lives. Schools, workplaces, and neighborhood organizations can all get involved.
Making this a community initiative not only educates individuals but brings people together. It creates a collective memory that, in times of stress, can really help everyone stay calm and collected.
Be that person who champions for safety and preparedness. Sure, it might be a tough conversation to start, but it’s one that needs to happen.
FAQs
What should I include in my tsunami emergency kit?
Your emergency kit should have essentials like water, non-perishable food, a first-aid kit, flashlight, and personal medications. Remember to tailor it to your needs!
How can I find out if my home is in a tsunami zone?
You can check local government websites for hazard maps that indicate tsunami risk zones. These maps are usually clear and easy to understand.
What’s the best way to stay informed about tsunamis?
Sign up for local alerts, subscribe to emergency updates, and follow local news on social media for real-time information.
How often should I update my emergency kit?
It’s a good idea to check and update your kit at least every six months or after any items have been used. Keeping supplies fresh is key!
How can I be a part of my community’s tsunami preparedness?
Participate in local workshops, volunteer for community safety events, or help educate your friends and family about tsunami safety measures.


