
Hey there! If you’re reading this, it means you’re either planning a trip into the great outdoors or just curious about how to survive if things go south. Trust me, I’ve been in quite a few sticky situations while out in nature, and I’m here to share what I’ve learned. Let’s dive into the major areas of wilderness survival and get you prepared for whatever Mother Nature throws your way.
Finding and Purifying Water
Locating Water Sources
First things first — you gotta know how to find water. In my experience, looking for streams or rivers is a great starting point. Water flows downhill, so if you’re in the mountains, follow the slope. You’d be surprised how often you’ll come across a small trickle. Also, keep an eye out for animal tracks; they usually know where the water is located.

Another trick I learned was to look for wet ground or plant life. Green plants are usually a sign that water is nearby. Even digging a bit in that muddy patch can yield results. Just make sure not to go overboard digging if you’re in a dry area — you don’t want to waste your energy!
Lastly, look for dew in the morning. It might not seem like much, but collecting dew from leaves with a cloth can give you a refreshing sip in an otherwise dry camp. Every drop counts, right?
Methods of Purifying Water
Once you’ve found some water, it’s time to make sure it’s safe to drink. I can’t stress enough how important this step is. Boiling water is the most basic and effective method. Just get it rolling for a few minutes, and it should kill any nasty microorganisms lurking in there.
Thank you for reading this post, don't forget to subscribe NOW for FREE!

If you can’t boil it, try filtering through a cloth or using natural materials like sand and charcoal to create a makeshift filter. It’s not perfect, but it can help clear out some impurities and make it more palatable.
For those with a bit more gear, water purification tablets can be a lifesaver. I always keep a few in my pack. Just remember to follow the instructions on the package, and you’ll be good to go!
Staying Hydrated
Hydration is key, folks! I learned this the hard way — dehydration is no joke in the wild. Always drink small amounts frequently instead of guzzling a ton all at once because your body absorbs it better that way.
If you’re sweating a lot, don’t forget to replenish electrolytes. You can carry sports drinks or eat some salty snacks to keep your sodium levels in check. Or, you can go the natural route — some wild plants can help too.
Keep an eye out for signs of dehydration, such as headaches or dizziness. Listen to your body; it’s amazing at sending signals when things aren’t right.
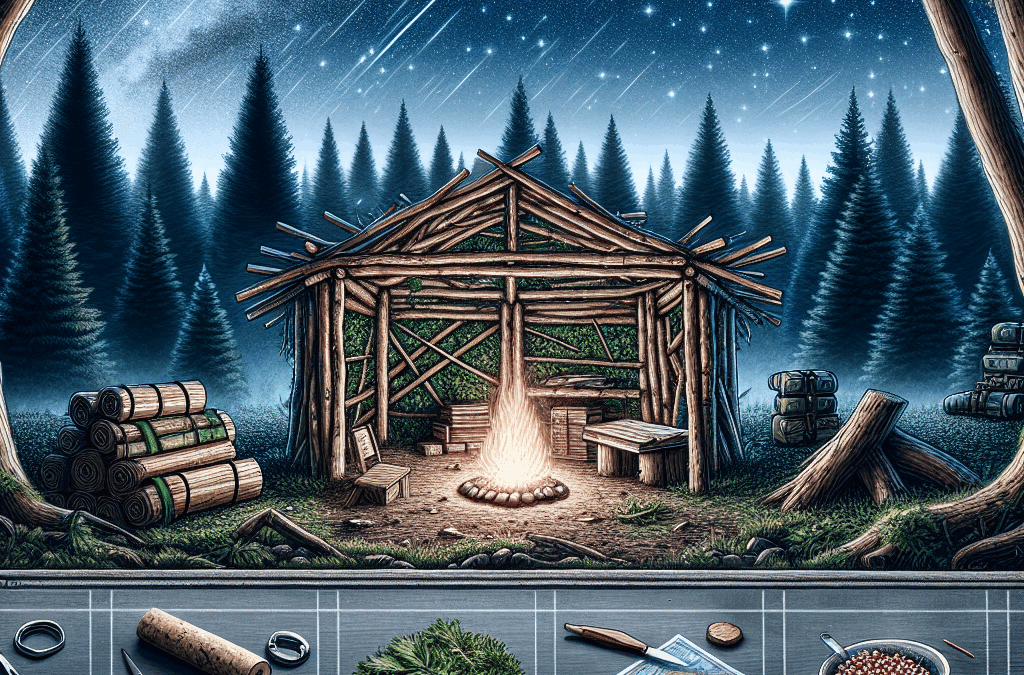
Building a Shelter
Choosing the Right Location
Finding a good spot for your shelter is super important. I once made the mistake of setting up camp too close to a stream, and guess what happened? I woke up soaked! Look for higher ground to avoid flooding — always a solid choice.
Aim for an area that provides some natural windbreak, whether it’s a cluster of trees or rocks. They not only block the wind but also offer some insulation. I like to set up my shelter in a way that it faces away from the direction of the prevailing wind as well.
Lastly, avoid areas where there’s an obvious risk of falling branches, known as widow makers. You don’t want to wake up feeling like you’re in a horror movie because a tree decided to drop a branch on you while you were sleeping!
Types of Shelters
When it comes to the type of shelter, your options really depend on your environment. In the forest, I often go for a simple lean-to made from branches and leaves. It’s quick to set up and provides great coverage from rain.
In a colder climate, I’ve built a snow cave, which is surprisingly warm. Digging into the snow may take some effort, but once you’re in there, the insulation it provides is fantastic. Just don’t forget to create an air hole; ventilation is key!
If you’re lucky enough to have a tarp or emergency blanket, using that over some branches can make for a fast and effective shelter too. Creativity goes a long way in survival situations!
Insulating Your Shelter
Insulation is all about keeping the warmth in and the cold out. When I’ve built shelters, I always gather ample foliage to line the walls and the floor. It’s surprising how much warmth it can trap.
If you’re in a pinch, your own body heat can be used for insulation, so huddle up if you’ve got friends around! I remember one cold night where we all snuggled together for warmth – it made for good bonding too!
Lastly, consider the orientation of your shelter. Keeping it small and cozy helps retain heat, so don’t go building a mansion in the woods. Go for a snug fit; it’s much more effective than sprawling out in the cold.
Finding Food
Identifying Edible Plants
Alright, let’s talk food. I’ll be honest — I was overly cautious at first about foraging. But once I got familiar with a few plants, I realized it’s a good skill to have! Start with plants you know; dandelions and clover are great beginner options.
You can also check your surroundings for nuts and berries. Just make sure you have a good guide or app to identify what’s safe; some wild berries can be tricky. I always remember the old saying: “When in doubt, don’t eat it!”
Plus, look for natural food sources like insects — yes, crickets are a thing! They are packed with protein and are very crunchy. Just don’t think too hard about it!
Setting Traps
If you’re more into hunting, traps can be a useful tool. I’ve set a few snares in my time, and it’s fulfilling to catch your own meal. But, I’d advise practicing how to set them before you find yourself in a situation where you need to.
Try using natural materials like twigs or vines to create your traps; they blend well into the environment. There are tons of resources online showing different techniques to employ — a bit of research can go a long way.
Just be mindful of local regulations, and remember to check your traps regularly if you set them. You want to avoid cruelty and wasting food!
Cooking Options
So once you’ve snagged yourself some food, you’ll want to cook it. Fire is definitely your best friend here. If you don’t have a pot, you can wrap food in large leaves and cook them over hot stones. My first attempt at this ended up with smokey flavors that were surprisingly delicious!
If you have any cooking gear, don’t hesitate to use it. A lightweight stove or a simple portable grill can make a world of difference when you need to cook something up quickly.
Always make sure you’re cooking your food thoroughly to prevent any nasty stomach aches. No one wants that when they’re trying to enjoy a wilderness adventure!
Starting a Fire
Gathering Materials
Fire might just be the most crucial skill in the wild, so let’s break down how to get it going. First, gather your materials. You’ll need tinder (think dry grass, leaves, or bark), kindling (small sticks and branches), and heavier logs for fuel.
The way I see it, the earlier you gather your materials the better. It can be a challenge to find dry kindling if it’s been rainy, so I always keep a few fire-starting materials in my pack just in case. It’s amazing how a little planning can save the day!
And remember, don’t forget to keep some of that burning material close to your site, so when it’s time to settle down, you can ignite a fire quickly, even if your hands are a bit cold.
Ignition Techniques
Now, on to actually starting the fire. There are multiple methods, but the classic matches or lighter works best for me. I always carry waterproof matches in my kit just for those damp days when I know fire is crucial.
If you want to go old school, try using flint and steel. It’s rewarding when you see that spark, but it does take practice. I remember my first fire; it took me ages and a lot of frustration before I finally got it. But once I did, I felt like a true wilderness pro!
Finally, you can even use a magnifying glass if you have one. Just focus the sunlight on your tinder, and it could catch. It’s a neat trick to have up your sleeve for sunny days!
Maintaining a Fire
Once you’ve got that fire blazing, maintaining it is key. Keep an eye on the size of your flames; you want them to burn steadily, not wild. Adding more fuel gradually helps ensure that the fire lasts longer.
Always have a backup plan for wind and rain; there are ways to create a windbreak for your fire if the weather turns. Using rocks or sticks can help create a shield. Trust me, it can save the day during a surprise downpour!
Lastly, don’t forget fire safety! Make sure to fully extinguish your fire when you’re done. Douse it with water and stir it up so that it’s completely out before you leave. We want to leave the wilderness just as we found it!
Outdoor Navigation
Using a Compass and Map
Alright, let’s talk about navigation. I can’t stress enough how important it is to have a good map and compass on hand. Even in this digital age, a physical map can be invaluable. I personally love the feeling of unrolling a real map and plotting my course — it feels adventurous!
Learning how to use a compass can be a bit tricky, but once you’ve got it down, it’s game-changing. Always make sure that you orient your map in the direction of the north indicated on your compass. Practice before you need to rely on it, so you won’t waste time fumbling in an emergency.
And remember, don’t just rely on technology, as batteries die and signals can be lost. Old-school skills keep you grounded, literally.
Natural Navigation
I’ll never forget the first time I tried to navigate using natural signs — things like the position of the sun and stars. It’s incredible how much information nature gives us. For instance, the sun rises in the east and sets in the west, which can guide you during the day.
At night, I rely on the North Star — it’s the brightest star in the Little Dipper and can point you north. It’s a skill that takes a bit of practice, but once you get it down, it’s pretty fun to show it off to friends!
Lastly, pay attention to the moss growth on trees. It’s usually lusher on the north side in the Northern Hemisphere. Use everything around you to your advantage!
Landmarks and Signs
As I wander through the wilderness, I always keep an eye out for natural landmarks. They serve as great reference points. Remembering a rock formation or a unique tree can help orient you as you hike. It’s like leaving breadcrumbs on your way out!
Keep track of your direction and distance as you travel; I often jot things down in a small notebook because it helps me remember my path. It’s easy to get turned around when you’re deep in the woods.
And don’t forget to share your navigation skills with your buddies — it makes the adventure more fun and engaging. Plus, it’s always safer when everyone knows where they’re heading!
Frequently Asked Questions
- 1. What should I pack for a wilderness survival trip?
- You should pack essentials like a good knife, water purification tablets, a first-aid kit, fire-starting tools, and non-perishable food. Don’t forget a map and compass for navigation!
- 2. Is it safe to drink water from streams or lakes?
- No, it’s not safe to drink untreated water from natural sources. Always purify your water by boiling or using purification tablets before drinking.
- 3. How can I keep warm at night in the wilderness?
- Layering is key! Use extra clothing, build a cozy shelter, and ensure you’re insulated from the cold ground. A good fire can help too!
- 4. What should I do if I get lost in the woods?
- Stay calm, and don’t panic. Try retracing your steps to a known area. If that fails, find a safe place to shelter and signal for help. Use your map and compass to navigate if you have them.
- 5. How do I start a fire without matches?
- You can use flint and steel or even create a fire using a magnifying glass on a sunny day. Both methods take practice, so try them out beforehand.
Related Content
- Could You Survive an Earthquake? Take This Quiz
- 5 Essential Steps to Disaster Preparedness: Are You Ready
- Don’t Wait for the Storm: Top Tips for Effective Disaster Preparedness
- Stay Calm and Act Fast: Unconventional Emergency Evacuation Tips for Every Situation
- Transform Your Safety Strategy with an Effective Emergency Shelter Plan


