by Preparation | May 10, 2025 | Preparedness
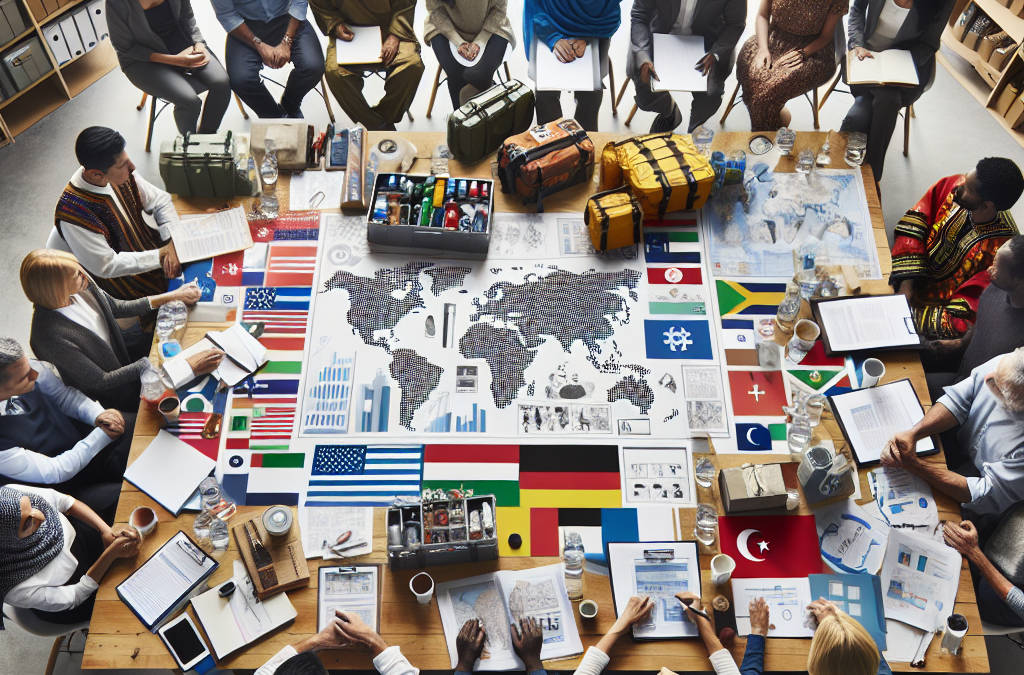
Understanding Cultural Diversity
Recognizing Different Cultural Norms
When I started working on community preparedness, I quickly realized just how diverse the communities I was dealing with were. Each group had its unique set of cultural norms that influenced how they interpreted risks and responded to emergencies. Understanding these differences became crucial. For instance, some cultures might prioritize family gatherings as a first response, while others rely heavily on institutional instructions.
It was a real eye-opener for me to see how different beliefs and values shaped people’s perspectives on safety and security. Engaging with various community leaders helped me gather insights into what those norms were. By spending time with them, I developed a better understanding of how to create a more inclusive and effective preparedness plan.
Without recognizing these cultural nuances, any preparedness plan could fall flat. It’s vital for us as planners to immerse ourselves in the community’s cultural outlook. A little effort goes a long way in enhancing trust, leading to a more resilient community when faced with crises.
Language Barriers
Language plays a huge role in how communities prepare for emergencies. In my experience, failing to accommodate language differences can leave entire communities in the dark about vital information. When I put together preparedness materials, I always made it a point to translate them into the predominant languages of those communities.
One time, working in a multilingual neighborhood, I collaborated with local schools to create bilingual pamphlets. The feedback was incredibly positive! It turned out that families were more likely to engage in preparedness activities when they understood the information in their own language.
Going beyond just translation, I learned that incorporating visual aids also helped overcome language barriers. Infographics, pictures, and easy-to-read bullet points could convey critical information even for those with limited reading skills. It’s all about making sure that everyone feels informed and involved in their own safety.
Community Engagement Techniques
Getting the community involved is another key aspect. I found that organizing workshops in different neighborhoods allowed for open conversations about preparedness. People were more receptive when they could discuss their concerns actively. This co-creation not only empowered the community but also ensured the plans resonated with their experiences.
We also discovered that using local events, like festivals or farmer’s markets, as platforms to share preparedness information was super effective! It created a laid-back atmosphere where people were willing to stop, chat, and learn without feeling overwhelmed by the seriousness of the subject.
Building relationships with community members is about trust. When they saw us genuinely interested in their needs, it became a partnership rather than just a top-down approach. Effective engagement leads to better preparedness and boosts morale, making everyone feel like they’re in it together.
Incorporating Community Values
Identifying Core Values
When the time came to incorporate community values into our preparedness plan, I was amazed at how much joy and pride people took in their customs. Each community I worked with had core values that defined them. For some, it was about coming together as a family during crises; for others, it was about maintaining traditions through challenging times. Understanding these values helped me design a plan that was truly reflective of each community’s spirit.
Aside from the values, I also learned the importance of honor in certain cultures. Many groups place a high value on respect and honor, with some even having rituals that involve ancestors during emergencies. By respecting and incorporating these traditions into our plans, we found deeper connection points with the community.
Ultimately, the takeaway was clear. If we wanted to build a community preparedness plan that truly resonated, we had to align it with their core values. This understanding fosters a natural sense of ownership among community members, leading to better engagement overall.
Utilizing Cultural Competence
Cultural competence is a skill I’ve invested a lot in mastering over the years. It enabled me to engage more effectively with diverse community groups. It’s not just about knowing a few facts; it’s about understanding and appreciating those differences. I always remind myself to be approachable and open-minded when interacting with different cultures.
One practical skill I honed was active listening. I truly took the time to listen and seek clarity on how people felt about various issues related to preparedness. This approach not only improved my knowledge but also made residents more comfortable in expressing their thoughts and concerns.
Ultimately, practicing cultural competence means that you’re committed to ongoing learning. Each interaction serves as a learning opportunity to understand how best to engage with communities, thus enriching both professional and personal experiences.
Building Trust Through Transparency
In my journey towards building community preparedness, I learned that transparency is vital in establishing trust. I made it a priority to communicate openly about what our preparedness plan entailed, how decisions were made, and who was involved. Residents appreciate honesty, especially when it comes from someone who genuinely cares about their well-being.
Creating an open-door policy where community members could approach us with their thoughts and suggestions was important. This not only built trust but also fostered a stronger partnership between us and the community. I realized early that people were more likely to engage in preparedness activities when they felt they were included in the process.
Finally, I found that consistently providing updates, particularly during emergencies, goes a long way in reinforcing that trust. By sharing real-time information and being upfront about challenges, we built a resilient community that remained proactive even in tough times.
Educational Outreach
Creating Targeted Educational Programs
When it came to educational outreach, I quickly identified the need for targeted programs. Not every community will respond the same way to general preparedness education, and that’s something I learned the hard way. By focusing on specific needs and challenges faced by distinct groups, we could create effective educational sessions.
I started partnering with local organizations and schools to help reach diverse audiences. We emphasized hands-on learning experiences, which resonated well with participants. This kind of engagement made them feel like they weren’t just students but active participants in their preparedness education.
Topic-wise, we tailored our programs to cover culturally relevant information that aligned with their values. For instance, incorporating examples from their everyday lives made the lesson plans more relatable. This approach allowed community members to see preparedness as not just a task, but a lifestyle.
Empowering Community Leaders
Empowerment is a big theme I’ve witnessed over the years. One of the most effective ways to enhance educational outreach is by empowering local leaders to take charge. I’ve found that training community leaders enables them to share knowledge with their own networks effectively. They often have established trust, which makes them credible messengers of preparedness.
I remember a particular instance where we conducted workshops specifically for community leaders. Instead of just handing them information, we encouraged them to share their perspectives and techniques for engagement. The outcome? A ripple effect where leaders could multiply the impact of the training by sharing it with their communities.
Empowering leaders not only educates but also fosters a sense of ownership over the preparedness process. They become champions of change and advocates within their communities, creating a more robust preparedness culture overall.
Leveraging Technology for Outreach
Technology has played a huge role in how I approach educational outreach. Digital platforms allow us to reach even the most remote communities. Utilizing social media, apps, and websites helped share information quickly and effectively. I started collaborating with tech-savvy individuals within the community to enhance our outreach capabilities.
Webinars and virtual workshops became a mainstay, especially during the pandemic, bridging the gap when in-person gatherings weren’t possible. We utilized storytelling and local examples, making our virtual interactions just as engaging as face-to-face meetings.
As we continued to innovate our outreach strategies through technology, we realized that using interactive platforms led to more engagement. Polls, Q&As, and “Ask Me Anything” sessions facilitated a dynamic two-way conversation that made residents feel included and heard.
Feedback and Continuous Improvement
Encouraging Community Feedback
One of the best lessons I’ve learned is the importance of gathering community feedback. After implementing our preparedness plan, I started creating simple channels for community members to share their thoughts and suggestions. Whether through surveys or community gatherings, the aim was to create a continuous cycle of feedback.
In my experience, community members often have insights that surprise you! Their unique perspectives helped me better understand what worked and what didn’t. For instance, a community member once mentioned that the information sessions were too formal, leading us to revise our approach and make it more inviting and relaxed.
Encouraging this feedback fosters a sense of collaboration and makes the community feel valued. People appreciate being able to voice their opinions and witness their feedback lead to tangible changes in the plan.
Implementing Changes Based on Feedback
Taking feedback seriously is crucial. I learned that when community members see their suggestions result in changes, it builds trust and engagement. Each time we adjusted our plan, based on their input, we showcased our commitment to doing what’s best for the community.
For instance, after receiving feedback on the accessibility of our meeting locations, we adjusted our venues to better accommodate everyone. Enabling all members of the community to participate enhances our preparedness efforts.
This iterative process of implementing feedback ensures that the preparedness plan adapts over time, staying relevant to the community’s evolving needs. Ultimately, it’s about creating a living document that grows alongside the community.
Establishing a Review Process
Lastly, establishing a regular review process ensures that everything stays on track. I made it a point to set quarterly meetings where we would assess the effectiveness of our preparedness efforts. During these meetings, we celebrated successes and identified areas needing attention or adjustment.
In our reviews, I’ve found that involving community partners brought additional value. They provided insights into how our plans were impacting the community positively or negatively. It was an excellent platform for collaborative problem-solving, enhancing both our plan and our relationships.
This commitment to review fosters accountability and transparency in the preparedness process, allowing for a smoother transition through challenges. It reminded all of us that preparedness is not just a one-time task but a continuous journey.
FAQ
1. What are some key cultural considerations in building a community preparedness plan?
It’s essential to understand cultural diversity, address language barriers, engage effectively with the community, incorporate their values, and always promote educational outreach.
2. How can language barriers affect community preparedness?
Language barriers can lead to miscommunication and misinformation about important safety measures, making it critical to create translated materials and use visuals to ensure everyone understands the information.
3. Why is community engagement important in preparedness planning?
Engaging the community fosters trust, ownership, and empowerment. It allows for the creation of a plan that reflects the needs and experiences of local residents, ultimately resulting in a more resilient community.
4. How do I empower community leaders to effectively communicate preparedness?
Providing training and resources for community leaders helps them share knowledge within their networks. This approach leverages their established trust and credibility, enhancing the overall outreach.
5. What role does feedback play in improving preparedness plans?
Feedback is crucial for making necessary changes to preparedness plans. It allows communities to feel heard, ensures that plans remain relevant, and fosters a culture of collaboration and continuous improvement.
by Preparation | May 10, 2025 | Preparedness
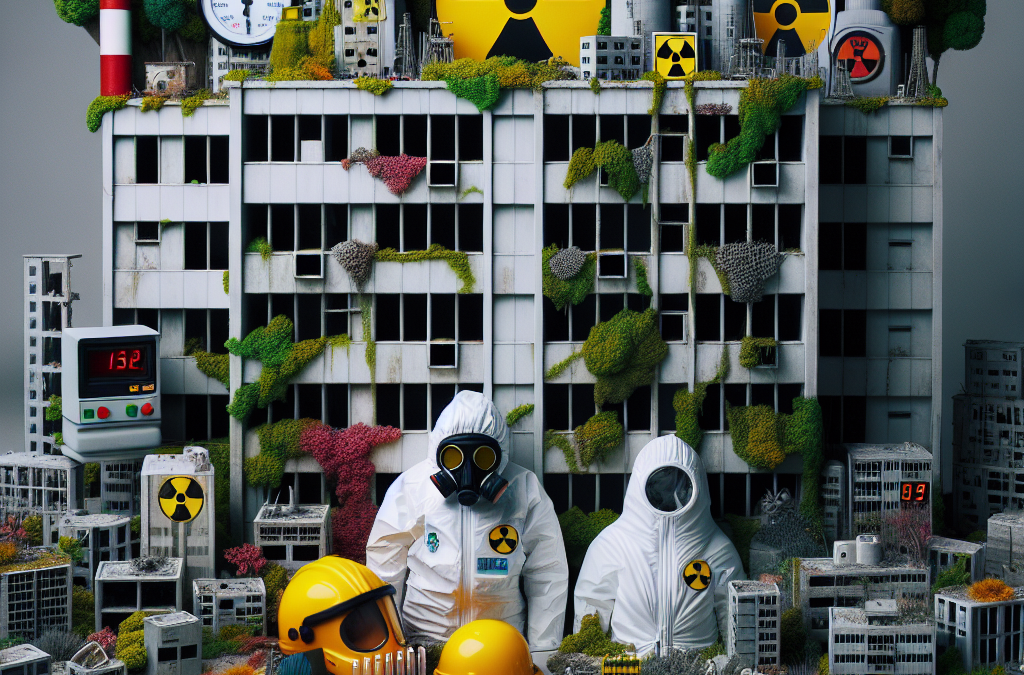
Human Health Impacts
Immediate Effects of Radiation Exposure
Let’s be real—radiation is no joke. When someone gets exposed to high levels of radiation, the immediate effects could be brutal. Things like nausea, vomiting, and fatigue can hit hard and fast. Honestly, you wouldn’t want to find yourself in that situation. It isn’t just about bad vibes; it’s about feeling physically awful.
These symptoms can onset very quickly after an acute exposure, often within hours. What’s scary is that some folks might not realize what’s happening to them at first. It can throw a wrench in your plans, making it essential to recognize the signs and seek help immediately.
In addition, the psychological aftermath can also be daunting. People often feel a sense of fear and anxiety about their health after these disasters, which can linger long after the physical symptoms fade away. That emotional toll is just as significant as the physical damage done.
Long-Term Health Risks
The long-term risks of radiation exposure can be even creepier. Cancer is the big bad wolf here. Those who’ve been exposed to significant radiation may have an increased risk of various cancers years down the line. It’s a grim truth that many don’t like to think about but ignoring it won’t help.
Other potential long-term effects include cardiovascular diseases and damage to your thyroid. Studies have shown that radiation can impact organs that we might not even immediately think about. Keeping an eye on your health post-exposure is crucial.
Your mental well-being plays a role too. Survivors often deal with anxiety and depression stemming from the event. It’s vital for folks to have access to mental health support to process what they’ve gone through and rebuild their lives.
Vulnerable Populations
And, of course, we can’t forget about vulnerable populations. Kids, pregnant women, and even the elderly are at greater risk during radiological events. Why? Their bodies are more susceptible, and the long-term effects can hit harder for them. It honestly breaks my heart when I think about how these disasters can impact those who are already vulnerable.
This vulnerability is a reminder for all of us to stay informed and prepared. When we know that certain groups are at a higher risk, it motivates us to create safer environments and advocate for better disaster preparedness.
The community plays an essential role here. Helping one another during crises—especially those most at risk—fosters resilience and supports recovery efforts across the board.
Environmental Impacts
Contamination of Land and Water
Now, let’s dive into the environment. One of the major issues following a radiological disaster is the contamination of land and water. The impact can last for decades, or even longer in some cases. Sites can become uninhabitable for a long stretch of time, and that’s a big deal!
Water sources can also be compromised, making them unsafe for drinking or irrigation. This can result in food shortages and health crises, creating a vicious cycle of issues. People need clean water, and when that gets messed up, it’s a problem shared by everyone.
As someone who has seen the effects of environmental disasters firsthand, I can say that the scars they leave can take generations to heal. It’s vital for society to develop robust cleaning and containment responses to deal with the fallout.
Impact on Flora and Fauna
Let’s talk about our furry and green friends. Radiological disasters don’t just affect people; they also have devastating effects on wildlife and vegetation. You can imagine that once an area is contaminated, the native species suffer, often leading to drastic declines in their populations.
This decline can disrupt entire ecosystems, creating imbalances that have long-lasting effects. It changes the landscape—both literally and figuratively—transforming vibrant areas into ghostly reminders of their former selves.
It’s sad to think about, but recovery for affected wildlife can take years. We really need to think about how we can mitigate these impacts ahead of time and preserve what we can.
Economic Consequences
Lastly, let’s touch on the economic fallout. After a radiological disaster, local economies can crumble. Property values can plummet, and businesses may close down for good. People are often hesitant to return—and who can blame them? The fear of radiation lingers long after the physical cleanup is done.
Tourism can take a massive hit as well, which can starve a community of much-needed revenue. With fewer visitors, local services suffer, creating a ripple effect of economic hardship. Recovery isn’t just about cleaning up; it’s about revitalizing a community.
As someone interested in marketing and community resilience, I believe we need to foster proactive approaches to recovery, so that when disaster strikes, communities aren’t left in the dust, financially or emotionally.
Preparedness and Response
Emergency Plans
So, how do we get ourselves set up for success? Well, emergency planning is a biggie. Communities need to create and communicate clear emergency plans for radiological disasters. This means everything from evacuation routes to communication methods for keeping everyone informed.
I remember a community drill I participated in; we learned about these plans firsthand, and it was honestly eye-opening. Preparedness isn’t just a bunch of jargon—it’s what can save lives when the crunch comes.
Having these plans in place also helps to mitigate panic and confusion when an actual disaster occurs. Clear communication can guide people and keep emotions at bay during a tense time.
Education and Training
Education is key! Folks need to know what they’re up against and how they can protect themselves. Community workshops could provide training on recognizing signs of exposure and how to decontaminate yourself if you find yourself in a disaster zone.
Kinda wild to consider how much power knowledge can give us. It can help individuals and communities band together and respond effectively, transforming a potentially chaotic situation into one where everyone knows what’s going on.
Having trained personnel ready to step in is vital too. First responders who have dealt with radiological threats can make all the difference in those early hours of a crisis. It’s refreshing to see communities prioritizing this level of preparation.
Community Engagement
Last but not least, community engagement is an essential piece of the puzzle. When people come together to prepare for potential disasters, it builds a sense of unity and resilience within the community. Sharing resources, planning, and participating in drills allows everyone to feel more secure and informed.
One thing I’ve noticed is that engaged communities handle crises better. There’s a certain trust that builds when people collaborate on preparation efforts. It’s reassuring to know that we can rely on each other when push comes to shove.
Plus, it’s pretty empowering to take action. People love being part of solutions, and when we rally together, we create stronger, safer environments for everyone.
Regulatory and Safety Measures
Government Regulations
Government regulations play a pivotal role in managing the risks associated with radiological disasters. There are strict rules dictated by organizations meant to keep us safe. These guidelines often revolve around proper containment measures, emergency response protocols, and worker safety measures.
Having those regulations in place is crucial—not just for preventing disasters but also for effectively responding when they do happen. I’ve seen communities that are proactive about implementing these standards set an example for others.
It can create a culture of safety where everyone knows their responsibilities and can act accordingly. In times of crisis, that culture can be life-saving!
Safety Training for Workers
Safety isn’t just about regulations; it’s personal, especially for those working in industries where exposure risks are higher. Regular training about safety procedures can empower workers to keep themselves and their colleagues safe. This kind of training can be lifesaving.
For example, learning to identify radiation hazards and how to mitigate those risks can create a safer workplace. Remember, those frontline workers become our first line of defense during a disaster.
So, when I think about safety training, it’s all about building a culture of vigilance. Workers should feel confident and equipped to face hazardous situations, and that starts with comprehensive training.
Community Involvement in Regulation
Lastly, community involvement in regulations is super important. It’s one thing to have regulations on paper, but when folks are involved in the process, it adds a layer of insight that’s invaluable. Communities can bring their experiences and knowledge to the table to create better regulations.
Public forums, discussions, and participation in licensing processes can result in regulations that truly reflect the community’s needs and concerns. This isn’t just top-down governance; it’s a collaborative approach that can foster trust.
From my experience, when local voices are heard, the regulations are often more effective and embraced by the community since people feel like they have a stake in their safety protocols.
Conclusion
In conclusion, understanding the risks of radiological disasters requires a multi-faceted approach. From grasping the health implications and environmental impacts to ensuring preparedness, response, and safety measures, it’s a lot to digest. But facing these challenges head-on can ultimately foster resilience and community strength.
My takeaway? It’s essential for all of us to stay informed, engaged, and prepared to tackle these very real risks together. When we band together and take knowledge to heart, we create safer worlds for our families and communities.
FAQ
1. What are the immediate health effects of radiation exposure?
Immediate effects of radiation exposure can include symptoms like nausea, vomiting, and fatigue. These symptoms can present themselves within hours of exposure, highlighting the need for prompt medical attention.
2. How does radiation affect the environment?
Radiation can contaminate land and water sources, making them unsafe for living organisms. It can disrupt ecosystems and lead to declines in plant and animal populations, impacting biological diversity.
3. Why is community engagement important in disaster preparedness?
Community engagement fosters collaboration and trust among residents. When people work together to prepare for disasters, they create a network of support that can make a significant difference in recovery efforts.
4. What role do government regulations play in preventing radiological disasters?
Government regulations set safety standards for industries and establish protocols that help prevent disasters from occurring. These regulations ensure that organizations are equipped to handle potential radiological risks effectively.
5. How can individuals prepare for a radiological disaster?
Individuals can prepare by creating emergency plans, participating in community drills, and staying informed about safety protocols. Being knowledgeable and ready can help mitigate the impacts of a radiological event.
This HTML article provides insight into the understanding of radiological disasters, structured to be informative and approachable. The tone is friendly and personal, aiming to both educate and engage the reader.
by Preparation | May 10, 2025 | Preparedness
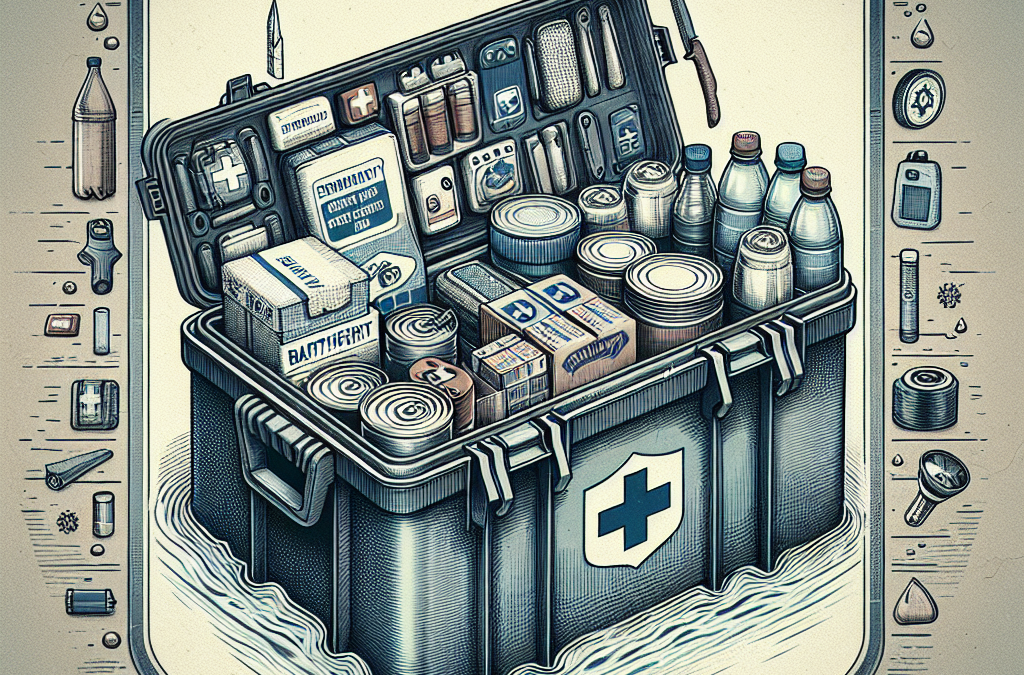
1. Choosing the Right Containers
Assessing Your Needs
When it comes to emergency supplies, the first thing I learned is that the choice of containers can make a world of difference. You want something that’s durable, breathable, and ideally waterproof. Think about the specific supplies you have—medications, food, gear—and how much protection each type requires.
For instance, if you’re storing items like batteries or electronics, a container with a good seal is key. Moisture can wreak havoc on these items, so I personally prefer hard plastic boxes that are designed for heavy-duty storage. They’re easy to stack, keep stuff organized, and keep moisture at bay.
Also, don’t forget to label everything! I’ve spent way too much time rummaging through unmarked boxes. A simple label maker or a permanent marker can save you from that chaos later on.
Material Matters
The material of your containers is just as important as the design. I’ve tried everything from cardboard to heavy-duty plastic, and let me tell you, plastic wins every time. It’s waterproof, resistant to pests, and can handle a bit of roughhousing during transport.
Metal containers are another option, especially for long-term food storage, but they can rust unless they’re coated. I learned the hard way to avoid fabric bags for anything other than light items. They soak up moisture and lose structural integrity over time.
Lastly, consider using vacuum-sealed bags for smaller items. They take up less space, and moisture is the enemy when you’re stocking up for emergencies. Anything I can minimize in terms of space that’s also moisture-proof is a win in my book!
Organizing Containers
It’s not just about having the right containers; it’s also about how you organize them. From my experience, it helps to have one container for each category: food, first aid, tools, etc. This way, when something goes down, you’re not playing hide and seek with your supplies.
I use clear containers whenever possible. This allows me to see what’s inside without opening them, which is a lifesaver when time is of the essence. Store similar items together and consider placing the most frequently used supplies on top, so they’re easy to grab.
Regularly go through your supplies to check expiration dates and ensure everything is in working order. This has saved me more than once from showing up to an emergency unprepared. No one wants to deal with expired band-aids or dead batteries!
2. Proper Storage Locations
Avoiding Damp Areas
Back in the day, I made the rookie mistake of storing my emergency supplies in the basement. It seemed logical until I realized it was prone to flooding and moisture buildup. Now, I keep my supplies in a dry, cool place—like a closet on the main floor or even a spare room.
Humidity is the number one enemy of emergency supplies. Areas like attics can get hot, while basements can get soggy. Find a happy medium that’s also protected from direct sunlight since UV rays can affect the integrity of your supplies.
If you must use a basement or cellar, invest in some moisture-absorbing products, like silica gel packs or a dehumidifier. Trust me, it’s better than replacing soggy supplies!
Accessibility Matters
As much as I want my supplies to be safe, I also need them to be easily accessible. I learned that this balance is crucial. After all, during an emergency, quick access can be the difference between calm response and chaotic panic.
Consider placing supplies in a location that everyone in your household knows about. I even made a little map and put it on the fridge. That way, if I’m not home, my family can still grab what they need quickly.
In addition, keep an emergency kit in your car, especially if you live in an area prone to natural disasters. I made it a point to have tools and snacks easily reachable in case I ever get stranded.
Temperature Control
Extreme temperatures can damage certain supplies, so I always consider climate control for my emergency kits. For example, batteries can leak in heat or cold, and food supplies may spoil or lose integrity.
I recommend keeping non-perishable foods and items like batteries inside your home rather than in the garage. Garage temperatures can fluctuate dramatically over the seasons and aren’t ideal for sensitive supplies.
If you’re in a particularly hot area, consider investing in insulated containers. They can protect against extreme temperatures while still being lightweight and easy to maneuver.
3. Regular Maintenance
Periodic Checks
Let me tell you, regular checks are a must! I learned the hard way that just stashing supplies and forgetting about them isn’t the way to go. Set a reminder on your phone every six months to go through your stuff.
During each check, I assess the condition of my containers and the supplies within them. Any outdated items get tossed, and I take note of what needs to be replenished. It keeps things from getting stale—literally and figuratively!
Seeing everything laid out also gives me peace of mind. I’ve made this a family activity, getting everyone involved so we all understand where things are and what we might need in the future.
Updating Supplies
As I go through my supplies, I often find that some things need upgrades. Maybe I’ve found better items that are lighter or more durable since the last time I stocked up. Each review session is a chance for me to improve what I’ve got.
Keep an eye out for seasonal items. For example, during winter, I make sure my kit has extra blankets and warm clothing. In the summer, it might be better hydration options. It’s all about adapting to the environment you’re in.
Don’t only focus on physical supplies! If you’ve learned new emergency techniques or first-aid methods, make sure to update your knowledge. Maybe even take a quick refresher course with your family. It’s a great way to bond and prepare at the same time.
Replacing Expired Items
One of the biggest pitfalls I encountered was not keeping an eye on expiration dates. I cannot stress enough how important it is to regularly replace expired items. Nothing worse than needing a first-aid kit only to find out the supplies inside haven’t been viable for years.
I usually keep a checklist handy that notes what we have on hand and when it expires. A simple spreadsheet does wonders. Time flies, and it’s easy to lose track of which items need replacing.
Make replacing expired items a part of your routine checks. This not only ensures everything is fresh, but it also gives you peace of mind knowing you’re truly prepared.
4. Keeping Supplies Clean
Hygiene Practices
In my experience, maintaining cleanliness in emergency supplies is often overlooked. But let’s face it: dirt and germs have no place in a kit meant to aid us in difficult times. I regularly wipe down my containers and check that everything inside is clean.
Especially with food items, hygiene matters a ton. I always ensure hands are washed before I restock supplies. If you’re putting fresh items inside, even better—everything should be as sanitary as possible to avoid contamination.
Additionally, don’t forget to clean your tools. Whether it’s a multi-tool or a set of flashlights, keeping them clean not only preserves their function but also extends their lifespan. It’s the little things that make a big difference!
Sealing Food Properly
Food storage is another key area where I recommend taking extra precautions. I’ve gotten into the habit of using sealable bags or vacuum-sealed containers for all perishable items. This helps keep ambient moisture and pests at bay.
This practice has saved me from many instances of moldy food. Nothing ruins your day faster than pulling out emergency supplies and finding they’re spoiled! I also try to use Food-Safe containers to ensure it won’t leach harmful chemicals.
Labeling is also super important here. I write down the purchase or expiration dates directly on the bags! That way, I can quickly know what to toss without digging through everything.
Mold Prevention
I cannot stress enough how dangerous mold can be, especially in emergency supplies. I’ve encountered it before and learned to be vigilant. Ensure your containers are completely dry before sealing them and always check your stored supplies regularly.
Use moisture absorbents inside your containers, especially when storing food. Silica gel packs or activated charcoal are great for keeping things dry. Remember, a little precaution goes a long way when it comes to preventing mold growth.
Don’t underestimate the power of ventilation either. I store some items in a well-ventilated room to deter any moisture buildup, which surely cuts down the chances of mold craving your supplies.
5. Planning for the Unexpected
Conducting Drills
I’ve found that planning for emergencies isn’t just about having supplies, but knowing how to use them! I conduct regular drills with my family to ensure everyone knows where the supplies are and how to handle different situations.
During these drills, we practice scenarios like power outages, natural disasters, or any situation where we might need to rely on our emergency supplies. It’s actually been pretty fun—kind of like a practice adventure!
Realistic scenarios give everyone the chance to get familiar with emergency protocols. And to ensure anyone can utilize the supplies effectively, we discuss the contents of our kits. Knowing how to act calmly is just as important as having the right stuff!
Understanding the Use of Supplies
Just having supplies isn’t enough; understanding how to use them is crucial. For instance, I took the time to learn how to use a tourniquet correctly and practice what steps to take in case of injury. These aren’t just gimmicks; they save lives!
I recommend keeping an instruction manual or guideline with your supplies. It doesn’t hurt to have a visual reference to follow, especially under pressure. Sometimes just reading something while in a chaotic moment can bring clarity.
Moreover, I try to gather resources like first-aid guides and emergency contact numbers and make sure everyone can read through them. Sharing knowledge is a major part of being prepared!
Updating Your Plan
Finally, I realized that as life changes, so should our emergency plans. Check in on your emergency plan periodically, especially if you’ve moved houses, added family members, or changed your lifestyle in some way.
This might mean updating contact lists or re-evaluating the supplies you have on hand. I found that making adjustments helps in keeping everything relevant, which is key when the unexpected happens.
Think ahead and anticipate potential challenges you could face in the future. Keeping flexibility in your plan ensures readiness for whatever might come down the road!
Frequently Asked Questions
1. How often should I check my emergency supplies?
It’s a good idea to check your emergency supplies every six months. This helps ensure everything is fresh and functional. During these checks, make sure to replace expired items.
2. What type of containers are best for storing emergency supplies?
Durable, waterproof plastic containers are usually the best. They protect against moisture, pests, and are easy to stack for organized storage. Make sure to label them, so you know what’s inside!
3. Can I store emergency supplies in my basement?
It depends. If your basement is prone to moisture, it’s better to keep supplies elsewhere to avoid water damage. If you do store them in the basement, consider using moisture-absorbing products.
4. What should I do with outdated food and supplies in my kit?
Outdated food and supplies should be discarded immediately. Replace them with fresh items to ensure you’re always prepared. This should be part of your regular check-ups.
5. How do I plan for emergencies with my family?
Conduct drills with your family and discuss your emergency plan. Make sure everyone knows where supplies are kept and how to use them. Reinforce learning through realistic scenarios and keeping guidelines handy!

by Preparation | May 10, 2025 | Preparedness
Understanding Off-Grid Living
What is Off-Grid Living?
So, diving into off-grid living has become a bit of a passion project for me over the years. It’s not just about
removing yourself from the rat race; it’s about embracing a lifestyle that’s as self-sufficient as it gets. In
essence, off-grid living means you’re not relying on public utilities. We’re talking water, electricity,
sewage—you’re essentially creating a little self-sustaining world for yourself.
Why would anyone want to live off the grid, you ask? Honestly, it varies from person to person. For some, it’s
an escape from the hustle and bustle of urban life. For others, it’s a way to reduce their environmental
footprint. And let’s not forget those who just want to give a big middle finger to utility companies!
But like all big lifestyle changes, it comes with challenges. I mean, no one tells you how tricky it can be to
find clean drinking water or how often you’ll have to wrestle with your solar panels! But don’t let that scare
you away. Trust me; the freedom is absolutely worth it!
Essential Skills for Off-Grid Living
Self-Sufficiency Skills
One of the biggest lessons I’ve learned is that you’ve gotta have some serious self-sufficiency skills under your
belt. Whether it’s growing your own food or learning how to fix what’s broken, the more skills you acquire,
the more confident you’ll feel in an off-grid setting. I actually started small—I learned to garden and even
dabbled in canning jars like a grandma on a mission!
Don’t overlook the importance of cooking from scratch. You’d be surprised how many convenience foods you take
for granted until they’re not available anymore. Being able to whip up a meal from your pantry is a must,
my friend. Let’s just say having a good recipe book on hand has become more precious than gold!
And let’s talk DIY repairs. You’ll need to channel your inner handyman (or woman!). From fixing leaky roofs to
simple plumbing issues, being a bit of a jack-of-all-trades will save you a ton of cash and headaches down the
road.
Choosing the Right Location
Land Selection Criteria
Location is everything! Seriously, this is where it all begins. After some soul-searching, I learned to look
for a piece of land that really spoke to me. For me, access to fresh water was non-negotiable. I made sure to
look for spots near rivers or streams—water is life!
Then there’s the aspect of sunlight. If you’re relying on solar power (which I totally recommend), scout out a
location with plenty of sun exposure. You don’t want to be living in a shadowy nook wondering why your solar
panels aren’t doing their job.
Lastly, always check local regulations. Some places are all about that free spirit vibe, while others are super
strict. It’s crucial to know what you can—and can’t—do with your land. I once thought I could build a little
cabin wherever I wanted. Spoiler alert: I couldn’t!
Building Your Off-Grid Home
Design and Construction
Let’s chat about building your off-grid home—this part is thrilling, but also kinda daunting! The design of
your house is super important. I learned that opting for smaller, energy-efficient designs can make a world of
difference in resource management.
And hey, building DIY can be a satisfying option! But be prepared for a steep learning curve. I didn’t know
squat about construction when I first started. I watched tons of YouTube videos and picked up a skill or three.
Just remember, good quality materials go a long way in durability.
Also consider waste management. I know, I know, not the sexiest topic but critical nonetheless. Composting
toilets became my best friend, and now I can’t imagine living without one. Much easier than traditional plumbing
and friendlier to the environment—win-win!
Energy Independence
Renewable Energy Sources
Alright, let’s geek out over energy independence! One of the first things I invested in was solar panels. The
sun is a magical thing; harnessing it can power your living space and reduce your reliance on traditional
energy sources. I swear, watching my energy bill drop felt like Christmas morning every month!
Wind turbines are another rad option. Depending on your location, setting up a small turbine can further boost
your energy production. Just be aware of your surroundings—trees and other obstructions can really mess with
your wind flow.
Batteries for energy storage are an absolute must if you want to maintain independence. I learned the hard way
just how crucial this was during cloudy days or storms. Investing in quality batteries made all the difference,
and trust me when I say you don’t want to run out of power when you need it most!
Fostering Community Connections
Building Relationships
Living off-grid can sometimes feel lonely, especially if you’re a social butterfly like me! This is where
building community connections comes in. I made it a point to reach out to my neighbors. Let’s just say the
potlucks have been life-changing for both my stomach and my social life!
Think about joining local off-grid groups or communities—online or in-person. These folks can share knowledge,
lend a hand during tough times, and help you feel less isolated. Seriously, there’s just something about being
with like-minded people that’s comforting.
Lastly, don’t underestimate networking for resources. A neighbor might have a gadget you could borrow, or maybe
they’re looking to swap skills. Building those social ties can make your off-grid journey smoother and more
enjoyable!
FAQ
1. What do I need to start living off-grid?
To start off-grid living, you’ll need essential skills in self-sufficiency, a good location, a plan for your
home, energy solutions, and community connections for support.
2. Can I live off-grid with kids?
Absolutely! Many families thrive while living off-grid. The key is to involve your kids in the process so they
can learn about sustainability and self-reliance alongside you.
3. What are the legal requirements for off-grid living?
Legal requirements vary depending on location. Always check local zoning laws, building codes, and permits
needed for off-grid systems.
4. How do I deal with isolation while living off-grid?
Combat isolation by fostering local community ties, joining groups focused on off-grid living, and regularly
reaching out to friends and family.
5. Is living off-grid expensive?
Initial setup costs can be high due to land purchase and building. However, long-term expenses can be lower since
you’re not relying on utility services. It’s an investment in sustainability!
by Preparation | May 10, 2025 | Preparedness
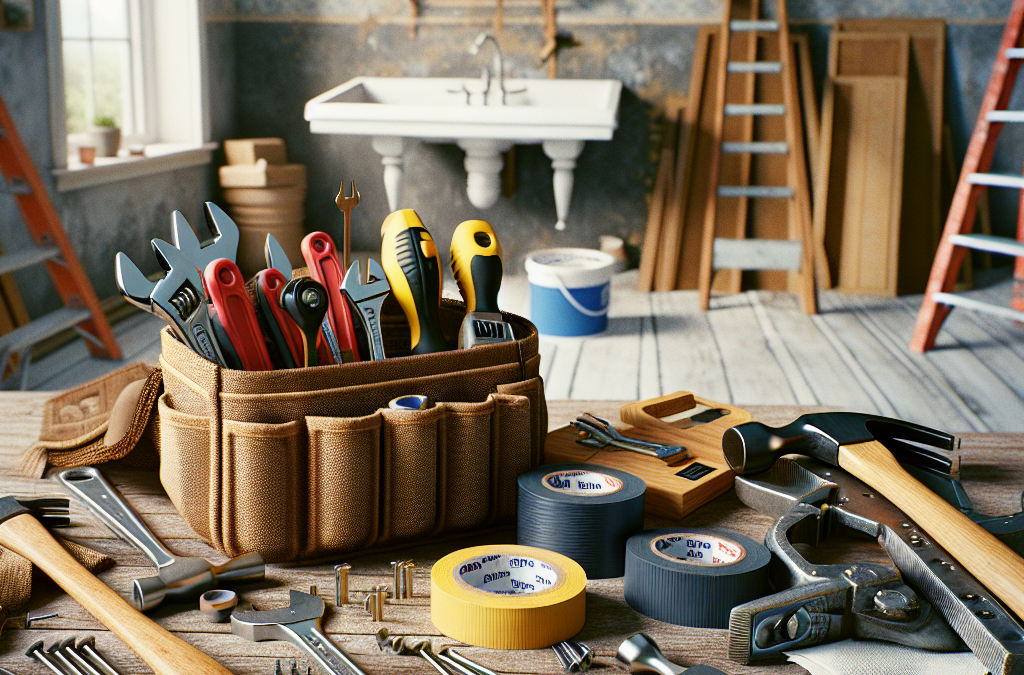
Dealing with Leaky Faucets
Understanding the Basics
Let me tell you, nothing’s worse than a dripping faucet keeping you up at night. I’ve learned that understanding the anatomy of your faucet is the first step in diagnosing the problem. Depending on whether you have a cartridge, compression, ball, or ceramic disc faucet, the repair steps will vary slightly.
On top of that, it’s crucial to know how to turn off your water supply. I once made the mistake of diving into a repair without shutting the water off first, and boy, did I regret it! Always locate your main shut-off valve.
Finally, gather your tools—wrenches, screwdrivers, and replacement parts. Being equipped ahead of time can save you tons of headaches during an emergency!
Common Causes of Leaks
As I’ve gotten my hands dirty over the years, I’ve realized there are a few typical culprits behind leaky faucets. Most often, it’s just a worn-out washer or O-ring. These little pieces can wear down over time due to constant use. It’s pretty easy to switch them out once you’ve got the right parts!
Another thing you might find is mineral buildup. Especially if you live in an area with hard water, those pesky deposits can cause your faucet to act up. Regular cleaning and maintenance can really help keep this under control.
Not to forget, if the leak persists, there might be a more severe issue lurking under the surface, potentially requiring a plumber’s expertise. Don’t hesitate to call in the pros if you’re in over your head!
Step-by-Step Repair Process
Fixing a leaky faucet is often easier than you might think! Start by taking off the handle, which usually involves unscrewing a few screws. Once it’s off, you’ll be able to access the cartridge or the assembly inside. Make sure to take a picture of how it looked for reference.
Next, replace any worn washers or O-rings. This step might be as simple as unscrewing and putting new ones in place, but hey, easy mistakes can lead to bigger headaches. Pay attention to what you’re doing!
Once everything is back together, slowly turn your water supply back on and check for leaks. You’ll be surprised at how a tiny change can make a huge difference.
Fixing a Running Toilet
Identifying the Problem
Oh boy, a running toilet is probably one of the most common—and ignored—issues I come across. First things first, let’s identify the problem. Usually, it’s caused by a faulty flapper or an issue with the float mechanism. I had my fair share of “technical difficulties” before I learned to troubleshoot properly.
Check inside the tank and see if the flapper is seating correctly. If it’s old or warped, it’s time to swap it out. A little investment here can really keep your water bill in check!
Next, observe the float ball or float arm. If it’s stuck, the water will keep running. You can usually fix this by adjusting the height or replacing the entire assembly if needed.
Tools and Materials You’ll Need
Before you jump into the repair, gather your supplies. Flush these items through your checklist: a new flapper, adjustable wrench, and perhaps a screwdriver or two. I’ve tried it before without the right tools, and trust me, it’s not a good time!
While you’re at it, keep some cleaning gloves handy. Getting into the tank can be a bit messy, and it’s best to protect your hands. Plus, cleaning while you’re in there never hurts!
Also, don’t forget a towel or two for cleanup. Let’s face it, accidents happen—even to the pros!
A Simple Repair Guide
Once you have everything prepped, let’s get down to business! Start by turning off the water supply to the toilet, then flush to empty the tank. This step makes it far less messy.
Now, replace the flapper if it looks worn. Installing a new one is usually as simple as hooking it over the pegs on the flush valve. If everything looks good there, check the float mechanism. Make sure it moves up and down freely.
After that’s all set, just turn the water back on and check to see if everything functions properly. I can’t tell you how satisfying it feels to stop a running toilet!
Unclogging Drains
Recognizing Clogs
So, let’s talk about one of life’s biggest annoyances—clogged drains. I can’t tell you how many times I’ve faced this issue, especially in the kitchen after cooking up a storm. Understanding the signs of a clog is key; slow drainage or strange noises are usually the first indicators.
If you’ve noticed a gurgling sound when you run water, it often suggests that there’s a blockage somewhere. Also, if multiple sinks are backing up at once, it’s likely an issue with the main drain instead of just one sink.
Recognizing these signs early can save you a lot of fuss later on. Give your pipes a good visual check now and then—trust me, future you will thank you!
Tools for Unclogging
I’ve learned through trial and error that having the right tools for this job makes all the difference. A plunger is a must-have; it’s like the Swiss army knife for drain issues. A snake is also fantastic for deeper clogs. Having both at your disposal makes your DIY arsenal much stronger!
Additionally, you might want to stock up on some natural drain cleaners. I prefer using baking soda and vinegar because they’re effective and less harsh than chemical options. But, I’ll admit, there have been times I’ve had to pull out the big guns!
Lastly, have some old towels or rags on standby to clean up any spills or mess that may occur during the process. It’s better to be over-prepared than to get caught in an unexpected situation!
Clearing the Clog
Alright, let’s get to work clearing that clog! Start with the plunger—press down firmly to create a seal, and give it a good few pumps. You’d be surprised at how often this works, even on stubborn clogs!
If that doesn’t do the trick, it’s time to break out the snake. Insert it into the drain and twist while pushing forward. It’ll catch any hairs or gunk along the way. At this point, I’ve always found patience to be key—a few twists and pushes often yield the best results.
After you feel like you’ve done all the work, run some hot water down the drain to help wash everything free. In my experience, flushing the drain afterwards is often the best part of the whole process!
Sealing Drafty Windows
Identifying Drafts
Let’s not forget about those pesky drafts during winter. I can’t tell you how many times I’ve cranked up the heat only to feel cold air creeping in through the windows. The first step is to check where the drafts are coming from, and believe me, it can save you a ton on your heating bill!
Feel around the edges of your windows with your hands or use a lit candle to spot any errant drafts. If the flame flickers, you’ve got a culprit! Once you pinpoint the sources, you can focus your efforts on sealing them up.
Be thorough; even the tiniest gaps can cause a significant chill. I’ve had great success by doing a full inspection of all the windows, especially those that seem to be the oldest or most exposed to the elements.
Materials for Sealing
When it comes to sealing drafts, you’ve got options! Weather stripping is a great place to start. I usually opt for adhesive-backed foam tape as it’s super easy to use and surprisingly effective.
Then there’s caulk—my go-to for sealing gaps around the window frame. It’s like magic for keeping cold air out and warm air in. Keep in mind to get the right type of caulk for indoor or outdoor use!
Another idea is to use window film. This is a great temporary solution for when you need extra insulation. I’ve had plenty of success using it during the winter months.
Executing the Seal
The sealing process is relatively straightforward! Start with cleaning the window surfaces to remove any dust or old residue. You want the adhesive to stick well, right?
Next, apply your weather stripping around the edges, making sure to cut it to the right lengths. Don’t worry too much about being precise; it’s more about insulating that space!
For caulk, cut the tip of the tube, and apply it along the seams where the window meets the frame. Smooth it with your finger to ensure a solid seal. Once you’re finished, test for drafts again. You’ll be amazed by the difference!
Understanding Electrical Issues
Common Electrical Problems
Now, let’s dive into something a lot of folks dread—electrical issues. I get it; the thought of dealing with wires can be intimidating. But trust me, most common problems are pretty manageable! Flickering lights, tripped breakers, or dead outlets are signs that you might need to fix something.
Flickering lights can mean a loose bulb or a faulty fixture. If it’s a circuit breaker tripping, you might have an overload or a short circuit. Keeping an eye on these signs will help you avoid bigger, more dangerous problems in the long run.
Always remember: if you’re feeling uneasy, or if the issue requires more than your comfort level, don’t hesitate to bring in a good electrician!
Tools to Have on Hand
What I’ve learned over time is that having the right tools can make a potentially scary situation much easier. A multimeter is a must—I can’t tell you how many times that little device has saved me from guessing. It helps you measure voltage, current, and resistance.
I also recommend getting a good insulation tester and some safety glasses. A lot of electrical work can be messy, and the last thing you want is debris getting in your eyes.
Let’s not forget gloves, either. Ensuring you have proper personal protective equipment can’t be overemphasized!
Simple Repairs to Consider
When tackling minor electrical repairs, always start by turning off the power to the area you’re working on. Safety first, right? Once that’s done, unscrewing light fixtures or replacing outlets is usually as simple as matching colors to reconnect. Just be cautious and go slowly!
If you’re dealing with circuit breakers, resetting them is usually just a matter of flicking the switch back. If they keep tripping, it might be time to consult a professional to check for shorts or overloaded circuits.
In my experience, taking an afternoon to familiarize yourself with your electrical system and practicing some of these repairs can be incredibly empowering. You’ll gain confidence and maybe even a few new parties stories!
Conclusion
In conclusion, knowing how to handle these common home repairs can save you a lot of money and stress in emergencies. From leaky faucets to drafty windows, having some basic skills under your belt makes you much better equipped to tackle household issues. I hope that by sharing my experiences and knowledge, you’ll feel inspired to take on your own DIY challenges!
FAQs
1. Can I fix a leaky faucet myself?
Absolutely! Most leaky faucets can be repaired with some basic tools and a bit of knowledge on the type of faucet you have.
2. How do I know if my toilet is running due to a faulty flapper?
If you hear your toilet refilling frequently without you flushing it, or if you notice water trickling into the bowl, it’s likely the flapper needs replacing.
3. What should I do if I cannot unclog my drain?
If plunging and snaking don’t work, it may be time to call a plumber. They have specialized tools to handle tougher clogs.
4. Is window film effective for sealing drafts?
Yes! Window film can add an extra layer of insulation during colder months and is easy to apply.
5. When should I call a professional for electrical issues?
If you’re feeling uncertain or if the repairs involve complex wiring, it’s always best to call an electrician for safety reasons.


