
by Preparation | May 11, 2025 | Preparedness
Planning Your Adventure
Choosing the Right Location
When planning a wilderness trip, you’ve got to think carefully about location. I personally recommend selecting a spot that suits your skill level. For beginners, a nearby forest or a national park with clear marked trails is perfect. As you get more comfortable, venturing into more rugged terrain becomes exciting. Just remember to scout out potential hazards in the area, like wild animals or unstable weather conditions.
Also, consider the season you’re heading out. Each time of year brings unique challenges and rewards. For example, springtime might feature blooming beauty but also unpredictable rain. On the flip side, winter hikes can be breathtaking with that pristine snow, but they demand more careful planning. Check weather forecasts and prepare accordingly—it can make or break your adventure.
Don’t forget to inform someone about where you’ll be. Whether it’s a friend or family member, having someone know your whereabouts can add an extra layer of safety, just in case things go sideways. Trust me, that little bit of precaution can give you peace of mind while you’re out enjoying the wild.
Essential Gear and Supplies
Your Packing List
So, let’s chat about gear. The essentials can vary widely depending on your destination and duration of stay. Generally, I always pack a sturdy backpack, a reliable water filter, and a first-aid kit. Trust me, you don’t want to be stuck with no way to purify your water, nor do you want an injury to turn into an ordeal.
Along with safety gear, having extra layers of clothing is key. There’s nothing worse than getting soaked or too cold because you didn’t plan for changing weather. I often bring a lightweight rain jacket and a warm layer, just in case. You can always take off layers, but being underdressed can lead to serious risks out there!
And let’s not forget about food. Pack snacks that provide quick energy, like nuts or energy bars. In a survival situation, having food that can give you sustenance without needing an elaborate setup is crucial. Remember to keep your food stored safely, too; those curious animals will be on the lookout for any opportunity!
Fire Making Skills
Different Methods to Start a Fire
Fire can seem daunting to start in the wild, but it’s so important. I love practicing various methods at home first, like using matches, lighters, and even fire starters like cotton balls soaked in petroleum jelly. Each method has its strengths. Matches are reliable, but lighter can be easier to manage.
Then, there are traditional methods like the bow drill—definitely a skill worth practicing. It may take practice, but when you finally get that ember, it’s incredibly rewarding. Even being in the wilderness brings back memories of my first successful fire! Nothing beats that warm glow after a long day of hiking.
Remember to gather tinder, kindling, and fuel wood before you start. Dry leaves, small twigs, and even bark work wonders for tinder. I often find that preparing your fire site, making a little teepee structure, helps keep the flames going strong once you get it lit. And always practice fire safety: have water at hand, and never leave a fire unattended.
Water Sourcing and Purification
Finding Clean Water
Water is another survival essential that can sometimes be overlooked. I’ve experienced firsthand how vital it is to have a reliable water source. Streams and rivers are typically your best bet, but you need to assess the water quality. Getting too close to human activity can lead to contamination, so it’s best to source your water upstream.
If you can’t find running water, rainwater collection can be a lifesaver. Using tarps or clean containers, I’ve gathered water during storms, and it doesn’t get much fresher. But always remember, collecting rainwater requires some foresight and having the right gear ready.
Never drink untreated water straight from nature without purifying it first! I carry a portable water filter wherever I go. Boiling is also a reliable method; if you can get a fire going, that’s a surefire way to kill off harmful bacteria. Just be mindful of how much fuel you use for boiling—make it count!
Navigation and First Aid
Reading Maps and Compasses
When wandering in the wilderness, knowing how to navigate is crucial. I remember my first trip without a map—I felt adventurous until I realized I was completely turned around. It’s important to familiarize yourself with reading topographical maps and using a compass, as they can prevent you from getting lost or worse.
Always practice your skills beforehand. Using landmarks along with your compass gives you confidence in your ability to find your way. A good tip is to locate several reference points on your map before heading out. This way, you’ll be able to tell how far you’ve walked and determine your location more easily.
In addition to navigation, being prepared with first-aid knowledge can save lives. Knowing how to treat common injuries like sprains or cuts helps keep spirits high on a trip. I’ve taken courses myself, which made me feel much more secure about what to do if something goes wrong. Plus, having a first-aid kit stocked and accessible is essential!
Conclusion
Wilderness survival is all about being prepared and knowing the skills to handle different situations. The more you know, the more confident you’ll feel heading out into the wild. Always remember, practice makes perfect, and learning from each trip only adds to your expertise.
FAQ
What should I pack for a day trip into the wilderness?
An ideal packing list includes water, snacks, a first-aid kit, a knife, a fire starter, and appropriate clothing. Always ensure you have essentials handy to keep safe and comfortable.
How do I start a fire without matches or a lighter?
Using methods like the bow drill or fire steel can help you start a fire without traditional means. It requires practice, so give it a go before you’re in a survival situation!
Where can I find clean drinking water in the wild?
Look for streams or rivers, ideally upstream from any human activity. Rainwater collection can also provide fresh water. Always remember to purify any water before drinking.
What are the best navigation tools for wilderness survival?
A good quality map and compass are essential. It’s also beneficial to have GPS devices, but always have a backup in case batteries die or you lose service.
How can I improve my first-aid skills for wilderness trips?
Taking certified first-aid courses is the best way. They provide hands-on experience, which is invaluable. Additionally, reading books or guides on wilderness first aid can be helpful.
by Preparation | May 11, 2025 | Preparedness
Evaluate the Situation First
Assess the Damage
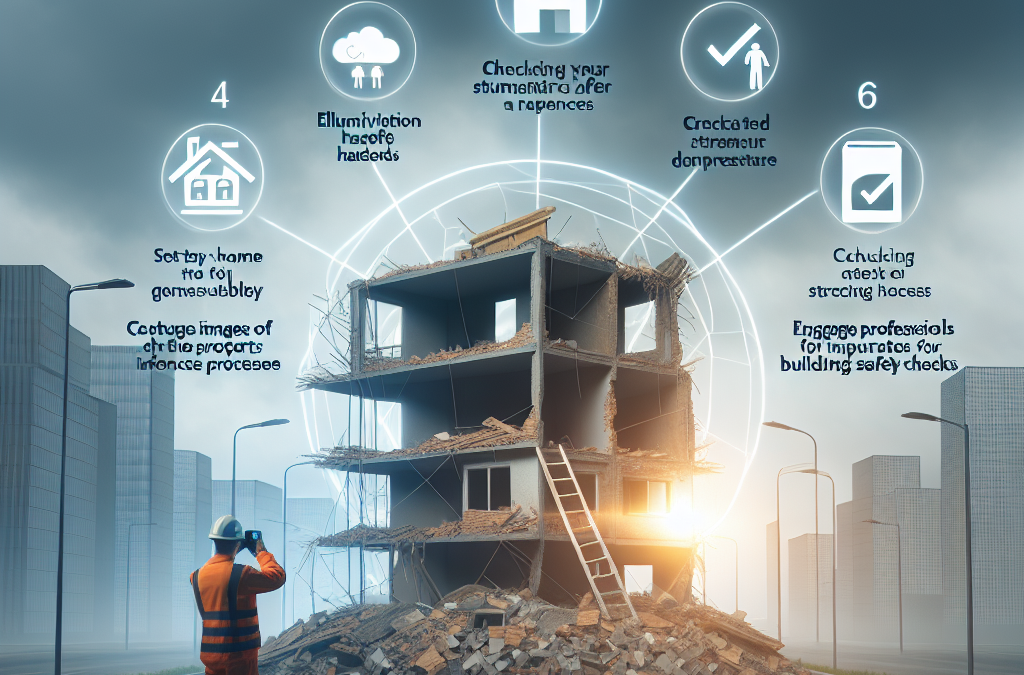
Before I ever set foot back in my home after a disaster, I always take a moment to stand back and really look at the property. It’s crucial to recognize potential hazards like downed power lines, damaged structures, or broken glass. Going in without checking might seem tempting, but trust me, you don’t want to get caught off guard.
I’ve learned to have a little checklist in my head: look up for anything that might fall, check the ground before I step, and most importantly, listen for anything unusual. If it feels unsafe, I’ll wait for professionals to give the all-clear.
Remember that sometimes the biggest danger isn’t always visible. Mold can set in almost instantly in a water-damaged home, and inhaling those spores isn’t something anyone wants to deal with. If there’s flooding, better to err on the side of caution!
Check for Utility Safety
Once I’m certain it’s somewhat safe outside, I pay close attention to my utilities. I walk to the main gas line and look for any leaks – a whiff of gas is a red flag. If I smell anything weird or I’m unsure, I don’t take any chances; I turn off the main valve and leave the area.
Next, I check the electricity. If I see any sparking or damaged wires, I know it’s best to keep a distance until an expert comes over. Sometimes, I’ll try to look at my circuit breaker too, but I always keep my safety gear handy just in case.
Water supply is another thing I check. If the water system is compromised, I make sure to rely on bottled water until I know it’s safe to use again. I’ve made the mistake of thinking tap water was okay before, and let’s just say it didn’t end well!
Listen to Local Authorities
After assessing my own property, I tune in to what local authorities are saying. This is a biggie! I always monitor news reports and social media updates to get the latest news about evacuation areas or safety notices. Sometimes, the information they provide can save me a lot of headaches.
It’s also good practice to keep my phone charged – it’s amazing how often I need it for alerts. If disaster strikes, things can change on a dime, and having the latest info is key. It’s best to follow the guidelines they provide, even if it throws a wrench in my plans.
Community meetings can be really helpful too. If they’re held in my area, I take time to attend. They often give out useful advice about recovery services, shelters, and cleanup efforts. Connecting with neighbors also brings a sense of community that can be so comforting during tough times.
Document Everything
Take Photos for Insurance
One of the first things I do when I think it’s somewhat safe is to grab my phone and start snapping pics. It’s wild how much damage can be inflicted, and having a visual record for my insurance company is a lifesaver. I make sure to photograph everything – the exterior, interior, damage up close, you name it.
If my home insurance process has taught me anything, it’s that proof is everything. The more detailed my documentation, the better chance I get a fair settlement when the dust settles. I also make sure to take pictures of what I’m salvaging, like furniture or other items, just to keep track.
Loyal to my organizational habits, I sometimes even jot down notes on each item – when it was purchased, estimated value, and condition. Yes, I know it sounds tedious, but trust me, it pays off!
Keep Records of All Communications
I’ve learned the hard way that keeping a record of conversations with my insurance agent, contractors, and even city officials is really important. I always use a notebook or my computer to log who I talked to, what they said, and when we spoke. Seriously, details can get fuzzy when stress is high.
When I reach out to my insurance company, I document every interaction. I note down claim numbers and the names of the people helping me. Having that information organized and accessible can make follow-ups way less daunting. I’m basically creating a mini-history of my recovery!
This documentation helps in case disputes arise later about coverage or payment. I never want to be in a situation where someone says they didn’t say something – it’s like he-said-she-said, but with a lot more at stake.
File a Claim as Soon as Possible
Timing is everything when it comes to filing insurance claims post-disaster. I learned to jump on it as soon as I feel safe enough to start the process. My mindset is: the quicker I file, the quicker I can start the recovery process!
Every insurance policy has time limits. I keep a close eye on those dates to ensure nothing slips through the cracks. If I miss a deadline, I might as well be throwing my money out the window.
Getting all my documented details together for the claim is super important. I organize photographs, bills, and repair estimates to present a solid case. When I make the effort to compile everything ahead of time, it makes the submission process a lot smoother.
Stay Connected and Informed
Establish a Communication Plan
Finding a way to check in with loved ones is crucial for my peace of mind. I usually make a plan beforehand or at least write down a method for reaching my family and friends. It can be challenging, especially if cell services are down, but I’ve found that social media or messaging apps can do wonders.
Regular status updates can help keep everyone calm and ensure no one is worrying unnecessarily. Plus, when things settle down, I always have a game plan for deciding where to meet up if we can’t get home.
Establishing a communication plan is also a good way to connect with neighbors. I’ve found that fostering relationships can lead to all sorts of support during tough times, whether it’s sharing resources or emotional support.
Utilize Community Resources
Once I return home and things seem in order, I don’t shy away from reaching out to local community resources. I always check in with local governments and organizations for any available assistance programs aimed at disaster recovery. They often have a wealth of information that can help!
In my experience, it’s been great to tap into local resources for food, clothing, or housing assistance. There’s often a community spirit that blossoms after a disaster, so getting involved can help a lot – I’ve met some incredible people through these programs!
So, don’t hesitate to ask for help! Sometimes, just knowing there’s a network out there can make a massive difference in my recovery process. Plus, you never know – you might end up forging lasting relationships while you’re at it.
Keep Updated on Recovery Efforts
Staying informed about ongoing recovery efforts is essential. I usually follow local news channels and government websites fr updates related to rebuilding phases, road closures, and safety warnings. Being in the loop keeps me aware of potential dangers.
I also appreciate any information on local help centers and recovery-oriented community meetings. They usually provide updates on resources and aid being offered, which assists during my cleanup efforts.
Joining local online groups can be a real game changer, too. They often share firsthand experiences about dealing with insurance or recovery, and offer comforting advice during times when I might feel alone in my struggle.
Rest and Recover
Take Care of Your Mental Health
Returning home can take a toll on anyone’s mental well-being. I always remind myself that it’s okay to feel overwhelmed during this process. I make a conscious effort to give myself permission to take breaks and just breathe. Sometimes, just stepping outside for some fresh air can do wonders!
Talking about my feelings with friends or a therapist can help me process all that’s happened. It’s important to vent, even if it involves crying over coffee with a friend while reminiscing about happier times.
If I notice lingering stress or anxiety that won’t go away, I don’t hesitate to reach out for professional help. Mental health is just as crucial as physical health, and taking care of myself sets the stage for a successful recovery.
Find Support Systems
I’ve come to learn that leaning on friends, family, or support groups during this period is vital. Surrounding myself with supportive people not only helps me feel balanced but also keeps my spirits lifted.
Finding local support groups can be an excellent way to connect with others who are going through similar experiences. I’ve found group settings transform sharing struggles into learning moments; hearing how others cope can offer fresh perspectives!
Also, sometimes just knowing that I’m not alone in this journey can be comforting. Check-ins from loved ones, even in simple forms like a text or call, remind me that my world is still filled with caring connections.
Establish a Routine
Finally, creating a routine helps me regain a sense of normalcy after a disaster. I’ve been amazed at how having a daily schedule—even if it’s simple—helps shift my mindset. It’s about getting back to doing things that bring me joy, whether cooking a meal or taking a walk.
Additionally, checking items off my to-do list can provide little victories throughout the day. Slowly but surely tackling cleanup or recovery tasks brings a sense of accomplishment, which is so motivated during recovery.
Even if my routine isn’t perfect, it serves as a mental anchor, allowing me to feel a bit more in control. I’ve realized that recovery is a journey, and taking small steps is totally okay!
FAQ
Q1: What should I do first when I return home after a disaster?
A1: The first step is to evaluate the situation to assess any damage and ensure it’s safe to enter your home. Look for hazards like broken glass, downed power lines, or any smells that could indicate gas leaks.
Q2: Why is documenting damage important?
A2: Documenting damage with photos helps provide evidence for insurance claims and ensures you’re assessing the true extent of the damage. The more detail you have, the better your chances of getting a fair settlement.
Q3: How do I choose the right community resources for recovery?
A3: Check with local government sites, disaster relief organizations, or community centers. They often have a list of resources tailored to those affected by the disaster.
Q4: What should I prioritize during the mental recovery phase?
A4: Take care of your mental health by seeking support from friends, family, or professional help. Make space for your feelings and don’t hesitate to lean on your support system.
Q5: How can I establish a routine during recovery?
A5: Start small by setting up a daily schedule that incorporates tasks that bring you joy or a sense of accomplishment. Creating little victories in your day can help restore a sense of normalcy.
by Preparation | May 11, 2025 | Preparedness
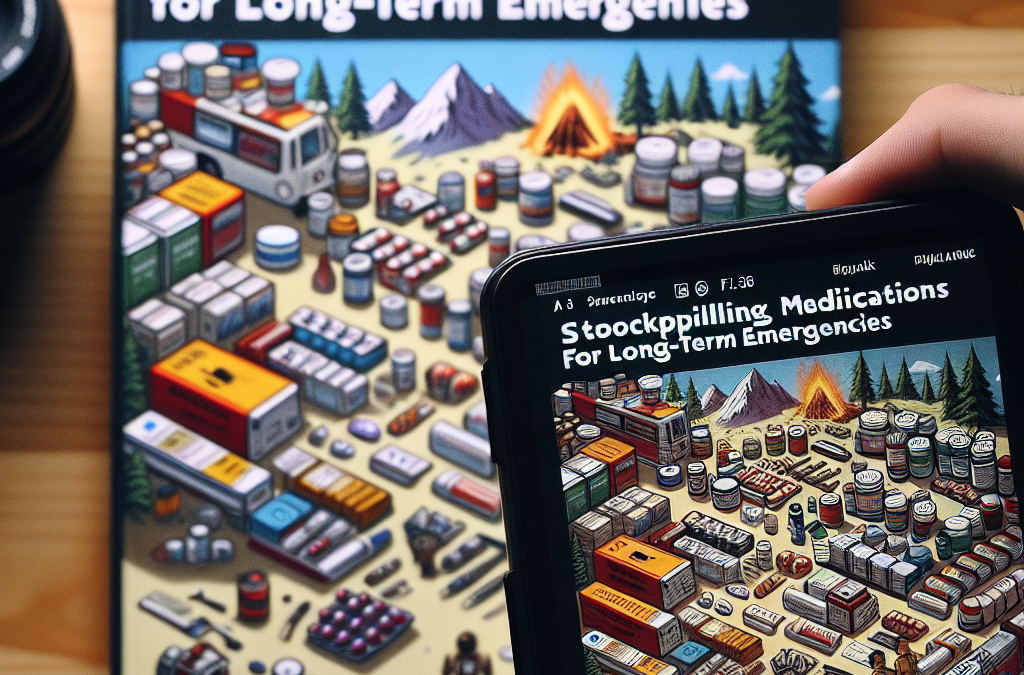
Understanding Your Medication Needs
Assess Your Current Medications
First things first, I’ve learned that it’s crucial to sit down and list all the medications currently being used in your household. This includes everything from prescription meds to over-the-counter staples like ibuprofen and allergy pills. Having a comprehensive list can save you from the dreaded panic when an emergency strikes.
Once you have your list, dive a little deeper and note down why each medication is needed. For instance, if someone in your family is managing chronic conditions like diabetes or asthma, you’ll want to ensure those essentials are prioritized when you start your stockpiling endeavors.
Also, remind yourself to check the expiration dates on your existing supply. It happens to all of us; medications can sit in cabinets and become outdated without us even realizing it. Keeping track can prevent wastage and ensure you’re always covered during unforeseen circumstances.
Consult with Healthcare Professionals
Next, do yourself a favor and chat with your healthcare providers. This tactic has proven invaluable for me. By discussing your stockpiling plans with your doctor, you can get their insights on which medications are truly essential for your health needs.
Additionally, don’t hesitate to ask about alternatives or generics. There are many effective medications available that may not drain your pocket as much. Finding reliable substitutes could provide you some peace of mind while accumulating your supplies.
And if your doctor thinks it’s necessary, they may be willing to prescribe a larger supply of critical medications. This is especially true for people with chronic health issues. Just explain your situation, and you might find them understanding and accommodating.
Recognizing Emergency Scenarios
It’s super important to understand the various scenarios that may lead to a shortage of medications. Natural disasters, pandemics, or even economic disruptions can all disrupt the ease of accessing prescriptions. Trust me, I’ve seen it happen, and it’s wise to be prepared.
Aside from just the obvious natural disasters, smaller-scale emergencies like a family member becoming unexpectedly sick can put a strain on your supply. Keeping this in mind, developing a broader understanding of potential scenarios can help you be better prepared.
Having an awareness of these emergencies can guide you in how much medication you choose to stockpile and how diverse your supplies should be. It’s not just about gathering what you think you need, but about prepping for the unexpected.
Building Your Stockpile Step by Step
Inventory and Organization
When setting out to create a stockpile, my first move is always to organize everything. I like to create a dedicated space at home where I can keep all my medications. Whether it’s an old cabinet or a designated shelf, having a specific spot makes retrieval and management way easier.
Alongside organization, I also create a rotating system to avoid expiration. This means arranging medications based on their expiry date, with the oldest upfront so that I can use those first. It’s a simple hack, but it genuinely helps keep everything fresh!
I’ll even label everything—it sounds super extra, but it really helps when you’re in a hurry. A quick glance can direct you to what you need and prevent any mix-ups in times of stress.
Where to Purchase Additional Supplies
Finding the right place to stock up on medications can be a game-changer. Personally, I prefer checking local pharmacies first. They often have memberships or discounts on bulk purchases that can really help save a few bucks in the long run. Plus, supporting local businesses always feels good!
Online pharmacies are another great option. I’ve found that you can often get prescriptions delivered right to your door, and many times they offer discounts for first-time customers. Just be sure to use a reputable site to avoid counterfeit medications—safety first!
Don’t overlook community health organizations either. They sometimes provide free or discounted medications, especially for those in need. Connecting with these organizations can not only help you build your supplies but also reinforce a sense of community, which is critical during trying times.
Monitoring and Rotation for Safe Storage
As I dive deeper into stockpiling, I’ve realized that simply gathering medications isn’t enough; proper storage is key. Make sure the area you’ve chosen is cool and dry. Storing medicines in heat or humidity can majorly decrease their effectiveness, and let’s be real, that’s not what we want!
Additionally, I keep a eye on expiration dates and rotate my stock regularly. It’s a good habit to check in every couple of months to make sure everything is still valid and to reorder what’s running low. I usually set a reminder on my phone—it’s really helpful!
Finally, always keep a log of what medications you have, their expiration dates, and when you purchased them. Creating a simple spreadsheet might seem tedious, but I promise it pays off when you’re in a pinch and can’t remember what you have on hand!
Know the Legalities of Stockpiling Medications
Understand Prescription Laws
One of the most crucial aspects of stockpiling is being aware of the legalities in your area regarding medication prescriptions. As someone who’s dabbled in this quite a bit, I can tell you that every state has its own set of laws. It’s essential to familiarize yourself with these regulations to avoid running into any trouble.
For instance, certain states limit the quantity of medication you can obtain at one time. Knowing if your state allows for 90-day prescriptions or if there are restrictions can make a big difference in how you plan your stockpiling.
And let’s not forget about controlled substances, too. Strict regulations often apply, so being knowledgeable about what medications fall under this category is vital. This way, you can prepare accordingly and advocate for yourself where needed.
Communicate with Your Pharmacist
Now, here’s a little insider tip: your pharmacist can be your best buddy in this stockpiling mission. They have the insight and knowledge regarding local laws and can help you navigate the tricky waters of obtaining your medications. Seriously, don’t underestimate the power of a good conversation!
Don’t shy away from asking questions about bulk ordering, generic alternatives, or their policy on refills. Building a relationship with your pharmacist can also result in them looking out for you when it comes to potential savings or available discounts.
Having an open dialogue can make your stockpiling efforts not only smoother but also more effective. You never know, they might even provide you with valuable tips regarding medications or stockpiling based on what they see in their daily practice!
Document Your Supplies and Prescriptions
As I mentioned before, keeping a proper log is crucial. Treat it like a checklist where you record each medication, the quantity, expiration dates, and any refill information. By doing this, you make your stockpile legible and manageable at a glance.
In addition to that, store all important prescriptions and paperwork in a safe place. God forbid you lose access to a critical medication; having documentation could make all the difference in getting a swift refill when you need it.
In times of crisis, you want to be well-informed and prepared. By putting your stockpiling plan on paper—and storing it safely—you’re likely to feel much calmer knowing that you have things organized and legible when it counts the most.
Simplifying Long-Term Stockpiling Storage
Choose the Right Containers
Not all containers are created equal! Trust me, after experimenting with various options, I’ve learned how crucial it is to pick the right storage for my stockpiled medications. Opt for opaque containers that protect medicines from light, and always ensure they are labeled clearly to avoid any confusion.
Air-tight containers also help protect your meds from moisture. I’ve found that just repurposing old tupperware isn’t the best option. Instead, find containers specifically designed for storing pharmaceuticals, which provide better protection.
Investing a small amount in quality storage can save you a lot of heartache down the road! Plus, it keeps everything looking neat and professional, making it easier for you—or anyone else—who might need to access the meds in a hurry.
Regular Maintenance Checks
Let’s be real; just because you set up your stockpile doesn’t mean you can forget about it! Regular maintenance checks are essential to ensure everything is still in good condition and within its expiration dates. Personally, I schedule a bi-monthly check where I go through my entire stockpile.
During these checks, I’ll look for anything that looks suspect or damaged. Medications stored improperly may become ineffective, so it’s crucial to assess everything periodically. Catching expired meds can help you rotate what you have, so you’re using the freshest options first.
Moreover, this routine helps reinforce the importance of being prepared. The more you engage with your stockpile, the more comfortable you’ll feel using it when that inevitable rainy day comes.
Creating a Strategic Use Plan
Having a plan set in place detailing how to utilize your stockpile is as important as gathering it in the first place. I’ve drafted a strategic use plan that outlines what medications I’ll tap into for specific scenarios. For example, chronic conditions, minor illnesses, and even injuries should have specific meds prioritized!
This plan not only saves time in emergencies but also helps to ensure that the right medications are taken at the right moments. A little planning goes a long way in a pinch, right?
And as always, make sure to keep each family member in the loop. Having everyone informed takes the burden off of any one person during an emergency and ensures that everyone knows where to find what they need when they need it.
FAQs
1. How often should I check my stockpile of medications?
It’s a good idea to do a thorough check of your stockpile every couple of months. This way, you can assess expiration dates and quantities to see if you need to reorder anything. Regular checks keep your stockpile fresh and ready for emergencies!
2. Can I stockpile medications without a prescription?
While you can stockpile over-the-counter medications without a prescription, prescription medications must be obtained through a healthcare provider. Consult your doctor about the possibility of larger prescriptions for chronic conditions to help build your stockpile.
3. What types of medications should I prioritize when stockpiling?
Focus on medications that you or your family members frequently use. Essential prescriptions for chronic illness should be at the top of your list. Additionally, consider pain relievers, allergy meds, and first-aid supplies as part of your broader stockpile.
4. How do I ensure my medications stay effective over time?
Storing your medications in a cool, dry place away from direct sunlight is crucial. Use air-tight, opaque containers to help keep moisture and light out, which can degrade the effectiveness of your medications over time.
5. What should I do with expired medications?
Do not just toss expired medications in the trash! Instead, take them to a pharmacy that offers medication take-back programs or follow local regulations for safe disposal. It helps keep the environment clean and safe.
by Preparation | May 11, 2025 | Preparedness
Hey there, fellow prepper! Whenever I chat with people about prepping, one thing that really gets the conversation going is how much technology has transformed our approach to being ready for whatever life throws at us. Gone are the days when prepping meant simply filling your basement with canned goods and a few flashlights. Now, we’ve got a whole world of gadgets, apps, and innovations that can help us stay ahead of the curve. So, let’s dive into the role of technology in modern-day prepping!
1. Communication Tools: Staying Connected
Emergency Communication Devices
First off, let’s talk about communication. In a crisis, it’s crucial to stay connected with loved ones. I swear by my satellite phone. When cell towers go down, this little device can make all the difference. It might be old school, but hey, it works! Plus, there are new apps like Zello that turn your phone into a walkie-talkie, allowing you to communicate even when internet connectivity is shaky.
Another great tool? Two-way radios! I’ve got a set for our family – they’re great for keeping in touch when we’re out of cell service. Learning to use these tools ahead of time makes you ready when it really counts. Practice makes perfect, right?
Don’t forget about social media, either. In some situations, platforms like Twitter can serve as emergency outlets, allowing you to post updates or check on friends. But remember, in a real scenario, you might not want to overshare your location or situation!
2. Survival Apps: Information at Your Fingertips
Top Survival Apps I Use
Now, I’ll be honest with you — my smartphone is basically my survival companion. There are tons of apps out there that help with everything from plant identification to tracking weather patterns. My go-to is the “SOS (Survival Operating System)” app. It has an incredible collection of resources you can use to learn about first-aid, navigation, and other key prepping aspects.
Another app I can’t live without is “MyRadar.” This app gives you real-time weather updates. After a day of hiking and getting caught in the rain, I learned my lesson: always be prepared, and knowing the weather is a big part of that.
And let’s not forget offline access! Some apps allow you to download essential information ahead of time, so when you’re in an area with no signal, you’re still ready to roll. That’s a huge lifesaver!
3. Renewable Energy Sources
Solar Power for Preppers
Solar energy? Yup, I’m all about it! Having adequate power backup can be a game changer in prepping. I’ve invested in a portable solar charger that keeps my devices alive no matter what. It’s lightweight and it fits in my backpack, making it perfect for camping too!
There are even solar panels you can set up at home to power your entire prepper setup. You can connect a battery and keep your tools and tech charged, which is especially useful during extended power outages.
Plus, there’s a certain satisfaction that comes from harnessing the sun’s energy. It adds to my self-sufficiency and lets me minimize reliance on traditional power sources. In prepping, every little bit helps!
4. Smart Home Technology
Security Systems
Smart home tech has taken prepping to another level. I’ve got smart security cameras set up around my property. They help me keep an eye on things even when I’m away. I could be hiking with friends or just chilling at a coffee shop, and I can check in from my phone. Talk about peace of mind!
Some systems even offer motion detection and alerts, so if something doesn’t feel right, I know immediately. This helps prevent disturbances before they become real problems.
Of course, I understand tech can sometimes fail, so I always have backup security plans — like reinforcing doors and windows — just in case. A mix of old school and new school is a personal mantra of mine in prepping!
5. Online Communities and Learning Resources
Joining Prepper Networks
Let’s not underestimate the power of community in prepping! There are countless online forums and social media groups focused on prepping. It’s amazing to connect with others who have the same goal. I’ve learned so much from fellow preppers about everything from food preservation techniques to bug-out bag essentials.
YouTube has been my favorite teacher. I love watching tutorial videos on outdoor skills or food storage. The only downside? I often end up down a rabbit hole of watching bizarre survival experiments, but I guess that’s all part of the learning process!
Plus, many local communities offer workshops or meetups. These in-person connections allow you to share knowledge and resources, which is invaluable. Who knows? You might even find a prepping buddy or two to share tips and tricks with!
Frequently Asked Questions
1. How can technology enhance my prepping efforts?
Technology offers numerous tools and resources that can streamline your prepping process, such as communication devices, survival apps, and renewable energy sources that ensure you’re prepared for emergencies.
2. Are there specific apps for prepping I should consider downloading?
Definitely! Some of my favorites include SOS (Survival Operating System) for emergency resources and MyRadar for accurate weather updates. Research various apps to find the ones that resonate with your prep needs.
3. What’s the best way to stay informed about emergency situations?
Using a combination of emergency communication devices and social media can provide the best updates during an emergency. Apps like Twitter can assist in getting real-time news during crises.
4. How can I ensure my renewable energy sources are effective during emergencies?
Invest in quality solar chargers and panels, and practice setting them up to ensure you know how to use them when the time comes. Keeping backup batteries charged is also key!
5. What are some good ways to connect with other preppers?
Join online forums or social media groups, watch YouTube channels, and look for local meetups to learn from others and exchange valuable prepping insights.
Thanks for joining me on this exploration of technology in prepping! I hope you feel inspired to incorporate some of these innovations into your own routine. Happy prepping!
by Preparation | May 11, 2025 | Preparedness
Stay Calm and Assess Your Situation
Taking a Moment to Breathe
First off, when you find yourself in a stressful survival scenario, the first thing I always recommend is to take a deep breath. Seriously, just stop for a second. Stress can hit you like a ton of bricks, and when that happens, the last thing you want to do is panic. By taking a moment to breathe, you give yourself the chance to think clearly.
Breathing is such a simple yet powerful tool. I often use a technique that involves inhaling for four counts, holding for seven, and then exhaling for eight. It sounds a bit fancy, but trust me, it works wonders to steady your heartbeat and clear your mind.
Once you’ve got your breathing under control, it’s time to assess. What happened? What resources do you have? This little moment of calm can help you transition from a reactive state to a proactive one.
Identifying Immediate Needs
Now that you’re calm, let’s chat about identifying what needs to be done right away. Focus on the essentials: shelter, water, food, and communication. These are the basics and will guide your actions moving forward.
For example, if you’re lost in the woods, your immediate need might be to find fresh water first. Understanding what’s critical means you can prioritize your plans and avoid getting overwhelmed by everything at once.
This step is all about survival tactics, but it’s so essential that you can’t skip it. Make a quick mental checklist of what you need versus what you want, and stick to that when planning your next steps.
Creating a Plan
Once you have your needs identified, it’s time to develop a plan. I can’t stress enough how important it is to have some sort of direction. It not only helps in survival but gives you a purpose, which can tremendously reduce stress.
Write things down if you have a pen and paper; sketching out your plan can make it feel more solid. If not, just keep repeating it to yourself. Remember, a plan doesn’t have to be foolproof, just something to guide you out of that initial chaos.
Having a plan gives you focus. It’s like having a roadmap in an unfamiliar landscape. The more clear your plan, the less anxious you might feel, which means you’re better equipped to handle the curveballs that come your way.
Stay Physically Active
Use Movement to Combat Stress
Staying physically active is another major key. I’ve found that moving my body helps shake off some of that initial stress response. Whether it’s a short hike, a little jogging in place, or even just stretching, it keeps the blood flowing and helps clear your mind.
When I’m stressed, I often think of my body like a pressure cooker; if I don’t let some steam out, it just builds up. Even simple exercises can be a great way to release those pent-up feelings and keep your energy levels up.
Plus, getting some physical activity can help you feel grounded in your situation. It’s like a little reminder that you’re still you, no matter what’s going on around you.
Utilizing the Environment
Look around you. Nature itself can be a form of therapy. I often take a moment to appreciate my surroundings, whether that’s the trees, the sound of a river, or even the stars at night. It’s a reminder that I’m part of something much larger.
Use your environment to encourage activity too. Climbing a tree for a better view or walking along a stream can help you feel more connected and less stressed. Engaging with nature can shift your mindset from one of fear to curiosity.
Moreover, being in nature can provide unexpected solutions to your problems. It’s amazing how a little exploration can lead to fresh water sources or edible plants that help you survive, all while taking your mind off the dire situation.
Physical Comfort Measures
Don’t underestimate the power of comfort. Find ways to make yourself comfortable, be it a makeshift seat or bundling up in leaves for warmth. Every little bit helps! If you’re comfortable, that relaxation will translate to less stress.
I remember a time I built a small shelter with branches and leaves. It wasn’t the prettiest thing, but hey, it kept me dry and gave me a sense of safety. Feeling secure in your physical environment helps bring down those anxiety levels.
Even consuming something as simple as a snack can be a great stress reliever. Food can have a grounding effect and provide the necessary energy for whatever comes next in your survival journey.
Stay Mentally Sharp
Keep Your Mind Engaged
Staying mentally engaged is crucial in a survival situation. The more you think and evaluate, the less time you have to dwell on stress. I love to create simple games in my head or recite facts I’ve learned about survival—anything that keeps my brain active.
Trying to visualize what could happen next also helps. Imagine the outcomes of your decisions. This not only keeps you focused but also gives you confidence in your abilities.
Moreover, don’t lose sight of your sense of humor either. Laughter can be a great stress buster, even in dire situations. Finding humor, when possible, can lighten the mood in any tense moment.
Mindfulness Techniques
Another approach that’s served me well is incorporating mindfulness techniques. It might sound a little out there, but focusing on the present can drastically decrease stress levels.
You can do this by engaging your senses. What do you hear? What do you see? What scents are in the air? This practice pulls your focus back to the now and reduces anxiety about the unknown.
Mindfulness can also involve meditation. Even a minute or two focusing on your breath or visualizing a safe place has helped me a ton—especially when the stress feels like it’s about to overwhelm me.
Reflecting on Past Experiences
Reflect on past experiences, even if they weren’t survival-oriented. Drawing parallels and remembering how you handled difficult situations before can boost your morale. I often think back on tough times I overcame and realize I got through them just fine.
Journaling your thoughts, when possible, can also be liberating. It may not be feasible during critical survival moments, but thinking about what has worked for you in the past can pave your path to success now.
This reflection helps me understand that I am capable of facing challenges, which can be incredibly empowering. Reminding ourselves of our capabilities can be such a game-changer in stressful situations.
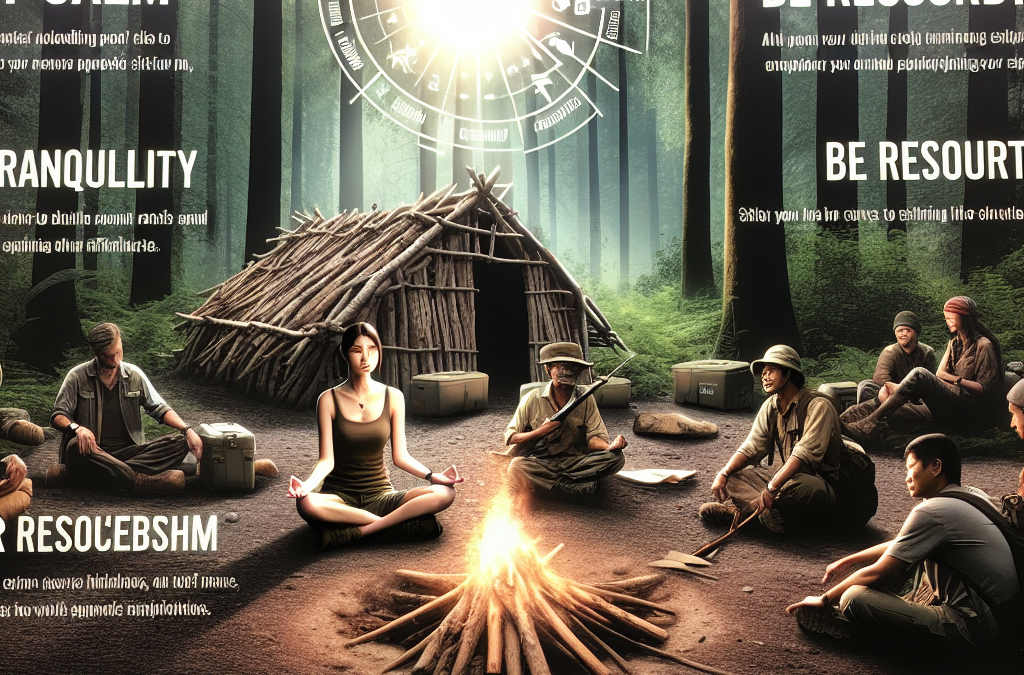
Build Social Connections
Finding a Supportive Group
If you’re not alone, building social connections with fellow survivors can help tremendously. Sharing experiences, discussing plans, and supporting each other can alleviate stress levels. You’ll find that many minds working together can lead to better solutions!
Even just a conversation, a laugh, or a shared meal fosters camaraderie and helps individuals feel less isolated in their struggle. Teaming up can create a support system that’s crucial in stressful situations.
I remember being part of a group where we all felt the weight of our situation, but the simple act of sharing stories and working together transformed our stress into solidarity.
Effective Communication
When in a group, effective communication becomes key. Clearly sharing your thoughts and feelings can reduce misunderstandings and build trust among your group members. It’s a must if you want to thrive together.
Here, I recommend techniques like active listening—acknowledging what others say can make them feel valued and heard. When people feel understood, it can lower stress levels for everyone.
Moreover, it’s essential to be honest about your own feelings too. If you’re feeling overwhelmed, sharing that with your group can help create a supportive environment where others can offer help or encouragement.
Working Together Toward Solutions
Last but not least, collaboration can reduce individual stress by splitting tasks. Breaking down responsibilities allows people to feel less burdened. We can often come up with creative solutions when brainstorming together.
I’ve found that when we tackle survival needs together—like building a shelter or finding food—stress transforms into purpose. Everyone pitches in with their skills, leading to not only practical results but emotional relief as well.
This unified effort helps reinforce bonds and creates a sense of community, leading to less fear and anxiety overall. Having people you can rely on in high-stress situations is invaluable.
FAQs
1. What should I prioritize in a survival situation?
Your primary focuses should be on finding shelter, water, and food. Prioritize these essentials to stabilize your situation before moving into longer-term survival strategies.
2. How can I manage panic during a crisis?
Start by taking deep breaths to calm your heartbeat. Then, assess your situation and create a plan to regain a sense of control over your environment.
3. Is it important to stay active in stressful situations?
Absolutely! Physical activity helps alleviate stress. Engaging your body can keep your mind clear and boost your overall morale.
4. How can I maintain hope during survival challenges?
Reflecting on past experiences where you’ve overcome challenges can boost your confidence and help you stay hopeful. Finding reasons to stay positive helps shift your mindset.
5. Why is social connection vital in survival situations?
Building connections with others fosters support and reduces feelings of isolation. Teamwork can lead not only to better survival tactics but also emotional relief.


