by Preparation | May 13, 2025 | Preparedness
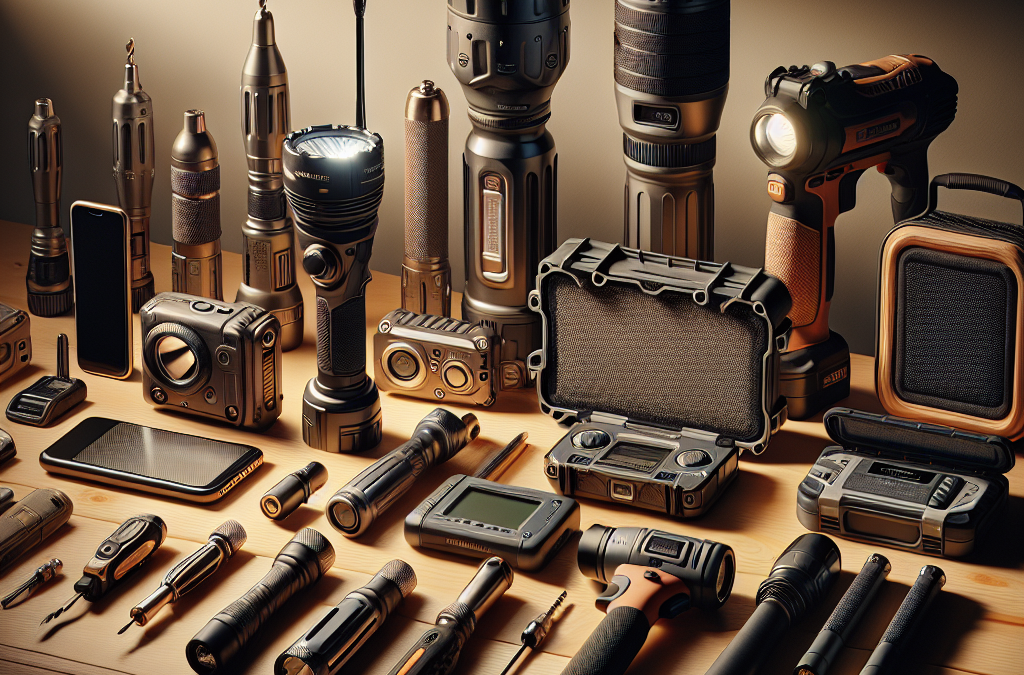
Emergency Lighting Tools
Why You Need Emergency Lighting
We’ve all been there: a sudden power outage or a camping trip that goes sideways. Emergency lighting is not just a luxury; it’s a necessity! When darkness falls, having a reliable light source can make all the difference. You can say goodbye to fumbling around in the dark while searching for candles or your phone’s flashlight app.
Personally, I’ve experienced a blackout in the middle of cooking a family dinner. The sudden darkness sent us scrambling for our flashlight. It highlighted how crucial having a dependable light source can be—not just for safety but also for maintaining calm in chaos.
Battery-operated lanterns and flashlights can illuminate your surroundings efficiently. This means less stress and more focus on what’s really important: keeping everyone safe and comfortable, whether you’re at home aiming for your emergency kit or out in nature enjoying the stars.
Top Picks for Battery Operated Lights
When determining the best emergency lights, I’ve found that brightness and battery life are key. My go-to is the LED lanterns that give off a warm light and can last hours without needing a recharge. They even have settings for different brightness levels!
Some flashlights come equipped with solar charging options, which I think is super cool. This feature ensures that even if you forget to charge them, they’ll still work thanks to the sun’s power. I love being outdoors, so these flashlights are often by my side on hikes or nights under the stars.
Don’t overlook smaller options, either. A simple battery-operated clip-on light can save space in your emergency kit and is incredibly versatile. I often use them for late-night reads or even board games when the power goes out!
Maintenance Tips
Keeping your lighting tools in working order is crucial. I can’t stress this enough: make sure to check your batteries regularly. No one wants to be caught in the dark with dead batteries! I set reminders on my calendar every few months to give everything a check-up.
Additionally, store your lights in an easily accessible place while still ensuring they won’t accidentally turn on. A dedicated pouch in your emergency kit is a great idea. I’ve learned the hard way after throwing my gear in a backpack, only to find a flashlight that mysteriously drained its batteries.
Lastly, give your tools a good clean every now and then. Dust and dirt can affect their performance, and nobody wants that—especially in an emergency. A quick wipe with a damp cloth is often all it takes to keep things running smoothly!
Battery Operated Power Tools
Why Choose Battery Operated Tools
Battery-operated power tools are a game changer during emergencies or any unexpected home repairs. From drills to saws, these tools offer convenience without the hassle of cords or searching for an outlet. I particularly appreciate the mobility they offer—no matter where I’m working, I know I can get the job done.
It’s also worth mentioning the environmental advantage. Many modern battery-operated tools have lithium batteries, which tend to be more efficient and environmentally friendly than traditional corded power tools. Using less energy means we can all do our part to reduce our carbon footprint while tackling our home projects.
Throughout my DIY journey, I’ve accumulated a small arsenal of battery-powered tools, and they’ve saved me countless headaches, whether it’s assembling furniture or fixing things around the house. The ability to pick up and move freely is a massive benefit.
Choosing the Right Tools
When it comes to selection, focus on versatility. My favorite tool is a cordless drill that can switch from drilling to driving screws effortlessly. It saves time and minimizes the chances of losing my momentum when tackling a project.
Furthermore, consider the runtime of the tools. If you’re dealing with large tasks, ensure your battery can last long enough to complete them. Many tools today come with additional battery packs, which is fantastic—just swap it out and keep going!
Don’t forget to check reviews for durability. I’d recommend leaning towards brands known for their quality. It’s an investment, and you want something that’s going to last through all those unexpected emergencies.
Safety Tips
Battery-operated tools can still be dangerous if not used properly. Always read the manual before starting any project! I admit I was tempted to skip this step once, and it cost me a minor injury due to improper equipment handling.
Make sure to wear appropriate safety gear, regardless of whether you’re using manual or battery-operated tools. Goggles, gloves, and even dust masks can protect you from splinters or debris flying your way.
And if you’re ever unsure about using a specific tool, ask someone! Your safety should always come first, and there’s no harm in reaching out for help. I’ve learned so much from friends and family when I was stuck or confused.
Battery Backup Systems
What are Battery Backup Systems?
Battery backup systems are a fantastic way to ensure you have power when you need it most. They store electric energy to provide power during outages, whether it’s a storm taking out your electricity or an unexpected home emergency.
My experience with battery backup systems started after a particularly nasty winter storm that left my neighborhood without electricity for days. I invested in a battery backup system that kept my essentials powered, and it was one of the best decisions I made.
Not all systems are created equal, though. Some are designed just for smaller devices, while others can power larger appliances like refrigerators or medical devices. Assess your needs before making a purchase. It’s a crucial step that can save you a ton of hassle later!
Choosing the Right Battery Backup System
Consider the wattage requirements of the devices you intend to power. The last thing you want is to assume you can power a fridge when your backup can barely handle a light bulb. I once made that mistake, and it was definitely a lesson learned!
Look for units with multiple plug options. A system that only provides a few outlets is pretty limiting. My backup has multiple plugs and USB ports, so I can charge my phone and keep a few essential appliances running all at once.
Battery lifespan is another factor. I always opt for those that display how long they can sustain power at varying loads. The last thing you want is a system that doesn’t live up to its advertised capabilities when you need it most.
Maintenance and Storage Tips
Battery backup systems need a little TLC to keep them in top shape. Check and replace batteries regularly; this will ensure they’re always ready when needed. I check mine twice a year—it’s such an easy task!
Store your system in a cool, dry place. If you place it in places that are too hot, the batteries can degrade much faster than their intended lifespan. I always try to be mindful of temperature when setting up my emergency gear.
Finally, periodically testing your system is essential. I run through a quick test every few months to ensure it actually works—this way, I’m never caught off guard.
Portable Battery Chargers
The Importance of Portable Power
We live in such a tech-driven world, and running out of battery can feel like the end of the world. Portable battery chargers can help keep our devices powered, which can be especially critical during emergencies. I’ve found them to be essential during camping trips and travels where charging options are limited.
These handy chargers can fuel everything from smartphones to tablets and even small medical devices. Picture this: you’re in an emergency at home, and your phone dies. A portable charger could be what saves the day—you need a way to communicate with others!
They can also be a lifesaver during outdoor adventures. If you rely on GPS or other essential applications, you won’t want to run out of juice. Having a portable charger just brings peace of mind, knowing that I am covered, no matter what adventure I tackle.
Choosing the Right Portable Charger
When choosing a charger, look for one with a high capacity—something like 20,000mAh is a great choice for multiple charges. It might be a bit bulkier, but I assure you, it’s well worth the extra size when you’re out and about.
I prefer chargers with multiple outputs, which allows me to charge several devices simultaneously. If I’m camping with friends, it means we can all keep our devices charged together instead of fussing over who gets to use the charger first.
Quality matters too! Be sure to invest in a reputable brand, as low-quality chargers can pose safety risks. I learned this one the hard way after a cheap knockoff charger overheated. Scary stuff—I never made that mistake again!
Maintenance for Longevity
Treat your portable chargers with care. Avoid leaving them in extreme temperatures, as it can damage the batteries. I store mine in a cool place where they aren’t exposed to direct heat from sunlight or excessive cold.
Also, clean the connectors gently. Dust can build up quickly, which may prevent your devices from charging properly. A soft cloth does wonders to keep everything spick and span.
Lastly, don’t let your charger sit idle for too long. Periodically use it to keep the battery healthy. It’s easy to forget, but I’ve made it a habit to plug in my portable charger every so often, ensuring it’s always ready to go when I need it.
Emergency Communication Tools
The Need for Communication in Emergencies
Effective communication can make or break an emergency situation. Have you ever been left in the dark during a storm, unsure of the updates or what to do next? That’s where battery-operated communication tools come in.
From walkie-talkies to emergency radios, these tools ensure you stay connected even when regular systems fail. During a time when everyone is in panic mode, having a way to communicate can keep things calm and organized.
Personally, I love having a small emergency radio with NOAA Weather Band capability. It offers immediate information on weather updates during severe storms, and I can easily take it along when I go hiking. Knowledge is power, right? It’s crucial for staying safe!
Types of Emergency Communication Tools
Walkie-talkies are incredible for short-range communication. They can be great for family outings or situations where cell coverage might not reach. I picked up a pair, which transformed our family camping trips from “Where are you?” to promises of “I’m right here!”
Emergency radios provide peace of mind, especially during severe weather. I like models that can also charge my phone or have multiple power sources, including hand-cranking options. You never know when you might need it!
Don’t overlook options like signal mirrors or whistles. In a pinch, these tools can help you communicate without relying on battery power. They’re lightweight and can easily fit into your emergency kit—definitely a smart addition.
Keeping Communication Tools Ready
Be sure to check batteries regularly in your communication devices; I can’t stress this enough! It’s something I do alongside my lighting checks. A talking device that’s out of batteries won’t help anyone during a crisis.
Store all your communication tools in a designated bag within your emergency kit. This way, you know exactly where to find them when the time comes, instead of frantically rummaging through your supplies.
Learn how to use your devices ahead of time. I once stumbled in the dark while trying to tune an emergency radio during a storm. Familiarizing yourself with your devices beforehand can save precious time and reduce panic when a true emergency arises.
Conclusion
In conclusion, battery-operated tools are invaluable during emergencies. Their ease of use, portability, and reliability can help you navigate through unexpected situations with confidence. Remember to maintain your tools regularly, choose wisely, and always be prepared. I’ve learned the hard way that preparation truly is half the battle!
Whether it’s lighting a path in the dark, powering devices, or providing reliable communication, having the right tools can significantly impact safety and peace of mind. As someone who’s been through various emergencies, I can assure you: it’s better to be over-prepared than underprepared.
FAQ
1. What types of battery-operated lights are best for emergencies?
LED lanterns and flashlights are fantastic choices due to their brightness, longevity, and versatility. Look for ones with multiple brightness settings to cater to different scenarios.
2. How do I choose the right battery-operated power tools?
Prioritize versatility, battery life, and brand reliability. Tools like cordless drills that can switch between tasks are incredibly useful in a pinch.
3. What is a battery backup system, and why do I need one?
A battery backup system stores power to provide electricity during outages. It’s particularly vital for running essential appliances to ensure comfort and safety during emergencies.
4. How do I maintain my portable battery charger?
Store it in a cool, dry place, regularly check charge levels, and clean connectors to ensure optimal performance. Regular use can also keep the batteries in good shape!
5. What communication tools should I have during an emergency?
Invest in emergency radios, walkie-talkies, and even signal tools like whistles. These tools ensure effective communication when traditional means may fail.

by Preparation | May 13, 2025 | Preparedness
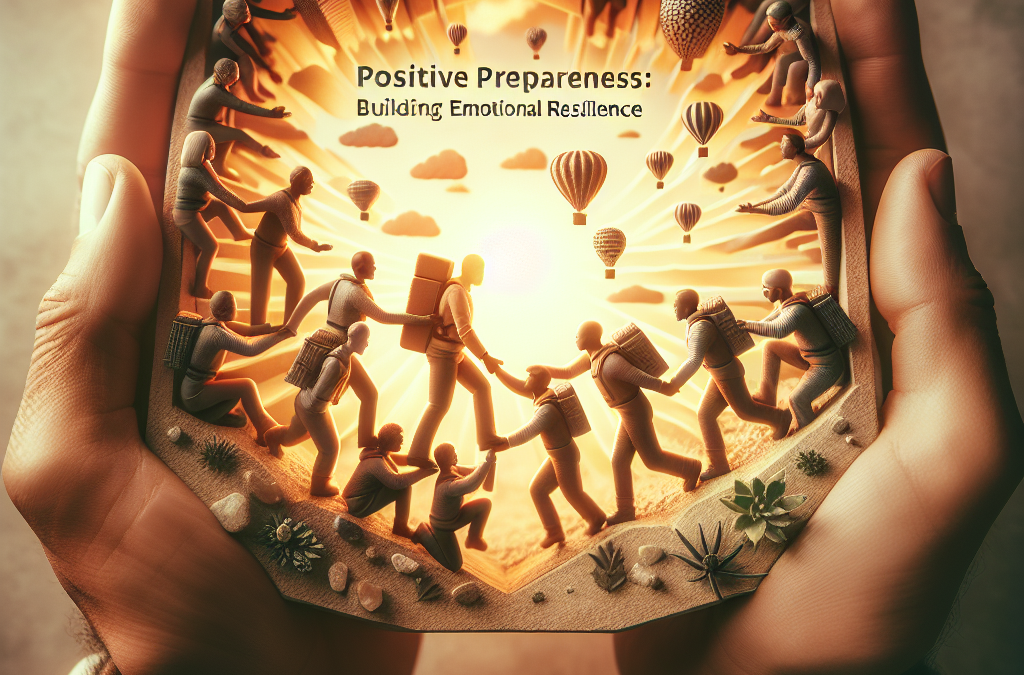
Understanding Emotional Resilience
What is Emotional Resilience?
Emotional resilience is all about our ability to bounce back from tough times. It’s like a rubber band; the more you stretch it, the stronger it gets. I’ve faced my fair share of ups and downs, and through my journey, I’ve learned that understanding what emotional resilience truly is can be a game-changer.
In simple terms, it means being able to adapt and recover from stress. Whether it’s a rough day at work, a personal setback, or dealing with grief, knowing that we can bounce back is comforting. When faced with challenges, resilient people are able to maintain their mental health and well-being.
For me, embracing my emotional resilience has been a key part of my life. Instead of viewing my struggles as weighing me down, I started to see them as opportunities for growth. This shift in mindset has transformed my perspective and helped me navigate life with confidence.
The Importance of Emotional Resilience
So why should we care about building emotional resilience? Honestly, life is unpredictable. Bad days are guaranteed, but how we handle them can make all the difference. For example, having emotional resilience has made it easier for me to cope with stress and maintain my relationships.
Moreover, emotional resilience not only boosts your mental health but also improves your physical well-being. I’ve noticed that when I’m feeling strong emotionally, my body responds positively too. It’s kind of wild how intertwined our mental and physical states are!
Beyond personal benefits, think about how it helps in professional settings. Being resilient allows you to tackle challenges head-on without letting them consume your energy or enthusiasm. I’ve found that my best ideas often come during tough times because I stay focused and adapt quickly.
Building a Support Network
Why You Need People
Ah, the age-old saying: “No man is an island.” Having a support network is crucial for building emotional resilience. When I went through some tough patches, the people around me made all the difference. It’s like having a safety net when you walk the tightrope of life!
Your support network can be friends, family, or even colleagues. Just knowing that there are people who care and are willing to lend an ear is comforting. I’ve spent many nights chatting with friends over coffee, sharing our struggles, and it always lightens the load.
Creating this network requires effort, and it doesn’t happen overnight. I remember reaching out to old friends and reconnecting, realizing how valuable those relationships were for my emotional health. Don’t hesitate to ask for support; it’s a strength, not a weakness!
Communicating Needs
Once you have your support network, learning how to communicate your needs effectively is essential. Early on, I often found myself bottling up my feelings, thinking I could handle everything alone. But trust me, opening up is liberating!
Effective communication involves being honest about what you’re feeling. Whether you’re stressed, overwhelmed, or even just need a hug, expressing those emotions makes a world of difference. I’ve learned that people are often more understanding and supportive than we expect.
Also, remember to listen as much as you share. Just having an open dialogue not only fosters closer relationships but also strengthens your emotional resilience. It’s all about creating an environment where everyone feels valued and heard.
Practicing Self-Care
The Basics of Self-Care
Let’s talk about self-care – my favorite topic! Self-care is often viewed as a luxury, but it’s a necessity for boosting emotional resilience. I’ve found that simple actions, like setting aside time for hobbies or practicing mindfulness, can profoundly impact how I feel daily.
It’s essential to identify what makes you feel good. For me, it’s gardening, hitting the gym, or just curling up with a good book. Making self-care a priority can refresh your energy and keep you grounded when times get tough!
Another crucial aspect is respecting your limits. There was a time when I took on too much, thinking I could manage it all. But when I learned to say “no” to things that drained my energy, life became way less hectic, and I reclaimed control over my emotional well-being.
Mindfulness and Stress Management
Incorporating mindfulness into your routines can significantly enhance emotional resilience. I remember when I first tried meditation; it felt strange but brought me to a state of calm I hadn’t experienced before. Mindfulness practices help center your thoughts and bring focus to the present moment.
Also, stress management techniques like deep breathing or yoga can be incredibly beneficial. After a filled day, I often unwind with some stretches or a focused breathing exercise, and it’s a game-changer for my mood. The more I practiced, the more resilient I became.
Creating a stress management toolkit tailored to your needs can set you up for success. Take a bit of time to try out different techniques and find what works best for you. Once I did that, it felt like I was armed with the best defenses against life’s challenges!
Embracing Change and Learning
Adapting to Life’s Changes
Embracing change can be daunting, but it’s a big part of building emotional resilience. Life’s unpredictability means that we’re constantly facing new challenges and situations. Instead of resisting change, I’ve learned that adapting to it can lead to incredible growth.
When I faced a major life transition, embracing the discomfort and uncertainty taught me valuable lessons. Reflecting on how I handled those changes helped me realize that every challenge could be an opportunity for development!
Learning to manage your reaction to change is vital. Understanding that it’s okay to feel uneasy or uncertain gives you a framework to navigate future changes confidently. I often remind myself that each experience is unique and contributes significantly to who I am.
Continuous Learning and Growth
Lastly, continual learning is critical for emotional resilience. Whether it’s reading books, taking courses, or engaging in conversations with others, my commitment to learning keeps me flexible and open-minded. I believe that staying curious about the world around us has shaped my ability to adapt to changes.
Applying the lessons I’ve learned from both failures and successes accelerates my growth. For instance, reflecting on past mistakes has helped me make better decisions in similar situations moving forward. Embracing growth in all areas of life is vital for resilience!
My journey has shown that investing in personal development enriches not only our emotional resilience but also our overall well-being. The more we cultivate our abilities to learn, adapt, and grow, the better we handle life’s curveballs!
Conclusion
To wrap things up, building emotional resilience is not just about surviving tough times, but thriving despite them. Each of these areas plays a significant role in fostering strength and adaptability. So, whether it’s leaning on your support network, practicing self-care, or embracing change, remember that it’s all part of the journey.
Frequently Asked Questions
1. What is emotional resilience?
Emotional resilience refers to our ability to adapt and recover from difficult situations. It’s about maintaining mental health amidst life’s challenges.
2. Why is a support network important?
A support network provides emotional backing during tough times. Connecting with friends and family can help lighten the load and provide different perspectives.
3. How can I practice self-care?
Self-care can include hobbies, exercise, or simply taking time for yourself. It’s about recognizing your needs and making them a priority to enhance emotional well-being.
4. What role does mindfulness play in resilience?
Mindfulness helps you stay present and focused. It reduces stress, allowing for clearer thinking and better emotional responses to challenges.
5. How can I embrace change better?
Embracing change requires a shift in mindset. Accept that change is natural and view challenges as opportunities for growth. Reflecting on past experiences can also help position you positively for future changes.
by Preparation | May 13, 2025 | Preparedness
Understand Your Body’s Needs
Recognizing Signs of Dehydration
First off, it’s crucial to understand how your body signals that it needs water. You might experience common symptoms like dry mouth, fatigue, or headaches. These can be sneaky signs that you’re running low on hydration, especially when water access is scarce.
As I’ve experienced, dehydration can sneak up on you, especially during hot weather or after intense physical activity. Don’t wait until you’re extremely thirsty to think about your hydration, because by that time, you may already be dehydrated.
Pay attention to your urine! If it’s dark yellow or amber, that’s your body hollering for more H2O. And trust me, being mindful of these signals can help prevent nasty headaches or fatigue that can be debilitating.
Calculate Your Water Requirements
It can also be helpful to understand your daily water requirements. On average, adults need about 2 to 3 liters a day, but this varies based on activity levels and environmental conditions. When water sources are limited, being strategic about this is essential.
I usually take into account my activities for the day. If I’m hiking in the heat, I know I’ll need more water. Tracking my water intake through apps or even just keeping a mental note has been a lifesaver. It helps me ensure I’m drinking enough, especially when access to water isn’t guaranteed.
It’s also a good idea to adjust your intake based on your body’s signals and your personal habits. If I’ve been sweating a lot or feeling especially thirsty, I make it a point to drink more, even if it means rationing my current water supply.
Adapt to Your Environment
Your environment plays a key role in your hydration needs. I’ve learned that when I’m out in the sun for long periods, staying in the shade or taking a breather helps manage my hydration without guzzling all my water at once.
On colder days, I often find myself less thirsty, but that doesn’t mean I should ignore my hydration. I make it a habit to sip regularly, even when I’m not feeling parched. It’s like muscle memory after a while—once you get into the habit, it becomes second nature.
So, when you’re out in nature or in a dry environment, remember to tweak your hydration strategy according to what your body requires. Trust me, your future self will thank you for it when you’re not feeling sluggish!
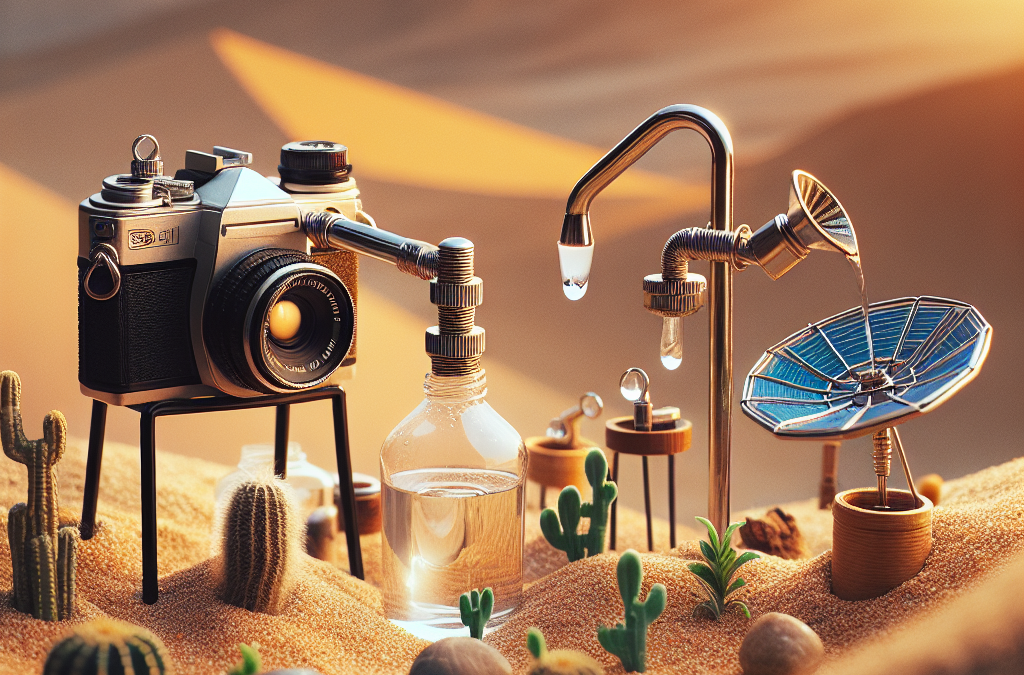
Utilize Alternative Hydration Sources
Incorporate High-Water Content Foods
One of my favorite tricks for staying hydrated without drowning in water is loading up on fruits and vegetables with high water content. Items like cucumbers, watermelon, and oranges not only help deliciously quench my thirst but also provide essential nutrients.
I often make smoothies or salads packed with these ingredients as a refreshing way to hydrate. It’s like multi-tasking for your body; you’re not just drinking water—you’re getting vitamins and minerals at the same time.
During times when water is limited, I try to have a stash of these snacks available. If I know I’m going to be in a place with little access to clean water, having these foods ensures I’m still fueling my body properly.
Explore Hydration Options Beyond Water
Have you ever thought about alternative hydration sources like herbal teas or electrolyte drinks? I’ve found that these options not only taste great but can also provide added benefits, especially when I’m sweating a lot or feeling drained.
You’d be surprised how a nice cup of herbal tea can perk me up, or how coconut water can replenish my electrolytes when fresh water is scarce. It’s all about being inventive and trying things out to see what works best for you.
Just remember to check labels on ready-to-drink options, as they can be loaded with sugar. Look for natural, low-sugar options if you’re going this route to keep it healthy and hydrating without any weird aftershocks.
Carry Portable Water Sources
When I venture out, I always carry a reusable water bottle with a built-in filter. This small addition has been a game-changer for me, allowing me to drink from streams or refill at public fountains with peace of mind.
If you don’t have a water filter, carrying purification tablets can also come in handy. In situations where I’m unsure about water quality, these tablets enable me to make ordinary water safe to drink, which is super comforting when I’m outdoors.
So, make sure to prepare yourself ahead of time before heading out by packing these essentials. It’s all about being ready and making the most of what’s available!
Monitor Your Hydration Regularly
Set Reminders to Drink Water
One simple, yet incredibly effective tip I personally rely on is setting reminders on my phone to drink water. Sure, it sounds a bit anxious at first, but trust me, it’s easy to forget to hydrate when caught up in daily activities.
What I’ve started doing is setting an alarm every couple of hours to remind myself to drink. When the alarm goes off, I simply knock back some water. It’s become part of my routine, and I bet it could work for you too!
Over time, I’ve found that this habit not only keeps my energy up but greatly reduces the chances of that dreaded dehydration headache later on. The key is consistency!
Track Your Intake
There are amazing apps and fitness trackers available nowadays that can help you monitor your water intake. I’ve played around with several and found them to be quite motivating. Seeing my daily hydration levels has encouraged me to make better choices!
By logging what I drink, I’ve gained insight into my habits and see that I often underestimate my daily needs. This awareness helps me adjust and prevent those moments when I realize I’m way behind on hydration.
If tech isn’t your jam, keeping a notepad might do the trick too. It could be as simple as marking down every glass of water you drink throughout the day. Just figure out what works best for you!
Assess Hydration Effects on Performance
Finally, I’ve noticed how maintaining good hydration directly impacts my performance, whether exercising or at work. When dehydrated, I become sluggish and struggle to concentrate. It’s all about feeling good and functioning at my best.
When I’m well-hydrated, my energy levels soar, and tasks feel more manageable. I complete my workouts without feeling wiped afterward, and I promise, a clear mind makes all the difference in productivity.
So, pay close attention to how your body responds to your hydration habits. I guarantee it’ll motivate you to stay on top of your water game when you notice how so much better you feel each day!
Make a Plan for Emergencies
Create Your Hydration Strategy
Life throws curveballs all the time! I always make it a priority to have a hydration strategy ready for emergencies. If I’m going somewhere that might lack water sources, I mentally create a game plan on how to manage my intake effectively.
This strategy might involve figuring out how much water to bring along, identifying potential water sources, and setting reminders to hydrate. Planning ahead saves me a lot of stress when water is running low. It makes those situations less scary because I have backup plans!
Always remember: Preparation is key. If I’m heading into the wilderness, I’ll know exactly how to ration my water while drinking enough to stay functional. This approach has been a lifesaver more than once!
Know How to Purify Water
If you find yourself in a pinch, knowing how to purify water can be an invaluable skill. I’ve learned various methods, from boiling water to using filtration systems or solar purification, depending on the situation.
Carrying small water purification tablets can also be a game-changer for me, especially when traveling. I can fill up from a creek or tap and turn untrustworthy sources into something safe to drink. It feels empowering to have these skills in my back pocket!
Prepare yourself by practicing these methods beforehand. Test out purification tablets at home to get comfortable with them. This knowledge could be invaluable when you find yourself in an unexpected scenario!
Share Your Strategy with Others
Lastly, don’t forget to share your hydration strategies with friends or family. I find that discussing what works for me encourages others to take their hydration seriously as well. We reinforce each other’s good habits!
Maybe plan hikes or outdoor activities together where water management can be a joint effort, swapping tips and tricks. It’s super reassuring knowing we’re all on the same page and supporting each other in staying hydrated.
Who knows? You might even learn something new from them that you can incorporate into your routine. Always keep that line of communication open; it makes for a supportive community!
FAQs
What are some signs I might be dehydrated?
Common signs include dry mouth, fatigue, dark yellow urine, and headaches. It’s crucial to tune into these signals before they escalate.
How much water should I drink if water sources are limited?
The general recommendation is to aim for about 2 to 3 liters daily, but adjust based on activity levels and weather conditions.
What foods can help with hydration?
Fruits and vegetables with high water content, like cucumbers, watermelon, and oranges, are fantastic options to boost hydration.
What are some alternative hydration sources besides water?
Herbal teas, coconut water, and low-sugar electrolyte drinks are great alternatives worth considering when water is limited.
Why is it important to monitor hydration?
Regularly monitoring your intake ensures you’re meeting your hydration needs and helps you maintain energy levels for daily activities.
by Preparation | May 13, 2025 | Preparedness
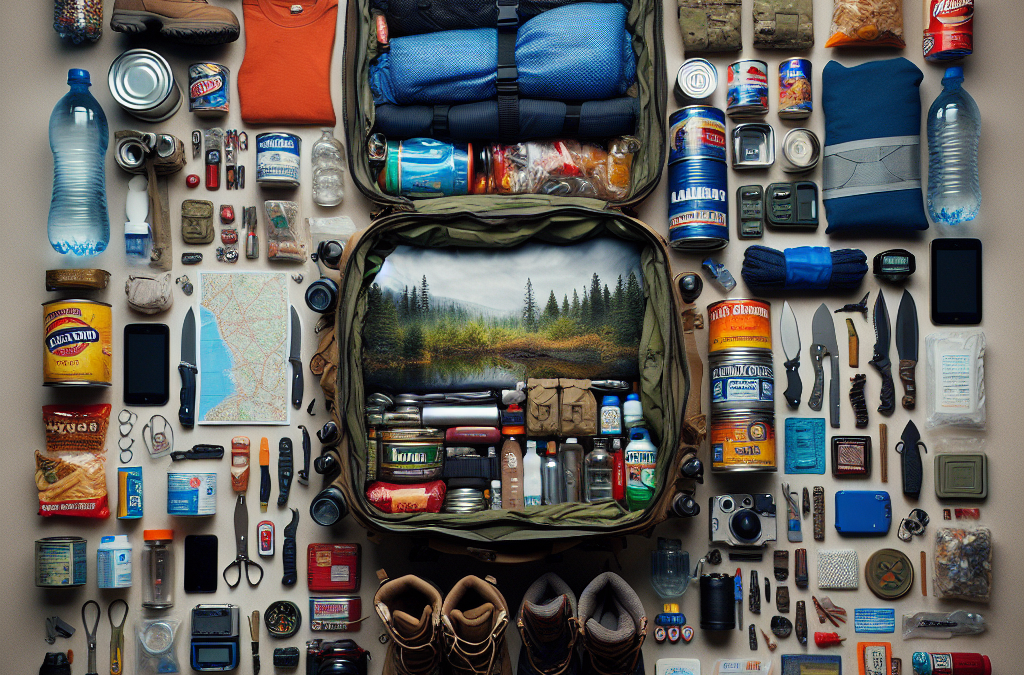
1. Choosing the Right Bag
Assessing Your Needs
Alright folks, let’s get right into it! When you’re choosing a bug-out bag, you have to think about what you’re gonna need it for. Are you planning for a natural disaster, a road trip, or maybe just some wilderness adventure? Each scenario will require different items, so sit down and really consider what your top priorities are.
I remember when I first put together my bug-out bag; I just grabbed the biggest backpack I had lying around. That was a mistake! A bag that’s too big can get heavy fast, so ensure it’s not just spacious but organized enough to find everything you need quickly.
Also, your bag should be durable. Look for something made out of tough materials, with water-resistant properties. You want this bag to last through rough conditions, not fall apart after a few uses.
Different Sizes and Styles
Next, consider the size and style of your bag. You don’t want to go overboard; usually, something that holds 72 hours’ worth of supplies is ideal. That’s about 50-75 liters for most people. For me, I found that a medium-sized backpack with compressible features does wonders because it keeps everything compact.
Then there are different styles. You’ve got the classic backpack, sling bags, or even tactical options. I personally lean towards a tactical bag because of the versatility and extra features. They can be handy for attaching gear and organizing tools, which is super important when you’re on the go.
So, think about what fits comfortably and suits your style. If you don’t like carrying it, you won’t use it, and that’s the last thing you want in an emergency!
Budget Considerations
Let’s not forget about budget! I get it; you want to stock up on all the cool gadgets and tools, but it’s crucial to set a budget for your bug-out bag. You can find quality bags and supplies without breaking the bank. Check out sales or even second-hand options; sometimes, you can score fantastic gear for much less.
On my journey, I discovered that there’s no single “perfect” bag for everyone. Sometimes you find a decent bag that just needs a few tweaks with added pockets or pouches. Do a bit of research and read reviews before plopping your cash down.
Remember, the goal is to be prepared, so don’t skimp on quality where it really matters—like the bag itself—but also know you don’t need to spend a fortune to be ready for anything.
2. Essential Supplies
Food and Water
Moving on to supplies! When it comes to food and water, the rule of thumb is to pack enough for at least three days. I usually throw in some energy bars, freeze-dried meals, and even a couple of nice protein packs that I know won’t spoil quickly. High-calorie foods are your best friend here!
Water is a huge must-have. I always include a portable water filter and a few collapsible water containers. Trust me, carrying bottles around can become cumbersome. With a filter, you can refill from almost any fresh water source.
Don’t forget about the space! Keep everything compact to save room. You might want to consider some waterproof bags to keep your food fresh and dry in case of mishaps.
First Aid Kit
Now let’s talk about the first aid kit. I can’t stress how crucial this is! A well-stocked first aid kit can be your lifesaver. I started with a basic one and added my personal touch over time: more antiseptic wipes, bandages, and even some pain relievers.
Make sure you have items tailored to your specific needs, especially if you have allergies or chronic conditions. I’ve also found it helpful to keep a little instructional guide in my kit for emergencies. You never know when someone’s going to need some basic first aid!
Don’t forget to check your kit regularly and replace items that have expired. If you’re not prepared, it can lead to bigger problems when you actually need it.
Tools and Gear
Alright, now let’s cover tools and gear. You might be a whiz at survival skills, but having the right tools can make a massive difference. I always keep a multi-tool in my bag; they’re incredibly versatile and save space.
Flashlights, fire starters, and emergency blankets are also a must. And trust me, a good rope can come in handy in various situations—from securing items to makeshift shelter—in case you find yourself in a bind.
Lastly, don’t forget a map and compass or a satellite communicator if you’re going off the grid. Technology can fail, but the classics will always work. These tools can help you navigate back to safety when things go haywire.
3. Clothing and Shelter
Choosing the Right Clothing
Clothing should never be overlooked in your bug-out bag preparations. I mean, think about it—it’s your first line of defense against whatever Mother Nature throws at you! I always pack moisture-wicking base layers, a durable outer layer, and of course, a warm hat and gloves.
The trick is to layer, layer, layer! That way, you can adjust according to the temperature. Also, try to stick to neutral colors that blend in with your surroundings. Bright colors can attract attention you might not want!
Water-resistant fabrics are essential, so consider that when you’re selecting your clothing. I once got caught in the rain with cotton clothes, and trust me, you don’t want to feel soaked when you could be warm and dry.
Personal Shelter Options
When it comes to shelter, I always prioritize lightweight options, like a compact tent or a hammock with a rainfly. The last thing you want is to be weighed down by heavy gear. I remember the first time I set up a tent; it was a game changer. Having a place to stay dry and shielded from the elements is crucial.
Consider a thermal or emergency protection blanket too. They don’t take up much room, and boy, they work wonders in keeping your body heat in when the temperatures drop at night!
Plus, a tarp can provide versatile options, whether you’re building a makeshift shelter or covering your gear during poor weather. It’s about thinking ahead and preparing for the unknown!
Adjusting for Seasons
Now, don’t forget to adjust your clothing and shelter based on the season. In the summer, you might prioritize breathable fabrics, while in winter, insulating layers become essential. I try to review my bug-out bag every few months, swapping out items as the seasons change.
Also, keep an eye on the weather, and if you’re going somewhere specific, make the necessary adjustments! You wouldn’t want to be caught in the wrong gear during extreme conditions.
This attention to detail can greatly increase your chance of survival and comfort while you’re out adventuring. Always think about where you’re headed and prepare thoroughly!
4. Important Documents
Identification and Legal Papers
When I first put together my bug-out bag, I completely overlooked documents! Your ID, insurance papers, and any legal documents should always be on your packing list. You never know when you might need to prove your identity or access emergency services!
Make copies of important documents and store them in a waterproof bag. Even a digital copy stored on a USB can come in handy, so you have access regardless of what happens to the physical copies.
Think about things like financial information, medical records, and any permits you require depending on where you’re heading. These details can make navigating emergencies that much easier!
Emergency Contacts
Keep an updated list of emergency contacts, too. If you’re in a bind, you need to reach your family, friends, or even emergency services quickly. I keep mine in my wallet and a copy in my bug-out bag in case I misplace my phone.
Consider including an emergency communication plan with instructions on how to contact each other in case of separation. This can ease a whole lot of stress during chaotic situations.
It helps to ensure that you are on the same page with those closest to you, reducing panic if something goes wrong. Plus, it’s good to have everyone’s contact information in one place.
Miscellaneous Documents
Additional documentation like property deeds, titles for your vehicle, and financial information can help you get back on your feet later if disaster strikes. I like to keep these in a separate, waterproof pouch just to be safe.
In some situations, you might also need maps of your area or lists of critical resources nearby. Think about your location and what kind of documents could be beneficial, and then stash them in your bag!
Having these important papers at your fingertips when you need them can make a huge difference, so don’t overlook this aspect of your emergency preparation!
5. Regular Maintenance and Updates
Check and Replace Supplies
Last but definitely not least is the regular maintenance of your bug-out bag. It’s easy to throw stuff in there and forget about it, but trust me, you need to check your supplies regularly! You don’t want to find out that your food has expired or your flashlight batteries are dead when it’s go-time.
I usually set a reminder to go through my bag every six months. I check the food items, swap out batteries, and ensure everything is still in working condition. It’s a quick process if you stay on top of things!
Plus, you’ll probably spot things that need to be reinforced or improved. Each review means your bug-out bag just keeps getting better!
Stay Informed
Staying updated on potential threats in your area and new survival techniques can impact your bug-out strategy. I like to read up on survival blogs or join local prepping groups to stay in the loop; there’s always something new to learn!
Also, try practicing your skills. Go out camping or hiking and actually use your gear! It helps you know how to best utilize your bag when you really need it.
Knowledge is power in emergency situations, so keeping your skills sharp is as important as the supplies you carry!
Adapt to Changes in Life Circumstances
Your needs might change based on your lifestyle, so don’t forget to adapt your bug-out bag accordingly. Whether you have kids, pets, or new hobbies, think about how these elements fit into your kit.
As life evolves, so should your bug-out strategy. If you know you’re gonna be in a different region soon, adjust your supplies to fit that area’s specific needs. Every detail matters!
Remember, being prepared for anything means being adaptable. Take that to heart as you review and update your bug-out bag regularly!
FAQs
1. What is a bug-out bag and why do I need one?
A bug-out bag is a portable kit that contains everything you might need in an emergency situation where you have to leave your home quickly. It’s essential for being prepared for situations like natural disasters or unexpected evacuations.
2. How often should I check my bug-out bag?
It’s a good idea to check your bug-out bag every six months. This way you can replace any expired supplies and ensure everything is in working order.
3. What should I prioritize when preparing my bag?
Your priority should focus on food, water, shelter, first aid supplies, and important documents. Outside of essentials, think about your personal needs and preferences!
4. Can I pack my bug-out bag too heavily?
Absolutely! A heavily packed bag can slow you down. Aim for lightweight, essential items and regularly assess what you truly need.
5. What if I have special needs or kids to consider?
If you have special needs or children, ensure your bug-out bag reflects their needs. Pack any necessary medications, foods, and supplies that are specific to them for a successful evacuation.
by Preparation | May 13, 2025 | Preparedness
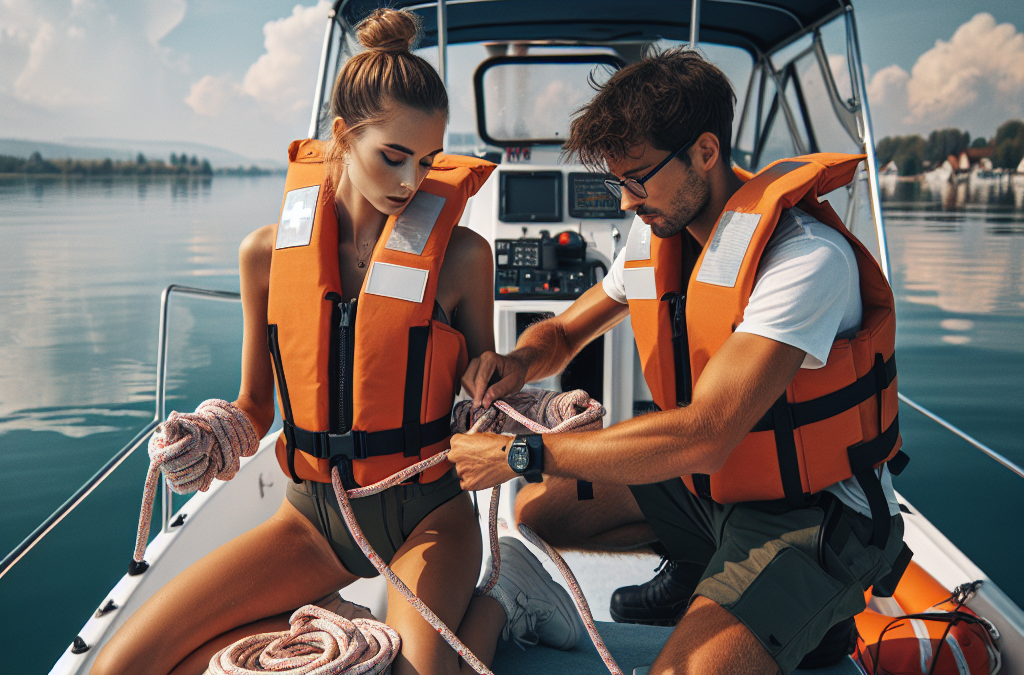
Understanding the Basics of Boating Safety
Importance of Safety Gear
Let’s kick things off by chatting about safety gear. Honestly, having the right equipment can be a real game changer when you’re out on the water. When I first started boating, I didn’t quite grasp just how vital life jackets and other gear were!
Every time I step onto a boat, I ensure that I have my life jacket on. They come in all shapes and sizes nowadays, so there’s no excuse to go without one. And don’t forget about other essentials like flares, a whistle, and a first aid kit. You never know when you might need them!
Also, ensure your gear is in tip-top shape. A cracked life jacket or faulty flair might just make all the difference in an emergency, and trust me, you don’t want to find that out the hard way.
Understanding Weather Conditions
Another crucial skill I’ve picked up is reading the weather. Before any of my outings, I always check the forecast. Trust me, clear skies can turn stormy in the blink of an eye, and I’ve learned that lesson well!
Pay attention to wind patterns and cloud formations as well. If you see dark clouds rolling in, it might be time to cut your trip short. I’ve had to turn back more times than I can count because I ignored the signs—a real lesson learnt.
Consider downloading a weather app that gives updates in real-time. Having that info at your fingertips can mean the difference between a fun day on the water and a hectic scramble to safety.
Basic Navigation Skills
The first time I hopped on a boat, I thought the GPS was all I needed. Boy, was I wrong! Basic navigation skills are essential. Knowing how to read a compass and understand your maps can save you a ton of trouble.
It’s super important to familiarize yourself with navigational markers and buoys. They’re not just decoration! Each color and shape has a specific meaning, and learning what they are can help you steer clear of hazards.
Also, practice makes perfect. Try to navigate familiar waters first. This way, when you venture into uncharted territory, you’ll feel more confident in your abilities.
Emergency Preparedness and Response
Creating an Emergency Plan
Now, let’s talk about emergency preparedness. Every trip out should start with a solid plan. I like to sit down and outline what I would do in various emergency scenarios the night before my outing. Why? Because it’s better to be safe than sorry!
Think about potential emergencies: capsizing, getting lost, or even medical issues. Your plan should address these situations and cover action steps for everyone on board. Make sure your crew knows the routine!
Make it fun; include role-playing to help everyone understand their responsibilities. You’d be amazed at how much more at ease everyone feels once they know what to do in a crisis.
First Aid Knowledge
I can’t stress how important basic first aid knowledge is. Accidents happen, whether it’s a scrape from fishing or something more serious like a severe allergic reaction. Knowing what to do can literally keep someone alive.
I took a first-aid course a couple of years back, and it wasn’t just helpful; it made me feel empowered. From CPR to bandaging a wound, these skills are invaluable on the water, where help can feel so far away.
Remember to carry a first aid kit, but don’t just stash it away. Familiarize yourself with the contents and ensure it’s stocked up and always accessible. It’s one of those things that could really make a difference.
Staying Calm During Emergencies
In any emergency, staying calm is key. I remember a time when my engine stalled in choppy waters—panic was creeping in, and I had to consciously remind myself to breathe. It’s easier said than done, but keeping a level head can save your life!
When things go south, rely on your training and your emergency plan. If you’ve prepared well, you’ll have a framework to operate within, which can stabilize you when panic tries to take hold.
Practice calming techniques, like deep breathing or counting to ten. The better you are at staying calm, the easier it’ll be to respond rather than react during an actual emergency.
Swimming and Water Survival Techniques
Enhancing Your Swimming Skills
If you’re going to be on the water, you should be able to swim, plain and simple. I took swim lessons to boost my confidence and technique, and that was one of the best decisions I made! Even if you feel like a decent swimmer, there’s always room to improve.
So, hit your local pool and practice. Even doing drills to improve your endurance and speed can make swimming feel second nature when you’re in open water.
Get comfortable with various strokes, and practice swimming in clothes, too. You never know when you might find yourself in that kind of situation, and you need to be prepared for it!
Reaching Safety in Emergencies
Let’s say you fell overboard or your boat capsized; your immediate goal is to reach safety. Familiarize yourself with the safest swimming techniques to get to the nearest shore or floating objects.
Remember to float on your back if you need a breather. This can conserve energy and keep you above water. I’ve found practice in calm waters to be hugely beneficial, as it helps me feel prepared for the chaos of an actual emergency.
If you’re ever stuck in open water, try to stay calm and assess your surroundings. Look for other boats or landmarks to help guide your way. Keeping your wits about you can help tremendously!
Using Personal Flotation Devices (PFDs)
I’ve already harped on the importance of life jackets, but let’s dive deeper into PFDs. Modern flotation devices are designed to keep you safe in style, with options ranging from vests to jackets.
Ensure your PFD fits properly, as an ill-fitting device may not save you. I learned the hard way when my jacket slipped off during a boating mishap. You want it snug but comfortable enough to swim in it!
Lastly, get familiar with how your PFD functions. If you’re in open water, having the confidence to use your flotation device can save lives. Trust me, it can be a lifeline when the unexpected happens!
Regular Maintenance of Your Boating Equipment
The Importance of Routine Checks
Before hitting the water, I always conduct routine checks on my boat. Trust me, doing these checks can prevent a ton of headaches later on! I’ll check the batteries, the engine, and all safety equipment to ensure everything’s in shipshape.
Creating a checklist can be really helpful. I simply go through it before every outing so I don’t forget a crucial piece of equipment or overlook potential issues. This routine has saved me more than a few times!
Staying proactive rather than reactive can truly make a world of difference. Trust me, you don’t want to deal with a breakdown miles from the shore!
Cleaning and Storing Your Equipment
After an outing, I make it a habit to clean and store my gear properly. Saltwater and grime can quickly damage equipment if you leave them unattended. A quick rinse and thorough drying can extend the life of your valuables!
When storing my boat for extended periods, I do a full inspection. I’ll cover it up to protect it from the elements and keep it functioning well for my next adventure.
By taking care of your gear, you’re not just ensuring its longevity; you’re also ensuring safety for yourself and your fellow boaters. It’s vital to keep that cycle going!
Keeping Up with Safety Regulations
Rules and regulations for boating are always evolving, and keeping up with them can be tricky. I make it a point to regularly check local regulations and any updates regarding safety requirements and navigation rules.
Consider joining a local boating community or online forum. Networking with fellow boaters can provide you with valuable insights into the latest safety regulations and best practices in your area.
Staying informed means not only keeping yourself safe but also contributing to the safety of others. When we all adhere to the same set of rules, everyone benefits!
Frequently Asked Questions
What is the most essential survival skill for boating?
One of the most essential skills is understanding basic safety gear and ensuring you have all necessary equipment on board, like life jackets, signal devices, and a first-aid kit.
How can I effectively handle an emergency on the water?
The best way to handle emergencies is through preparation. Have an emergency plan in place, know basic first aid, and practice staying calm under pressure.
Is swimming proficiency necessary for boating?
Yes, swimming proficiency is very important. It’s crucial to feel comfortable in the water in case you need to swim or assist someone in distress.
What should I do if I get caught in rough weather while boating?
If you’re caught in rough weather, execute your emergency plan. Seek shelter if possible, and try to navigate back to shore while staying calm and focused.
How often should I check my boat’s equipment and safety gear?
It’s advisable to conduct routine checks before every outing. Post-outing checks are also critical to ensure everything is maintained and stored properly for future use.


