
by Preparation | May 13, 2025 | Preparedness
Understanding the Importance of Forward Planning
What is Forward Planning?
Forward planning is like having a roadmap for your life, goals, or any project you’re tackling. It’s all about taking a step back and looking at the bigger picture before diving in headfirst. From my experience, when I take the time to plan ahead, everything seems to flow much more smoothly. You can identify potential roadblocks and set yourself on a path to success instead of scrambling around at the last minute. Trust me, it’s a game-changer!
Moreover, forward planning isn’t just about figuring out what I want to achieve; it’s also about anticipating challenges. By thinking through how various scenarios might play out, I mentally prepare myself for the unexpected. It’s like having a secret weapon—an ace in the hole that keeps me ahead of the game!
In my projects, I’ve often noticed that I’ve felt more in control and confident when I’ve engaged in thorough planning. It’s a proactive rather than reactive choice, and it can make all the difference between success and a last-minute panic!
Why It Matters
Implementing a forward planning strategy is vital for a couple of reasons. First, it helps prioritize tasks and allocate resources wisely. I’ve found that when I’m juggling multiple responsibilities, identifying what’s urgent versus what can wait is crucial. This clarity helps me focus on what truly matters and prevents me from getting bogged down by tasks that aren’t immediately necessary.
Additionally, forward planning reduces stress. When I know what’s coming down the pipeline, I can manage my time better and prepare for upcoming deadlines. Instead of waking up in a frenzy, I can approach each day with a clear mind and a solid plan.
Ultimately, it allows for adaptability. Life is full of surprises, and while I can’t control everything, I can respond proactively rather than reactively. This quality alone has transformed the way I handle challenges in both my personal and professional life.
Setting Realistic Goals
A huge part of forward planning is setting realistic goals that are both achievable and measurable. From my perspective, it’s vital to break down larger goals into smaller, manageable milestones. This makes the whole process feel less overwhelming and allows for a sense of accomplishment along the way.
What’s worked for me is the SMART criteria—specific, measurable, achievable, relevant, and time-bound goals. By crafting my plans around these principles, I’m setting myself up for success. It’s like creating a checklist that keeps me on the right track!
And here’s a tip: always be flexible with your goals. Sometimes life throws curveballs, and it’s important to adjust your plans accordingly. Embracing the fluidity of your objectives helps maintain motivation and keeps things fresh!
Identifying Potential Challenges
Recognizing Obstacles
One of the keys to successful forward planning is identifying potential challenges before they arise. It’s a bit like driving—you can’t just focus on the road ahead; you also need to anticipate any bumps or turns that might come your way. I always recommend dedicating time to brainstorm possible obstacles related to my goals.
It’s often helpful to create a “what if” scenario list. For instance, I might think, “What if I miss a deadline?”, or “What if resources are limited?” By considering these questions, I can strategize solutions ahead of time, which, let me tell ya, is incredibly empowering!
Being proactive about challenges allows me to remain calm under pressure. It’s all about having contingency plans at the ready, giving me the confidence to tackle whatever life throws my way. Learn from this: when you get in the habit of anticipating hurdles, you’ll find they become much easier to navigate!
Being Open to Change
Now, real talk: not everything goes according to plan. I’ve learned that embracing change is a crucial part of the forward planning process. Sometimes the goals I set don’t align with my evolving priorities or external circumstances, and that’s okay!
I’ve found that staying open-minded about adjustments is key. Whether it’s revisiting my goals or tweaking my timeline, flexibility keeps me resilient. When I face unexpected challenges, I can pivot instead of feeling defeated. This adaptability is vital in maintaining progress and not getting stuck in rigid thinking.
Remember, change isn’t a setback; it’s a part of the journey! Embrace it, and watch how it can lead to unexpected opportunities that you might not have considered initially.
Communicating Effectively
One aspect of planning that’s often overlooked is communication. Whether you’re working in a team or managing a personal project, ensuring that everyone is on the same page is essential. I’ve seen firsthand how effective communication can improve collaboration and streamline processes.
I always make it a point to share my plans and ideas with those involved. This transparency creates an environment where feedback is welcomed, and adjustments can be made collaboratively. Speaking of, I’ve learned that asking for input can offer new perspectives that enhance the overall plan!
Moreover, clear communication minimizes misunderstandings that can lead to obstacles down the road. So make an effort to keep everyone in the loop. Trust me; it pays off in dividends!
Creating a Flexible Action Plan
Building Your Action Steps
Once I’ve laid the groundwork, it’s time to create a solid action plan. This is where the magic happens! I like to outline specific tasks that need to be accomplished, breaking them down into even smaller steps if necessary. This makes them feel manageable and less intimidating.
By using tools like to-do lists or project management apps, I track my progress and stay organized. I find that visually seeing what I need to accomplish often provides the motivation I need to get things done. Plus, checking off completed tasks is so satisfying!
And hey, make sure to include deadlines for each step. While some days might require my attention elsewhere, having specific time frames for each task keeps me accountable and on track.
Reviewing and Reflecting
A crucial part of my action plan is to set aside time to reflect on progress regularly. I can’t emphasize this enough! Whether it’s weekly, monthly, or after completing a project, reviewing what I did well and what didn’t go as planned helps me adjust and improve.
I find it beneficial to ask myself a few key questions: Did I achieve my goals? What challenges did I face? How can I do better next time? This reflection process is fundamental in building a growth mindset and ensuring future plans are even more robust.
Don’t forget—give yourself a pat on the back for your achievements too, no matter how small! Acknowledging your wins boosts morale and keeps the fire burning for your next set of goals.
Adjusting as Necessary
Making adjustments is natural and, dare I say, necessary! As I’m going through my action plan, it’s essential to remain aware of any changes that might need to be made. Sometimes life throws unexpected challenges, and rather than seeing them as setbacks, I treat them as opportunities to recalibrate.
I’ve had to shift gears many times, whether it’s extending deadlines or re-evaluating priorities. Embrace this fluidity in your forward planning, and don’t be afraid to pivot! Being flexible with your plans allows you to remain adaptive and keep moving forward, regardless of the bumps in the road.
Consistency, coupled with adaptability, creates a powerful recipe for success. Always be prepared to modify your plans based on your ongoing reflections and changing circumstances!
FAQ About Positive Preparedness: The Power of Forward Planning
1. What is forward planning?
Forward planning is the practice of setting clear goals and identifying the steps necessary to achieve them while anticipating challenges and changes that might occur along the way. It’s like a roadmap to help you stay on track.
2. Why is it important to identify potential challenges?
Identifying potential challenges allows for proactive problem solving. By recognizing obstacles in advance, you can create contingency plans that keep you moving toward your goals, minimizing stress and uncertainty.
3. How do I create an effective action plan?
An effective action plan includes clear, manageable action steps, deadlines for each task, and regular reviews to assess progress. It’s also vital to be flexible and ready to adjust the plan as circumstances change.
4. What are some tips for communicating effectively during the planning process?
Maintain transparency by sharing your plans with everyone involved. Encourage feedback and be open to suggestions. Clear communication prevents misunderstandings and enhances collaboration.
5. How can forward planning help in stressful situations?
Forward planning helps minimize stress by providing a clear direction and understanding of what needs to be done. When you know what to expect, you can manage your time and resources more effectively, leading to greater confidence in facing challenges.

by Preparation | May 13, 2025 | Preparedness
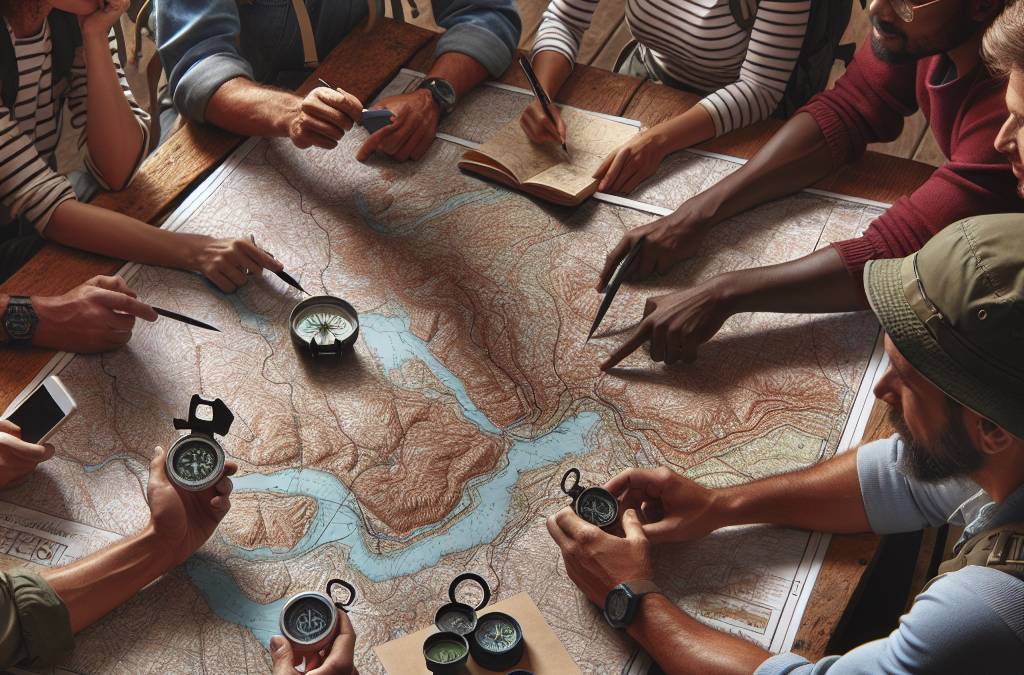
Hey there, fellow adventurers! If you’ve ever found yourself wandering in the great outdoors, you know how crucial navigation can be. I’m here to share my personal take on how to use a map and compass effectively. This isn’t just theory—I’ve learned this stuff through plenty of trial and error out on the trails. So grab your gear, and let’s dive into it!
Understanding Your Map
Types of Maps
When it comes to maps, it’s like a candy shop—you’ve got plenty of options! There are topographic maps, which show elevation changes, and road maps, which are more about the streets and highways. I personally lean towards the topographic maps when I’m trekking, as they can give you a lot of insight into what lies ahead—like hills, rivers, and valleys.
Another favorite of mine is the trail map. These are specific to hiking trails and often include important information, like distances, estimated times, and difficulty levels. It’s just super helpful to know what you’re getting into when you’re heading out!
Finally, don’t underestimate the digital maps available on your phone. While I always carry a physical map for backup, tech can really help me plan routes before I hit the trails.
Map Symbols and Legends
Next up, let’s chat symbols. Every map has a legend, which is basically a key that explains what those little icons mean. Trust me; getting familiar with them will save you some headaches later! From marking trails to indicating water sources, these symbols are your best friends when navigating.
It’s a bit like learning a new language—at first, it feels overwhelming, but with time, it becomes second nature. Make sure to spend some time studying the legend and get to know the symbols; it’ll pay off when you’re out there.
I often find that while I’m studying the map, it also helps me visualize my route, making the journey feel more immersive and exciting. So, don’t rush this part!
Plotting Your Route
The most thrilling part, in my opinion, is plotting your route. It’s like creating a mini-adventure! Once you have an idea of where you want to go, use a pencil to mark your waypoints onto the map. I love to do this before I head out so I can have a clear picture when I’m in the field.
But don’t forget to factor in your pace, the terrain, and any potential obstacles. These elements can impact your travel time more than you might think! I’ve learned to allow for a little extra time during unexpected situations—it’s all part of the adventure.
Lastly, remember to set realistic expectations. Just because you can see a straight line on the map doesn’t mean it’ll be a walk in the park!
Using Your Compass
Parts of a Compass
Just like any tool, understanding your compass is key. Familiarize yourself with its parts—the needle, the baseplate, and the bezel. The needle always points north, and getting to know how it interacts with your map is crucial.
For instance, the baseplate often has a ruler on it, which can help you measure distances. Meanwhile, the bezel is rotational, allowing you to set bearings. I’ve found that by playing around with my compass, it becomes a lot less intimidating!
So take a few moments to hold your compass in your hand, spin it, and practice. A bit of hands-on experience will go a long way in building your confidence before hitting the trails.
Taking Bearings
Okay, now we’re getting into some nitty-gritty stuff! Taking bearings with your compass is like getting a cheat code for navigation. To do this, hold the compass flat in your palm and rotate your body until the needle lines up with the north marking on the compass. Voilà, that’s your bearing!
Once you have your bearing, you can align it with your map. Find a feature on the map you can see in the real world and use that landmark to stay on course. Honestly, it’s super satisfying, like putting together a puzzle.
And remember, practicing this skill will help you a ton when you’re out in nature. I can’t stress enough how much confidence it builds to know you’re heading in the right direction!
Following a Bearing
Now that you’ve taken a bearing, how do you follow it? Picture this: You’re on a trail with beautiful scenery but you need to steer in a specific direction. It’s easy! Focus on a fixed point in the distance that aligns with your bearing and walk towards it.
But here’s a friendly reminder—keep checking your map and compass so you don’t veer off course. I’ve had my moments where I got a bit too engrossed in the views and strayed off! It’s all part of the adventure, but constant checking helps keep your path clear.
As you move, make sure to adjust as needed. If there’s a big obstacle, like a lake or steep hill, don’t hesitate to recalculate your bearing. Flexibility is a big part of navigation!
Improving Your Skills
Practice, Practice, Practice
Just like any skill, the more you practice using your map and compass, the better you get. I make it a point to go on mini-adventures to test my skills. Whether it’s in the local park or the wild mountains, I always have my map and compass on hand.
Even just setting out to find specific landmarks can help. Each outing reinforces your skills and teaches you new tricks. It’s all about building muscle memory!
And hey, do it with friends! It’s a shared learning experience that can make it even more fun. Plus, they might have some cool tips to share!
Joining Navigation Groups
Another great way to improve is by joining navigation or hiking groups. Sharing experiences with like-minded folks is super valuable. Not only do you get to learn from more experienced navigators, but you also get to hear stories that make your own journeys feel more alive.
From workshops to group hikes, there are plenty of opportunities to sharpen your skills. I’ve made some amazing friends through these groups, and it definitely adds to the adventure!
Plus, discussing techniques and experiences opens up a world of tips that can enhance your navigation skills in ways you never expected!
Reflecting on Your Adventures
Lastly, don’t forget to reflect on your adventures! After each trip, I take some time to jot down what went well and what didn’t. Reflecting on these experiences really helps me learn from my mistakes and celebrate my wins.
Did I miss a bearing? What would I do differently next time? This reflection has helped me grow so much as a navigator, and I highly recommend it!
So grab your journal and start keeping track—you’ll thank yourself later!
FAQ
1. Do I really need a physical map if I have a smartphone?
Yes! Technology can fail, especially in remote areas. Always carry a physical map as a backup.
2. What if my compass isn’t pointing north?
Make sure you’re holding it flat and away from metal objects. Sometimes magnetic interference can mess with your compass. If it still doesn’t work, try another compass.
3. How do I stay oriented on a longer trek?
Regularly check your map and compass, and look for landmarks as you travel—they’re great indicators of your position!
4. Is it difficult to learn navigation skills?
It might feel daunting at first, but with practice, it becomes intuitive! Just take your time and enjoy the learning process.
5. Can I use a compass at night?
Absolutely! Just make sure you have a light source to see your compass and map. Night navigation can be magical!
So there you have it! With a bit of practice and patience, you can become confident in using a map and compass for navigation. Get out there, explore, and most importantly, have fun!
by Preparation | May 13, 2025 | Preparedness
Creating a Defensible Space
Understanding Defensible Space
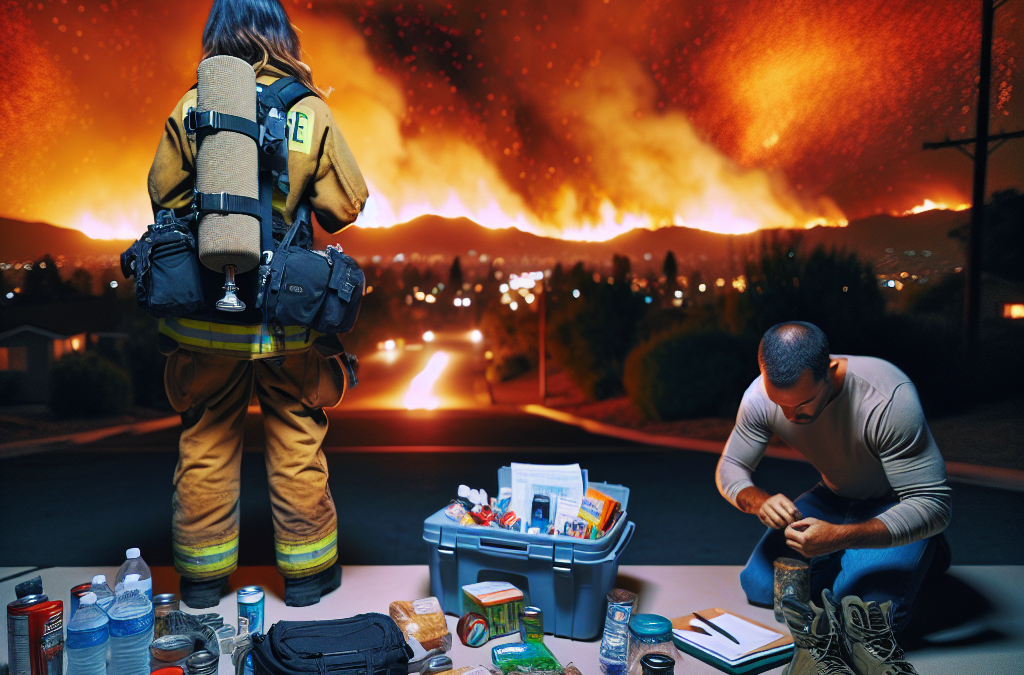
When I first learned about defensible space, I didn’t think it was that big of a deal. I mean, it’s just the area around my home, right? But boy, was I wrong! This space is crucial in preventing wildfires from reaching your property. By creating a buffer zone where flammable materials are limited, you can fend off flames and embers, increasing your home’s chances in a wildfire scenario.
Defensible space is often broken down into zones, each requiring specific actions and considerations. Zone 1, which is closest to your home, should be maintained with no combustible materials, and plants should be spaced apart properly. In Zone 2, you can have landscaping, but it needs to be fire-resistant or at least thoughtfully maintained. It’s about creating layers of defense!
So, as you look at your property, consider making some changes. Trim those overhanging branches, clear dead leaves, and don’t underestimate the power of some carefully chosen plants. It’s all about that eye for detail that can make a real difference.
Landscaping with Fire-Resistant Plants
Choosing the right plants is like having a fire-fighting squad right in your garden! Fire-resistant plants can create barriers that slow the fire’s progress. I learned quickly that native plants are often the best because they’re adapted to the local environment and usually require less water, too. It’s like a win-win!
When landscaping, consider the layout as well. Grouping plants in clusters rather than scattering them throughout your yard can help contain a potential fire and ensure quick access for emergency responders if needed. Also, space those clusters out! It reduces the chance of a fire jumping from plant to plant.
Additionally, don’t forget about mulch! Using inorganic mulch or finely shredded bark can help reduce flammable material. Stay away from the traditional wood chips because they can be a fire hazard. Sometimes it’s the simple changes that bring the biggest benefits.
Regular Maintenance and Clean-Up
Man oh man, keeping up with maintenance can feel like a full-time job! But trust me, regular cleaning in the defensible space around your home is vital. I’ve adopted a routine of checking for fallen branches and leaves, especially after storms. It’s one of those “out of sight, out of mind” things if you’re not careful.
The key here is consistency. I set reminders on my phone every month to check my property. This way, I’m not scrambling to clean it all at the last minute. Plus, when fire season hits, you’ll be thankful for all that hard work that’s already been done.
Another important maintenance task is to manage your backyard debris. Old furniture, wood piles, and anything else that can accumulate should be stored neatly or discarded. It can often be easy to overlook those items, but a clean yard is a safer yard.
Emergency Kits and Evacuation Plans
What to Include in Your Emergency Kit
Having an emergency kit prepared can mean all the difference. I’ve put together one myself, and let me tell you, it’s like packing for a vacation—only this is way more important! Start with the essentials: food, water, medications, and a first aid kit. Also, think about including important documents and some cash—just in case things go south.
If you’ve got pets, don’t forget their needs! I made sure to stock up on their favorite food and also have a pet carrier handy, just in case. It’s one of those things that might slip your mind until you’re panicking, so make a checklist!
Lastly, make sure to update your kit regularly. I take an afternoon once every season to rotate out food and check that my supplies haven’t expired. Keeping your kit up-to-date gives you peace of mind.
Developing an Evacuation Plan
Now, let’s chat about evacuation plans. Honestly, this seemed a bit overwhelming at first, but it’s actually pretty straightforward. Sit down and plot out multiple escape routes from your home and neighborhood. Think about where you’d meet your family if things got chaotic. I personally like to map out both driving and walking paths—you can never be too prepared.
Additionally, have a plan for where you’ll go! Whether it’s a friend’s house, a nearby hotel, or evacuation sites established by local authorities, knowing your destinations ahead of time can calm your nerves during a crisis.
In our home, we also run through fire drills together, just like in school. It helps everyone remember the routes and keeps the panic at bay when the time comes to use them. Trust me, it makes a world of difference!
Staying Informed and Connected
In today’s world, information is everything! Staying connected—whether through local radio, social media, or community alerts—is critical when it comes to wildfires. I make it a habit to sign up for alerts from my local fire department. This helps me stay on top of conditions and any warnings that might come up.
Join community groups and forums; connecting with neighbors can provide both support and valuable information. Sharing tips and experiences has been a lifesaver for my confidence. We all throw in our ideas and strategies, and it just fosters a sense of community and preparedness.
Also, keep your smartphone handy. There are several apps designed to alert you to fires in progress, and downloading a few can be beneficial. Knowledge is power, and when it comes to wildfires, being informed can save lives.
Post-Wildfire Recovery and Prevention
Assessing Damage and Safety
After a wildfire, it’s easy to feel overwhelmed by what’s left behind. I remember after one near-miss proximity to my home, it was daunting to assess the damage. The first step is to ensure safety. Avoid any burnt areas or damaged structures until experts can evaluate them, and know that your health is paramount.
Take some time to survey your property, documenting damage for insurance purposes. It’s a painful yet necessary step, especially if you’re in a situation where you’ve lost valuable items. Be kind to yourself; it’s a process.
Reach out to local authorities and evaluate if assistance is available. Community resources can provide not just physical help, but emotional support, too. You’re not alone in this, so don’t be afraid to ask for help.
Implementing Recovery Strategies
Once it’s safe, turn your focus to recovery. This means cleaning up debris and beginning restoration efforts. Depending on the damage, it might be time to consult with professionals for rebuilding or repairing structures. I’ve learned that skipping this part can lead to bigger headaches later because it’s important to address underlying issues before they worsen.
Also, consider replanting efforts. Planting trees and shrubs can help restore the landscape and prevent further erosion, so invest in fire-resistant varieties. Not only does this aid ecological recovery, but it also enhances the overall aesthetics of the area.
Finally, look into grants or funding opportunities that exist to assist wildfire recovery in your area. My town has specific resources available, and it’s made a significant impact on both the community and individual homeowners trying to get back on their feet.
Implementing Preventative Measures
After experiencing a wildfire’s aftermath, it’s all about prevention for me. I’ve taken time to reinforce not just my home but my entire property. This includes hardening the structure by using non-combustible materials where possible. Simple things like installing ember-resistant vents can go a long way!
Regular monitoring and machinery maintenance are also crucial. Ensure power lines and trees are trimmed back and utilities are downgrading the risks of fire hazards. I came to learn that being proactive in these areas can be less stressful than dealing with the aftermath.
Lastly, educate your family about fire safety. Making sure everyone in your household knows how to handle these situations and knowing what steps will be taken can make a world of difference. Empowerment through knowledge is key!
Frequently Asked Questions
1. How do I create a defensible space around my home?
To create a defensible space, start by cleaning and maintaining a zone around your property that eliminates flammable materials. Use fire-resistant plants, space out vegetation, and regularly clean debris that can catch fire.
2. What should I include in my emergency preparedness kit?
Your emergency kit should include food, water, medications, pet supplies, a flashlight, batteries, a first aid kit, and important documents. Regularly check and update its contents to ensure everything is current and available when needed.
3. How can I develop an effective evacuation plan?
To develop a solid evacuation plan, map out multiple escape routes, decide on a meeting place for your family, and run drills to practice. Make sure everyone is aware of the routes and knows what to do in case evacuation becomes necessary.
4. How do I stay informed about wildfire risks or alerts?
Stay informed by signing up for local emergency alerts, following local fire department pages on social media, and using apps designed to provide wildfire risk notifications. Community groups can also be a valuable source of information.
5. What steps can I take post-wildfire to recover and prevent future incidents?
After a wildfire, first assess the damage safely. Focus on recovery strategies like cleaning up debris, restoring your property, and implementing preventive measures such as using fire-resistant materials. Educating your household also helps prepare for future risks.

by Preparation | May 13, 2025 | Preparedness
Choosing the Right Location
Understanding Your Surroundings
First off, let’s talk about location because, trust me, it’s everything! When I found myself needing to build an emergency shelter, I learned quickly that you want to set up shop in a safe spot. Look for an area that’s away from potential hazards like falling branches, steep slopes, or flash flood zones.
Make sure you check the weather too. If it’s about to rain, don’t pitch your shelter in a basin where water can collect. It’s all fun and games until you wake up floating. Choose a flat, dry area to keep it cozy and secure.
Lastly, give some thought to your surroundings in terms of resources. Are there any nearby trees for support or brush you can use? Also, think about your exit routes. You never know, and it’s always smart to have a plan!
Gathering Materials
What You’ll Need
So, let’s get down to business on the materials. I quickly learned that you don’t need a Home Depot level supply list. All you need is a few essentials to get rolling. Generally, a tarp, rope, or even some branches will do just fine.
If you’re lucky enough to have access to a proper tarp, awesome! If not, any plastic sheet, or even a large garbage bag can be a lifesaver. Remember, the point here is to keep the elements at bay, and a little ingenuity goes a long way.
Rope is super handy too – I can’t tell you how many times I’ve used it to tie things together or create a makeshift structure. If you don’t have rope, paracord or even shoelaces can work in a pinch. Just get creative!
Building the Shelter Structure
Creating a Strong Frame
Once you’ve picked your spot and gathered your materials, it’s time to build! I usually start by creating a frame using branches. The trick is to find some sturdy ones that can handle the weight of your tarp or cover material.
Visualize a shape like a lean-to: one end of the frame should be elevated while the other rests against the ground. This creates a nice slant where rain can run off, keeping you dry. I’ve made a ton of these and don’t forget to secure your branches well so they don’t collapse when you lean against them!
As I build, I always keep the wind direction in mind. You want to have the opening away from the wind to make it more comfortable inside and ensure better protection from the elements. It’s all about maximizing your comfort!
Securing the Shelter
Stability Matters
Now, securing your shelter might just be the most important step. You want your creation to withstand those gusty winds when the weather decides to toss a tantrum! I always make sure that the tarp is tied down tightly to prevent it from flapping around.
If you can, use rocks or logs to weigh down the edges of your tarp. This makes your setup extra stable and keeps it from blowing away. Plus, it adds a little extra insulation to help keep you warm.
Checking for any weak points is vital too. If something seems loose, take the time to reinforce it. I remember a night where I didn’t… and let’s just say it was a very uncomfortable wake-up call when everything collapsed on me!
Maintaining the Shelter
Keeping It Safe and Comfy
Finally, once you’re all set up, maintaining your shelter is key. I always make it a point to check for any wear and tear throughout my stay. If a few branches are starting to buckle or if the tarp seems to be losing tension, I don’t hesitate to fix it right away.
Keep the inside of the shelter clean too! A tidy space can help keep out pests and makes for a much more pleasant experience. I like to use natural materials for bedding, like leaves, to create a comfy little nest.
And, if you can manage it, consider a small fire outside (safely, of course) to provide warmth and light. Just make sure to keep it a safe distance away from your shelter so there’s no risk of fire spreading.
FAQ
1. What materials do I need to build a portable emergency shelter?
You’ll need a tarp or plastic material, rope, and sturdy branches to create the frame. A bit of creativity goes a long way if you don’t have the usual gear!
2. How do I choose the right spot for my shelter?
Look for a flat, dry area away from potential hazards like falling branches or flood zones. Always consider the weather conditions and your exit routes too.
3. How can I secure my shelter against strong winds?
Tie down your tarp securely, and use rocks or logs to weigh down the edges. Ensure that the overall structure is tight and stable to withstand gusts.
4. What should I do to keep my shelter comfortable?
Keep the inside clean, use natural materials for bedding, and make necessary repairs promptly. If possible, set up a fire a safe distance away for warmth and ambiance!
5. Do I need any special skills to build a portable emergency shelter?
Not at all! Basic knowledge of tying knots and arranging materials will suffice. It’s more about being resourceful and proactive than having expert skills.
by Preparation | May 13, 2025 | Preparedness
Preparation Before a Flood
Creating an Emergency Plan
When I think about facing a flood, the first thing that jumps to mind is preparation. Having an emergency plan is like your blueprint for survival. You’ve got to map out where you’ll go, how to get there, and what you’ll do if things get tricky. Make sure everyone in your household knows the plan. A little coordination goes a long way!
Everyone should have a role in the plan; it makes the whole situation less chaotic. If you’ve got kids, involve them! Let them help put together a “go-bag” with essentials. Kids often feel more empowered when they actively participate in the planning process.
Lastly, review and rehearse the plan. This isn’t something you just write down and forget about! Go through the steps together, and if possible, do a mock evacuation. It can be a great bonding experience and ensures everyone is on the same page.
Stocking Up on Supplies
You never know when a flood will hit, so having an emergency supply kit is a must. In my experience, I like to keep enough non-perishable food and water for at least three days for everyone in the household. It’s not just about food; think about medications, personal hygiene items, and other essentials too. You want to be completely stocked!
Don’t forget about your furry friends! If you have pets, make sure to include food, water, and any medications they might need in your emergency supplies. I can’t imagine being in a situation where I had to choose between my pet’s needs and mine. It’s all about planning for the whole family, right?
Also, keep important documents in waterproof containers. I learned the hard way that losing irreplaceable papers can complicate things when you’re trying to get assistance post-flood. So, having everything safely stored away saves a ton of headaches later!
Understanding Flood Alerts
It’s crucial to stay tuned into weather reports and alerts. These days, there are plenty of apps and services that provide real-time updates. When I’m alert for possible flooding, I ensure that I check reports multiple times a day. It’s better to be safe than sorry, after all!
Familiarize yourself with the different types of flood alerts: watches, warnings, and emergencies. They signal how serious the situation is. For example, if a flash flood watch is issued, it means conditions are favorable for flooding. Actively monitoring these alerts can save your life.
Additionally, local emergency management offices often share invaluable information about your specific area. It’s worth following them on social media or signing up for their newsletters. You’d be surprised how much peace of mind it brings knowing you’re being kept in the loop!
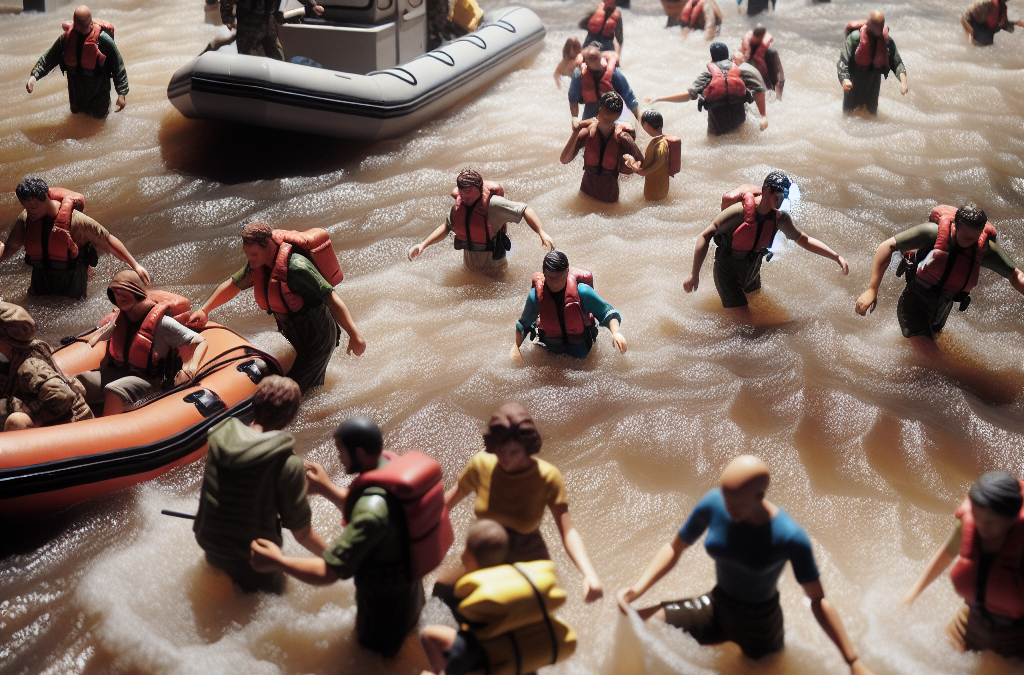
During the Flood
Evacuate If Necessary
If things take a turn and you need to evacuate, don’t hesitate! I’ve learned that staying put just because you think you’re safe is a risky move. Follow the planned routes in your emergency plan and avoid walking or driving through floodwaters. You never know how deep or fast the water is moving!
Don’t forget to take your emergency kit. Trust me, I’ve been in situations where I thought I’d be fine without it, and it’s a bad feeling! Pack some of your most important belongings if time allows—documents, medication, and loved items that can’t be replaced.
While evacuating, keep your family together. The chaos can make it easy to lose sight of one another. I always stress the importance of sticking together. It’s not just for safety; it’s comforting to know you’re all facing this challenge as a team!
Staying Informed
During a flood, it’s super important to stay updated. This is where battery-powered radios or phone alerts come into play. I always keep a radio handy for emergencies. Sometimes, power lines can go down, and cell service may get iffy, so having a backup is key.
Follow local authorities and emergency services on social media and listen to their reports. They often share critical updates about evacuation routes and safety notices. The more informed you are, the better decisions you can make for everyone’s safety.
If you’re at home and water starts to rise, don’t ignore it. It can escalate quickly. I’ve learned to have that mental switch ready to go just in case. Don’t wait for someone else to tell you to leave; trust your instinct!
Keeping Your Family Safe
In a flooding situation, ensuring everyone’s safety has to be your top priority. Avoid flooded areas, stay away from downed power lines, and steer clear of electrical appliances and outlets. Staying safe means keeping a level head and thinking about what’s truly essential.
Communicate with each family member about what to do in an emergency. It helps everyone know what’s happening, and it can reduce anxiety. If you have kids, it’s comforting for them to see that there’s a plan in place, even when things seem scary.
Lastly, don’t forget to have a buddy system. If you’ve got neighbors who are also trying to navigate the flood, check in on each other. Sometimes those connections can make all the difference when you’re feeling isolated or overwhelmed.
After the Flood
Returning Home Safely
When the floodwaters recede, and it’s time to go home, you need to approach it with caution. It’s easy to want to rush back, but checking for any hazards should be your first step. Look out for structural damages, downed electrical lines, and any signs that the area is still unsafe.
Always listen to local authorities regarding when it’s safe to return. They often provide the best information on whether areas have been cleared or are still in danger, which can protect you from accidental harm.
Once you’re back, take photos of any damage for insurance purposes before starting to clean up. This will save you a lot of hassle later when you’re dealing with claims. I’ve learned that it’s always better to have documentation just in case!
Cleaning Up
Cleansing your home after a flood can seem overwhelming, but tackling it step by step makes it manageable. Wear protective gear, including gloves, masks, and sturdy boots. You never know what could be lurking in the floodwaters, and being cautious is always wise.
Focus on removing water-damaged items first—carpets, appliances, and furniture. I’ve found that documenting each item is super helpful for later discussions with your insurance company. Make a list, take photos, and keep track of what needs to go!
After the bulk is removed, thoroughly clean and disinfect all surfaces. You don’t want mold lurking around, trust me! Mold can be hazardous, so a bit of elbow grease during the cleanup phase does wonders for your home’s longevity.
Seeking Support
After a flood, it’s not just about physical repairs; the emotional impact can be just as significant. Don’t hesitate to reach out. Whether it’s family, friends, or a support group, talking things through can be incredibly helpful during the recovery phase.
You can also check for local resources and organizations offering assistance. Many communities rally together in times of need, and you’d be surprised at the kindness of strangers. It’s something that has always amazed me in tough situations.
Lastly, give yourself time to heal, both mentally and physically. Engaging in community programs that focus on recovery can offer camaraderie and support as you navigate the aftermath of flooding. Lean on your community; there’s strength in numbers!
FAQs
1. What should I do before a flood hits?
Preparation is key! Create an emergency plan, stock up on supplies including food and water, and stay informed about potential flooding in your area.
2. How can I ensure my family stays safe during a flood?
Stay together, stick to your emergency plan, and ensure everyone knows the safest routes to evacuate. Avoid flooded areas and listen to local authorities for updates.
3. What supplies are crucial for my emergency kit?
Your kit should include non-perishable food, water, medications, personal hygiene items, important documents, and items for your pets if you have them.
4. How can I clean up my home effectively after a flood?
Start by wearing protective gear, removing water-damaged items, cleaning and disinfecting surfaces, and documenting everything for insurance purposes.
5. Where can I find support after experiencing a flood?
Reach out to family and friends, local organizations, and community support groups to help with recovery, both emotionally and physically.


