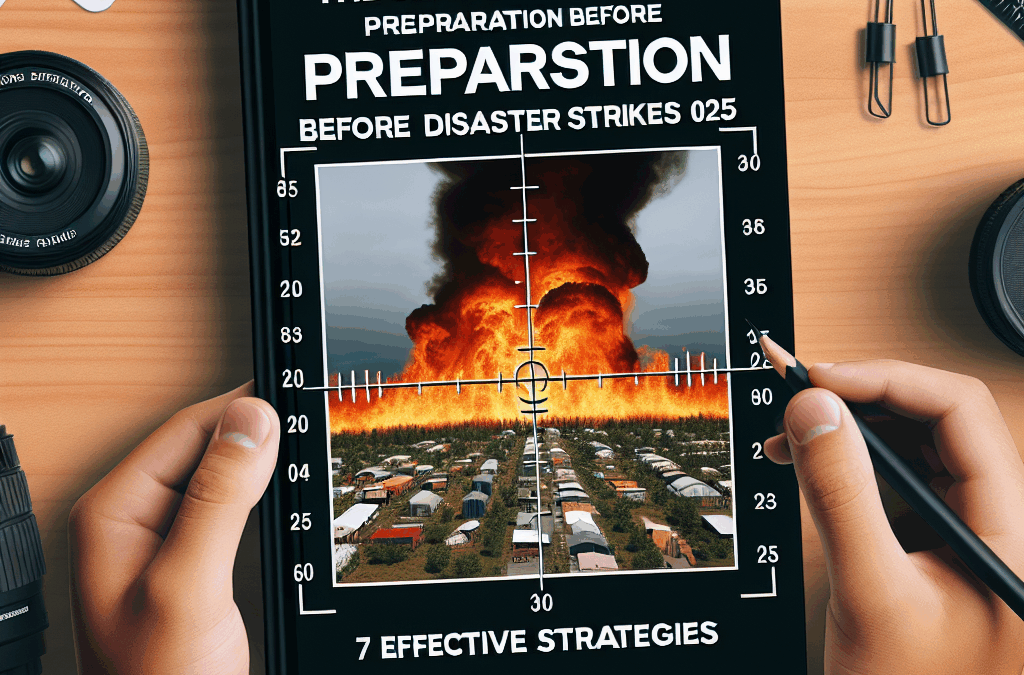
To effectively engage in preparation before disaster strikes, you first need to understand the specific risks that threaten your area and the world in 2025. Natural disasters vary by regionâearthquakes in California, hurricanes in the Gulf Coast, floods in the Midwestâand global threats such as pandemics and cyber-attacks are increasingly relevant. By analyzing recent data and reports, you can tailor your preparedness efforts accordingly.
For example, recent studies show that climate change has increased the frequency of severe weather events in 2025, making risk assessment more crucial than ever. Local government agencies often provide hazard maps and risk assessments that can help you identify vulnerabilities specific to your residence or business.
Taking time to evaluate these risks enables you to prioritize your preparation efforts efficiently. This understanding allows you to allocate resources where they are needed most, whether it’s strengthening your home against storms or creating cybersecurity measures.
Using Data and Resources for Accurate Risk Assessment
Today’s technology offers numerous tools to assess disaster risks. Interactive maps, government reports, and community surveys are valuable resources. Platforms like FEMA’s disaster maps and local emergency management portals provide in-depth insights into potential threats.
Utilizing weather alerts and early warning systems helps you stay informed about imminent dangers. Many apps can send real-time notifications about approaching storms, earthquakes, or other emergencies, giving you a critical head start in preparation before disaster strikes.
Becoming familiar with these tools and regularly checking updates ensures you stay ahead, ready to act promptly when necessary. Incorporating this intelligence into your overall preparedness strategy is vital for your safety in 2025.
2. Building a Comprehensive Emergency Kit
Essential Items for Your Emergency Kit
Creating an emergency kit is one of the most straightforward yet vital steps in preparation before disaster strikes. Your kit should include basic supplies such as bottled water (at least a gallon per person per day), non-perishable food, first aid supplies, medications, flashlight, batteries, hygiene products, and important documents.
In 2025, consider adding smart devices like portable chargers and solar-powered lanterns to ensure communication and lighting during power outages. Remember, emergencies can last days, so plan for at least a weekâs worth of supplies.
Also, include specialized items based on your family’s needs, such as baby formula, pet food, or medical equipment. Customizing your kit ensures you’re prepared for various disaster scenarios.
Storing and Maintaining Your Emergency Supplies
Proper storage is crucial. Use durable, waterproof containers and keep your kit in a readily accessible location known to all family members. Periodically check expiration dates, replace consumed items, and update your kit with new supplies annually.
Labeling your emergency kit helps during stressful situations, ensuring quick access. For instance, having a dedicated bag or box labeled “Emergency Kit” in your closet or garage makes the process smoother.
Practicing how to access and use the contents of your kit during drills enhances actual response efficiency. Regular maintenance and reviews keep your kit ready for when you need it most.
3. Creating a Family Emergency Plan
Communication Strategies and Contact Lists
Establishing a clear communication plan is fundamental in preparation before disaster strikes. Your plan should include multiple ways to contact each other if separated, such as phones, emails, or social media.
Designate a family emergency contact person who resides out of town, so everyone knows who to reach if local communication fails. Make sure every family member has a printed copy of the contact list, including emergency numbers, doctors, and local shelters.
In 2025, consider using sharing apps or emergency messaging services that can notify all family members simultaneously. Testing communication strategies regularly will ensure everyone is familiar with the procedures.
Designating Meeting Points and Emergency Locations
Pick and mark safe meeting placesâone near your home and another outside your neighborhood. These locations should be easily accessible and known to all family members.
Keep physical maps and GPS coordinates for each site, and ensure children understand how to reach these points. This simple step can prevent confusion and save precious time during an emergency.
Practicing the plan frequently, including evacuation drills, helps build confidence and ensures that everyone knows their role when disaster strikes. A well-rehearsed plan reduces chaos and enhances safety.
Frequently Asked Questions
Q1: How does preparation before disaster strikes differ in 2025 compared to previous years?
In 2025, preparation before disaster strikes emphasizes technology integration, such as smart alarms, real-time alerts, and digital documentation. There’s a greater focus on cybersecurity, climate adaptation, and personalized emergency plans based on regional risk assessments.
Q2: What are the top items to include in a 2025 emergency kit?
Focus on essentials like potable water, non-perishable food, first aid supplies, portable chargers, solar-powered devices, and personalized items such as medications. Staying updated with the latest recommended supplies is key.
Q3: Why is creating a family emergency plan crucial in 2025?
An effective family emergency plan ensures quick, coordinated responses during crises. With increasing global threats, having a well-communicated plan enhances safety, reduces panic, and saves lives.
Q4: How can I stay informed and prepared for unexpected disasters in 2025?
Utilize mobile alerts, weather apps, local news, and community resources. Regularly reviewing and practicing your disaster response plans helps keep you ready for any emergency.
Conclusion
In 2025, the importance of preparation before disaster strikes cannot be overstated. By understanding your risks, building a comprehensive emergency kit, creating a detailed family plan, and staying informed, you can significantly improve your safety and resilience. Remember, proactive planning today ensures you’re better equipped to handle unforeseen challenges tomorrow. Start implementing these effective strategies now and make 2025 the year you are truly prepared for any disaster.
In 2025, having a comprehensive emergency plan is fundamental for effective natural disaster prep. Start by outlining clear procedures for different scenarios like earthquakes, floods, or hurricanes. Your plan should identify escape routes, safe zones, and communication methods. Customizing these for your specific region dramatically increases safety for all household members.
Practicing your plan regularly ensures everyone knows what to do during a disaster. For example, conducting drills for fire evacuations or earthquake drop, cover, and hold exercises can make a big difference. Remember, the key to successful natural disaster prep is communication and readiness before an emergency occurs.
Include roles and responsibilities for each family member, especially children and elderly relatives. Write down emergency contacts and keep a physical copy accessible. This proactive approach minimizes panic during real events and can save lives.
Creating a Family Emergency Kit
Part of your natural disaster prep should include assembling a well-stocked emergency kit. Essential items include water, non-perishable food, medications, first aid supplies, flashlights, and batteries. In 2025, consider adding high-tech gadgets like portable chargers and solar-powered lights to stay connected even during prolonged outages.
Keep your kit in an accessible location known to everyone in the household. Remember to update your supplies regularly, especially perishable items and medications, to ensure everything is in working order. A thoughtfully prepared kit provides peace of mind and immediate resources during the first critical hours of a disaster.
In addition, personalize kits for pets, children, or individuals with special needs, ensuring all family members are covered. Smart stocking can make the difference in your overall natural disaster prep.
2. Stocking Essential Supplies
Creating a Long-Term Food and Water Reserve
One of the most vital aspects of natural disaster prep in 2025 is maintaining a reliable supply of food and water. Experts recommend storing at least a two-week supply for each person in your household. Stock non-perishable foods like canned goods, dried fruits, and energy bars that can last years if stored properly.
Water is even more critical; aim for at least one gallon per person per day. Consider investing in water purification methods like filters or tablets to supplement stored water. This ensures your family remains hydrated and healthy during extended crises.
Planning for long-term sustainability is key. Rotate supplies regularly to prevent spoilage, and customize your stockpile based on dietary needs. Proper preparation reduces dependence on external sources, making your natural disaster prep more resilient.
Essential Personal Hygiene and Medical Supplies
Maintaining hygiene during disasters prevents illnesses and infections. Your supplies list should include soap, hand sanitizers, feminine hygiene products, and cleaning supplies. For medical needs, keep a first aid kit, prescription medications, and essentials like antiseptics handy.
In 2025, telemedicine services are more accessible, but having a stock of basic medical supplies at home can be lifesaving. Make sure to include items like bandages, pain relievers, and personal protective equipment (PPE). Proper natural disaster prep emphasizes health and hygiene to prevent secondary health crises.
Store these supplies in a dedicated, organized space so they’re easy to find. Regularly check expiration dates and replenish as needed.
3. Evacuation and Shelter Plans
Planning Your Evacuation Route
An essential step in natural disaster prep is planning multiple evacuation routes from your home. Map out primary and alternate routes in case of road closures or hazards. Use tools like Google Maps or local emergency services info to identify safe zones and shelters nearby.
Practice your evacuation plan at least once a year. Include attaching a portable emergency kit to your vehicle so you’re ready to go on short notice. Keeping your vehicle fueled and in good condition is also vital since it can significantly reduce chaos when evacuating.
Stay informed by subscribing to local alerts and weather updates. A well-rehearsed evacuation plan minimizes confusion and ensures safety during unforeseen events.
Sheltering-In-Place Strategies
Sometimes, evacuation isnât feasible or safe. In these cases, preparing a shelter-in-place strategy is crucial. Reinforce your home with safety features like storm shutters, reinforced doors, and secure windows. Stock your home with enough supplies to sustain your family for at least a week.
Creating a designated safe room within your house provides a sturdy shelter during tornados, earthquakes, or other hazards. It should have basic supplies, communication devices, and first aid essentials.
Practicing shelter-in-place scenarios ensures that your family knows what to do in a pinch, reinforcing the importance of comprehensive natural disaster prep.
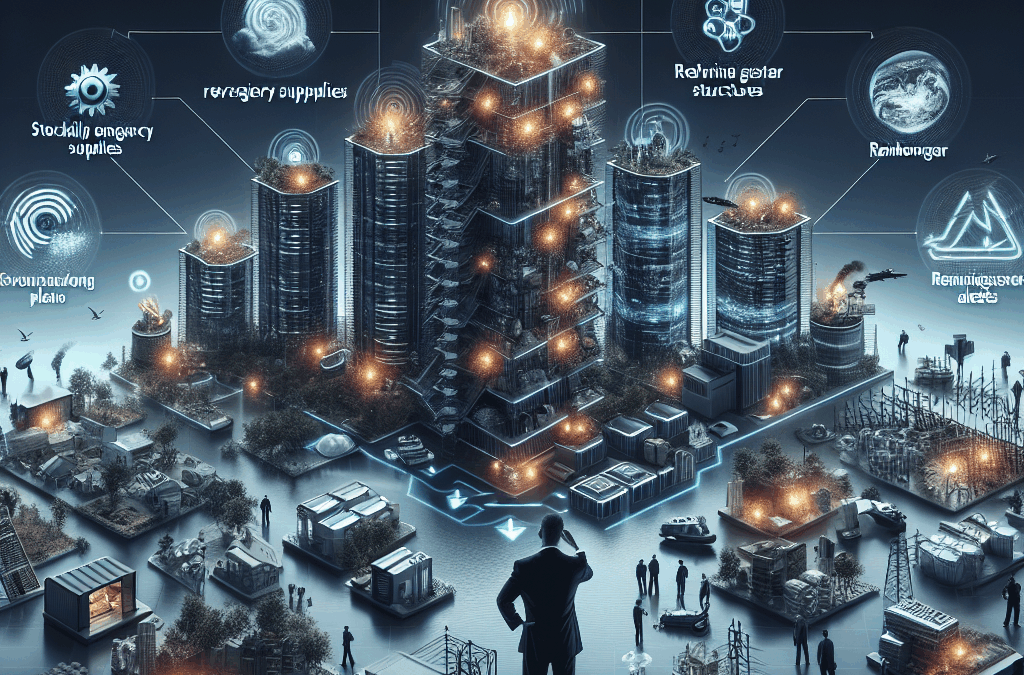
4. Maintaining Community Resilience
Building Local Support Networks
While individual preparedness is essential, community resilience plays a vital role in natural disaster prep. Connecting with neighbors and local organizations creates a support system that can be invaluable during emergencies. Organized neighborhood groups can share supplies, information, and assistance.
Attend local emergency preparedness meetings or create a neighborhood watch focused on disaster readiness. In 2025, many communities are adopting digital platforms for instant communication and resource sharing, increasing overall resilience.
Community efforts improve quick response times and reduce chaos, making everyone safer during disasters. Building these networks is as crucial as personal prep.
Volunteer and Training Programs
Participating in volunteer programs or emergency response training enhances your natural disaster prep skills. Organizations like the Red Cross offer courses on first aid, CPR, and disaster management. Learning these skills can save lives in real situations.
Encourage your community to organize drills and training sessions regularly. Knowledge shared among neighbors fosters a culture of readiness and collective safety. Staying informed and prepared helps mitigate the impact of disasters for the entire community.
By investing in community resilience, we all benefit from a safer, more prepared environment in 2025 and beyond.
5. Utilizing Technology & Communication Tools
Emergency Notification Apps and Alerts
Modern technology offers numerous tools for natural disaster prep. Download reliable emergency alert apps that provide real-time updates on weather, hazards, and evacuation instructions. Many local governments and agencies now use SMS alerts and apps to notify residents instantly.
In 2025, consider using social media platforms and community forums to stay connected and share vital information. Setting up a family communication plan using messaging apps ensures everyone stays in contact during chaos.
Technology can reduce confusion during disasters, allowing quick decision-making and response. Staying connected is a critical part of comprehensive prep strategies.
Smart Home Safety Devices
Investing in smart home devices adds an extra layer of security. Install smoke detectors, carbon monoxide alarms, and leak sensors that can alert you remotely. In case of power outages, consider battery-powered or solar-connected options.
Smart security cameras can help monitor your property during ab emergencies, and voice-activated assistants can provide critical information or contact emergency services. Digital tools enable better management of your safety during an unpredictable 2025.
Harnessing technology enhances your overall natural disaster prep approach and increases your chances of staying safe.
6. Physical & Medical Readiness
Physical Fitness and Safety Measures
A physically prepared body can better withstand the challenges posed by some natural disasters. Regular exercise increases strength, endurance, and agility, which are vital during evacuation or rescue efforts. In 2025, consider incorporating functional training for emergenciesâlike lifting heavy objects or quick escapes.
Safety measures include wearing appropriate footwear and protective gear during drills or actual scenarios. Being physically prepared reduces injury risks and enhances your ability to respond swiftly.
Overall, staying active is a simple but often overlooked facet of natural disaster prep, contributing to long-term resilience.
First Aid and Medical Skills
In a disaster, immediate medical attention can prevent minor injuries from worsening. Learning basic first aid and CPR is essential. Enroll in certified courses or practice using simulation kits at home.
Stocking a well-organized medical kit tailored to your familyâs needs enhances your readiness. In 2025, digital health apps provide guidance for common emergencies, supplementing hands-on skills.
Preparedness is about empowering yourself and your loved ones to act confidently in critical moments, integral to effective natural disaster prep.
7. Insurance & Financial Protections
Reviewing Your Policies
Review and update your insurance policies regularly to ensure adequate coverage for natural disasters. In 2025, many insurers offer specialized coverage for floods, earthquakes, and wildfires. Proper insurance minimizes financial fallout after a disaster.
Understand the fine printâwhatâs covered, deductibles, and claims processes. Document your property and valuables with photos and receipts for easier claims.
Financial resilience, combined with physical and emotional preparedness, helps you recover faster, which is key to comprehensive natural disaster prep.
Emergency Savings Fund
Building an emergency savings fund dedicated to disaster recovery is a savvy move. Aim for at least 3-6 months of living expenses. This safety net provides liquidity for unexpected needs like repairs, temporary housing, or medical bills.
In 2025, consider digital savings accounts designed specifically for emergencies. Automate contributions regularly to stay consistent.
Being financially prepared complements physical readiness, enhancing your overall resilience against natural catastrophes.
8. Education & Training
Staying Informed Through Continuous Learning
Ongoing education is vital for natural disaster prep. Stay updated with the latest research, technology, and best practices by following credible sources like FEMA or the Red Cross. In 2025, new techniques and tools continually evolve, so consistent learning is crucial.
Attend webinars, workshops, and local drills to refresh your knowledge. Educating children in disaster preparedness also instills responsibility and confidence.
Knowledge empowers action and reduces panic during an actual event, making education a cornerstone of effective prep strategies.
Training Family Members and Community
Training your family and neighbors in basic emergency response ensures collective safety. Practice drills for fire, earthquake, or severe weather scenarios, and teach children how to respond calmly.
Consider holding community-based workshops. In 2025, virtual training modules have become accessible, enabling wider participation. This collective knowledge minimizes chaos and saves lives in real emergencies.
Consistent training is an investment in preparedness, making your natural disaster prep efforts more effective and inclusive.
9. Embracing Sustainable Prep Practices
Eco-Friendly Preparedness
In 2025, integrating sustainability into your natural disaster prep is both responsible and practical. Use renewable energy sources like solar panels to power emergency equipment. Opt for reusable supplies to reduce waste.
Planting native, drought-resistant gardens can provide food and reduce environmental impact. These practices support resilient communities and a healthier planet when disasters strike.
Sustainable prepping ensures that your efforts are long-lasting and compatible with environmental conservation goals.
Reducing Carbon Footprint in Emergency Planning
Plan evacuation routes and backup systems that minimize emissions. Use electric vehicles for evacuation or solar-powered chargers for devices. These choices align with global efforts to combat climate change, which often exacerbates natural disasters.
Smart resource management during prep reduces environmental impact and ensures sustainable resilience. In 2025, eco-consciousness in preparation becomes an essential component of comprehensive natural disaster strategies.
Embedding sustainability into your planning not only protects the planet but also enhances your communityâs capacity to withstand crises.
10. Regularly Reviewing & Updating Your Plan
Annual Plan Review and Drills
Your natural disaster prep plan should be reviewed and tested annually. Changes in family circumstances, local hazards, and available technology necessitate regular updates. Conduct drills to ensure everyone remembers their roles and procedures.
Analyze past drills and real encounters to identify gaps and improve strategies. Use feedback from family members to adapt the plan for better efficacy.
Consistent review keeps your preparedness current, relevant, and effective in 2025 and beyond.
Staying Ahead With New Technologies and Risks
As new risks emerge and technologies develop, stay informed by subscribing to official updates and research reports. Incorporate the latest tools and best practices into your natural disaster prep routine.
Technological advancements like AI weather forecasting and real-time data analytics can improve your response strategies. Regularly updating your plan using such innovations enhances safety and resilience.
Being proactive and adaptive is fundamental for staying prepared in an ever-changing world.
Frequently Asked Questions
What are the most important natural disaster prep strategies for 2025?
Focus on creating a comprehensive emergency plan, stocking essential supplies, utilizing technology, and staying informed through continuous education. Regularly review and practice your plans for maximum effectiveness.
How can I improve my natural disaster prep in a community setting?
Build local networks, participate in community training, share resources, and conduct joint drills. Community resilience significantly boosts the overall safety and recovery capacity.
What technological tools are recommended for natural disaster prep in 2025?
Emergency alert apps, smart home safety devices, communication platforms, and online training courses are vital for modern preparedness. These tools facilitate quick response and effective information sharing.
Why is regular review of my disaster plan important?
It ensures your plan stays current with changing risks, family dynamics, and available resources. Regular practice and updates help reduce confusion and improve response times during actual disasters.
How does sustainable prep contribute to disaster resilience?
Sustainable practices reduce environmental impact, improve resource management, and contribute to community resilience. Using renewable energy and eco-friendly supplies ensures long-term preparedness.
Embarking on the journey of getting prepared step by step is essential, especially in 2025 when global uncertainties and rapid changes demand proactive planning. Whether you’re preparing for a career shift, personal development, or an emergency situation, having a structured approach makes all the difference. In this comprehensive guide, Iâll walk you through 7 effective tips to ensure your preparation process is organized, achievable, and successful. Letâs dive into each step and make your preparations in 2025 a cakewalk!
1. Define Your Goals Clearly
Understanding the Importance of Goal Setting
Before you start getting prepared step by step, itâs crucial to know *what* you’re preparing for. Clear goals serve as a roadmap, guiding every action you take. According to research, individuals who set specific goals are 10 times more likely to succeed than those with vague intentions. In 2025, defining your objectives with precision will prevent wasted effort and keep you focused.
For example, if you’re preparing for a new job opportunity, specify what skills you need, the timeline, and the milestones. Precise goal setting empowers you to measure progress effectively and stay motivated through the process.
Additionally, SMART goalsâSpecific, Measurable, Achievable, Relevant, and Time-boundâare instrumental in structuring your getting prepared step by step process. Use this framework to ensure your goals remain realistic and actionable.
Setting Short-term and Long-term Goals
Effective preparation includes balancing immediate priorities and future aspirations. Short-term goals, such as completing a training course within a month, lay the groundwork. Long-term goals, like achieving a career change in 2025, provide direction and purpose.
Breaking down long-term goals into manageable short-term objectives helps maintain momentum. For instance, if your long-term goal is to start your own business, your short-term goals might include market research, business plan development, and securing funding.
This step-by-step goal setting ensures you donât feel overwhelmed. Each small achievement fuels motivation and brings you closer to your ultimate vision.
2. Create a Detailed Action Plan
Organizing Tasks Systematically
A well-structured action plan transforms your goals into executable steps. When getting prepared step by step, an actionable plan acts as your personal guidebook. In 2025, utilizing digital tools like Trello, Notion, or Asana can streamline this process and keep your tasks organized.
Begin by listing all necessary actions, then prioritize based on urgency and importance. For example, if you’re preparing for a certification exam, your plan might include study schedules, practice tests, and review sessions.
Remember to assign deadlines to each task to ensure steady progress. An effective plan reduces confusion and helps you stay on track, even when life throws curveballs.
Developing Contingency Strategies
No plan is complete without backup strategies. Anticipate potential obstacles and prepare alternatives. For example, if your internet goes down, having offline resources ready can keep your progress uninterrupted.
Developing contingency plans builds resilience and confidence. When you’re getting prepared step by step, consider what might go wrong and plan how to address those issues efficiently.
This foresight ensures your preparations are robust, reducing stress and increasing the likelihood of success.
3. Gather Necessary Resources
Identifying Essential Tools and Materials
Every preparation requires the right resources. In 2025, technological advances have made access to tools like online courses, e-books, and software essential. Start by listing what you’ll needâbe it equipment, information, or support networks.
For example, if you’re learning a new language, resources might include language apps, tutoring services, and practice partners. Ensuring you have these resources in place prevents delays and boosts efficiency.
Invest effort in sourcing high-quality materials to maximize your efforts. Sometimes, paying for premium resources yields better results and saves time in the long run.
Building a Support Network
Getting prepared step by step isn’t just about materials, but also about community. Connecting with mentors, peers, or online communities provides encouragement and accountability. In 2025, social media and online forums make it easier than ever to find support.
Having a support system can help you gain different perspectives, troubleshoot challenges, and stay motivated during tough times. For example, joining a local or virtual study group can accelerate your learning process.
Remember, collaboration amplifies your progress and keeps your enthusiasm alive throughout your preparation journey.
4. Break Tasks into Manageable Steps
Why Smaller Steps Make a Difference
One common mistake when getting prepared step by step is trying to do too much at once. Instead, breaking tasks into smaller, manageable chunks makes the process less overwhelming. In 2025, this approach is backed by productivity studies showing that chunking increases focus and achievement.
For instance, instead of aiming to ‘learn a new skill,’ set smaller goals like watching tutorials, practicing for 30 minutes daily, or completing specific exercises. Each small step provides a sense of accomplishment.
By dividing your preparation into bite-sized actions, you’ll build momentum, stay consistent, and avoid burnout.
Creating a Priority List
Prioritizing is key. When getting prepared step by step, make a list of tasks based on urgency and importance. Use tools like Eisenhowerâs Matrix to categorize your tasks, ensuring you focus on what truly matters first.
For example, securing necessary resources might take precedence over attending optional workshops. Once high-priority tasks are handled, move to secondary items on your list.
This structured approach guarantees that your efforts are directed productively, saving time and energy.
5. Set Up a Tracking System
Monitoring Your Progress Effectively
Tracking progress is vital when getting prepared step by step. It helps you see how far you’ve come and identify areas needing improvement. In 2025, digital dashboards or printable trackers make it easy to stay accountable.
Regularly reviewing your milestones keeps motivation high. For example, review weekly whether you’ve completed your scheduled tasks or need to adjust due dates.
Incorporate visual cues like progress bars or checklists to make tracking engaging and straightforward, which enhances your overall commitment.
Using Data to Optimize Your Plan
Data insights aren’t just for businessesâthey can help you too. Analyze your tracking data to see patterns in your productivity. Maybe you’re more productive in the mornings, so schedule your tough tasks then.
Adjust your plan based on these insights, making it more effective. Flexibility and refinement are critical components of successful getting prepared step by step strategies.
In 2025, leveraging these tools can significantly boost your ability to stay on course and accomplish your goals efficiently.
6. Stay Consistent and Motivated
Building Habits that Last
Consistency is the cornerstone of effective preparation. Developing daily or weekly routines helps embed your tasks into your lifestyle. In 2025, habit-tracking apps are popular tools to reinforce positive behaviors.
For example, dedicating 15 minutes daily to skill practice can lead to substantial improvement over time. Celebrate small wins to foster motivation and create a positive feedback loop.
Remember, persistence in following your plan ensures steady progress and eventual success.
Overcoming Common Motivation Challenges
Everyone faces setbacks or dips in motivation, but resilience is key. In 2025, using motivational techniques like visualization, affirmations, and accountability partners can help you push through tough periods.
Another strategy is to revisit your goals regularly and remind yourself why you started. Tracking your achievements also reinforces your sense of purpose.
By maintaining motivation and consistency, you’ll ensure your getting prepared step by step process remains on track to meet your 2025 goals.
7. Review and Adjust Regularly
Evaluating Your Progress
Periodic review is essential to ensure your strategy remains effective. Set aside time weekly or monthly to evaluate your progress and identify any obstacles. This habit helps you stay aligned with your goals.
Ask yourself whatâs working, whatâs not, and what can be improved. Being honest allows you to make necessary adjustments, keeping your efforts relevant and efficient in 2025.
Regular reviews also boost morale by highlighting achievements and renewing your focus.
Refining Your Approach in Response to Changes
Flexibility is crucial. As circumstances evolve, your plans should adapt. For example, unexpected opportunities or challenges might require shifting deadlines or re-prioritizing tasks. In 2025, agility is a competitive advantage.
Stay informed about new tools, techniques, and trends to enhance your getting prepared step by step process. Incorporating feedback and data-driven insights ensures continuous improvement.
This proactive mindset helps you stay resilient and successful in your preparations.
Frequently Asked Questions
1. Why is getting prepared step by step important in 2025?
In 2025, rapid technological and global changes make it essential to plan carefully. Getting prepared step by step allows you to manage complexity effectively, reduce overwhelm, and increase your chances of success.
2. How can I stay motivated throughout my preparation in 2025?
Set small, achievable goals, track your progress, celebrate achievements, and surround yourself with supportive communities. Regularly revisiting your purpose keeps motivation high.
3. What tools are best for getting prepared step by step today?
Digital tools like Trello, Notion, habit trackers, and online learning platforms are excellent for organizing and monitoring your progress in 2025. Choose tools that fit your workflow and preferences.
4. How do I know if my getting prepared step by step plan is working?
You can gauge success by tracking your milestones, checking if tasks are completed on schedule, and evaluating whether your goals are becoming closer. Regular review sessions help you stay aware of your progress.
5. Can getting prepared step by step apply to personal development, work, or emergencies?
Absolutely. Whether you’re pursuing career goals, enhancing skills, or preparing for unforeseen events, a step-by-step approach provides structure and clarity to all types of preparation.
Conclusion
Getting prepared step by step in 2025 is all about intentional planning, disciplined execution, and continuous improvement. By defining clear goals, creating actionable plans, gathering the right resources, and maintaining flexibility, you set yourself up for success. Remember, the key is consistency and regular reviewâthese habits transform your ambitions into achievements. No matter what you’re aiming for, following this proven approach will help you navigate 2025 with confidence and ease. Stay committed, adapt as needed, and keep moving forwardâyour success is within reach!
In 2025, having a solid family emergency plan remains the most critical step in storm preparedness. Start by setting up a communication strategy where all family members know how to reach each other if cell services are disrupted. Use a designated out-of-town contact, as local networks may be overwhelmed during a storm.
It’s essential to drill this plan regularly so everyone feels confident in their roles. Practice different scenarios, including power outages or evacuations, to ensure your family can respond efficiently. Remember, kids and elderly relatives may need additional guidance, so tailor your plan accordingly.
Sharing your storm preparation checklist with extended family or neighbors can also strengthen community resilience. When everyone knows their role, response times improve, and safety increases significantly.
Establishing Meeting Points and Escape Routes
Designate specific, accessible locations outside your home where you and your family can assemble in case you need to evacuate. Make sure these meeting points are safe and known to all. Create multiple escape routes from your home, avoiding blocked or hazardous paths that could develop during a storm.
Keep maps and route details handy in your emergency kit or mobile devices. Practicing your escape routes annually ensures everyone stays familiar with the plan. Donât forget to consider special needs like pets or family members with mobility challenges.
By planning your escape routes and meeting points now, you’ll streamline emergency response when it counts the most, playing a key role in your comprehensive storm preparation checklist.
2. Assemble an Emergency Kit
Essential Items for Your Storm Kit
Creating a well-stocked emergency kit in 2025 should include water, non-perishable food, medications, flashlight, batteries, and hygiene supplies. Experts recommend preparing at least a three-day supply per person, but a weekâs worth is even better.
Include additional items like a hand-crank radio, power banks, and first-aid supplies. Donât forget essentials tailored to your familyâs needs, such as infant formula or pet food. Regularly check and replace expired items to keep your kit ready at all times.
Store your kit in a durable, waterproof container located in an accessible area. Advise all family members on its location, so everyone knows where to find it during an emergency.
Specialized Emergency Supplies for 2025 Trends
With 2025 advancements, consider including portable solar chargers or compact, battery-powered generators to ensure your electronic devices stay powered. Smart home devices can also warn you in advance of severe weather, adding an extra layer of safety.
Additionally, include masks or sanitizers to address health concerns that may arise during crowded evacuation centers. As climate events grow more severe, having these specialized supplies enhances your overall storm readiness.
Invest smartly in durable, multipurpose gear that can serve multiple functions, reducing clutter and ensuring preparedness without unnecessary burden.
3. Secure Your Home
Reinforcing Windows and Doors
One of the most vital components of your storm preparation checklist is protecting your home from wind and water damage. In 2025, innovative storm-resistant windows and reinforced doors are more accessible than ever. Installing impact-resistant windows or covering existing windows with storm shutters can prevent breakage and injury.
If you can’t install permanent fixtures, heavy plywood boards can serve as temporary barriers during storms. Secure all entry points thoroughly to prevent water intrusion and wind damage. Remember, a well-secured home can significantly reduce repair costs and risk to your family.
Regular maintenance, such as checking seals and structural integrity, ensures your home remains resilient during severe weather events.
Landscape and Exterior Maintenance
Trim overhanging branches and remove dead trees to prevent them from falling on your house or power lines during a storm. Clear gutters and drainage systems to ensure proper water runoff, reducing the risk of flooding.
Secure outdoor furniture, grills, and other loose items that could become projectiles in high winds. These proactive steps help protect your property and keep your storm preparation checklist comprehensive.
In 2025, integrating landscape design with storm resilienceâlike planting windbreaks and permeable surfacesâcan also enhance your homeâs durability while maintaining aesthetics.
4. Stay Informed with Weather Alerts
Using Technology for Real-Time Updates
In 2025, leveraging the latest technology is essential for staying ahead of storm developments. Configure your mobile devices to receive alerts from trusted weather apps and emergency management agencies. Many apps now provide live updates, safety tips, and evacuation routes tailored to your location.
Smart home systems, like connected thermostats and security cameras, can also help monitor weather conditions and provide alerts directly to your phone or home hub. Make sure to test these systems regularly to confirm they work effectively during storms.
Additionally, subscribing to local news and weather radio stations provides a reliable backup if internet services are disrupted. Staying informed allows you to act promptly and confidently as a vital part of your storm preparation checklist.
Understanding Weather Patterns and Risks in 2025
Research indicates that storm patterns are evolving due to climate change, making it crucial to understand regional risks. Use updated weather forecasts and historical data to anticipate typical storm season challenges in your area.
Certain zones face higher risks of hurricanes, tornadoes, or floodingâknowing these patterns helps you prepare better. Websites and local agencies often provide detailed risk assessments, which can guide your decision-making process during emergencies.
Utilize these insights to customize your storm preparation checklist, ensuring your family is ready for whatever weather 2025 might bring.
5. Protect Important Documents
Digitize and Backup Critical Records
Storing essential documents safely is a key part of any comprehensive storm preparation checklist. In 2025, digital backups are more accessible, so scan important papers like IDs, insurance policies, medical records, and property deeds. Store these securely in cloud-based services or encrypted drives.
This ensures quick access during evacuation or recovery, even if physical copies are lost or damaged. Remember to also keep physical copies in a waterproof, fireproof safe or container.
Regularly update and verify your document backups, especially after significant life changes or policy updates, to maintain their relevance and usefulness.
Preparing a Physical Document Kit
Create a physical kit with hard copies of all vital documents, stored compactly in a waterproof folder. Include emergency contact info, medical prescriptions, insurance cards, and property titles. Keep it accessible but protected from the elements.
Discuss with your family where this kit is stored so everyone knows where to find it during a crisis. This step ensures legal and financial safety even amid chaos.
Preparing and maintaining these documents is a simple yet essential element of your overall storm preparation checklist, safeguarding your familyâs future.
Conclusion
Having a robust storm preparation checklist is fundamental for safeguarding your home, loved ones, and property in 2025. From creating a detailed family emergency plan to securing your property and staying informed, each step enhances your readiness and resilience. Remember, preparedness isnât just about weathering a stormâitâs about peace of mind and swift recovery.
By following the comprehensive tips outlined in this ultimate 2025 storm preparation checklist, you can navigate storm season confidently and ensure safety for everyone involved. Stay proactive, stay safe!
Frequently Asked Questions (FAQs)
1. What is a storm preparation checklist and why is it important?
A storm preparation checklist is a detailed list of actions, supplies, and plans to get your family and home ready for severe weather events. It is important because it helps reduce chaos during emergencies and ensures critical needs are met promptly.
2. How often should I review my storm preparation checklist?
Itâs recommended to review your storm preparation checklist at least once a year, ideally before the storm season begins. Regular reviews keep your plans and supplies current with changing conditions and personal circumstances.
3. What are the most essential items on a storm preparation checklist?
The most essential items include water, food, medications, flashlight, batteries, important documents, and emergency communication tools. Tailor these to your familyâs specific needs for maximum safety.
4. How can I stay updated on weather alerts in 2025?
Use trusted weather apps, subscribe to emergency alerts, and set up notifications on your mobile device. Also, maintain access to local radio stations and community alerts for comprehensive coverage.
5. Why is a storm preparation checklist crucial for 2025?
With evolving weather patterns and climate risks, a detailed storm preparation checklist helps you anticipate and respond effectively, minimizing risks and enhancing safety during severe storms in 2025.
Emergency food preparation is the foundation of any robust preparedness plan. It involves sourcing, storing, and utilizing food efficiently during crises such as natural disasters, power outages, or socio-economic disruptions. In 2025, mastering this skill is more crucial than ever due to the increasing frequency of various emergencies worldwide.
Key principles include food safety, shelf stability, and ease of preparation. Knowing how to prepare food without relying on electricity or traditional kitchen appliances can make a significant difference during an emergency. For instance, learning how to cook over a campfire or using solar ovens can enhance your food preparation capabilities.
Research indicates that over 60% of households that effectively practice emergency food preparation are better equipped to handle unexpected crises, reducing stress and health risks. Developing these skills now will ensure youâre prepared for potential emergencies in 2025.
Choosing the Right Equipment
Selecting appropriate tools for emergency food preparation is vital. Items like portable stoves, lightweight cookware, and durable utensils allow for flexible cooking scenarios. In 2025, advancements in compact and energy-efficient appliances make it easier to prepare nutritious meals even when resources are limited.
Investing in multi-use tools such as foldable water boilers or solar cookers can save space and money. Additionally, emergency preparedness experts recommend having manual can openers, insulated containers, and non-perishable cooking accessories on hand.
Proper equipment not only improves meal quality but also enhances safety during food preparation, minimizing risks of contamination or injury during stressful situations.
2. Creating an Emergency Food Stockpile
Planning Your Stockpile
In 2025, proactive planning remains key to emergency food preparation. Creating a well-rounded stockpile involves selecting foods that are nutritious, long-lasting, and easy to prepare. Consider dietary restrictions and family size to customize your supplies accordingly.
Start with essentials like grains, canned vegetables, dried fruits, and protein sources such as canned meats or legumes. Incorporate foods with extended shelf livesâup to 20-30 years in some casesâsuch as vacuum-sealed grains and freeze-dried meals.
Regularly review and rotate your stockpile to ensure freshness and nutritional value. Setting reminders to check expiry dates helps maintain an effective emergency food preparation system.
Storage Solutions and Location
Proper storage techniques are critical for preserving your emergency food stockpile. Store foods in a cool, dry, and dark place, ideally off the ground and in airtight containers to prevent pests and spoilage. In 2025, innovative storage solutions like modular shelving units and climate-controlled cabinets have gained popularity among preppers.
Designate an accessible location for your emergency supplies, ensuring itâs easy to reach even in stressful situations. Label all containers with purchase and expiry dates for quick inventory checks.
Consider portable emergency storage kits for easy relocation if needed. This ensures you remain prepared no matter where you are during a crisis.
3. Nutrition and Food Safety in Emergency Preparedness
Maintaining Nutritional Balance
Ensuring balanced nutrition during emergencies is vital for maintaining energy, immune function, and overall health. In 2025, incorporating diverse food groups into your emergency food preparation strategy helps prevent deficiencies.
Focus on including protein-rich foods, complex carbs, healthy fats, and vital vitamins and minerals. Freeze-dried meals, supplemented with fresh or canned produce, can help achieve this balance.
Planning meals that are hearty yet simple minimizes cooking time and resource use, making your emergency food preparation more efficient and effective.
Food Safety Principles
Practicing food safety in emergency food preparation prevents illnesses that could further complicate stressful situations. Always properly store perishable items and avoid cross-contamination by using separate utensils for raw and cooked foods.
In 2025, new technologies like smart temperature monitors and wireless food storage sensors help you keep track of food safety conditions remotely. This innovation significantly reduces the risk of foodborne illnesses.
Understanding proper reheating, cooking, and cleaning procedures during emergency scenarios is essential. Remember that contaminated food can be fatal during prolonged crises, so prioritize safety at all times.
4. Emergency Food Preparation FAQs
How do I start preparing for emergencies in 2025?
Begin by assessing your household needs, creating a food supply plan, and gathering the necessary equipment. Educate yourself on food safety, storage techniques, and prepping skills. Regularly review and rotate your supplies to stay ready for any crisis.
What are good foods for emergency preparedness?
Long-lasting, nutrient-dense foods such as canned vegetables and fruits, dried grains, nuts, protein sources like canned meats and legumes, and freeze-dried meals are excellent choices. Sustainability and ease of preparation are key factors in selection.
How can I ensure safe emergency food preparation without electricity?
Utilize alternative cooking methods such as solar ovens, portable gas stoves, and fire-based cooking. Store foods appropriately, keep them dry and cool, and have safety equipment like fire extinguishers nearby. Practice these methods regularly to build confidence in your skills.
Why is emergency food preparation important for 2025?
With climate change, economic uncertainties, and health crises increasing, being prepared with effective emergency food preparation strategies ensures safety and peace of mind. It allows you to maintain health and wellbeing during unforeseen disruptions.
Conclusion
In 2025, mastering emergency food preparation remains an essential element of any comprehensive disaster readiness plan. Whether itâs stockpiling nutritious supplies, honing cooking skills without traditional utilities, or ensuring food safety, these strategies will help you face any crisis with confidence. Remember, being prepared today can make a significant difference tomorrow, so take action now and make emergency food preparation a priority for your household.