by Preparation | May 10, 2025 | Preparedness
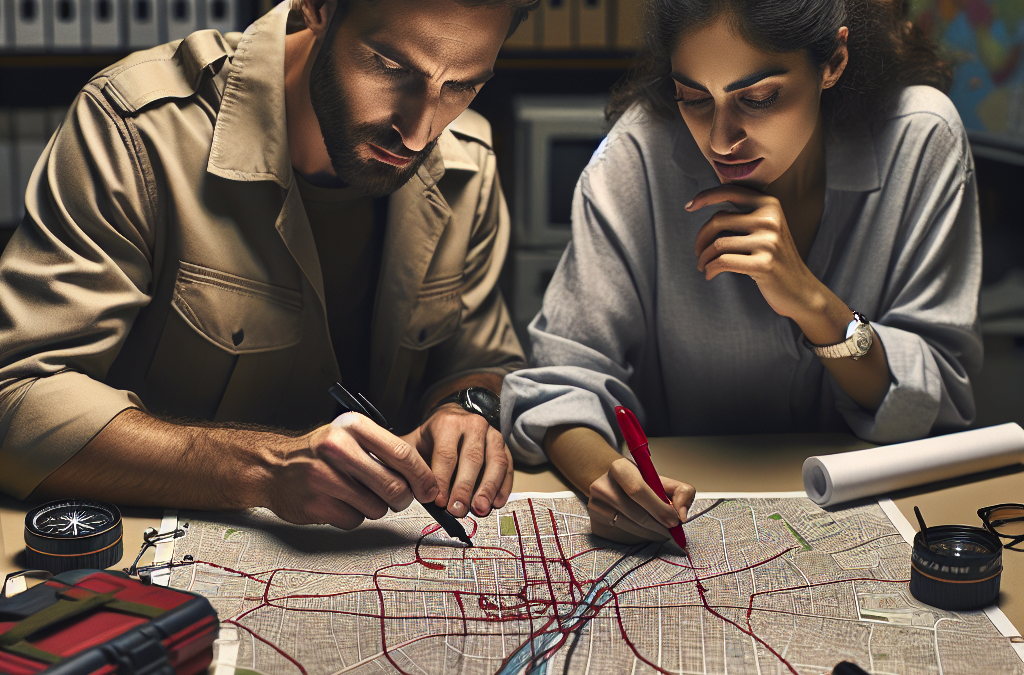
Assessing Your Evacuation Routes
Understand Your Surroundings
First thing’s first, understanding your surroundings is crucial. It’s not just about knowing the roads; it’s about being aware of the potential hazards around you. Whether it’s a natural disaster like a hurricane or a fire, knowing the layout of your neighborhood can save you heaps of time and stress when the need arises.
Take a stroll around your area. Identify main streets, alternative routes, and areas that could be potential choke points during an emergency situation. You might find shortcuts or hidden paths that could offer a safer escape route. Plus, familiarizing yourself with landmarks can also help you stay calm under pressure.
Map out these routes and keep them handy. Whether it’s an app on your phone or a good old-fashioned paper map, having a clear idea of your possible escape routes is vital to ensuring the best chance of a smooth evacuation.
Identify Safe Zones
Next, let’s talk about safe zones. Even if your primary route is blocked, it’s super important to know where you can go to find shelter or help. This could be a friend’s house, a community center, or even a designated evacuation point in your area.
Every neighborhood has those hidden gems. It could be a local school or a church that opens its doors for emergencies. Knowing these spots can give you peace of mind; if all else fails, you have a safe haven to escape to.
After identifying these safe zones, make sure to clarify how you can reach them from various points in your area. Having a plan not only reduces panic but also gives you that safety net, knowing you’re heading toward security and support instead of just running blind.
Consider Traffic Patterns
You’d think that when panic strikes, the last thing on our minds is traffic, right? But understanding traffic patterns can be revolutionary when planning your evacuation. During an emergency, everyone’s gonna be hitting the road at the same time, which can create massive gridlocks.
Spend some time observing traffic flow during different times of the day. Certain routes may be more congested during peak hours, and knowing this can help you to plan alternatives that could save your bacon in a crisis.
Also, don’t underestimate the power of local alerts. Many cities have apps or services that provide updates on road conditions and closures. Keeping tuned in can provide real-time information and help you dodge those pesky traffic jams.
Creating an Evacuation Plan
Outline Your Steps
Once you have your routes and safe zones mapped out, outlining your evacuation steps is next. To get started, think about what you need to pack in case of an evacuation. Essentials like food, water, and medicines should be prioritized in your plan.
Write these steps down and keep them visible. It might sound a bit old school, but having something physical to look at reduces the chances of forgetting something crucial while you’re in a scramble. Plus, it can be helpful for other family members or friends to know the plan, keeping everyone in the loop.
Practice makes perfect. Just like any kind of planning, running through your evacuation plan will help engrain it in your memory. Grab the family, do a quick rehearsal, and let everyone know what to expect. This will help alleviate any anxiety when the time comes to put that plan into action.
Communicate with Your Family or Group
Communication is key. Make sure that everyone involved knows the plan and the routes you’ve chosen. Use group chats or family meetings to ensure that everyone understands their tasks and roles during an evacuation. Trust me, it helps reduce confusion.
Designate a point person who can help coordinate actions and relay updates. While it’s important for everyone to be informed, having a central communicator can streamline efforts and make sure things run smoothly as nerves may start to fray.
Also, discuss emergency contact numbers and methods to stay in touch if you get separated. Having a fallback plan will ease worries for both you and your family in stressful situations. Just knowing that everyone has each other’s backs makes a massive difference!
Prepare an Emergency Kit
Next up, let’s chat about emergency kits. This is something I truly swear by when preparing for any unexpected situations. An emergency kit can be your lifesaver, so you want to make sure it’s stocked and accessible.
For starters, it should include essential items like water, non-perishable food, a flashlight, batteries, a first-aid kit, and emergency contact information. When packing the kit, think about your family’s specific needs—like medicines or baby supplies if you have little ones.
Don’t forget to routinely check your emergency kit and refresh its contents as needed! You wouldn’t want to reach for your supplies in a crisis only to find that the snacks are expired or it’s missing a flashlight. Keeping everything up to date is crucial!
Staying Informed During an Evacuation
Use Technology to Your Advantage
During an evacuation, information is power. Leveraging technology can give you a leg up on chaotic situations. There are some incredible apps out there, from weather alerts to emergency news updates that will keep you in the loop.
Having your phone charged and ready is vital. Make sure you have your emergency contact list and any apps that will help you navigate road conditions and alerts. Staying informed can help you make the best decisions on the fly, allowing you to dodge potential pitfalls.
Additionally, don’t forget the good ol’ radio. Sometimes, when all else fails, a battery-operated radio can keep you updated with the latest information when the power is out or cellular networks are jammed.
Monitor Local Agencies and News
Another key element is staying tuned to local agencies and news. It’s tempting to only watch national news, but local stations will provide specific details relevant to your area. They can give you information about the safety of roads, updates on emergencies, and any changes to shelter locations.
Follow local emergency service accounts on social media platforms for real-time updates. Many agencies are increasingly using these platforms to share essential information quickly, which can be a game changer during a crisis.
Consider also signing up for local alert systems where you can receive emergency messages directly to your phone. The more plugged in you are, the better prepared you’ll be to make quick decisions.
Keep an Eye on Weather Conditions
Never underestimate Mother Nature! Regularly checking the weather can help you gauge whether it’s best to hold tight or get moving. Apps and websites have made this super easy. You can track real-time weather updates right on your phone.
Pay special attention to forecasts and warnings. If a storm is rolling in, you’ll want to be on top of that, planning your route accordingly. Also, check for any changes in local travel conditions and road safety.
Prepare for the worst, but hope for the best! Having a backup plan based on changing weather conditions can often mean the difference between a smooth evacuation and a chaotic scramble.
Reviewing and Practicing Your Plan
Regularly Update Your Plans
Life changes, and so should your evacuation plan. Family structures might change, job situations might shift, or the neighborhood itself may evolve. Reviewing and updating your plans ensures that everyone’s needs are still met.
At least once a year, go over the plan as a family. Discuss any changes that might affect the original strategy, and take the time to adjust your routes and emergency kits as necessary. This proactive step saves you from being unprepared in the heat of the moment.
Engage everyone in this discussion. Keeping everyone involved fosters a sense of responsibility and unity in dealing with emergencies. Plus, it can be a fun exercise to explore new routes or decide on new safe zones together!
Conduct Drills
Practicing your evacuation plan may sound a bit over the top, but those drills can provide significant benefits. Conducting family evacuation drills allows everyone to understand their role, know the routes, and get acquainted with the emergency kit.
This drill doesn’t have to be elaborate; just doing a quick run-through can help. You can set a timer to simulate a sense of urgency. It can be surprising how practicing a simple routine can enhance your clarity and confidence during a real situation.
Not only does this create familiarity, but it also builds teamwork. As a family, you’ll learn to communicate and rely on each other, ensuring that the process feels less daunting when it really counts.
Review After Each Event
When calm is restored after an evacuation or drill, gather the family and talk about how things went. Reviewing your response after an event is crucial for improvement. What worked well? What didn’t? You can only improve on what you critique.
This review process can create a healthy discussion around fears, adjustments needed, and lessons learned, making it a bonding experience. Plus, it reinforces a culture of preparation that will serve your family best in future emergencies.
As time goes on, also encourage any new family members who join to participate and familiarize themselves with your evacuation plan. The more practiced you are as a family, the more confident you’ll feel!
FAQ
What should I include in my emergency kit?
Your emergency kit should include essentials like water, non-perishable food, a flashlight, extra batteries, a first-aid kit, personal medications, and a battery-operated radio. Don’t forget personal identification and important documents!
How often should I review my evacuation plan?
It’s best to review your plan at least once a year. However, any significant life changes or changes in your neighborhood might warrant an immediate review.
Can I rely solely on technology during an evacuation?
While technology can provide real-time updates, it’s crucial to have a backup system, like a battery-operated radio in case of power outages, as you can’t fully rely on tech during emergencies.
How can I ensure my family is ready for an evacuation?
Engage in conversations about the evacuation plan, conduct practice drills regularly, and ensure everyone knows their roles. Staying updated and involved fosters confidence and readiness in your family.
Why should I identify multiple routes for evacuation?
Identifying multiple routes prepares you for unforeseen circumstances, like road closures or congestion. Having alternatives can significantly reduce stress and time during an emergency.

by Preparation | May 10, 2025 | Preparedness
Understand What Carbon Monoxide Is
What You Need to Know
Let’s start with the basics. Carbon monoxide (CO) is a colorless, odorless gas that can be super dangerous. I remember the first time I learned about it; I was shocked to find out how easily it could be produced by everyday appliances like gas stoves or heaters. You can’t see it, you can’t smell it, and yet it can sneak up on you. It’s essential to be aware of its nature so that you can take the right steps to protect your family.
This gas comes from burning fossil fuels. Think about your car, your furnace, or even your fireplace. If these appliances aren’t working right, they can release CO into your home. That’s why it’s not just important to know what it is, but to be proactive in understanding where it might come from.
Moreover, symptoms of CO poisoning – headaches, dizziness, and confusion – can often be mistaken for something else, which makes it even more dangerous. Staying educated is really the first step in keeping your family safe.
Install Carbon Monoxide Detectors
Choosing the Right Detectors
One of the best pieces of advice I can offer from my own experience is to invest in good carbon monoxide detectors. When I first moved into my house, I realized I didn’t have one. That made me really nervous, so I did some research. The newer models are pretty affordable and come packed with features, like smart technology that sends alerts to your phone.
Installing these detectors in key areas of your home is crucial. I’ve learned the hard way that kitchens and bedrooms should definitely be top priority. When I added a detector outside my son’s bedroom, I felt a weight lift off my shoulders. It’s a simple step, but it makes a world of difference.
Don’t forget to check the batteries regularly too. Set a reminder in your phone every six months; it’s easy to forget otherwise! Trust me, spending a few minutes checking your detectors is worth it for peace of mind.
Maintain Your Appliances
The Importance of Regular Check-Ups
Let’s talk about maintenance. I can’t stress enough how critical it is to keep your fuel-burning appliances in good shape. When I first bought my furnace, I was tempted to skip the yearly check-up, thinking it would be fine. Well, I quickly learned that neglecting maintenance can lead to some serious issues.
Regular inspections can ensure everything is working properly and dramatically reduce the risk of CO leaks. In fact, most service professionals recommend at least once a year to prevent any hazards. Having a checklist helps too, so you don’t miss anything important.
Plus, I’ve found that keeping my appliances clean and well-ventilated not only helps in avoiding dangerous gases but also boosts their efficiency! Efficient appliances save money and contribute to our family’s safety. It’s a win-win.
Know the Symptoms of CO Poisoning
Be Aware and Educate Your Family
It’s essential to be aware of the signs of carbon monoxide poisoning. I remember when my cousin came to visit, he mentioned he had a headache, and I kicked into high alert mode. It’s so important to know the symptoms like headaches, dizziness, confusion, and even nausea. The more we talked about it, the more my family felt prepared.
Make it a family discussion! Teaching my kids about the symptoms has given them the ability to speak up if something feels off. I put together a little info sheet for my fridge, and it’s been a handy reference. When children understand, it empowers them to take action!
Staying informed helps everyone in the household recognize potential hazards and react more quickly. After all, acting fast is key – it can literally save lives!
Make an Emergency Plan
Preparing for the Worst
Having a plan in place is like having a safety net. My family and I sat down one rainy Sunday to talk through our emergency response plan. It might sound a bit dramatic, but knowing what to do in case of a CO alarm going off brings a lot of peace of mind.
We decided on a meeting spot outside, in case we ever need to evacuate. Everyone should know how to leave the house quickly and safely. We even practiced the drill a few times – it was fun and got everyone involved. It made me feel like I was doing something proactive, which is always nice!
Don’t forget to keep a battery-powered radio nearby for updates if the power goes out. I found one at a yard sale, and it’s a good reminder that you can often find practical solutions without breaking the bank. Stay prepared, and you’ll feel more secure.
FAQs
What are common sources of carbon monoxide in homes?
Common sources include gas furnaces, water heaters, car exhaust from attached garages, fireplaces, and gas stoves. Always ensure these appliances are well-maintained!
How often should I test or replace my carbon monoxide detector?
Test your detectors monthly and replace the batteries at least once a year. Also, replace the entire unit every 5 to 7 years depending on the manufacturer’s recommendation.
What should I do if my carbon monoxide alarm goes off?
If your alarm sounds, immediately evacuate your home and call emergency services. Do not ignore the alarm or try to find the source. Safety first!
Can carbon monoxide poisoning happen in the summer?
Yes, it can! Many people think CO poisoning only occurs in winter, but it can happen anytime there are working appliances that produce exhaust gases.
Is there a safe level of carbon monoxide exposure?
No, there is no safe level of exposure. Even low levels can cause health issues, so it’s best to invest in safety measures to prevent exposure entirely.

by Preparation | May 10, 2025 | Preparedness
Layering Your Clothing Correctly
Understanding the Basics of Layering
When the cold sets in, one of the first things I’ve learned is that layering my clothing is crucial. It’s not just about throwing on a bunch of sweaters; it’s about understanding the science behind how layers trap heat. The base layer should be snug and moisture-wicking to keep sweat away from your body, which can make you feel colder.
The middle layer should provide insulation—think fleece or wool—which helps to keep the warmth close. Finally, the outer layer needs to be windproof and waterproof if you’re facing stormy weather. This setup traps body heat effectively and relies on the principle of thermal insulation.
Another tip? Don’t forget accessories! Hats, gloves, and thick socks are essential as a lot of heat escapes from the extremities. When I bundle up properly, I can face the cold with confidence!
Choosing the Right Fabrics
Not all materials are created equal when it comes to keeping you warm. From my experience, natural fibers like wool and cashmere do wonders compared to cotton. Cotton tends to absorb moisture, which can quickly sap away your body heat. Wool, on the other hand, retains warmth even when wet!
Synthetic materials also have their place. They’re often designed for specific weather conditions and can offer good insulation without the weight of heavier fabrics. Look for clothes with thermal properties and good reviews from outdoor enthusiasts when shopping.
In the end, I’ve found that mixing different fabrics can really optimize warmth, balancing performance with comfort. Get creative with your wardrobe, and you’ll be amazed at how warm you can stay!
Utilizing Heat-Reflective Materials
Have you ever heard of heat-reflective materials? I hadn’t until recently, but they’re a game changer! Products like thermal blankets and sleeping pads can reflect your body heat back to you, making them ideal for cold nights whether you’re camping or at home. I keep one handy in my living room for those unexpectedly chilly nights.
What’s even cooler is that these materials are lightweight and easy to store. If I’m heading out for a hike in the colder months, I always pack a heat-reflective blanket in my backpack. It takes up hardly any space and can be a lifesaver!
So, next time you’re prepping for the cold, consider incorporating these materials into your repertoire. You’ll be surprised how effective they are in retaining warmth!
Creating a Warm Environment
Sealing Off Drafts
One of the simplest things I do when the cold comes knocking is to check for drafts in my home. Cold air sneaks in through windows, doors, and even cracks in the walls. A few years back, I invested a couple of hours sealing these gaps, and it was totally worth it.
Using weather stripping or caulking is super easy and can make a significant difference in how warm your space feels. You’d be amazed at how much colder it can get when those breezes whip through!
Plus, it not only helps with warmth but also energy bills since I’m not heating up the outside air. A win-win for sure!
Using Rugs and Curtains
Adding some cozy rugs and thick curtains isn’t just about aesthetics; it’s about function too! Rugs can add an additional layer of insulation against cold floors, and heavy curtains can help trap heat inside.
Last winter, I decided to invest in some plush area rugs and blackout curtains on my windows. The difference was astounding! I felt warmer immediately, and I loved the way it made my living space feel cozier.
Don’t underestimate the power of your ambiance; sometimes, just a few changes can offer a whole new level of comfort in your home!
Utilizing Natural Sunlight
On sunny days, I take full advantage of the sun’s natural warmth. I always open my curtains wide in the morning to let that beautiful sunshine flood in. It heats up my space surprisingly well, and it’s completely free!
In the colder months, I’ve learned to rearrange furniture to maximize the sunlight—sitting near windows makes a world of difference. Just be sure to close those curtains at night to keep the warmth inside and the cold air out.
Nature has its own little way of helping us if we just pay attention. So don’t shy away from using what’s out there!
Staying Active
Exercise to Boost Body Heat
One of my favorite ways to keep warm without relying on heat is to stay active, especially during the winter months. Whether it’s a quick dance party in my living room or a brisk walk outside, movement is fabulous for generating body heat!
I’ve found that even short bursts of activity can elevate my body temperature and make me feel significantly warmer. Plus, staying active throughout winter helps keep my spirits up, so it’s a double win!
So go ahead and jump around or do a few jumping jacks if you’re feeling chilly. You’ll not only get warmer, but you’ll also have a blast while doing it!
Utilizing Household Chores
I often find that doing household chores can keep me warm as well. Believe it or not, cleaning the house or cooking can get my blood pumping and warm me up! While I’m scrubbing the floors or preparing a meal, I can feel the warmth radiating throughout my body.
This approach comes with the added bonus of accomplishing something productive. It’s a fantastic way to kill two birds with one stone—stay warm and keep my home tidy!
So next time you’re feeling chilly, consider tackling that to-do list. You might be amazed at how much warmth comes from getting things done!
Socializing for Warmth
Let’s not forget the warmth of social interaction! Spending time with friends and family naturally boosts my mood and can help keep the chilly vibes at bay. When everyone gathers together, it adds a certain warmth to the atmosphere that I find comforting.
Having a cozy gathering with hot drinks, blankets, and good company can transform a cold evening into something special. We might even play games or watch movies together, which keeps us all moving and laughing!
So don’t underestimate the power of human connection during those cold months. Sometimes, all it takes is a little camaraderie to keep the chill away!
Encouraging Heat Retention Through Body Care
Keeping Hydrated
Staying hydrated might not seem like a direct method of keeping warm, but trust me, it plays a role! When I keep my hydration levels up, my body functions better and can regulate its own temperature more efficiently.
I love to sip on warm teas and broths during the winter months. It not only hydrates me but also gives my body that comforting warmth from inside out. Plus, it’s just delicious!
So remember to drink plenty of fluids and consider adding warm beverages to your routine if you want to keep cozy.
Warm Baths and Showers
A warm bath is one of my favorite ways to unwind and keep warm. There’s nothing quite like soaking in a hot tub of water for combating the chill after a long day outside. It relaxes my muscles and warms me up quickly!
I often light some candles or play soothing music when relaxing in a bath. It transforms the experience from just warm to a full-on spa day, which feels like a treat during the cold weather.
Even a hot shower can work wonders! Just make sure to dry yourself off completely and get dressed in warm clothes right after to lock in that heat.
Embracing Self-Care Rituals
Finally, don’t underestimate the importance of self-care! I’ve found that when I take the time to indulge in things that make me feel good, I naturally feel warmer. Whether it’s applying warm blankets or even a comforting face mask, these little rituals can create a sense of warmth and wellbeing.
Plus, pampering myself goes a long way for mental warmth as well. It helps fend off that winter gloom and makes those cold days feel a bit more bearable.
So go on! Treat yourself to your favorite rituals, and enjoy that warmth—inside and out.
FAQ
1. Can layering my clothes really help keep me warmer?
Absolutely! Layering is all about trapping heat between the layers while using moisture-wicking fabrics to keep you dry. It’s an effective way to stay warm in chilly conditions.
2. What materials should I avoid while dressing for the cold?
Avoid cotton as a base layer because it traps moisture, which can make you feel colder. Opt for materials like wool or synthetics designed for warmth instead!
3. How can I create a warmer environment in my home?
Sealing drafts, using rugs and curtains, and maximizing natural sunlight can all help in making your space warmer. Little changes can result in significant warmth!
4. Does staying active really make a difference in how warm I feel?
Yes! Movement increases blood circulation and generates body heat. Incorporating light exercises or chores can keep you toasty during colder months.
5. Are warm beverages helpful for keeping warm?
Definitely! Warm drinks like tea or broth not only hydrate you but also provide warmth from the inside out, making chilly days feel a little cozier.
by Preparation | May 10, 2025 | Preparedness
Choose the Right Location
Evaluating Your Property
When I first decided to dig in for a survival bunker, the location was everything. You want a spot that’s not only discreet but also safe from natural disasters. Look for flat land away from tall trees and potential flood zones. Trust me, you don’t want to end up with a lake in your bunker after heavy rain!
Consider access points as well. Is it easy to get to without attracting attention? If you have nosy neighbors, you might want to think about burying your bunker a bit deeper or hiding it with some landscaping. Make sure you can access it quickly when needed—your safety will depend on it!
Lastly, think about how you’ll be using this space. Is it going to be primarily for storage, or do you envision it as a living space? This will affect not only how you build it but also where you decide to place it.
Environmental Factors
Once I had a few locations in mind, I paid close attention to the environmental factors. Soil type is crucial; the last thing you want is a bunker that sinks into the ground! Clay soil might not be ideal as it retains water. Look for sandy or loamy soil for easier excavation.
Also, pay attention to local wildlife. It’s no good digging your bunker if critters are going to take over. Make sure your site doesn’t disturb any habitats. If you’re going to be spending time down there, I think you’d want to do it without the surprise of a raccoon visiting.
Weather is another important consideration. Make sure your site has natural barriers against the wind, like trees or hills, so it won’t be exposed to harsh weather. This will help retain warmth in the cooler months and keep it cooler in summer.
Legal Considerations
Before you break ground, you need to check the local regulations regarding underground structures. The last thing you want is to build a bunker only to be told to tear it down by the authorities. It pays to do a bit of digging (pun intended) into the local building codes.
You might need permits depending on what you plan to dig. Some areas have strict rules about underground spaces, so it’s wise to visit the local zoning office. They’ll help you figure out what you can and can’t do.
If it helps, have a conversation with a building contractor. They can offer insights into what’s possible and remind you of any additional regulations that might be necessary for your area.
Plan and Design Your Bunker
Space Allocation
Now that I’ve nailed down a location, it’s time to figure out how much space I’ll need. I always suggest starting with a floor plan, even if it’s rough. Think through how many people will be using it, what supplies need to be stored, and any additional features like sleeping quarters or a small work area.
Don’t forget about the essentials. You’ll need room for food storage, water supply, and possibly some kind of ventilation system. Also, consider extras that could make life more comfortable during a long stay, such as seating or a small table.
Consider making your bunker modular. This way, you can expand later without needing to entirely rebuild. Having designated areas can be very helpful in maintaining organization and access to essentials.
Material Selection
With the design settled, it’s time to talk materials. I took a lot of time considering what would work best for my budget while still being effective. Concrete blocks are a popular choice for bunkers because of their durability and strength. They might be a bit pricey if you’re working with a tight budget, though.
If you’re looking for a more affordable material, consider using reinforced wood or metal. Just remember that ventilation is key, and you might have to factor in some cash for metal vent pipes or whatever kind of system you decide to use.
Don’t overlook insulation either! You’ll want to make sure your bunker can maintain a livable temperature. Foam board insulation is a budget-friendly option that works wonders. It might sound like a minor detail now, but on a cold night, you’ll be grateful for that extra warmth.
Emergency Features
When planning your bunker, you have to think about emergencies. This isn’t just a man cave; it’s a survival shelter! Make sure to include essential supplies like first aid kits, a means for food preservation, and water purification options.
I recommend thinking about energy sources too. Solar panels are a great investment, but if that’s too pricey, a good old-fashioned hand-crank generator can work temporarily to keep some lights on or to charge your devices.
Don’t forget to include some entertainment options. Nothing dreadful than getting stuck down there with nothing to do. Board games, books, and maybe even some tools to keep you busy will go a long way toward keeping everyone sane in a crisis!
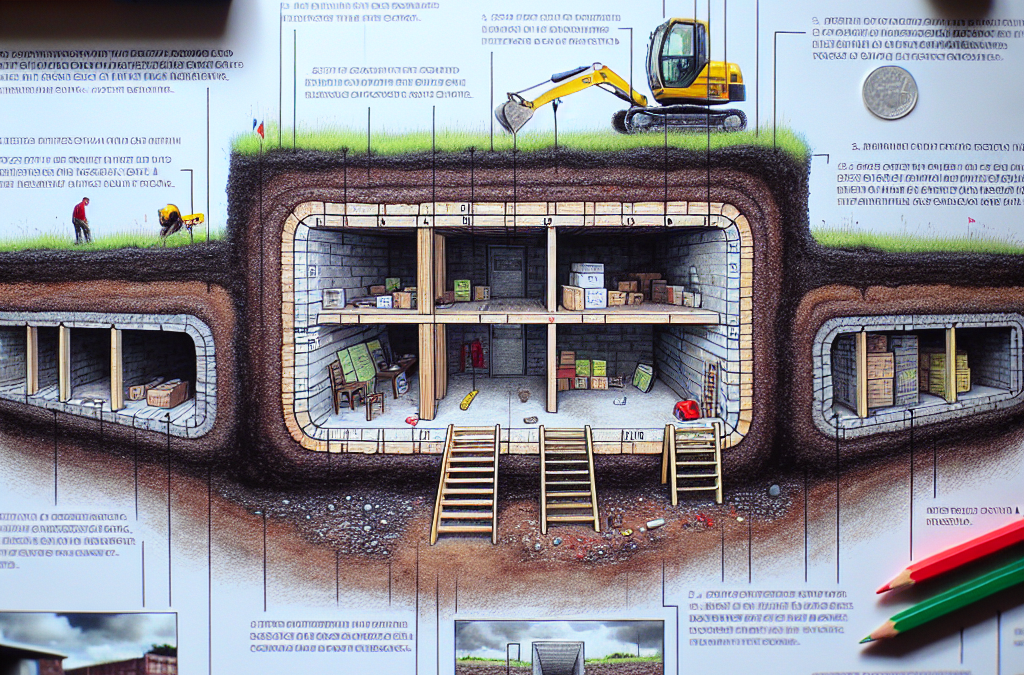
Excavate and Build Your Bunker
Excavating the Site
Alright, time to put all that planning into action! When I first started digging, I quickly realized it’s more than just shoveling dirt. You’ve got to plan for how deep and wide your bunker needs to be. Using a shovel might work for small digs, but renting a mini-excavator is usually the way to go.
Make sure to account for drainage too! Nobody wants a flooded bunker. Dig trenches to direct rainwater away, or set up a sump pump in case things go awry. I can’t stress this enough—watch your surroundings too! Look out for power lines and underground utilities before you dig.
Once you’ve dug your space, it’s time to lay a solid foundation. This will help prevent any settling or shifting that could compromise your bunker’s structure. If you’re not sure about the structural integrity of your site, consider consulting a professional.
Building the Walls
With the excavation done, it’s time to build those walls! Whether you’ve opted for concrete or wood, each choice has its pros and cons. I went for concrete blocks simply because they can withstand more extreme conditions.
Start from one corner and lay the blocks out according to your plan. You’ll need to make sure they’re level and stable. If you’re using wood, be sure to seal it with a water-resistant barrier to prolong its life against moisture.
Ventilation is crucial, so I made sure to leave space for vents during the wall construction. Having fresh air down there is a must. Also, remember to reinforce the walls with insulation to make your bunker cozy.
Finishing Touches
Now that the main structure is up, it’s time for those all-important finishing touches. You want to make your bunker livable, right? Start with interior partitions to create separate areas according to your plan—bedrooms, storage rooms, and so forth.
Then, consider lighting. Whether it’s battery-operated lights or solar options, having light in your bunker will make all the difference. I also suggest incorporating some kinds of emergency lighting in case the power goes out.
Lastly, don’t forget about decorations! It might sound frivolous, but adding a personal touch can make your bunker feel more comfortable and inviting. Posters or simple decor can lift spirits when you’re facing tough times.
Stock Your Bunker Wisely
Food Storage Strategies
You can have the best bunker in the world, but it’s no good if it isn’t stocked up with essentials! I started by creating a list of non-perishable foods that I knew my family would eat. Consider canned goods, freeze-dried meals, or even bulk foods like rice and beans that can last for ages.
Don’t forget to think about how you’ll store everything. Shelving units can maximize space, and vacuum-sealed bags can help keep food fresher longer. I highly recommend rotating your supplies to keep old stock from going bad—a little food management goes a long way!
Consider the types of meals you’ll want and make sure to stock up on enough variety so you don’t end up with a pantry full of bland food. It’s about survival, but a little joy in the taste department doesn’t hurt!
Water Supply Management
Next up is the vital issue of water supply. In survival situations, having access to fresh water is non-negotiable. I invested in a large water storage tank, which is essential for any bunker. Just ensure you keep it sealed and clean!
Filtering systems are also something I would recommend looking into. From activated charcoal filters to gravity-fed systems, having something in place can make a huge difference. You might even want to consider setting up a rain catchment system if you can!
And don’t overlook hydration—keeping a stockpile of bottled water is a good backup plan. Always store these properly to prevent contamination. I like to keep a rotation schedule for my water stock as well!
Emergency Supplies and Gear
When I finally stocked my bunk, I made sure to include emergency supplies, and boy did it pay off! A robust first-aid kit should be the backbone of your supplies. Consider including items like bandages, antiseptics, and any necessary medications. Having a well-stocked kit can be a lifesaver.
I also encourage you to gather gear that can help during a crisis. Flashlights, batteries, fire-starting kits, and multi-tools are going to be your best friends. You never know when you might need them, so I recommend stashing them in easy-to-reach places.
Don’t forget some basic tools for repairs and maintenance as well. Things like duct tape, hammers, and screwdrivers can save your day, and keeping a stock of spare parts can be incredibly handy down the line.
Maintain Your Bunker
Routine Inspections
Building your bunker is just the start! Setting a routine inspection schedule is essential to keep everything in top condition. I personally mark it on my calendar to check the structural integrity of the walls and ensure there’s no moisture buildup.
It’s also important to check your supplies regularly. I mean, who wants to dive into a stockpile of expired food or empty water containers? Check expiration dates and rotate through your supplies regularly—this not only keeps things fresh but also helps you stay organized.
Maintaining your ventilation system is equally vital. Make sure nothing is blocking the vents and that they’re working smoothly to keep air flowing. Run tests every so often just to be sure everything’s functioning!
Update Supplies Regularly
Beyond routine checks, updating supplies is crucial. I’ve found that taking stock at the changing of the seasons helps ensure that I’m stocked up on necessities—and ready for any surprises. This also gives me an opportunity to replace any outdated items.
If you’ve tried out some new recipes, make sure to incorporate new foods into your supplies. Diversity in your food stock can make a challenging situation feel less daunting!
I personally enjoy trying different brands or types of food as well. This way, I’m never stuck with items I don’t like in a pinch! Keeping things fresh boosts morale and keeps the bunker from becoming a drab environment.
Regular Clean-Up
Regular clean-up is not just for aesthetics; it’s essential for maintaining a functional space. Mold and dust can build up quickly in a confined area, and if you’re not careful, you might end up with more problems than you bargained for!
I recommend creating a cleaning schedule just like your inspection schedule. Dusting shelves, checking for leaks, and clearing out expired food can help keep your bunker in great shape!
And remember, when you’ve done the initial clean-up, it’s easy to keep things tidy. Just make it a habit when you’re restocking or spending time in the bunker. A clean space keeps spirits high, and you’ll always be ready for anything!
FAQ
1. How much does it cost to build a survival bunker on a budget?
The cost can vary greatly depending on materials and design, but you can start with a few thousand dollars for a basic bunker. It’s all about how much you’re willing to do yourself versus hiring help.
2. What are the best materials to use for a budget bunker?
Concrete is ideal for strength, but if you’re looking to save, consider reinforced wood or even shipping containers. Just make sure you’re mindful of insulation!
3. How do I ensure my bunker is safe from flooding?
Choose a location on higher ground, and incorporate proper drainage and water barriers. Regular inspections can also catch problems before they escalate.
4. What should I stock in my bunker besides food and water?
Don’t forget essentials like first-aid kits, tools, batteries, and entertainment items like books or games—these will make your time in the bunker more pleasant!
5. How often should I check and maintain my bunker?
Set inspection check-ups every few months, but also be spontaneous! If there’s a heavy storm or other events in your area, I’d check it more frequently just to be safe.
by Preparation | May 10, 2025 | Preparedness
Enhancing Home Security
First, Get to Know Your Home’s Vulnerabilities
So, let’s start by taking a good look at our homes. I found that assessing the weak spots in your property can actually save you a lot of trouble down the line. Go outside and walk around; make sure to check doors, windows, and other entry points that could be easy targets.
While you’re at it, don’t forget to examine the landscaping too. Overgrown shrubs near windows can be a hideout for thieves. Trim those bushes back, so they can’t use them as cover. It’s often the small details that make a difference.
After you have identified these areas, it’s time to think about how to improve them. Invest in solid locks and maybe even some smart home devices. Trust me, the peace of mind you get from knowing your home is secure is totally worth the effort.
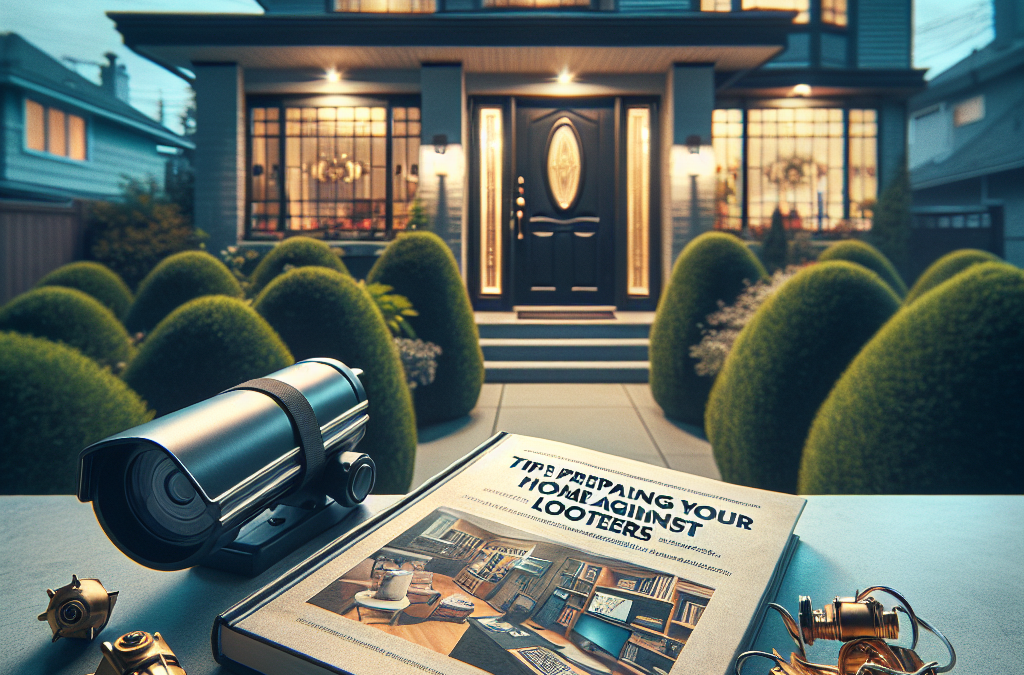
Lighting is Key
Lighting plays a huge role in deterring looters. I can’t stress enough how important it is to brighten up the perimeter of your home. Installing motion-activated lights near entry points can catch potential thieves off guard.
You might want to consider using some solar-powered lights if you’re looking for an easy installation. They are cost-effective and can really make a difference. Just imagine the surprise on the face of someone sneaking around when those lights flick on!
Plus, don’t forget about interior lighting. Keep some lights on timers to simulate that someone is home. It’s a classic trick but one that can help thwart would-be looters.
Security Systems and Cameras
In today’s world, it feels like having a home security system is essential. I’ve learned that these systems come in all shapes and sizes, from basic alarms to comprehensive setups with cameras and monitoring services.
Installing cameras not only puts you in a proactive position but also sends a message to anyone thinking of trespassing: “Hey, we’re prepared!” Plus, many modern security systems can be monitored from your phone, giving you peace of mind wherever you are.
Finally, don’t forget to regularly check and maintain these systems. An outdated security camera is almost as good as no camera at all. By staying on top of your home security, you ensure you’re always a step ahead.
Creating a Safe Environment
Neighborhood Watch Programs
One of the coolest things I’ve done is get involved in local neighborhood watch programs. There’s something empowering about banding together with your neighbors to watch out for each other.
Not only will you get to know your neighbors better, but this sense of community can significantly deter thieves. When they see that everyone is looking out for one another, many think twice about breaking into homes.
I’ve also found that having regular meetings can help stay connected. Share updates, concerns, or even tips on safety in the neighborhood. All of this creates a solid support system that we all appreciate.
Informing Trusted Neighbors
Having a trusted friend or neighbor look after your home while you’re away is invaluable. I always make sure to inform someone nearby about my plans and ask them to keep an eye on things.
When they know you’ll be gone, they will be more vigilant. Plus, I always remind them to report any suspicious activity. It’s amazing how much peace of mind comes from knowing someone is watching your back.
Also, consider exchanging keys with trusted neighbors. This way, they can check on your house, collect mail, or even water plants, making it less obvious that you’re absent.
Secure Your Valuables
Make it as difficult as possible for would-be looters to steal your stuff. I found it helpful to keep my valuables tucked away in secure places like safes. That’s where I stash important documents, jewelry, and any small electronics.
Additionally, avoid displaying high-value items from windows. It’s easy for someone to spot an expensive guitar or new TV and think your home is a target. I’ve learned to keep my valuable things out of sight whenever I can.
Finally, consider insuring your valuables. This can help you breathe a little easier, knowing that even if the worst happens, you are somewhat protected financially.
Emergency Plan and Communication
Developing an Emergency Plan
Having a plan in case of an emergency is a solid way to be prepared. I always make sure that everyone in the household knows the steps to take should anything happen—a fire, or, yes, even a break-in.
This plan should include designated meeting places, emergency contact numbers, and what to do during various situations. It might seem tedious, but having this mapped out can make a huge difference in a high-stress moment.
And remember: practice makes perfect! You can organize a drill where everyone knows what to do. It really helps everyone feel a bit more confident in times of crisis.
Communication is Crucial
It’s also really important to maintain clear communication with loved ones. I often set up group chats for emergencies, so everyone can stay in the loop. It might seem like a small thing, but having that channel open can save a lot of confusion in the heat of the moment.
Consider downloading safety apps that provide alerts in case of emergencies. Many neighborhoods have their own communication channels, making it easier to receive and share information quickly.
Being prepared and communicating effectively not only helps keep your home safe but also gives you confidence to tackle anything that comes your way. Let’s be real, the more informed we are, the better off we’ll be!
Regular Updates and Drills
Finally, take time every so often to revisit your safety plans and update them as necessary. I find that revisiting our strategies at least once a year keeps things fresh in everyone’s minds.
Additionally, these refreshers are a good opportunity to discuss any new concerns that may have arisen. Family dynamics can change, and so can the threats, so staying updated is key.
Plan another drill too—it can reinforce your emergency plans and make everyone feel a little more prepared. And hey, it can even be a fun family bonding activity!
Conclusion
To wrap things up, I hope these tips give you a solid foundation to prepare your home against looters. Whether it’s enhancing security, creating a safe environment, or developing an emergency plan, every step you take can make a difference. I’ll genuinely be rooting for you as you implement these strategies in your home. Stay safe!
FAQs
1. What are the most effective home security measures?
Installing a comprehensive security system, ensuring proper lighting around your home, and maintaining solid locks are among the most effective measures. Additionally, consider having cameras for added security.
2. How can I involve my neighbors in home security?
Engaging in a neighborhood watch program or simply keeping each other informed about unusual activities can create a supportive environment. Trusting your neighbors to look out for one another is key.
3. What can I do if I can’t afford a security system?
Even without a security system, simple steps like improving outdoor lighting, securing all entry points, using timers for lights when you’re away, and keeping valuables hidden can deter thieves.
4. How often should I review my home security plan?
I recommend reviewing your home security plan at least once a year. This ensures that everyone in the household remembers the plan and updates it based on any changes in circumstances.
5. What should I do during an emergency?
In any emergency, stay calm and follow your emergency plan. Make sure everyone in your home is safe and knows where to meet. Always prioritize calling local authorities and informing them of the situation.


