by Preparation | May 13, 2025 | Preparedness
Choosing the Right Materials
Gathering Supplies
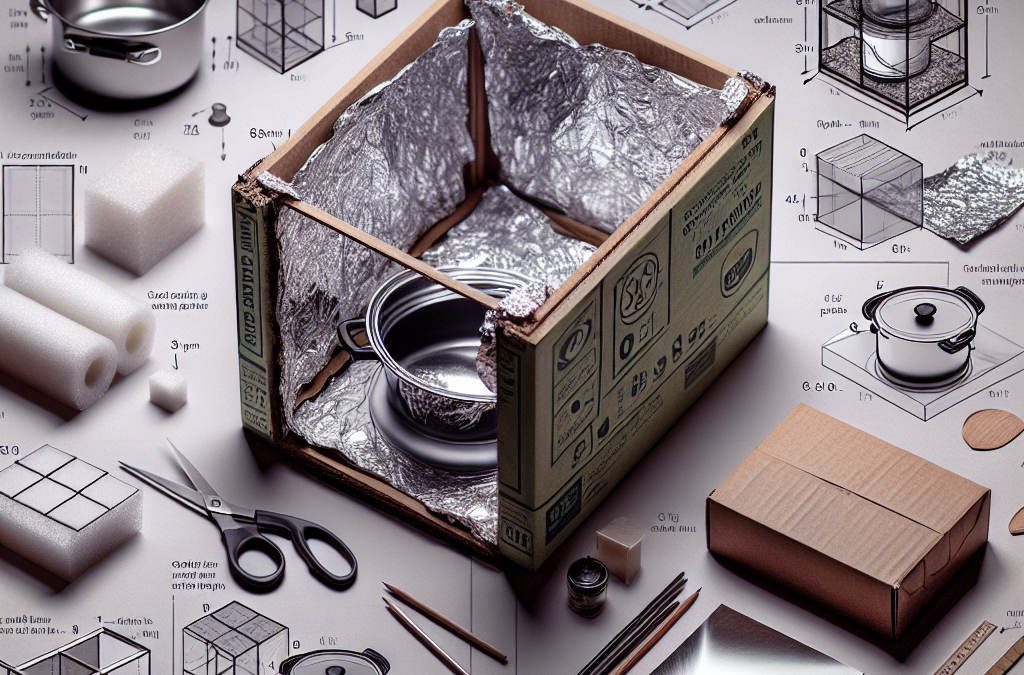
So, you want to make a solar oven? Great choice! Before diving into the construction, I found it’s crucial to gather all the materials you’ll need. Trust me, nothing’s worse than getting halfway through and realizing you’re missing something key. You’ll need a pizza box (this is my go-to!), aluminum foil, plastic wrap, and black construction paper.
Don’t worry, you can usually find these materials around the house or at a local store. Even check out thrift stores or online marketplaces for second-hand goods. I’ve scored some amazing stuff that way! And remember, the more reflective your foil, the more heat you can generate—this little detail can make a huge difference.
Getting all your supplies in one swoop not only saves time but also keeps the momentum going, which is so important during any DIY project. Plus, it gives you a chance to visualize how everything will come together!
Understanding Functionality
It’s super important to understand what each of these materials brings to the table. For instance, the pizza box is not just for pizza; it serves as the chamber to trap heat. The aluminum foil reflects sunlight into the box, while the black paper absorbs the heat—the science can feel a bit like magic!
When I first started, I spent some time just thinking about how the sun’s rays would travel through the plastic and heat what was inside. It’s fascinating! The clearer your understanding of your materials’ roles, the better your solar oven’s performance will be.
And let’s not forget: this is also a fun way to talk about sustainability and energy. It’s a conversation starter, especially if you have kids or friends who are curious about renewable energy. Share what you learn as you build—I promise it will draw more people into your DIY adventures!
Preparation is Key
Now that you’ve got your materials, it’s smart to prepare your workspace. I mean, nobody enjoys a chaotic environment when they’re trying to create something cool, right? Clean off that table or workspace and lay everything out so you can see what you’ve got. Trust me, it makes a world of difference.
Also, I like to have a plan. Sketch it out! It doesn’t have to be fancy, just a rough idea of how you’re going to assemble your solar oven. This visual map helps me stay focused and makes it easier to catch any steps I might have otherwise overlooked.
Remember, even when things don’t go perfectly, they can still turn out awesome. Preparing means you can respond to any hiccups with grace and make them part of the fun rather than frustration!
Building the Solar Oven
Constructing the Box
Alright, let’s get building! I love this part—there’s something satisfying about seeing your creation take shape. Start by cutting a flap in the lid of your pizza box. This is what you’ll use to direct sunlight into the oven. First cut along three sides, leaving an inch or so attached to create your flap.
Next, you want to cover the inside of that flap with aluminum foil. This is what reflects the sunlight into your solar oven. I like to make sure it’s shiny and smooth, as that helps with maximum reflectivity. The shinier, the better!
Once that’s done, grab your black paper and line the bottom of the pizza box with it. The black color will trap the heat much more effectively. It’s intriguing how color theory plays into this; it makes you think about the world from a different angle.
Sealing for Efficiency
Next up: sealing it all in! Take plastic wrap and cover the opening of the pizza box. This creates an insulating layer which locks in the heat. I usually add a couple of layers to ensure it holds up against the sun’s rays. It’s like making a cozy blanket for your solar oven!
A little pro tip: make sure there are no gaps in the plastic wrap; any holes can let that precious sunlight escape. You want this baby to be as airtight as possible while still allowing the heat to enter. This is where you can get creative—tape or glue down the edges securely!
It’s exhilarating to see a simple pizza box transform into something new and functional. Plus, sealing it well will make your solar oven more efficient, so you’ll be one step closer to cooking with it!
Setting Up for Success
Your solar oven is really coming together now! The last part of building is about positioning it correctly. Place it outside in a sunny spot where it can catch direct sunlight. I typically keep it facing south if I can. The orientation can really make a difference in how effective your oven is.
Adjusting the flap to catch the maximum sunlight is essential. Play around with different angles until you find the sweet spot. The more sunlight you capture, the hotter your oven will get!
And remember, patience is key here. You won’t be cooking things in a matter of minutes like a microwave. But isn’t that part of the charm? Taking your time with the cooking process can bring a sense of calm and mindfulness that’s hard to find in our fast-paced lives.
Cooking with Your Solar Oven
Choosing What to Cook
Okay, now for the fun part—cooking! The options are endless, but I recommend starting with simpler things. S’mores, mini pizzas, or baked cookies are perfect beginner projects. They’re easy, fun, and who doesn’t love a good s’more, right?
Make sure whatever you choose is quick to cook. You want to give your solar oven a good test run without feeling overwhelmed. Plus, the kids love being involved, and there’s nothing like a fun cooking session under the sun to make memories!
And if you feel adventurous, try roasting veggies! It’s an eye-opening experience to taste something you’ve cooked with the sun’s energy. Bonus points for flavor and nutrition!
Monitoring the Temperature
Once your food is inside, it’s important to keep an eye on the temperature. It can be tricky, as you won’t have a conventional oven gauge to rely on. I like to use a simple regular thermometer placed in the oven—it gives me peace of mind that I’m cooking things at the right temperature.
When I first used my solar oven, I set a timer to check on everything regularly. There’s something rewarding about peeking into the box and seeing deliciousness develop from pure sunlight!
Estimating cooking times can take practice, but it’s part of the whole DIY experience. And hey, if it doesn’t turn out perfect the first time—that’s totally cool! Learn, adapt, and enjoy the process!
Enjoying Your Creation
Finally, after the waiting game, it’s time to savor what you’ve created. Remove your food carefully—it can be hot! There’s something special about realizing you cooked with nothing but the sun’s rays; it’s like harnessing a superpower.
Set the table (or a picnic blanket) outside and share the moment with friends or family. I love hearing everyone’s reactions when they taste something made with the sun. It’s pure joy and often leads to conversations about sustainability and the environment!
Don’t forget to take some pictures—after all, you’ll want to remember your solar cooking triumph and inspire others to try it out for themselves!
Conclusion and FAQs
FAQs
1. How long does it take to cook food in a solar oven?
Cooking times can vary quite a bit depending on the food and the sun’s intensity. Generally, expect to wait anywhere from 30 minutes to several hours. Just be patient and enjoy the process!
2. Can I use a solar oven on cloudy days?
While sunny days yield the best results, you can still cook on cloudy days. It just takes longer since the rays are less direct. It’s a bit like camping out—embrace the change!
3. What type of food works best in a solar oven?
Start with easy recipes! S’mores, nachos, or vegetables are excellent beginnings. They’re fun and satisfying, and you can build your confidence for more elaborate dishes as you go!
4. Is it safe to leave the solar oven unattended?
It’s best not to leave it completely unattended. If you’re cooking for a longer period, check on it every now and then—it keeps the experience fun and lets you monitor how things are cooking!
5. How can I improve the heat efficiency of my solar oven?
Make sure you have no gaps in your insulating layers, and adjust your solar oven to catch the sunlight at the right angle. Keeping the inside clean and shiny will also help maximize heat absorption!

by Preparation | May 13, 2025 | Preparedness
Understanding Extreme Weather Conditions
What Constitutes Extreme Weather?
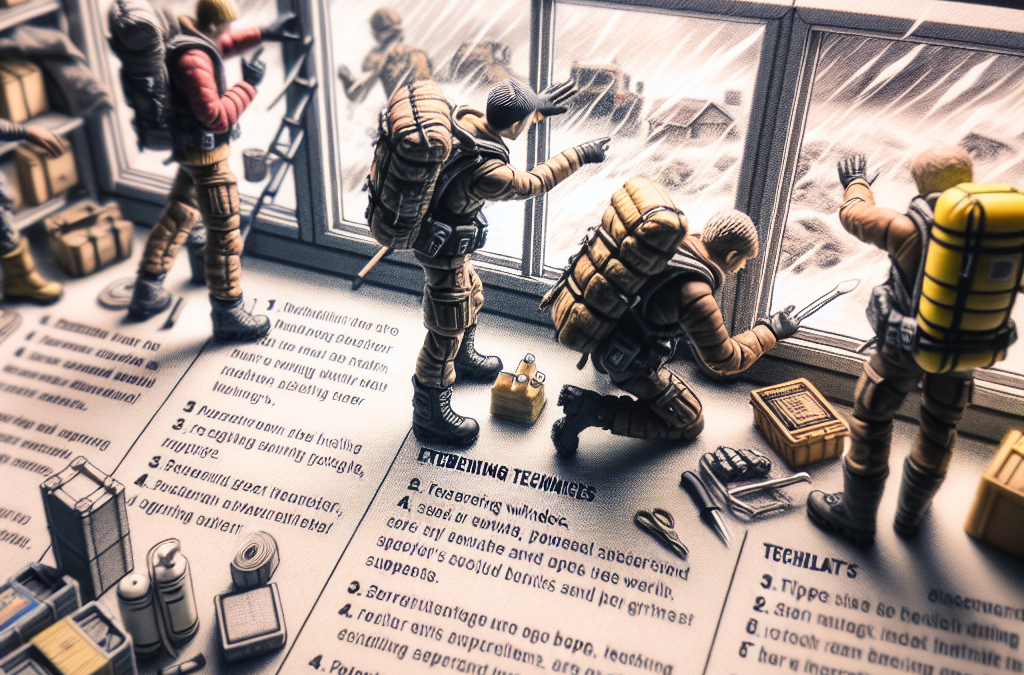
Extreme weather doesn’t just mean a bit of rain or a windy day; it’s all about those severe conditions that can really throw a wrench in our day-to-day lives. Think hurricanes, tornadoes, snowstorms, and even intense heat waves. Each of these presents unique challenges and dangers that we, as responsible individuals, must be aware of.
Knowing what constitutes extreme weather is the first step in effective preparation. For instance, a hurricane watch means you need to be ready for the worst, while a heat advisory can alert you to the need for hydration and sun-safety measures. Honestly, if something feels extreme, it probably is, and a little precaution can save a lot of hassle.
In my experience, staying informed about local weather forecasts and climate patterns is key. I found that having a weather app on my phone has helped me keep track of what Mother Nature has in store, so I never feel blindsided by unexpected weather changes.
Creating an Emergency Preparedness Plan
Gather Your Family and Make a Plan
When there’s a threat of extreme weather, gathering the family to set out a plan is crucial. This means discussing where to meet if you need to evacuate, knowing the routes to safety, and making sure everyone understands the plan. A family meeting sounds old school, but honestly, it really helps to create a sense of unity and preparedness.
Everyone in the family should have a role. Assign tasks to younger members, like gathering supplies or keeping track of the time. Making it a team effort not only spreads the workload but helps everyone understand the importance of emergency preparation. Believe me, this creates a sense of responsibility and reduces panic.
Plus, don’t forget to practice! Run through your plan a couple of times, maybe during a calm evening. It’ll feel less daunting if the moment arises since everyone will know what to do and where to go. Practice really does make perfect, and trust me, it eases the stress when actual emergencies happen.
Building an Emergency Supply Kit
Essentials You Should Have
Okay, let’s talk supplies! An emergency kit is basically your lifeline during extreme weather. I recommend starting with some basics: water, non-perishable food, a flashlight, batteries, and a first aid kit. These items are often the bare minimum, but they cover quite a lot when push comes to shove.
But don’t just stop there. Think about the things your family specifically needs. Do you have pets? Make sure to include their food and supplies too. Medications are crucial—stress might mess with our memories, so having those little bottles packed ready can be a lifesaver.
Lastly, consider the documents you might need during an emergency. Store them in a waterproof bag. I keep copies of my insurance policies, identification, and emergency contact information handy. It’s one less thing to worry about, and trust me, during a crisis, every little bit helps.
Staying Informed During Events
Utilizing Reliable Sources
Keeping abreast of the weather is so important; we’ve all seen how rapidly things can change. Relying on good sources of information can save you a ton of headaches. Local news stations, weather apps, and radio broadcasts are great ways to get timely updates. I always recommend having a battery-operated radio just in case the power goes out—you don’t want to be in the dark, literally and figuratively!
Additionally, social media can be a double-edged sword. It’s fantastic for real-time updates, but it can also be a hotbed of misinformation. Stick to credible accounts and channels, and be cautious when sharing information yourself. You don’t want to spread panic for no reason.
During extreme weather, I make it a ritual to check my phone frequently for updates while remaining conscious of the outside world. Sometimes things happen that aren’t covered on your app, so it pays to look out the window and listen for announcements or alerts!
Recovery and Post-Event Action
Assessing Damage and Starting Over
Once the event has passed, the recovery phase begins, and it’s essential to tackle it head-on. After an extreme weather event, don’t rush into assessing your property right away. Take a moment to breathe and ensure you’re in a safe environment first. It’s easier said than done, but your safety is the top priority.
Once it’s safe, I recommend walking through your space room-by-room, noting any damage, and gathering your insurance documents. Create a thorough inventory for your insurance company. It’s super tedious but trust me, having a clear record helps when you’re making claims.
Lastly, remember that it’s okay to ask for help during recovery. Whether it’s friends, family, or professional services, people generally want to lend a hand after disasters. No one should have to go through recovery alone, and leaning on your support system can make a significant difference during tough times.
Frequently Asked Questions
1. What types of extreme weather should I be prepared for?
Extreme weather includes hurricanes, tornadoes, blizzards, floods, and heat waves. Each type requires different preparations, so it’s important to know what could potentially affect your area.
2. How do I create a family emergency plan?
Gather your family, discuss potential scenarios, assign roles, and practice your plan. Ensure everyone knows where to meet and how to evacuate if necessary.
3. What essentials should be in my emergency kit?
Your kit should include water, non-perishable food, a flashlight, batteries, a first aid kit, medications, and any special supplies for pets or family members. Don’t forget important documents!
4. How can I stay informed during extreme weather?
Use reliable sources like weather apps, local news stations, and radio broadcasts. Keep a battery-operated radio handy for updates during power outages.
5. What should I do after an extreme weather event?
Ensure your safety first, then assess the damage carefully. Document everything for insurance claims, and don’t hesitate to ask for help during recovery.
by Preparation | May 13, 2025 | Preparedness
Understanding Chemical Spills
What Are Chemical Spills?
So, let’s kick things off by defining what a chemical spill really is. In simple terms, it’s when harmful substances leak out of their containers, often leading to contamination and safety hazards. Chemicals can range from household cleaners to industrial solvents, and when it spills, it can create tricky situations.
I’ve had my fair share of experiences with this. Once, I spilled a small bottle of bleach at home. The panic that ensued was unreal! The important takeaway is that no matter the size, always treat any spill seriously. They can escalate quickly if you’re not prepared.
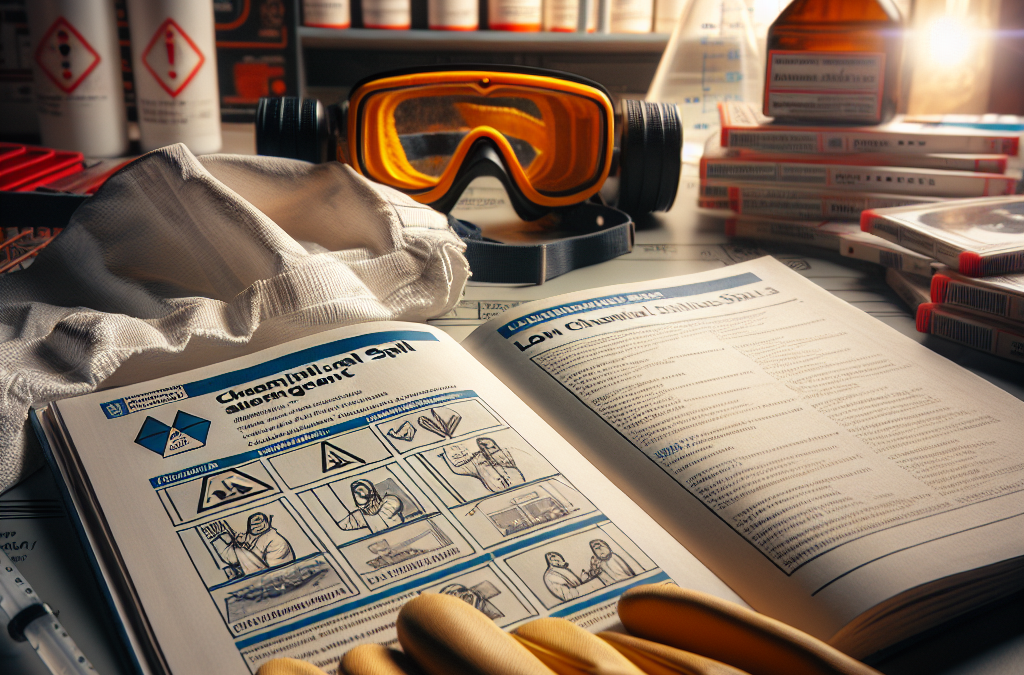
Understanding the danger levels is crucial. Some chemicals can be benign, while others might emit toxic fumes or pose fire hazards. Always check the material safety data sheets (MSDS) if they’re available. These sheets break down the risks and necessary precautions.
Personal Safety First
Assessing Your Environment
Before you even think about cleaning up that mess, you need to make sure your space is safe. Look for any signs of danger—fumes, unusual sounds, or even a strong smell. You should evaluate whether you can handle it alone or if you need to call for help. There’s no shame in asking for assistance!
Last summer, I was at a friend’s garage when a container burst and spilled all over. I remember feeling anxious, and instead of diving in, I took a step back to assess the surroundings. By doing so, I noticed some fumes hanging in the air and quickly made a mental note to get everyone away from that area.
Don’t underestimate the environment. Sometimes, just separating yourself and gathering the right tools can change the game. Planning your moves is essential for everyone’s safety, including yours. Wearing proper protective gear isn’t a fashion statement; it’s self-preservation!
Containment Measures
Act Fast to Prevent Spread
Once you’ve ensured your personal safety, it’s time to think about containment. Always have materials like spill kits handy—trust me, having these around is a lifesaver! They usually come equipped with absorbent pads and containment barriers that can help in a pinch.
I learned this the hard way during a small workshop where someone knocked over a container of paint. We scrambled for rags, but it was way too late, and we ended up with a mess that spread like wildfire. Just having a proper spill kit would have made life sooo much easier.
Also, if you’re working with liquids, remember to build a perimeter with absorbent materials. This helps contain the mess and prevents it from seeping into drains or other areas where it shouldn’t go. Quick thinking can save you from bigger headaches down the line!
Cleanup Techniques
Choosing the Right Cleanup Supplies
When it comes to cleanup, using the right materials is vital. Don’t just grab whatever’s lying around! Choose absorbent pads designed for the specific type of spill you’re dealing with. For example, oil spills require different cleaning agents than chemical spills do.
Thinking back, I remember tackling that bleach I spilled. I initially thought paper towels would do the job, but boy was I wrong! It spread and caused more harm. So, always keep specialty supplies on hand tailored to different kinds of spills.
Also, I’d recommend double-bagging any contaminated materials before you toss them out. You want to contain anything that could leak in the trash! It’s about being thorough and taking those extra steps to maintain safety.
Post-Cleanup Safety Precautions
Disposing of Waste Safely
The cleanup might be done, but your job isn’t over yet. Knowing how to properly dispose of hazardous waste is key. Always follow local regulations on chemical disposal; it varies from place to place. After all, we don’t want to make someone else’s job harder!
There was that time I was unsure about how to get rid of leftover paint thinner after a project. I Googled it, and thankfully found a local hazardous waste drop-off site. Weirdly satisfying to know that I did the right thing by not just throwing it in the regular trash.
Also, following up on the cleanup area is super important. Check for any lingering residues or smells after you think you’re done. Nothing beats that satisfying feeling of getting everything back to normal while keeping safety as a priority.
FAQ
1. What should I do immediately after a chemical spill?
The first thing to do is to ensure your safety. Evacuate anyone nearby and assess the situation. Use protective gear if necessary and check for any signs of danger, then start containment if it’s safe to do so.
2. Where can I find safety data sheets for chemicals?
Most manufacturers provide safety data sheets (SDS) on their websites. You can also find them through online databases and industry resources.
3. How can I prevent spills in the future?
Organizing your workspace and ensuring all containers are properly sealed can help. Regular training on safe handling procedures is also a solid prevention method.
4. What type of spill kit should I have?
Your spill kit should be tailored to the types of chemicals you use most frequently. Look for options that include absorbent materials, gloves, goggles, and bags for waste disposal.
5. Is it necessary to report all spills?
Depending on the severity and the type of chemical, yes. Reporting can help with monitoring and ensuring the safety of others, as well as prevent future incidents.
by Preparation | May 13, 2025 | Preparedness
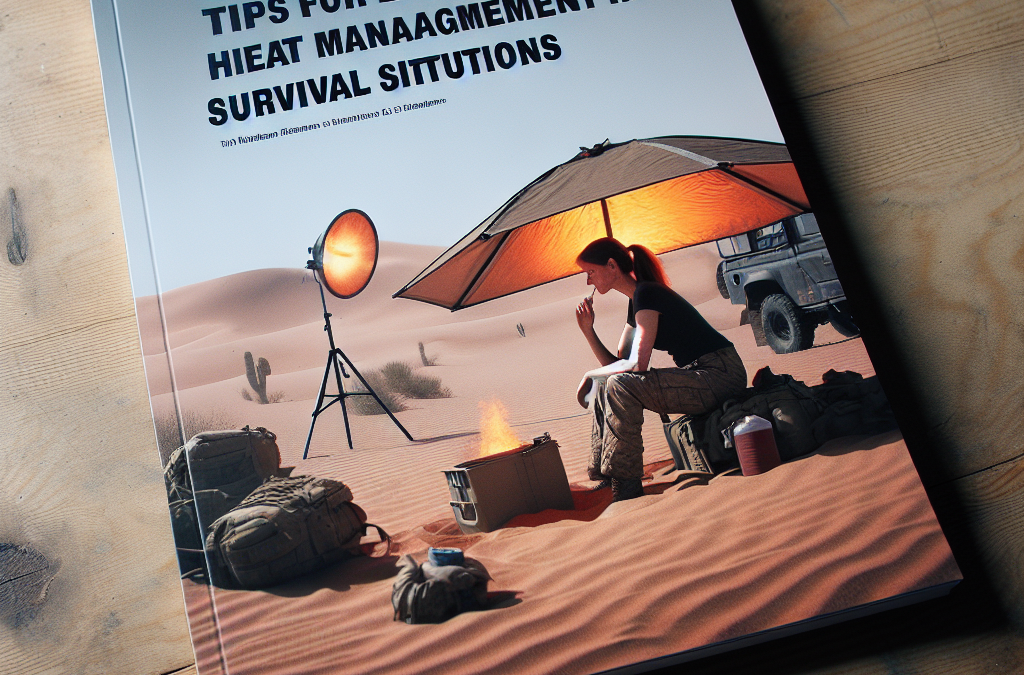
When I’m out in the wild, facing the elements, one of the most critical skills I’ve learned is how to manage heat effectively. Whether you’re in a harsh cold or battling the scorching sun, heat management can truly make or break the experience. Having gone through various situations, here are my five key areas of focus that help me outsmart the weather.
Understanding Your Environment
Assessing Temperature Levels
First off, you’ve got to get a handle on the temperature around you. It may sound basic, but trust me, actually stopping to assess the conditions can save your neck. I usually check for the highs and lows during the day, understanding when I might be able to cool off or need extra warmth.
Keep an eye on sunrise and sunset. The sun heats things up, so knowing when it’s at its peak can inform when to take breaks. It’s all about being strategic; if I know the sun’s blazing, I might aim for shelter to stay cool or find a stream to chill by.
Also, look around for natural indicators like wind direction and cloud coverage. These can provide hints about incoming weather changes, giving you a better understanding of how to manage heat effectively.
Recognizing Heat Sources
Next, it’s super important to recognize natural heat sources. Believe me, the sun is not the only player here. Things like campfires or even your own body can create excess heat in an already tough environment.
I once got caught in a situation where I was near a fire, thinking I’d just cozy up. But it turned into a heat management nightmare! I learned to position myself with care regarding any heat sources and to use them wisely.
Understanding how different surfaces retain heat is key too. For example, rocks can absorb heat during the day, only to release it at night, so being aware of where you sit or sleep can help you regulate your body temperature quite a bit.
Adapting to Changes
Adapting to sudden temperature changes is a skill I’ve honed over the years. Weather can be unpredictable, and you’ve got to have a plan B ready to roll. Dressing in layers has been a game-changer for me; it allows me to adjust my attire as conditions shift.
When it gets warm, I might peel off a layer, but if I’m caught in a chill later, I’m prepared to bundle back up. It’s all about flexibility and having that foresight to think ahead.
Lastly, I always carry items like a lightweight emergency blanket. You never know when you might need to wrap up and stay warm, especially if darkness creeps in unexpectedly!
Clothing Choices Matter
Choosing Appropriate Fabrics
My experience has taught me the true value of fabric choice. Wear lightweight, breathable fabrics when it’s warm, and opt for thick, insulating layers when it gets chilly. Cotton is usually a no-go; it traps moisture and stays wet, which can lead to hypothermia.
Instead, I lean toward quick-drying materials that wick moisture away. Fabrics like merino wool or synthetic blends can keep me comfortable no matter the situation. It really does make a difference!
Don’t forget about UV protection too. I always grab a hat with a wide brim and long sleeves when the sun’s high. Not only does it shield me from UV rays, but it also helps regulate my body temperature.
Layering Strategies
Just like a cake, layering your clothing helps when the temperature dips or soars. I usually start with a moisture-wicking base layer, which acts like a shield against sweat. Over this, I add an insulating mid-layer, often a fleece or down jacket, and finally a waterproof outer layer to battle the wind and rain.
I once went hiking with inadequate layers, and it was a lesson learned the hard way. I transformed into an ice cube at the top of a mountain, shivering and regretting my choices. Now, I always ensure I have options!
This layering system gives me the ultimate control over my body heat, which is vital in survival situations. I can add or remove layers to navigate through varying conditions effectively.
Footwear Considerations
Don’t overlook your feet! Trust me, poor footwear can lead to discomfort, affecting your overall survival strategy. I learned this on a trek where my shoes weren’t up to par; I limped my way back home!
Invest in durable and breathable shoes suited for rough terrain. Good grip is essential too. You’ll want your footwear to keep you grounded in both wet and dry conditions, ensuring that heat management isn’t thrown off.
Also, remember to pack extra pairs of socks. It may seem trivial, but switching out wet socks for dry ones can elevate your comfort level dramatically, helping you avoid blisters and maintaining warmth!
Staying Hydrated
The Importance of Water Intake
Now, hydration is key! Let’s face it; you can’t manage heat if you’re not drinking enough water. At times, I’ve been careless, and it led to fatigue and heat exhaustion. When you’re out there, staying hydrated keeps your body in check.
I always set reminders to drink water regularly. It’s easy to go hours without realizing you need it. Aim for at least half a liter every couple of hours, especially in extreme conditions.
In hot conditions, adding electrolyte tablets to my water has worked wonders. It helps replace lost salts and keeps me feeling energized, ready to tackle whatever comes next.
Recognizing Signs of Dehydration
Learning to recognize the signs of dehydration has been essential. Things like dizziness, dry mouth, or fatigue are red flags that I never ignore. When I notice them, I implement my hydration plan immediately.
It’s vital to listen to your body because getting behind on hydration can spiral fast. Just a couple of hours of neglect could have me battling a headache that ruins my experience.
If you’re sweating buckets, make sure to replenish those fluids and keep a lookout for darker urine. Ideally, I shoot for a light yellow shade, which indicates my hydration level is just right!
Creative Water Sources
When water gets scarce, being resourceful pays off big time. I’ve learned to look for dew in the mornings or even rainwater. Depending on where you’re at, you might find a stream or pond, just keep safety in mind and filter whenever necessary.
A portable water filter can be a lifesaver! On my last hiking trip, I used mine to drink straight from a stream. Nothing feels better than fresh, clean hydration when you really need it!
Yeah, there are times when you’ve got to get a little creative. For instance, I once made a makeshift solar still from a plastic bag and some plants. It was a fun challenge that paid off when I was in a pinch!
Utilizing Natural Shelter
Finding Shade When Necessary
Embracing nature means using what’s around you. I’m a huge fan of finding shade during those blistering hot afternoons. That could mean hiding under trees or even using large boulders to block the sun.
Staying still in the shade allows my body to cool down dramatically. I’ve, unfortunately, underestimated the sun before and wound up sunburned and irritable throughout my trip. Now, I prioritize cool spots regularly.
Using natural structures to shield from the elements adds an extra layer to managing heat. Even positioning my gear to minimize sun exposure can help maintain a cooler environment while I take my breaks.
Windbreaks and Insulation
In colder situations, I’ve had to get creative with windbreaks to retain body heat. Using fallen branches, natural mounds, or even packing my gear around creates a protective barrier against cold breezes. It’s a game-changer!
Building a small shelter can enhance protection from both heat and cold. I learned the basics of building a simple lean-to and, let me tell you, the warmth I kept at night made all the difference.
Emphasizing insulation also plays a vital role. I always keep insulated sleeping pads or emergency blankets in my gear. They reflect the warmth back to me, ensuring that even if it’s cold outside, I’ll stay comfy inside!
Emergency Shelters
Lastly, having an emergency shelter plan is crucial. When stuck in extreme weather, a tarp or bivy sack can save your life. I keep a compact emergency poncho that doubles as a shelter. It’s light, versatile, and comes in clutch when you need it most!
Building a quick shelter can also mitigate heat exposure. It doesn’t have to be fancy; just a fast structure can offer relief. I’ve crafted makeshift shelters from leaves and sturdy branches, and even those come in handy.
Always have a contingency plan. Knowing where to find materials or how to construct a simple structure can make all the difference. The peace of mind that comes with preparation cannot be overstated!
Conclusion
Managing heat in survival situations is all about preparation, knowledge, and a bit of creativity. I hope my personal experiences and tips help guide you on your next outdoor adventure. Whether it’s choosing the right clothing, staying hydrated, or utilizing natural shelter, always remember: your comfort can greatly enhance your survival chances. Stay safe out there!
FAQs
1. What is the most important factor in heat management during survival situations?
The most critical factor is understanding your environment. Knowing the temperature ranges and recognizing heat sources can help you make informed decisions about how to stay comfortable and safe.
2. How can I assess the heat level in my surroundings?
Look for natural indicators like cloud coverage, wind direction, and the position of the sun. Also, be aware of your own body’s reactions to temperature changes as they can provide insight into the conditions around you.
3. Why is hydration crucial in heat management?
Staying hydrated helps regulate your body temperature and prevents fatigue and heat-related illnesses. It’s essential to drink regularly, especially in extreme conditions.
4. What fun materials can I use to create a makeshift shelter?
Fallen branches, leaves, tarps, and even large rocks can all be used to build a simple shelter. Just let your creativity flow while thinking about how to shield yourself effectively!
5. Are there any tips for choosing the right clothing for varying temperatures?
Absolutely! Always choose moisture-wicking and insulating layers. Lightweight and breathable for heat, coupled with warm, thick layers for the cold, will give you the flexibility needed for any situation.
by Preparation | May 13, 2025 | Preparedness
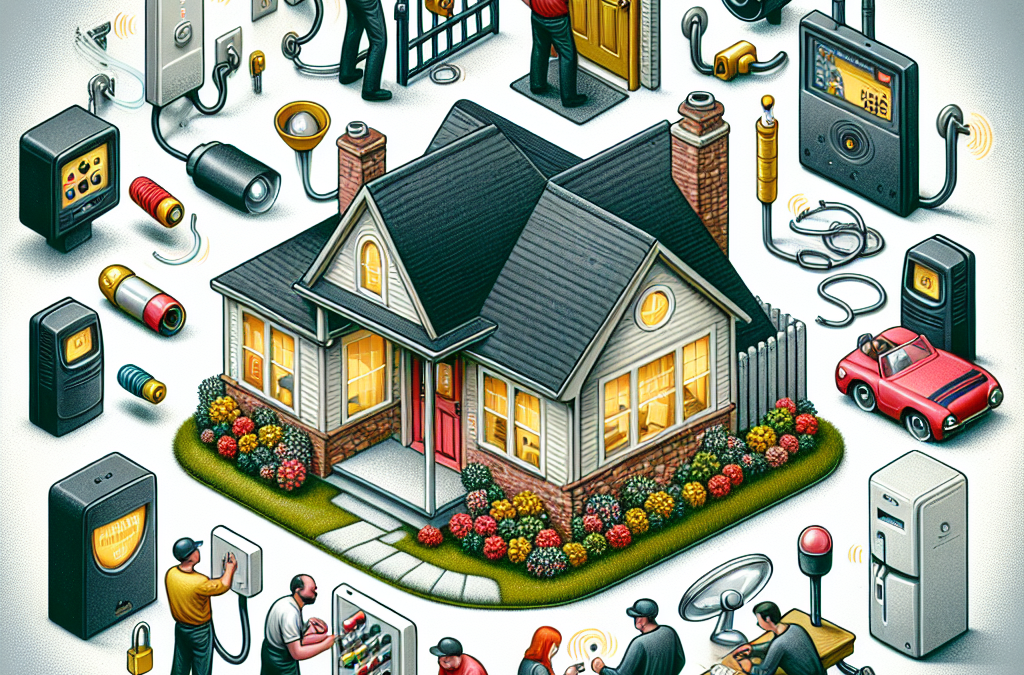
Hey there! Today, I’m diving into a topic that’s super important for all of us—how to secure our homes from intruders. Whether you live in a bustling city or a quiet neighborhood, the safety of your home should always be a priority. From personal experience, I can tell you that taking a few proactive steps can make a world of difference. So, let’s break this down into five major areas that can help fortify your fortress. Ready? Let’s go!
Enhance Your Physical Security
Invest in Quality Locks
First things first, let’s talk about locks. You’d be amazed at how many homes still have basic locks that can be easily picked. When I moved into my house, I swapped out all the standard locks for deadbolts. Trust me, it’s worth investing in high-quality locks that are hard to tamper with. Look for options that come with a grade rating from the American National Standards Institute (ANSI) for added peace of mind.
Also, consider installing smart locks. These babies let you control access to your home with your phone. No more fumbling for keys! You can remotely lock or unlock your door and even see who comes and goes.
Lastly, don’t forget about secondary entrances. That garage door or back door should have just as secure a lock as your front door. Time to lock it down, folks!
Upgrade Your Outdoor Lighting
Next up, let’s shed some light on the situation—literally! Criminals love the cover of darkness, so brightening up your property can deter unwanted visitors. Motion sensor lights are a fantastic option because they only turn on when someone approaches.
I’ve installed them around my yard and let me tell you, it’s made a huge difference. Just the other night, a raccoon set them off, and I can only imagine how a potential intruder would feel seeing those lights blaze to life.
Dusk-to-dawn lights are also a great addition. They keep your property lit from nightfall to sunrise, making it look lived-in and less appealing to anyone looking to cause trouble.
Fortify Windows and Doors
Don’t forget about your windows and doors! These can be vulnerable entry points if they’re not adequately secured. A simple upgrade is to add window locks and secure latches on all your ground-level windows.
For an extra layer of protection, consider window security film. This stuff strengthens your glass, making it harder to break. When I put this film on my windows, it really gave me peace of mind knowing that the glass wouldn’t shatter as easily.
Additions like door jammers or security bars can also add a friendly barrier to your doors and windows. Every little bit helps, and knowing my windows and patio doors are secure lets me sleep easier at night!
Utilize Security Systems
Invest in a Home Security System
If there’s one thing I can tell you, it’s that having a security system is worth it. Many companies offer affordable plans with comprehensive coverage. Whether you go for a traditional system with cameras and alarms or a modern smart home setup, it’s crucial to have that layer of security that alerts you and the authorities.
When I installed mine, I felt like I’d set up an invisible fortress around my home. Plus, you can keep tabs on everything through your phone. I love being able to check in when I’m away.
Installation can be a breeze, too! Some systems even offer DIY setups, so you can do it at your own pace. Just remember to put those yard signs up—let everyone know you’re serious about security!
Install Security Cameras
Your home security system won’t be complete without security cameras. They act as your eyes and can deter intruders right off the bat. I installed a few around my home, and I can’t tell you how comforting it is to have that extra surveillance.
With modern technology, you can find cameras that offer motion detection, night vision, and cloud storage. Some even allow you to talk through the camera. Imagine scaring off a would-be intruder by saying, “Hey! I see you!”
Be smart about where you place them—entry points are key. Cameras positioned to capture both the front and back of your home are especially important. And don’t forget about the sides of your home!
Set Up an Alarm System
An effective way to add security is through alarm systems. They not only alert you to movement but can also notify local law enforcement. I opted for a system that alerts me on my phone for real-time notifications.
Many of these alarms now come with features like glass break sensors, door/window sensors, and even smoke detection. It’s so reassuring to know that my system can alert me of more than just a break-in.
Make sure to test your alarms regularly. Nothing would be worse than feeling secure only to find out your alarm doesn’t work when it’s needed most!
Create a Secure Outdoor Environment
Lush Landscaping Isn’t Just Pretty
While it’s great to have a beautiful yard, overgrown bushes can create hiding spots for intruders. Keeping your landscaping neat and trim can help eliminate places for someone to lurk. I started doing regular maintenance, and cutting back my bushes near windows made a noticeable difference.
Instead of high shrubs, consider low plants that add some charm while keeping everything visible. Clear sightlines offer better security and can deter intruders who prefer to stay hidden.
If you’re looking for extra deterrence, planting thorny bushes near windows or under windows can also help. It’ll make anyone second guess their entry plans, that’s for sure!
Neighborhood Watch Programs
Buddying up with your neighbors to form a neighborhood watch program can enhance your security even further. It’s amazing what a little community spirit can do! I personally love how it fosters relationships, plus having a watchful eye can deter crime.
Regularly communicating with neighbors about any concerning activities keeps everyone informed and alert. You’d be surprised how sharing little details can lead to a safer neighborhood.
Host block parties or meetings to build camaraderie. A friendly neighborhood is a strong neighborhood, and you all look out for each other. Together, you can keep your community safe!
Secure Your Garage and Shed
Your garage and shed can actually serve as unwelcome entry points for intruders. Many folks overlook them, but making sure these areas are secure is vital. I used to leave my garage door unlocked often, but not anymore!
Invest in good quality locks for your garage door and shed. Furthermore, keep ladders stored away, as they can provide access to upper levels of your home. My trick is to always keep tools and outdoor furniture secured away—no need to give thieves an invitation.
Lastly, installing motion-activated lights around your garage and shed can alert you to any unwanted attention. I’ve had my motion lights save me from a couple of suspicious situations.
Stay Informed and Proactive
Regular Property Assessments
Staying proactive and regularly assessing your property for potential vulnerabilities is key. I set aside some time each season to walk around my home and check for weak spots or anything that could be improved.
Take a look at your locks, lights, and overall security. Ask yourself what could be done better. Making these tiny tweaks can go a long way in keeping your home secure.
Documenting these assessments also helps in tracking progress. Over time, you’ll identify areas that need addressing and make the necessary shifts to bolster your home’s defenses.
Education and Awareness
Education is another fantastic tool for keeping your home safe. Stay updated on crime trends or alerts in your neighborhood. Websites and social media are perfect for learning about recent reports of burglaries or suspicious activity.
Also, consider taking security workshops or self-defense classes. Understanding how to respond in a crisis can give you confidence and the tools to stay safe. I’ve found that even simple awareness techniques can make a difference!
And don’t hesitate to share your knowledge with neighbors—keeping everyone informed creates a culture of safety.
Follow Up on Security Measures
Lastly, always follow up on your security measures with regular reviews. It’s not just about installing systems but also maintaining them. If you’ve got smart technology, ensure your apps are updated and devices are functioning properly—nothing worse than a faulty security system!
You should also revisit your plans every so often. Circumstances change, and a simple reevaluation can propel you to upgrade your systems or strengthen areas that have become lax.
For me, it’s about cultivating a habit of vigilance. A few routine checks make all the difference, and it’s something I take pride in as a homeowner.
FAQs
1. What are the best types of locks to use for home security?
High-quality deadbolts and smart locks are among the best options. Make sure they are rated by ANSI and fit well into your door for maximum security.
2. How can I improve outdoor security without spending a lot?
You can improve outdoor security with strategic lighting, trimming your shrubs, and keeping an eye out in your neighborhood. These tasks can be done affordably and can greatly enhance your home’s safety.
3. Is it worth investing in a home security system?
Absolutely! A home security system not only deters intrusions but also offers peace of mind. It’s an investment that can protect your home and your loved ones.
4. How often should I assess my home for security vulnerabilities?
It’s a good practice to reassess your home at least once a season. Changes in the environment or your lifestyle may reveal new vulnerabilities that need addressing.
5. What should I do if I notice suspicious activity in my neighborhood?
If you notice suspicious activity, it’s crucial to alert your neighbors and, if necessary, contact local law enforcement. Staying informed as a community helps keep everyone safe!


